
On WordPress, if you want to take advantage of a custom email with your own domain, like [email protected], there are many ways to add the email to your own custom domain. One of the most popular ways is to use another email providers, which means that if your DNS settings and your domain name are controlled here, you can buy email hosting from other providers, then get your domain connected to it.
You can refer to one of the most common providers, including G Suite, Zoho Mail, Microsoft Office 365, or GoDaddy and so on.
However, you need to make sure that you are able to set up your email hosting account with one of these above-mentioned providers. To help you have further understanding about this, in this tutorial, we will instruct you on how to add an email through GoDaddy email hosting.
Take note that if you have an email for your own domain through GoDaddy prior to mapping this on WordPress.com, you are able to link the email hosting back to your own account by performing these steps below.
To add an email through GoDaddy email hosting on WordPress
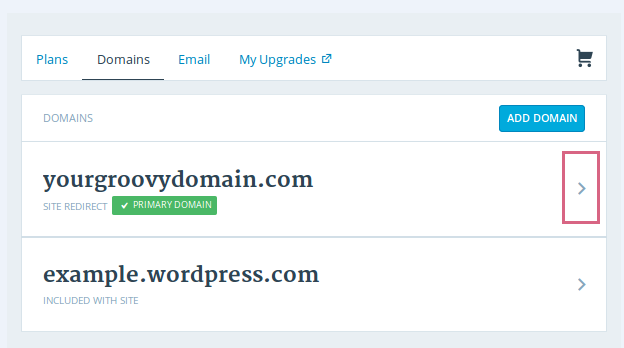
Step 1: Head to Domains
The first thing you need to do is to head to Domains and choose some of the related domains.
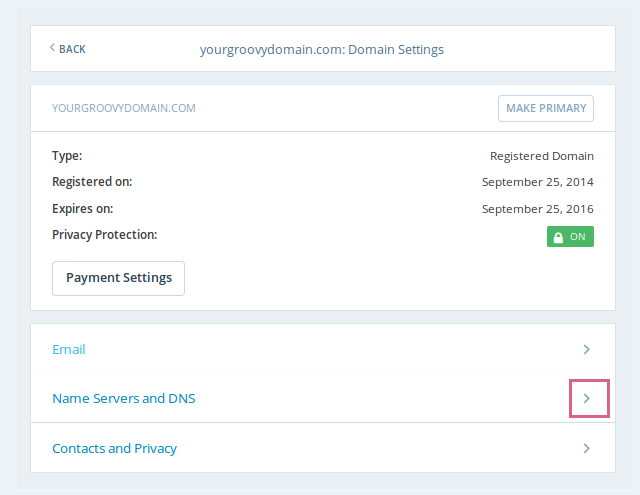
Step 2: Change Name Servers and DNS
In this step, you can change the name of the servers and DNS by clicking on Edit Name Servers and DNS.
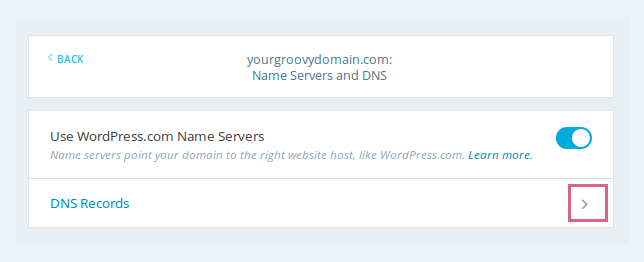
Step 3: Press on DNS Records
After that, to continue, press on DNS Records.
Take note that GoDaddy users in Asia and Europe might need to use the different MX and CNAME records.
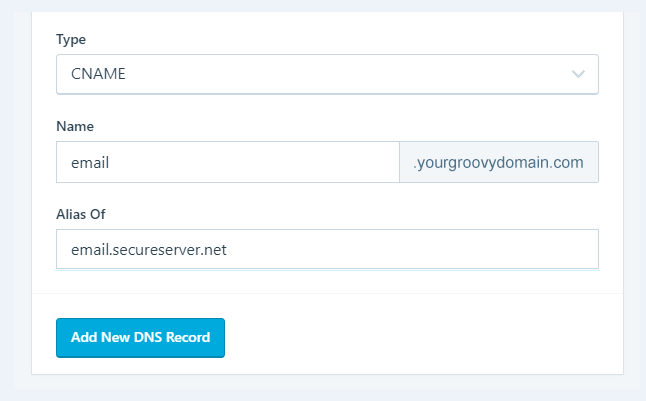
Step 4: Click on Add New DNS
Then, you can click on Add New DNS button and start selecting MX from the drop-down list. Type the name of your domain in the initial box, then the record value in the second one, and your priority number.
Go to Add New DNS to save those records and type each of those record below:
-
MX smtp.secureserver.net 0.
-
MX mailstore1. Secureserver.net 10.
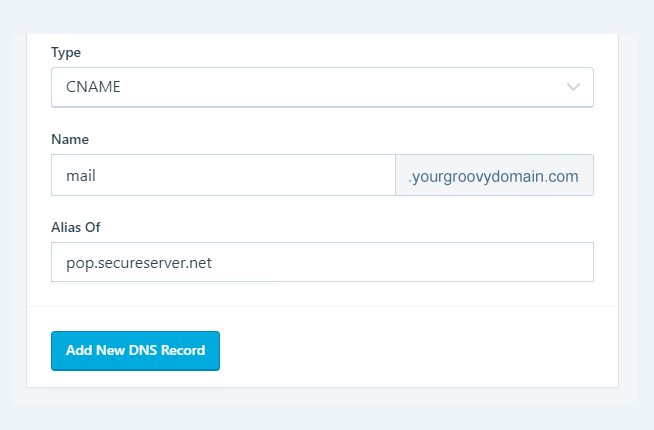
Next, to insert those two records, you had better use CNAME type.
-
Type: CNAME
-
Name: email
-
Alias Of: email.secureserver.net
Or,
-
Type: CNAME
-
Name: mail
-
Alias Of: pop.secureserver.net
Now, your mail can start working in several hours. Meanwhile, GoDaddy can ask for futher SRV-type record you can have from them, then add it on the similar page as another DNS records.
- GoDaddy users in Europe:
CNAME email email.secureserver.net
CNAME mail pop.secureserver.net
MX mailstore1.europe.secureserver.net 10
**MX smtp.europe.secureserver.net 0
- GoDaddy users in Asia:
CNAME email email.secureserver.net
CNAME mail pop.secureserver.net
MX mailstore1.asia.secureserver.net 10
MX smtp.asia.secureserver.net 0
Conclusion
We hope that our instruction on how to add an email through GoDaddy email hosting is helpful for you to continue working well on WordPress. Don’t hesitate to contact us or leave us a comment if you have any problems or questions.

