
In WordPress, Simple Payments button is a credit and debit card payment buttons designed for small business owners which help create more convenience for your customers and increase your sales. Using Simple Payments, you can easily create and embed these buttons on your WordPress.com and Jetpack-enabled sites in a few minutes. To use this feature, you need to be a Premium and Business plan subscriber on WordPress.com or on Premium and Professional plans for Jetpack sites running version 5.2 or higher.
To help you get used to Simple Payments, below is an instructional writing on how to use simple payments.
How to use simple payments
Add the first button
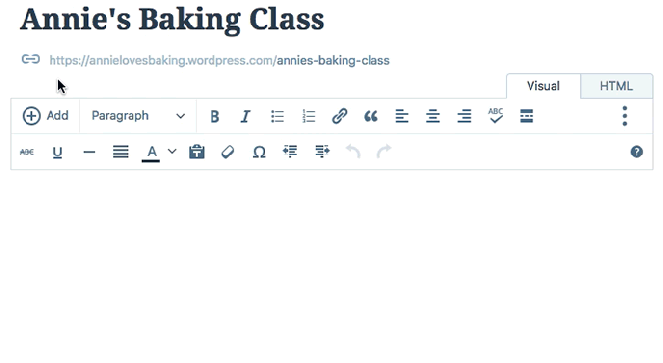
You can create your first Simple Payments button by going to My Sites and clicking on Pages → Add. Also, in order to add the button to an existing post or page, please go to the Visual Editor and start your editing.
This is an example of how to add the button using Visual Editor. Click “⊕ Add” which can be seen in the toolbar.
The create new button form is displayed if this is your first Simple Payments button.
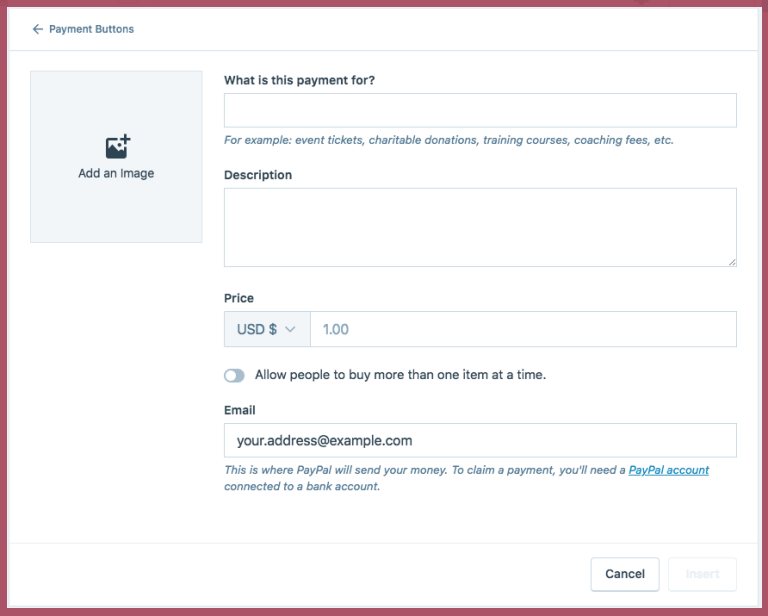
Add button details
Insert an image
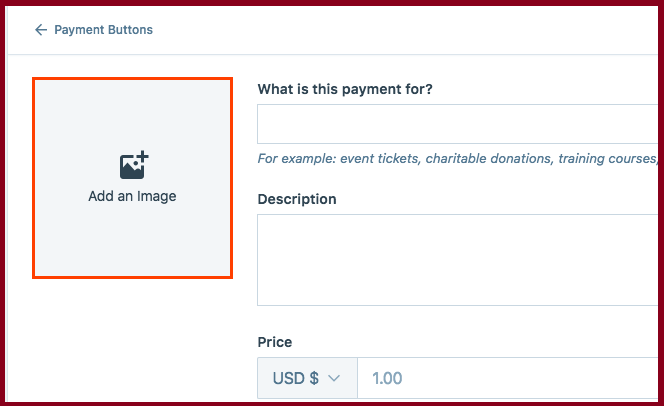
In order to insert an image, you can click Add an Image or drag and drop an image onto the form above.
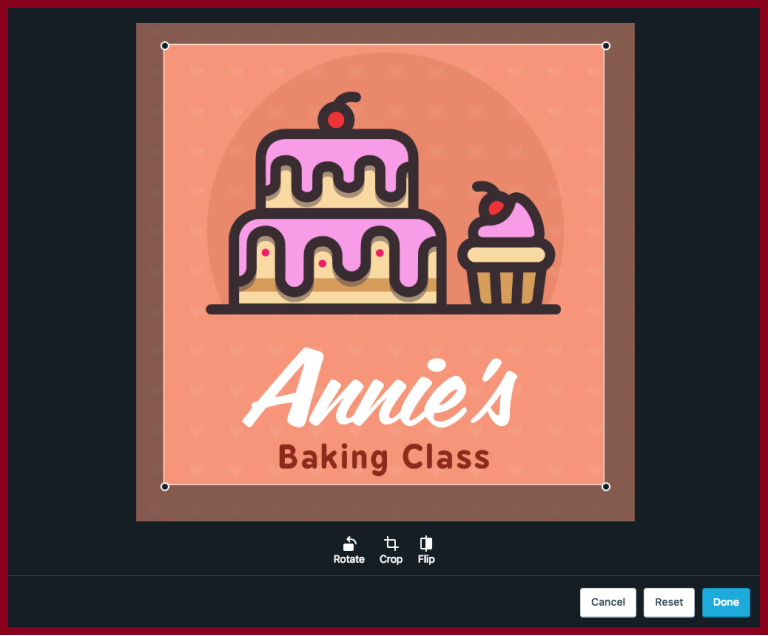
After adjusting your images, please click Done to finish adding the image. Additional changes can be made to the image by clicking the pencil icon, even after the image has been uploaded. Also, click ✕ on the top right of your current image to change it if you want.
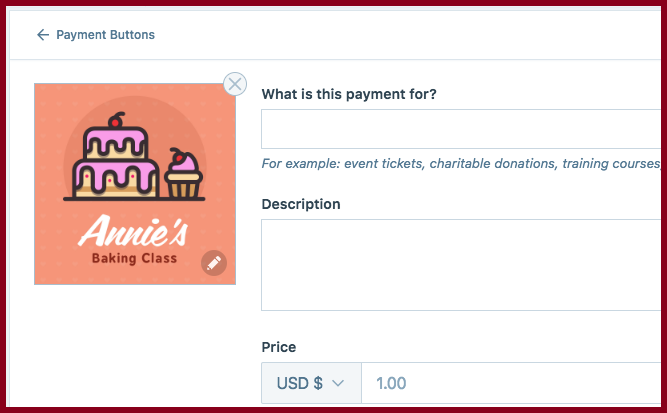
Add image details
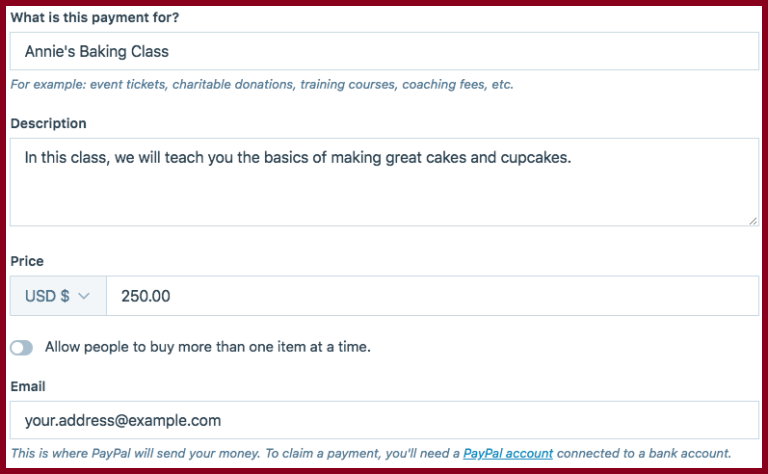
In this stage, you have to fill the Name, Description, and Price correctly. The currency can be changed by clicking the currency button which is located in the left of the Price input.
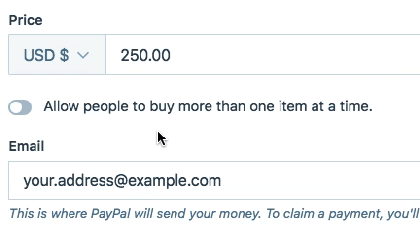
In order to allow people to purchase more than one item at a time, you can enable the toggle which can be seen below Price.
Please double check your email address because payments which are captured by your button will be paid out to that email address. Although Paypal is responsible for all payments, an existing account is not a requirement to start collecting payments on your site. You can use any email address that you have access to.
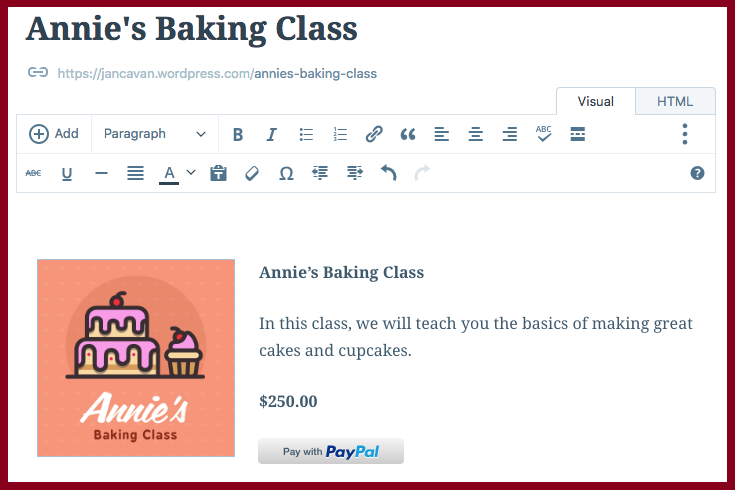
After clicking Insert, your new button will be added into your Post or Page.
Update and add buttons
After creating your first button, you are allowed to update changes and add the button into more posts or pages. In order to do this, please go to My Sites and click on Pages → Add or by opening an existing Post or Page in the Visual Editor.
In the toolbar, you have to click the ⌄ which can be seen next to the ⊕ symbol. Next, click the option which allows you to add a payment button, then your list of created buttons will be displayed.

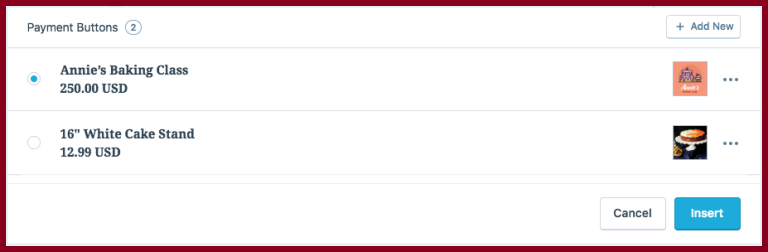
Add buttons
To add any button to any post or page, click Insert. If you want to add a new button, you can click Add New located at the top right corner of the list.
Delete buttons
In WordPress, you can easily delete your buttons from the Simple Payments button list. To delete one button, on the far right side of the button that you want to delete, please click on the ellipsis.
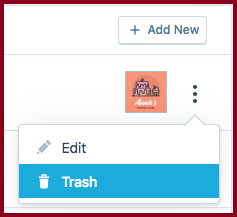
By clicking the trash, the button will be disabled from all Posts and Pages and deleted from everywhere on WordPress.
As WordPress pages are cached in order to provide your site visitors the best web experience, a old content might appear for a few minutes; therefore, you can still see the deleted Simple Payments button on a Post or Page. To solve this problem, you should update a Post or Page to remove it completely in that Post or Page.
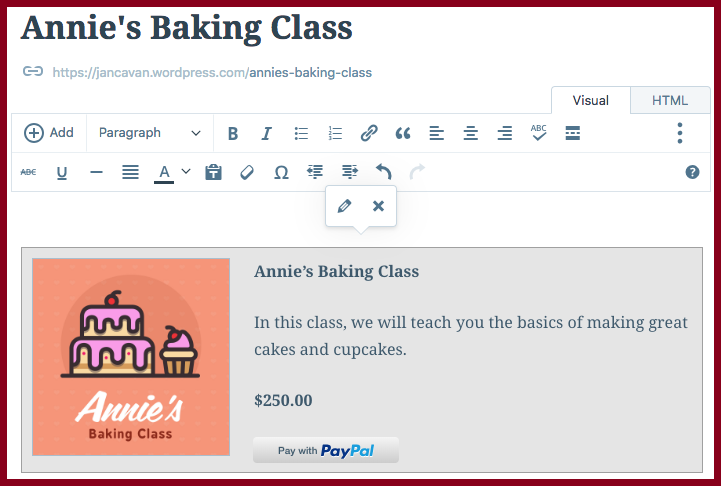
The Simple Payments button can also be removed in the Visual Editor. You only need to click on the Simple Payment button that you want to delete, click ✕ then update the Post or Page so as to save your changes.
Edit button
In the ellipsis menu in the button list, you can see the option to edit your button:
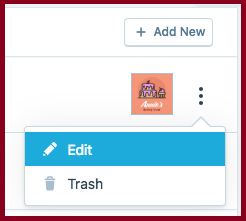
Additionally, by opening the Visual Editor, you can also edit the Simple Payments button easily.
All changes will be applied immediately and displayed on WordPress.
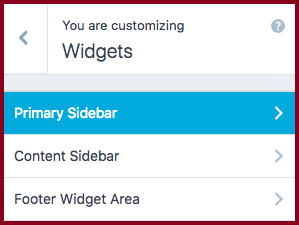
Add a widget
Using WordPress.com and Jetpack 6.3 or above will give you the ability to add a quick payment option to any widgetized area (like sidebar, footer, etc.) on your WordPress site.
Here is an example of adding a quick payment option to a footer area:

To insert a widget, you need to go to My Sites and click on Customize for the site customizer to be loaded. After that, please click on Widgets in the Customizer menu and select the area in which you want the widget to be displayed.
Click the Add Widget button which is shown at the bottom of this menu, then find the Simple Payments option in the list.
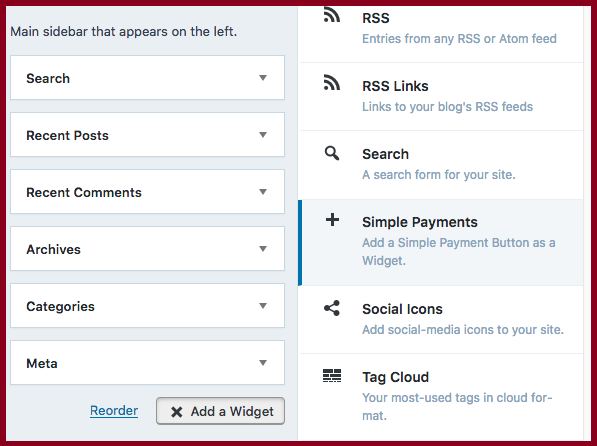
Choosing which product to display in the widget is the next step. You can clickAdd New to add a new product.
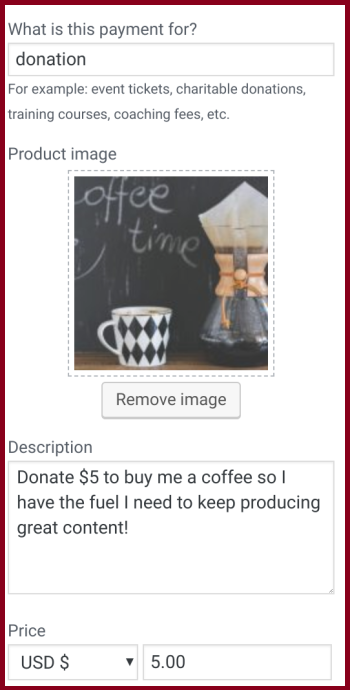
For each new product, you can add the information which includes a photo, description, and price on a standalone Simple Payment Button.
Additionally, you can switch between one or more products when adding a new widget or payment button by choosing from the right button in the list when setting up.

You are allowed to make changes to the widget options, reorder it, and see the preview on the page after selecting a product. When you’re satisfied, choose Publish displayed at the top of the Customizer sidebar in order to save your site layout with the new widget.
Collect payments
In order to collect payments, your site must be public although you are still able to create and add buttons.
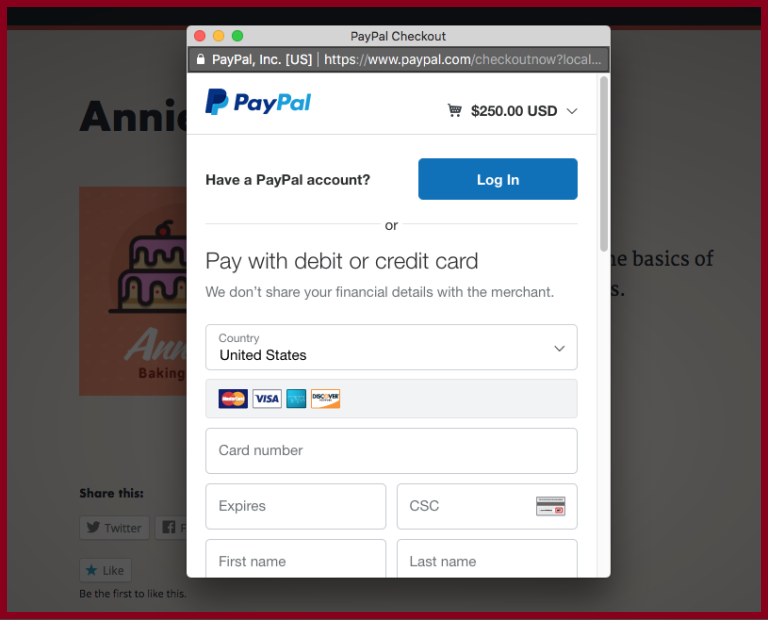
Whenever your visitors choose the pay with PayPal button on any of your Simple Payment buttons, a new window which takes them through the PayPal checkout will be automatically displayed. There are two options for your customers to choose: using PayPal account using PayPal funds or using a credit card. The PayPal Credit button will also be displayed if they are already logged into PayPal and have access to PayPal Credit as a payment method.
Using Business PayPal account will enable your visitors to use a credit or debit card even if they don’t have a PayPal account.
Please note that, in WordPress, all payments are credited to the PayPal account which is linked to the email address used in the button. A confirmation email with the purchaser's information will be sent automatically to this email address for every purchase by PayPal. Also, the purchaser will also receive a receipt for the purchase sent by PayPal.
An email from PayPal with information about claiming any collected payments will be sent to you if you use the email which is not linked to an existing PayPal account. Please make sure to double check that PayPal supports collecting online payments in your region. Business Account support will be needed in order to determine for your country by following PayPal’s online support.
An email for each purchase will be sent to the email of users who created the button by WordPress. Also, you will receive a monthly report for all your Simple Payment buttons, the report will be sent to the site plan owner.
Style the Payments button
To know how to style aspects of the button, please check out the Simple Payments styling page.
The "making of" Simple Payments
In order to know more about "making of" Simple Payments, you can take a look at the announcement post here.
Conclusion
Above is a detailed and informative instruction of how to use simple payments. Please take your time and read it carefully to understand about the simple payments button and use it effectively.

