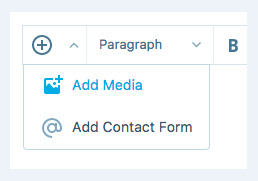
When using WordPress, you are allowed to get your documents uploaded to the WordPress site by using Add Media icon on the editor.
In this article, you will be shown how to upload documents from a URL on WordPress site.
To upload documents from a URL
How to upload documents from a URL
Before going further, take note that some of those steps below can refer to your WP Admin dashboard. Therefore, if you want to get to this dashboard, you can add /wp-admin to the end of the site’s URL such as example.wordpress.com/wp-admin.
Besides uploading documents from your computer, you can choose another way to upload them on your WordPress site.
From a URL, you can easily upload documents on your WordPress site by following those below instruction.
You also need to know that the following process can describe adding a download link to files which are existing on other websites. You cannot use this method to upload files or documents to your Media Library. In case the file is out of from its own location, the link is also broken. Therefore, this is not highly recommend if you do not know the file is available at its specified location.
-
Step 1: Head to Blog Posts -> Add or Pages ->Add.
-
Step 2: Choose Add Media icon and you can find it above your own editor.

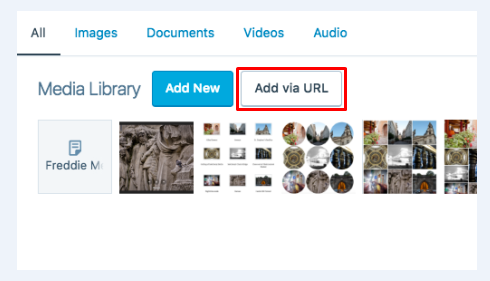
- Step 3: Press on Add via URL button.

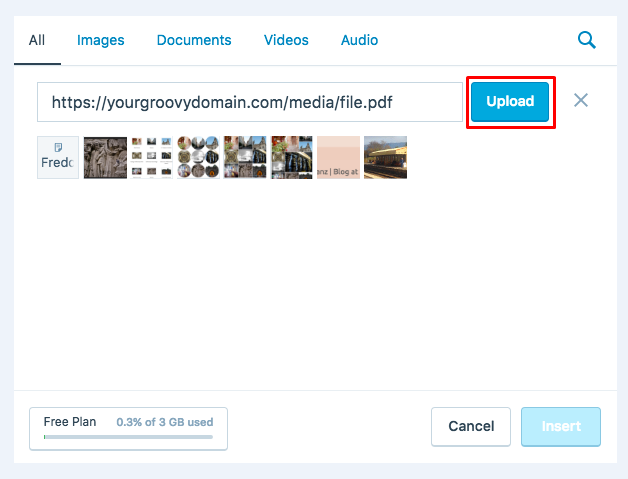
- Step 4: Type the URL and get it uploaded by choosing Upload button.

-
Step 5: Then, you can go to Insert button to continue.
-
Step 6: You had better note that now you can own a working download link to files in your new page or post.
Link an Image to a Document
You, sometime, have to dress up the download link with a photo like this:

With additional steps, you can get an image or a document uploaded like PDF versions, then link the image to your PDF file. As your users see your pages, they can head to button to take the .pdf download.
-
Step 1: The first thing you want to do is to upload documents to the Media Library.
-
Step 2: After that, you can choose documents from the list of your uploaded files.

-
Step 3: Select Edit located at the bottom of the left corner of the window.
-
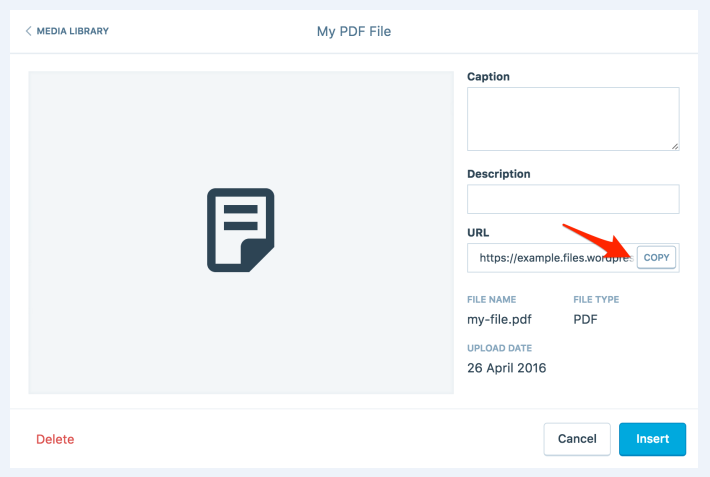
Step 4: At the same time, you can copy your document’s link.
-
Sep 5: You can follow the guide of the image link by using your new file URL.
How to upload documents from the WP Admin Media Library
In this guide, you are also shown how to upload documents from the WP Admin Media Library.
-
Step 1: In your WP Admin dashboard, you can head to Posts -> Add New or Pages -> Add New.
-
Step 2: To keep going, you can choose Add Media icon located above your own editor.
-
Step 3: Click on Media Library tab.
-
Step 4: Get your file located you want to insert before clicking on it.
-
Step 5: Opt for Media File located under Attachment Display Settings. In addition, the link you select can be saved for the next time of applying.
-
Step 6: Next, you can click on Insert into post button.
-
Step 7: Now you are possessing you working download link to your file in the new pages and posts. Take note that in case you want to embed a real document into a page or post, you can take advantages of Scribd.
Conclusion
Currently, you can have many ways to upload your documents on WordPress, including uploading documents from your computer, from a UR, from your WP Admin Media Library or links a photo to a document. We hope that with our instruction on how to upload documents from a URL, you can have a basic idea of uploading documents to your WordPress site. If you have any difficulties or seek help from us, don’t hesitate to contact us or leave us a comment.


