
Besides your site on WordPress.com, you may have other social media so do your readers that you may want to display these networks on your blog or page on WordPress.com. A number of themes in WordPress.com provide users with social media buttons shown in the header or footer of the site. However, you can use the Social Icons Widget to add and edit any button in any widget area regarding your theme. For more information, keep reading this topic to discover how to install social media icons widget on WordPress.
To install social media icons widget on WordPress
Step 1: Go to Widgets
Get access to your blog and click on My sites. A list of options will appear then look for the Customize under the Personalize and click on it. After that, find the Widgets and press on it to move on to the next step.
Step 2: Add the Social icons (Jetpack)
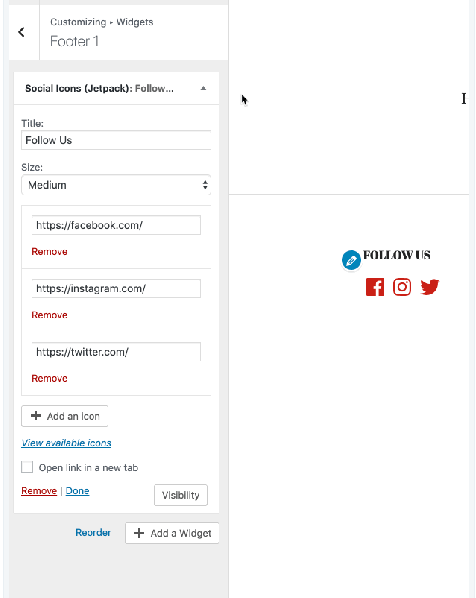
Choose the area that you want to show your social icons and click on the Add a Widget button. You can select the Footer 1 area as the picture below for example or anywhere you like on your site. After that, a list of widgets available will appear on your screen then you need to find the Social icons or Jetpack by typing that phrase in the search bar. When you see the search result, press on it to continue the setup.

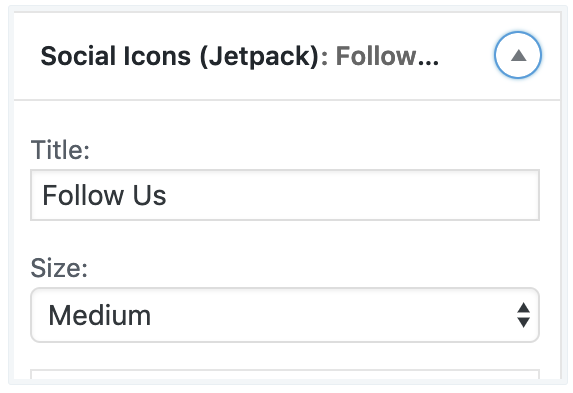
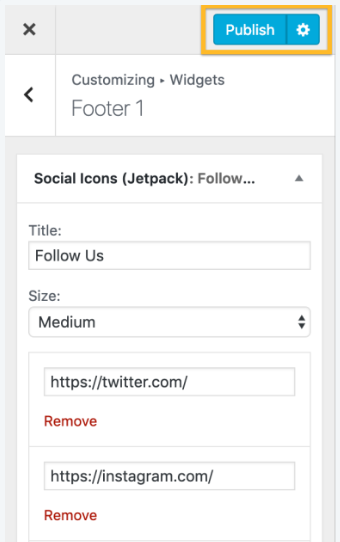
Step 3: Enter the Title
Put the name or message you want to use for the Widget in the Title field. For instance, you can name it as Follow Us or Social network, etc. Be noted that this header will be displayed right above your Social icons then you should use something that is relevant to your below content.
Step 4: Select icon size
Under the Title is the Size box which you have to specify the size you want to use for your icon. You can choose between three sizes, including Small, Medium and Large.
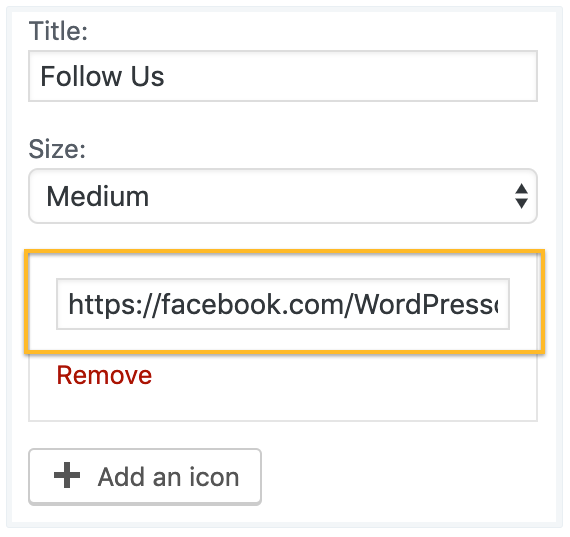
Step 5: Add link to social network
There is another box below the Size and this is the place that you must put your social media link in. Be noted that you must enter the full link (URL) of your social media there, like this one, for example, https://www.facebook.com/WordPresscom/.
Step 6: Insert more icons
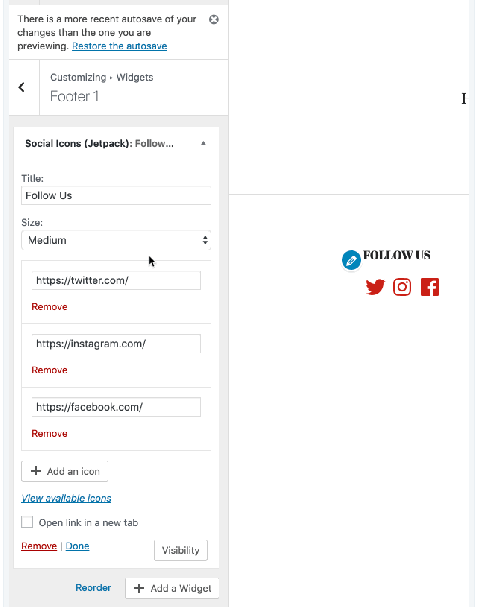
If you have multiple social networks, you can add more icons by clicking on the Add an icon button below the first URL box. Another box will appear then you can fill in the link for your second social media. Repeat this step if you want to insert more icons. You can also change the order of the icons by holding and dragging the URL field to the position you want. For example, the order of your icons are Facebook, Instagram and Twitter respectively then you want to put the Twitter to appear first. You can hold and drag the Twitter URL to the first place, right under the Size like the pictures below:
Step 7: Choose Publish
After completing all the above steps, if you are satisfied with your changes, press on the Publish button on the top to save all the adjustment.
Conclusion
In short, this writing has given you the introduction of how to install social media icons widget on WordPress. This process is quite simple and similar to other Widget set up that if you have experienced once, you can handle this one easily as well. Moreover, images are also included in this topic that it is easy for you to follow and understand what to do. I also added some notes in this writing that you should remember when works with this section. With such an effort, hope that you have a good time reading and gain some benefits from it.

