As you might not know about, lots of WordPress themes have been providing users with social media buttons on the sidebar and footer, however, there are some that do not support that. In fact, although your theme does not possess this feature, you may want to ask for another position for those buttons or you just want to use various icons to match the header or footer. And there exist several ways to aid you in adding social media icons to your own site on WordPress.
In this article, you will be shown on how to insert Social Media Buttons to your sidebar or footer.
To insert Social Media Buttons to your sidebar or footer
How to add social icons widget
The first thing you need to do is to add your social icons widget. By following the following steps, you can easily set up your social icons widget.
- Step 1: Go to My site -> Customize -> Widgets

-
Step 2: Choose the widget area you want to add your social icons, then don’t forget to click on Add a Widget.
-
Step 3: Search for the social icons (Jetpack) widget before choosing the title.
-
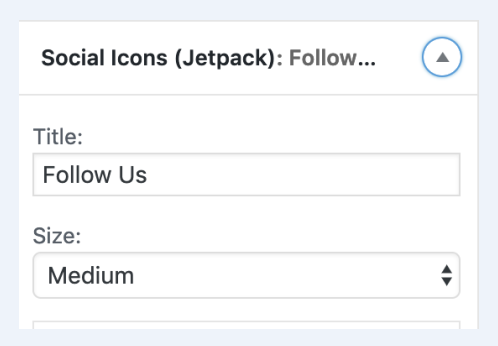
Step 4: Give your widget a title.
-
Step 5: Select sizes for your own social icons, including small, large.

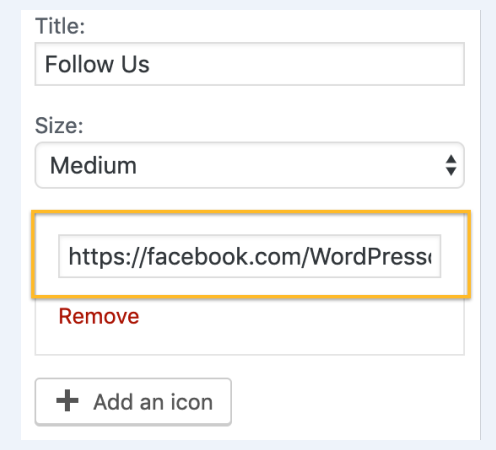
- Step 6: In this step, you can insert a full link into your social network profile. For instance,
https://www.facebook.com/WordPresscom/.

-
Step 7: When you want to add more social media button, you can head to Add an icon and add the next social network profile.
-
Step 8: As soon as you complete your social profile links, take note that you have to click on Publish to save your current changes.

Add social media icons to WordPress menu
You can also add social media icons to your WordPress menu by performing those steps below:
-
Step 1: The first thing you have to do is installing as well as activating your
Menu Imageplugin. -
Step 2: Then, you can go to Appearance -> Menus page before generating a new menu.
-
Step 3: It is time for you to insert custom links for each social media button in the new social menu separately.
-
Step 4: You will see that the option of a menu image located under the menu items. Then, you had better use it to get the social media icons uploaded. In addition, you are able to get an icon uploaded hover the main icon to show on the mouse-over.
-
Step 5: Next, you will choose a size for your social icons. You will see that there are many options for those image sizes. And all you need to do is to choose a similar size for your social media icons so that it does not break your menu area.
-
Step 6: Then, you can place a position to show the name of every social channel with your own icon. In case you want to show your social icons without having labels on them, just choose Hide under the settings of title position.
-
Step 7: After finishing inserting menu, you are asked to choose the display position for your own social menu before clicking on Save Menu button.
Now, you can also insert your social icon menu in the WordPress sidebar. All you need to do is to head to Appearance -> Widgets page. After that, you can drag the Navigation menu widget in your sidebar widget field. Next, in your dropdown list, you can choose the social menu you created before and hit Save button.
Reorder social icons
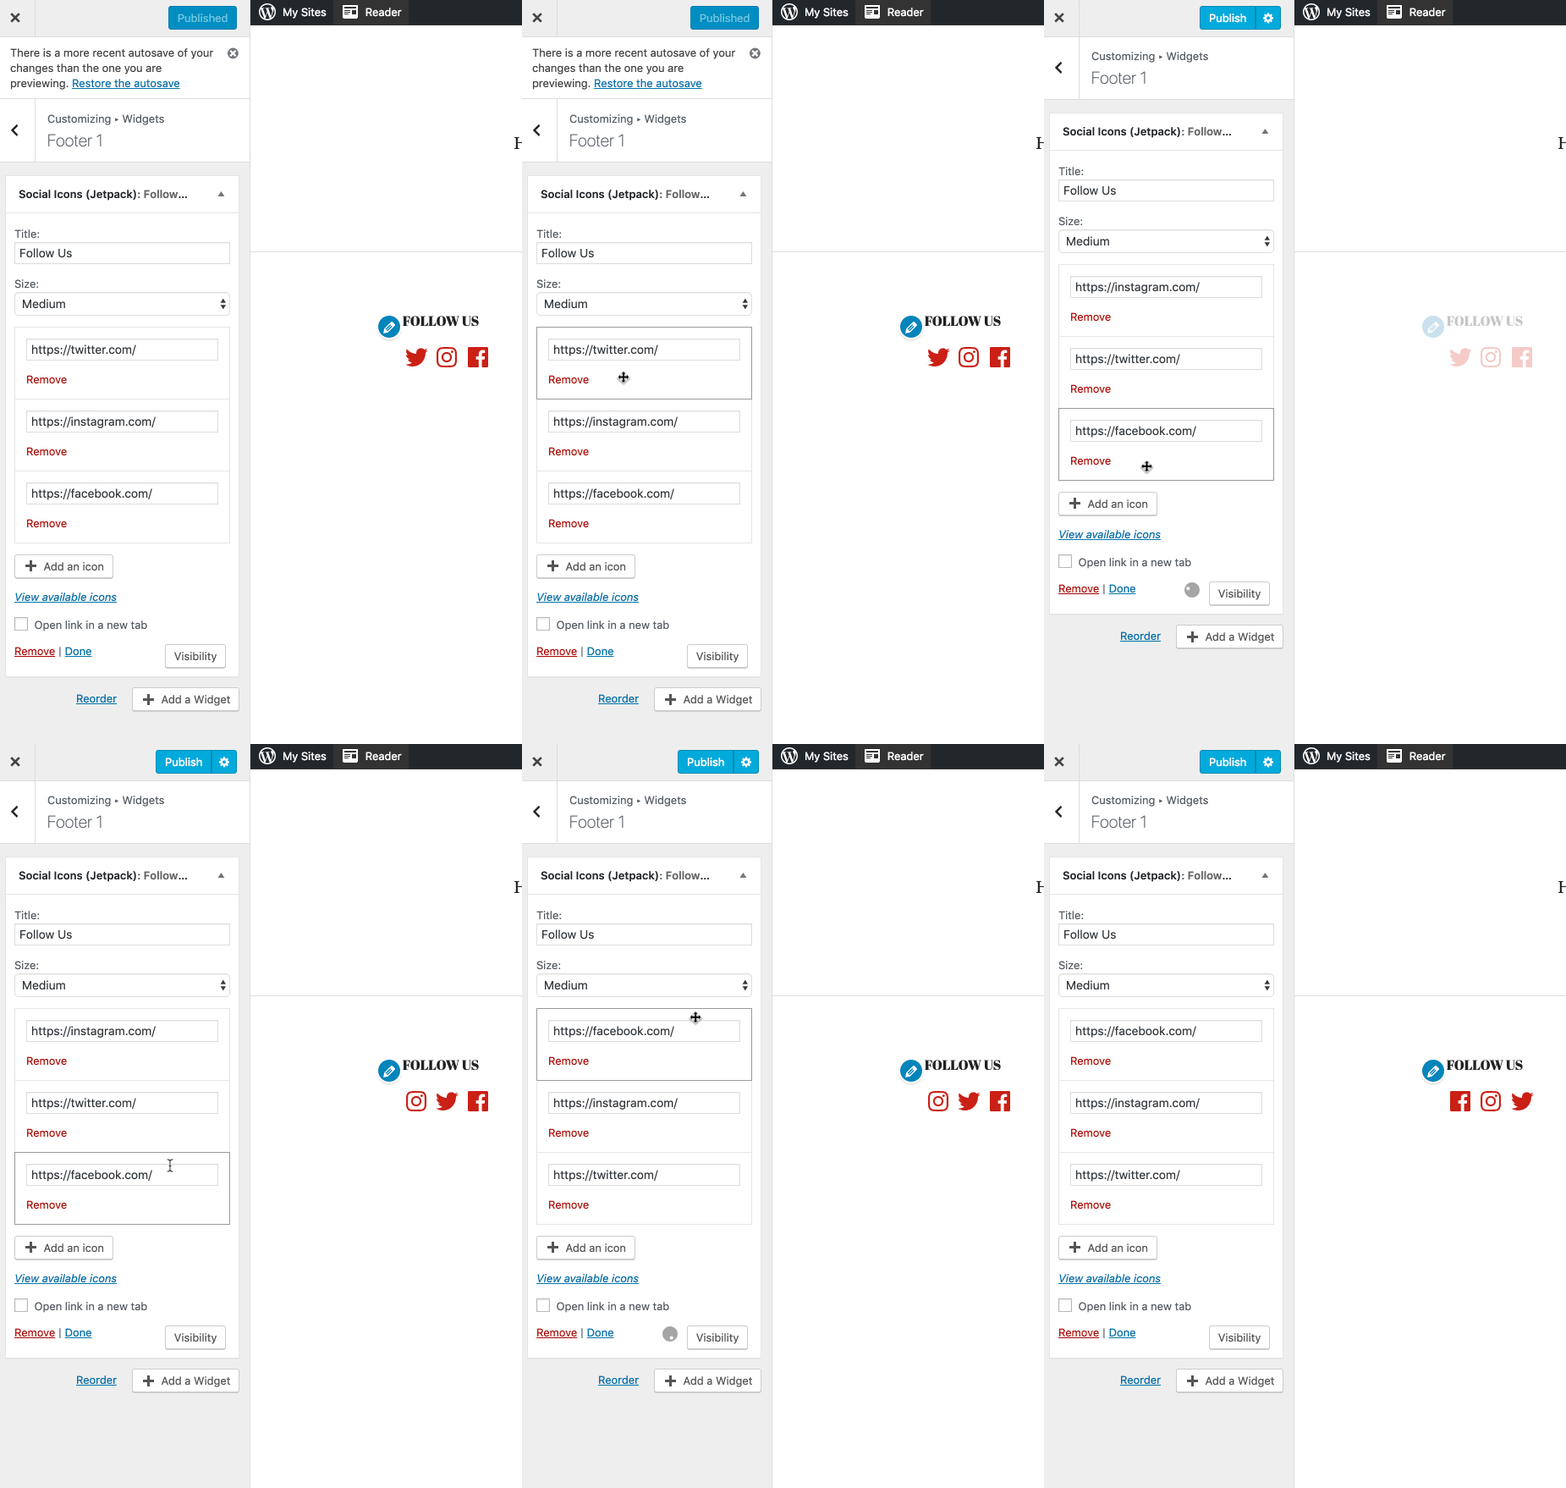
Reordering your social icons are not something hard to perform. You can easily modify the icons order at any time by dragging as well as dropping them into your favorite sequence. Then, the new order will stay live in your Customizes preview pane.

Conclusion
That’s all and we wish this article on how to insert Social Media Buttons to your sidebar or footer is helpful to you. You will now have enough time to practice ways on adding social media buttons to your site on WordPress. If you have any trouble while manipulating those above steps, don’t hesitate to contact us or leave us a comment.


