
If you might never hear of the term Blogroll link and might never know how to use them properly on Wordpress, you should not miss out this article.
In general, a blogroll link is known as a set of links on a blog. The list is often located on bloggers’ sidebars for their easy and simple access. Boggers might want to share their links with others.
A blogroll link is said to promote blogs and to give their reader various sources of a specific niche. Some users can get their blogrolls divided into many categories. For instance, a blog writer is writing a car niche and he or she can divide his or her blogroll links into different categories to another blog both he or she writes.
Additionally, a blogroll can be established depending on the blogger’s individual preferences and his blogrolls can be updated any time.
In this article, you will be shown on how to modify a Blogroll link on WordPress. However, before going further, let’s take a closer look at what a Blogroll link is and how it works well on WordPress.
How to change a Blogroll link
What is a Blogroll link?
As you are all bloggers, you already know that you usually link to your friends, your popular site or your favorite posts. In fact, links make what exactly the Internet is since, without it, you will find extremely hard to get from sites to sites. Hence, WordPress provides you many good chances to use links on your own blog.
Links menu located on your own dashboard will be used to help you generate a blogroll. Basically, a blogroll is known as just a list of links which appear in the sidebar. In addition, the term blogroll was used since it was, actually, a list of different links to another blog, but, you can have links to every site.
One more thing you should remember is adding links to the blogroll does not do anything for your visitors if you do not show them on your own blog. In order to show them in the sidebar, you have to insert the Links Widget to your sidebar.
How to modify a Blogroll link on WordPress
Now, in this part, you will be shown on how to change a Blogroll link on WordPress on WordPress. Before going further, it is highly recommended that you must add /wp-admin to the end of your URL site because the instructions can refer to your WP Admin Dashboard.
With a Blogroll link on WordPress, you can easily control your set of links by using Links menu in your own dashboard on Wordpress. Those links can appear on your site if you add Links Widget to your site.
- Step 1: Choose All Links located in the Links menu to aid in managing your links.

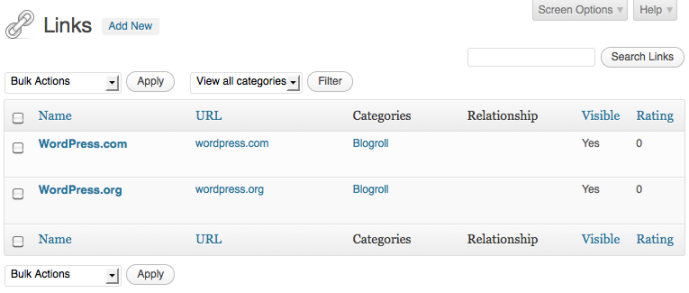
- Step 2: You will see your list of links. You can check the following picture to know more.
- Step 3: If you want to get rid of a link, all you need to do is to hover the link name, then click on Delete option appearing under it.
In order to remove multiple links, you can choose more than a link by using the checkboxes located on the left. After that, choose Delete from your Bulk Actions menu before clicking on Apply.
More interestingly, you can apply the filter function to display one category at any time or display all of your links. Next, you can opt for a typical category as well as View all Categories from your menu, then click on Filter button.
To edit a link, all you need to do is to hover the name of the link, then choose Edit option appearing below it. At the same time, you can also check the Add a Blog page page for the description of every module located on the Edit Link screen. Take note that after editing any link, don’t forget to click on the Update Link button.
Conclusion
We hope that with this above tutorial on how to modify a blogroll link on WordPress, you can create and change your blogroll links easily without having any difficulties. If you find this article helpful, don’ forget to give us a share on your social channels.

