
Categories on Wordpress helps you to group posts with related content together. Looking at the category of a post, readers could immediately know what the post is about. Thus, categories make it easier for readers to locate your content. Categories are somewhat similar to tags, but they are broader.
Categories on your pages can be displayed flexibly in different locations: on individual post view, at the beginning or end of posts, on your menu, or in the sidebar, depending on the widgets and theme you are using.
Each post can be assigned from (at least) one category, to multiple categories, and categories can be organized in hierarchical order.
In this article below, you will be guided through detailed, easy-to-follow instruction on How to insert a new category on Wordpress. You could either create a new category in the site settings, or create/assign one for your specific post.
To insert a new category
Inserting Categories through your site settings
One way to create a new category on Wordpress is to do it via your site settings.
Step 1: Go to My Site → Settings → Writing
First, go to My Site, click Settings, then access the Writing section.
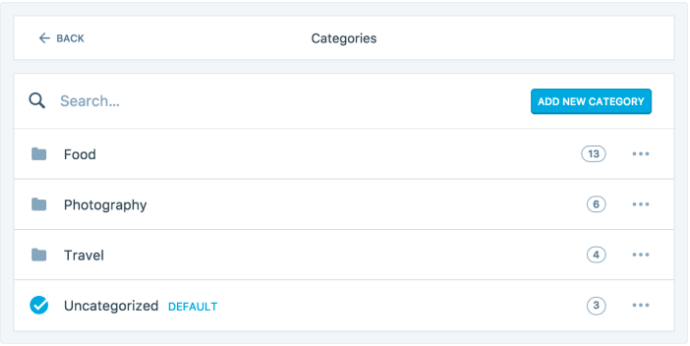
Step 2: Scroll down to the Categories section. Click Add new categories
Next, scroll down to the Categories section, where you could find your existed categories and options to manage them.
Click the blue Add New Category button.
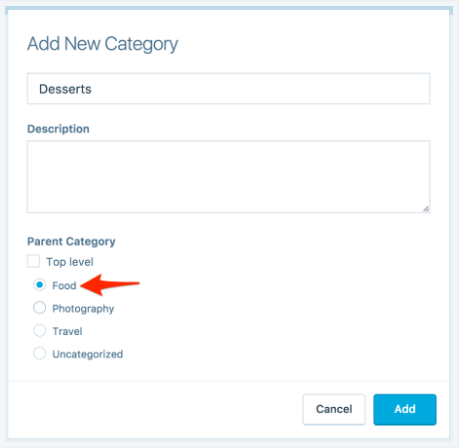
Upon adding new category, you could also create new, or assign its existing sub-category.
In the pop-up Add New Category window, select the parent category for your newly created category.
Inserting Categories through the Categories & Tags module
Another way to create a new category on Wordpress is to directly assign existed or add new categories to posts before publishing.
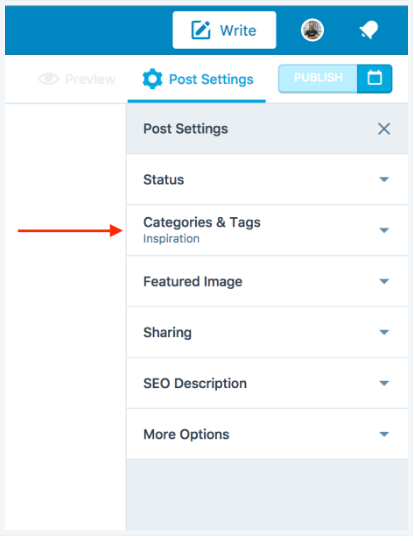
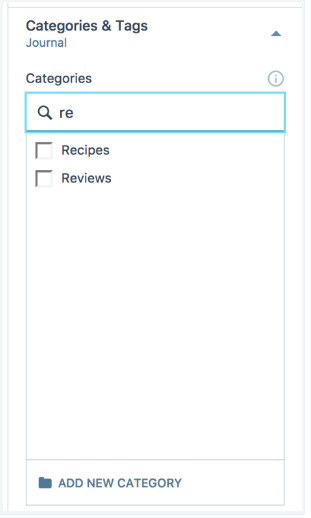
Step 1: Go to My Site → Blog Posts. Under Post Settings, click on Categories & Tags
First, go to My Site, then Blog Posts. Under the Post Settings tab, click on the Categories & Tags dropdown.
Step 2: Select an existed category or add a new one
In the expanded Categories & Tags option, select an existed category from the list, or click the ADD NEW CATEGORY button.
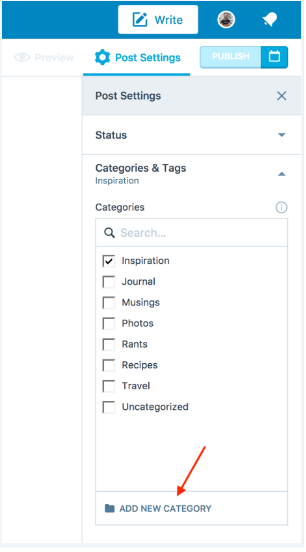
Your Categories list is displayed in alphabetical order. To search for a specific category quickly, just type in its name into the search field.
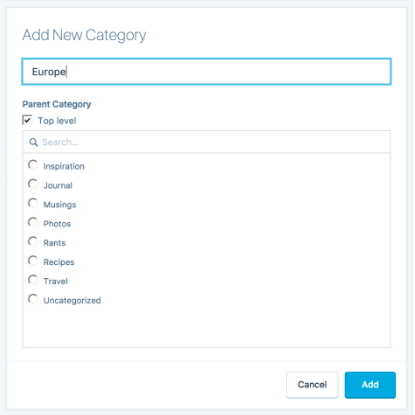
Step 3: (If you select Add New Category), enter the new category name. Check the Top level box, then click Add
If you click the Add New Category button, a new window will pop up with a blank field for you to enter the new category name. After that, check the Top level box, then click the blue Add button.
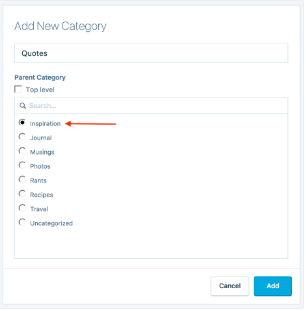
- To add a sub-category, after entering the new category name, instead of checking the
Top levelbox, select one of the categories that have already existed on your site to be the parent of the new sub-category. Finally, clickAdd.
Conclusions
Above is the detailed, step-by-step instruction on How to insert a new category on Wordpress. Hope it helps you in creating a better-organized blog.

