
After putting up and down the up and down side of having people comment on your Wordpress.com blog's post, you could decide by yourself whether to enable or disable the comment section on your published posts.
This article will provide you with the most essential things you need to know about comments on Wordpress.com, and guide you through a quick and easy-to-follow instruction on How to enable or disable comments on published posts on WordPress. Follow through!
To enable or disable comments on published posts on WordPress?
Comments: Benefits and Drawbacks
Before you decide whether to enable or disable comments on your published posts on WordPress, take a look at some of their benefits and drawbacks below:
On the one hand, comments can make a good blog great in many ways. Comments turn a monologue into a conversation and build a community. And sometimes, the gold lies in the comment section itself. Besides, they also give a boost to your SEO performance as search engines take the comments into consideration as well. So, what are the possible reasons to disable comments on your WordPress.com blog?
On the other hand, the most common reason blogger choose to disable comments on their blog is that, their comment section get trashy because of self promotional, spammy and sometimes hurtful comments. And more than that, spending time reviewing and moderating comments can consume a massive amount of your productivity. Another reason to disable comments could be to shorten website's loading time as each comment requires its own database ask or request, which does add up.
But it’s also true that a post devoid of comments somehow seems incomplete and therefore, many websites welcome comments with open hands.
How to enable or disable comments on published posts on WordPress
Step 1: Open a published post.
First of all, open an existing post that you have already published.
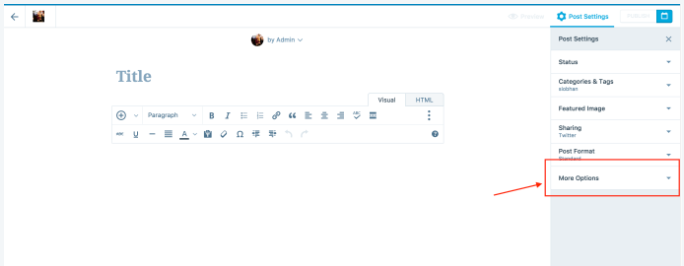
Step 2: Hover your mouse over the Post Settings section and click on More Options.
Hover your mouse over the Post Settings section in the top right, and click on More Options.
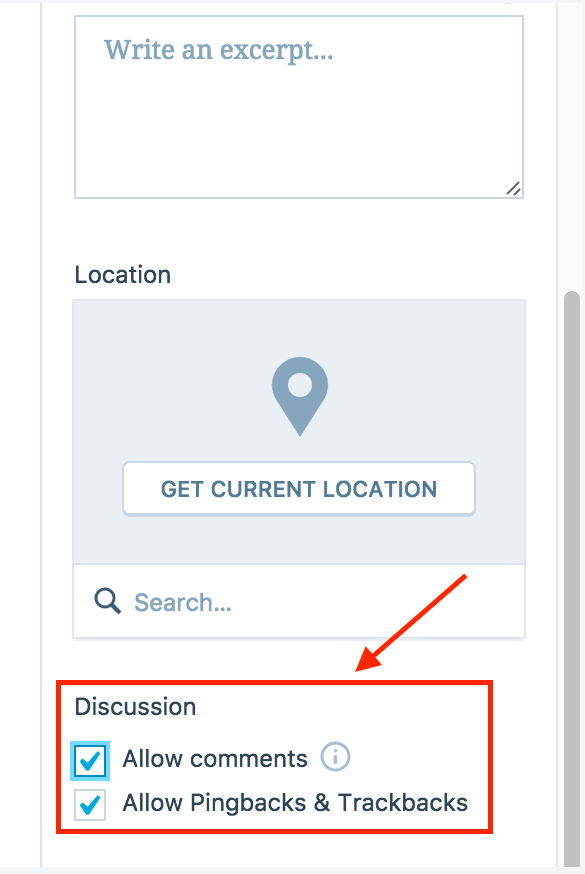
Step 3: Check or uncheck the Allow Comments box.
In the More Options section, check or uncheck the Allow Comments box under Discussion.
That's it! Click the final Update button and you are done.
How to enable or disable comments for a group of published posts or pages on WordPress
To help you save your time and focus more on important things like sharpening your content, Wordpress.com allows you to enable or disable comments in bulk. This means that you could manage the comment section for several published posts or pages at the same time.
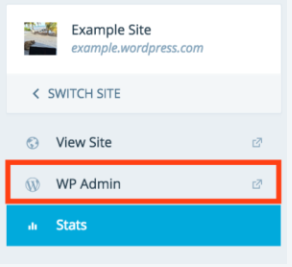
To do this, first go to your Wordpress Admin, access the Posts section and follow the instructions for Bulk Editing.
Conclusions
Above is the most essential things you need to know about comments on Wordpress.com, and guide you through a quick and easy-to-follow instruction on How to enable or disable comments on published posts on WordPress. Hope you use your comment section wisely and make the most out of it.

