
The old saying goes: "The more, the merrier". As a Wordpress blogger, high level of traffic to your site is a very good signal of high quality content that you must want to show the world.
The Recent Comments Widget is a very helpful built-in, ready to use tool that helps you create a real sense of live traffic to your site by displaying the most recent comments your blog readers left on the sidebar of your Wordpress. By showing other readers being active on your site, you are indirectly creating more trust and creditability for the content that you offer. If you are looking for a way to diversify users' experience surfing your website effortlessly, it's time you tried out the Recent Comments widget.
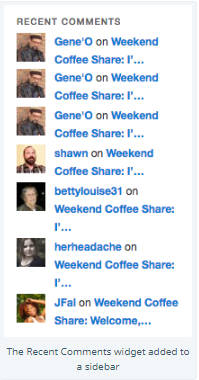
When activated, a Recent Comments widget could look something like this:
In this instructional writing below, you would be guided through a quick and easy-to-follow instruction on How to display the Recent Comments Widget on WordPress. You are only two steps away from making your site as lively as possible. Check it out!
Display the Recent Comments widget
Step 1: Visit Customizer > Widgets. Then add the Recent Comments widget to your sidebar
First, visit Customizer, then go to Widgets. Then add the Recent Comments widget to your sidebar.
Step 2: Customize the widget settings
Once you click Add, before the Recent Comments Widget is displayed on your site, there are several widget settings you are required to customize first.
The Settings window might look something like this:
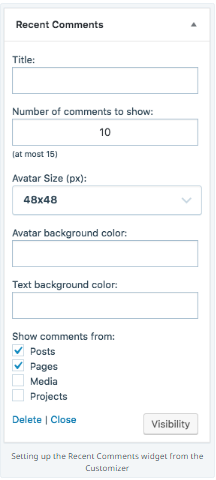
Here is a clearer explanation on what you are required to fill in those blank fields:
-
Title: Fill in the title for your widget
This is the text that is displayed right above the recent comments area in your sidebar. (i.e. "What Readers are saying", "Recent Comments")
-
Number of comments to show:
In this field, enter the number of comments that you would like to show in the Recent Comments widget. You could display as many as 15 comments.
-
Avatar size (px):
If you want to show recent commenters' avatars, enter the avatars' display size. You could also select the option of not showing avatars at all.
-
Avatar background color (Optional):
Choose the background color you would like to use for the commenters' avatars. You could either enter the code for hexadecimal color, (i.e. #fff for white or #000 for black), or simply the color name, like "black" or "white".
-
Text background color (Optional):
Choose the background color you would like to use for the text. You could either enter the code for hexadecimal color, (i.e. #fff for white or #000 for black), or simply the color name, like "black" or "white".
-
Show comments from:
In this field, select the particular types of posts you want to show user comments from.
Conclusion
Above is a detailed, step-by-step instruction on How to display the Recent Comments widget on Wordpress. Hope these little effort would bring you great result. Visit our site for even more instructions on similar topic like How to display the Posts I Like Widget, or How to display the Pages widget.

