In this article, you will be guided how to upload a video to any page or blog post on your site on WordPress.
To upload a video to any page or blog post on your site
VideoPress introduction
VideoPress works well on all of your modern browsers as well as devices. Also, it aids in making sure that your playback will be beautiful on every screen size, even from your smartphones to your desktops.
In fact, lots of many users take advantage of VideoPress as one of their individual video hosting services, which lets them host their videos in their media library, embed and share their videos at anywhere on websites, chat services, social media and so on by applying a snippet of code or a permalink.
Take note that there are some instructions in this tutorial are related to your Admin dashboard. You had better access to the dashboard by typing /wp-admin to the end of the site’s url. For instance, example.wordpress.com/wp-admin.
Enable VideoPress on users’ sites
In general, VideoPress can be added in WordPress premium or WordPress Business plans. When you choose one of the two plans which are activated on the site, you are willing to begin to upload and embed your video.
Upload a video
There are two ways to upload a video.
-
First, you can drag and drop your video from your computer to the page or post editor.
-
Or, you can take advantage of
VideoBlockand select to get a video uploaded from the computer.
VideoPress Sharing Settings
Regarding VideoPress sharing settings, VideoPress can make your video playback as well as sharing to bring great experience for your visitors by the sharing selections. By using the links of sharing, your visitors can download easily as well as embed your own videos. Next, you can press on the Share button in your video player and disclose the sharing options below:
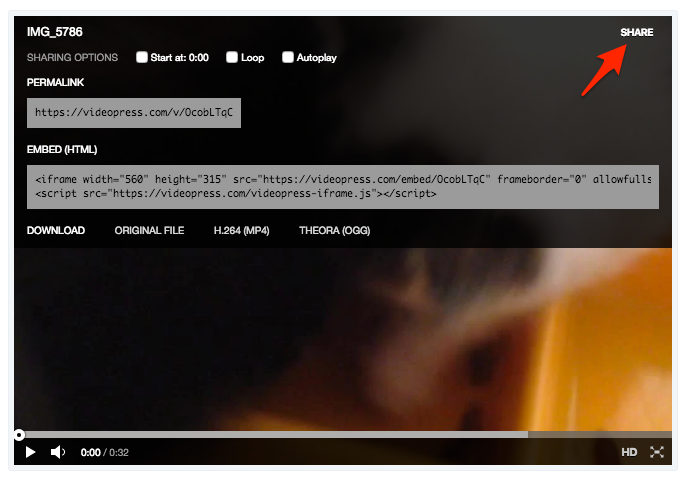
This action can help everyone who watches your videos a selection to get the video file downloaded in various forms and get the video permalink and iframe embed code shared.
In case you would like to disable the sharing, you can perform that in your video settings in your Media Library from the WP Admin dashboard.
By unchecking the selection to show the sharing option in your video player, your video is being added to the page.
VideoPress Stats
All of your videopress videos can come with the stats tracking that will be checked from the Stats screen in your own homepage.
Opting for the video name can show a chart displaying video’s daily activity. In addition, it also includes the URLs where your videos are embedded.
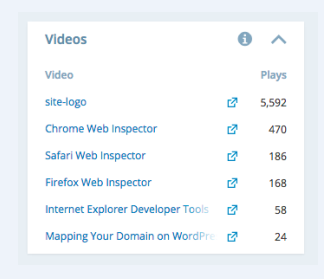
When a customer or visitor clicks on the play button on your Flash video player, Plays are counted.
Resize your video
VideoPress is able to opt for the best player size for the blog’s content column. If you want, you can easily specify the width of your video player by applying the Shortcode Block.
All you need to do is to head to your WP-Admin, then come to the media library. Don’t forget to choose the video you wish to go with and get the shortcode copied.
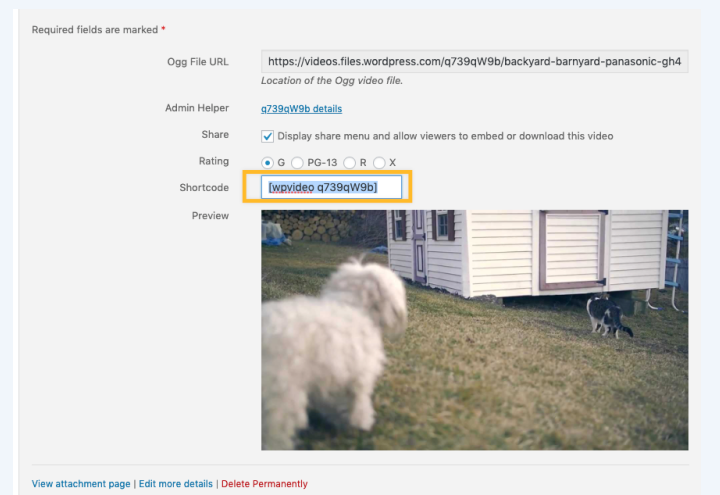
Next, you can add this Shortcode Block in your post or page. Paste the code and use w=# prior to the end of the bracket to enter the width while # is the pixel size you want.
[wpvideo OcobLTqC w=400]
You can set your video width from a smaller to a larger size and stop when it suits your theme’s post column’s width.
Attributes the shortcode supports
As you might not know about, the shortcode can support a great number of the attributes to help you change the default behavior.
-
w=X for width in pixels without including units
-
h=Y for height in pixels without including units
-
hd=true/false used to force HD playback
-
freedom=true/false used to force open-source video formats
-
autoplay=true/false used to play the video automatically as it is loading
-
loop=true/false used to play the video automatically over and over
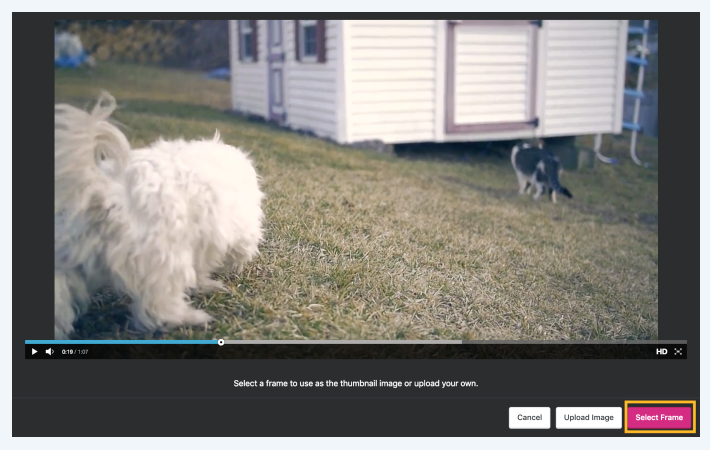
Choose a thumbnail
In order to choose a video a thumbnail uploaded to the VideoPress services, you can follow the simple steps below:
-
Step 1: Head to My Site -> Media.
-
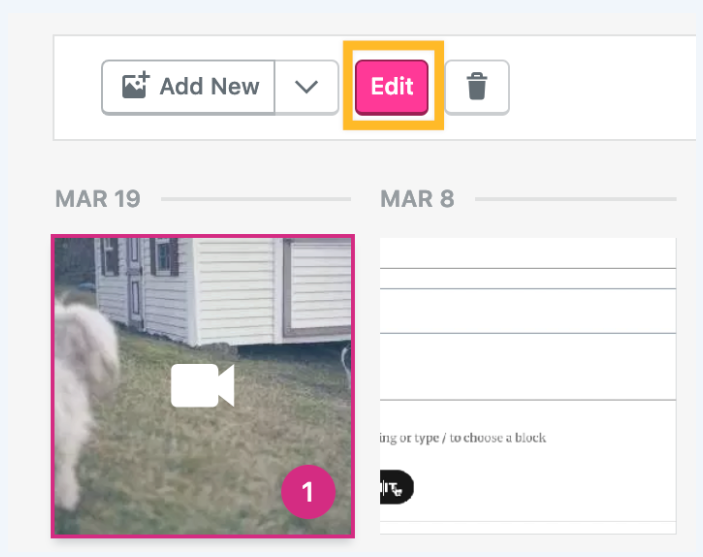
Step 2: Choose the video you like and choose the edition.
-
Step 3: Select Edit Thumbnail.
-
Step 4: Move your mouse through your video as long as you are happy with your favorite frame and head to Select Frame.
Another way is to select Upload Image to choose a picture you create on your desktop.
Conclusion
We hope with our post on how to upload a video to any page or blog post on your site, you can successfully perform your task without having any difficulties. In case you have any problem or question, don’t hesitate to leave us a comment.


