
You may want to add sharing buttons on your posts on WordPress.com then your viewers can easily share their favorite one with their friends and family. WordPress.com supports users with sharing buttons of common social media, like Facebook, Twitter, etc. then you can choose the one which suits your purposes. For more details, following this writing to know how to insert sharing buttons on WordPress.
To insert sharing buttons on WordPress
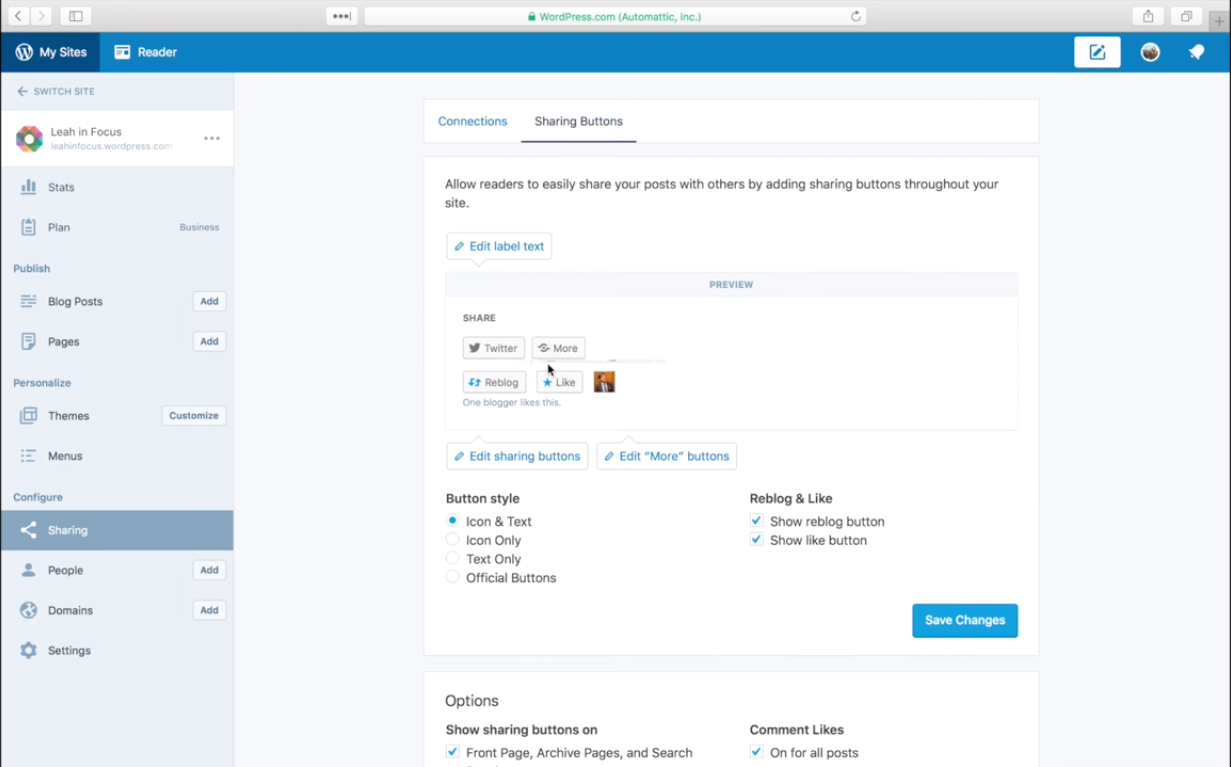
Step 1: Head to Sharing
Get access to your account on WordPress.com then click on My sites. After that, scroll down and find the Sharing option which stays under the Configure section and press on it.
Step 2: Select Edit sharing buttons
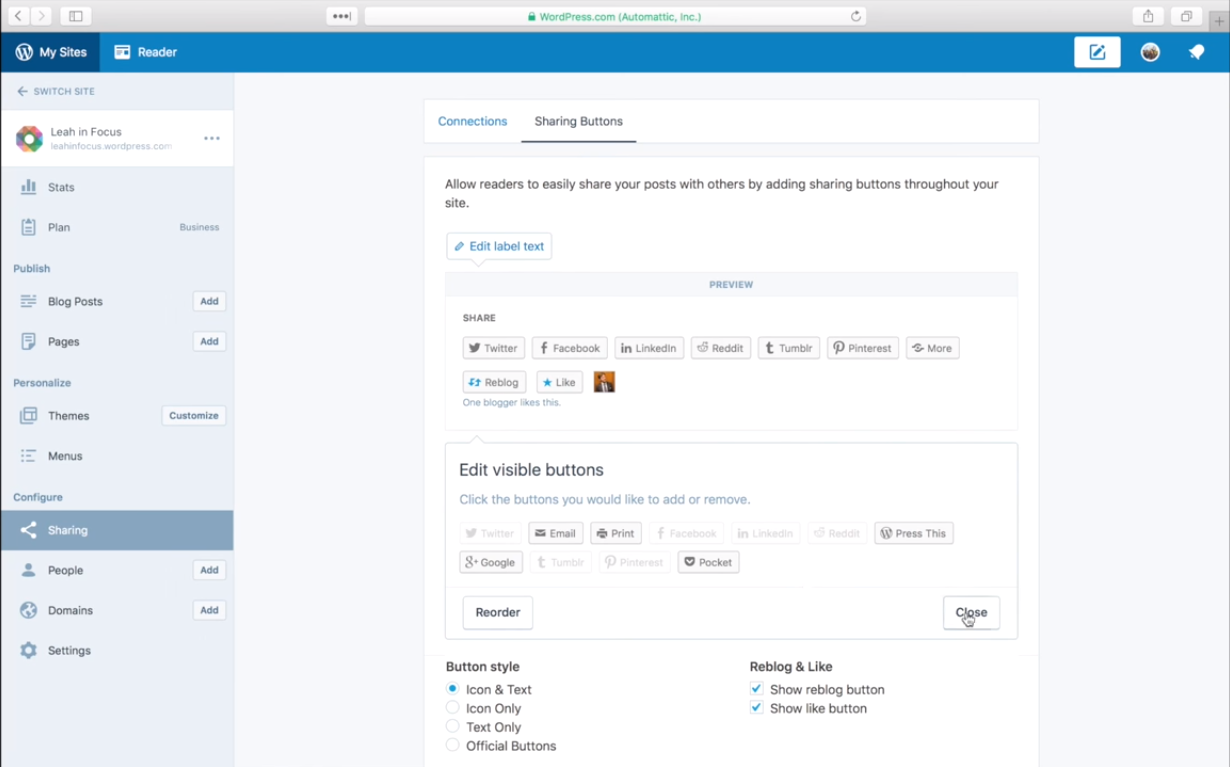
There are two tabs in the Sharing page that you have to click on Sharing buttons. Next, scroll down and press on Edit sharing buttons to set up for the visible buttons. You will see a number of options offered by WordPress.com that you can click on these buttons to activate it and press on it again it if you want to deactivate. Twitter, Facebook, LinkedIn, and Reddit are popular social media that it does not need to explain more. However, the More button is more special which you can use if you don't want to show too many buttons on your post. When clicking on it, other buttons will be displayed and you can set up the More button by going to the next step.
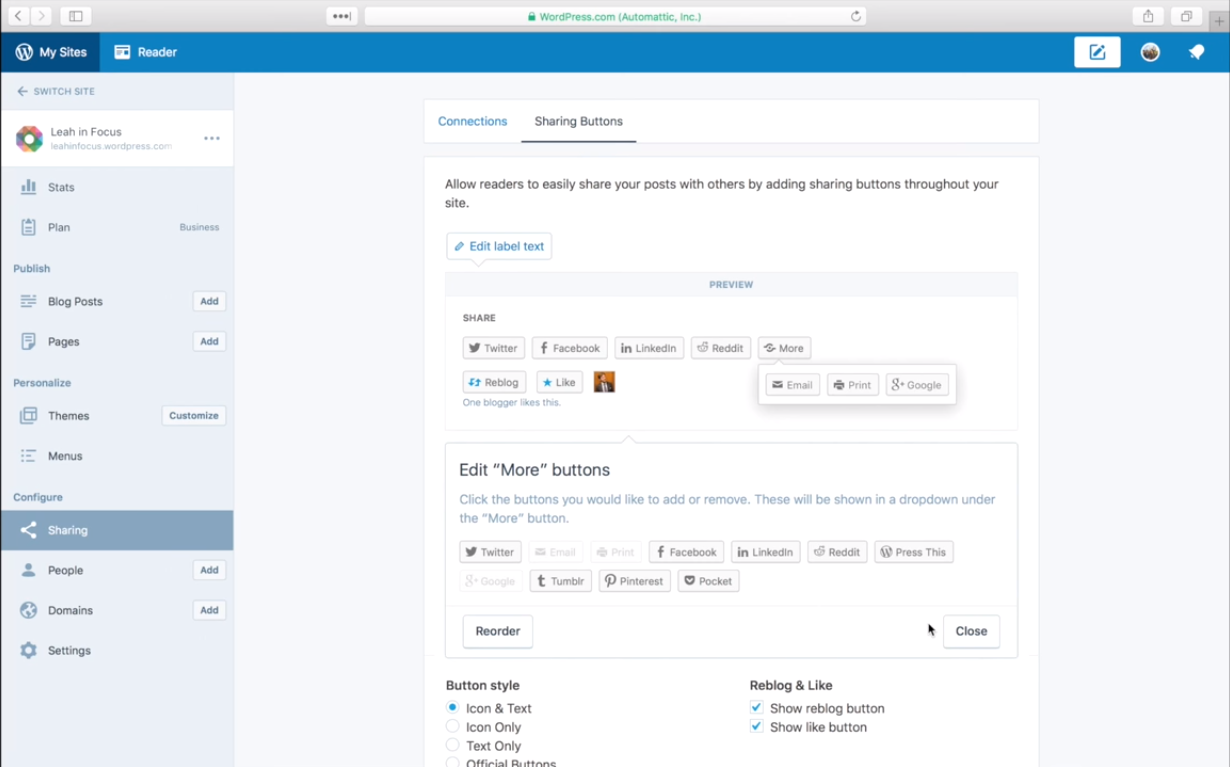
Step 3: Press on Edit "More" buttons
Click on Edit "More" buttons which is next to the Edit sharing buttons to start the set up for hidden buttons. Similar to when you enable the sharing button, you must click on the symbol to turn it on then when your readers select the More button on your post, it will show up. For example, if I want sharing buttons for Pinterest and Google to appear when choosing More button, I will select these two buttons. When one button is light up in the settings, it means it is available to choose that one.
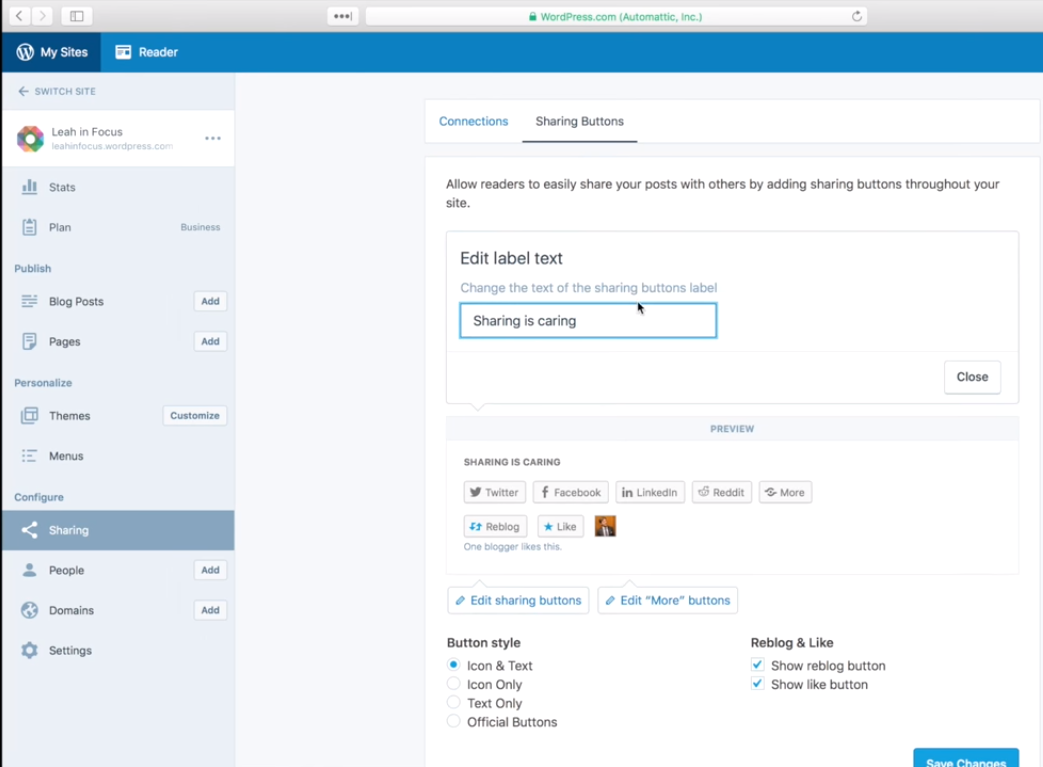
You can see the Preview right above the settings to observe how it will present on your post. Moreover, you can change the text appear above the sharing buttons by clicking on Edit label text. You can name it as Sharing is caring like in the picture below:
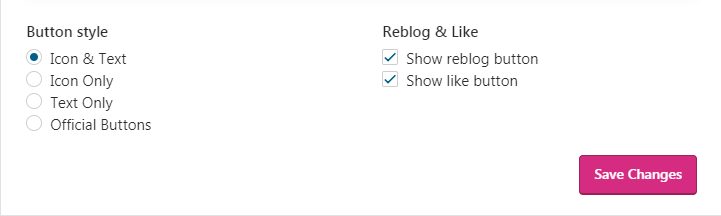
Step 4: Choose Button style and Reblog & like
Below the add buttons section, you can see the one for editing Button style and Reblog & like. For the formern, there are four options that you can choose, including Icon & Text, Icon only, Text only and Offical buttons. When you select Icon and text, the sharing button will contain its icon and its name, for example, for Facebook sharing button, it will contain the F icon and Facebook. In case you choose Official buttons, it will look like the following image:
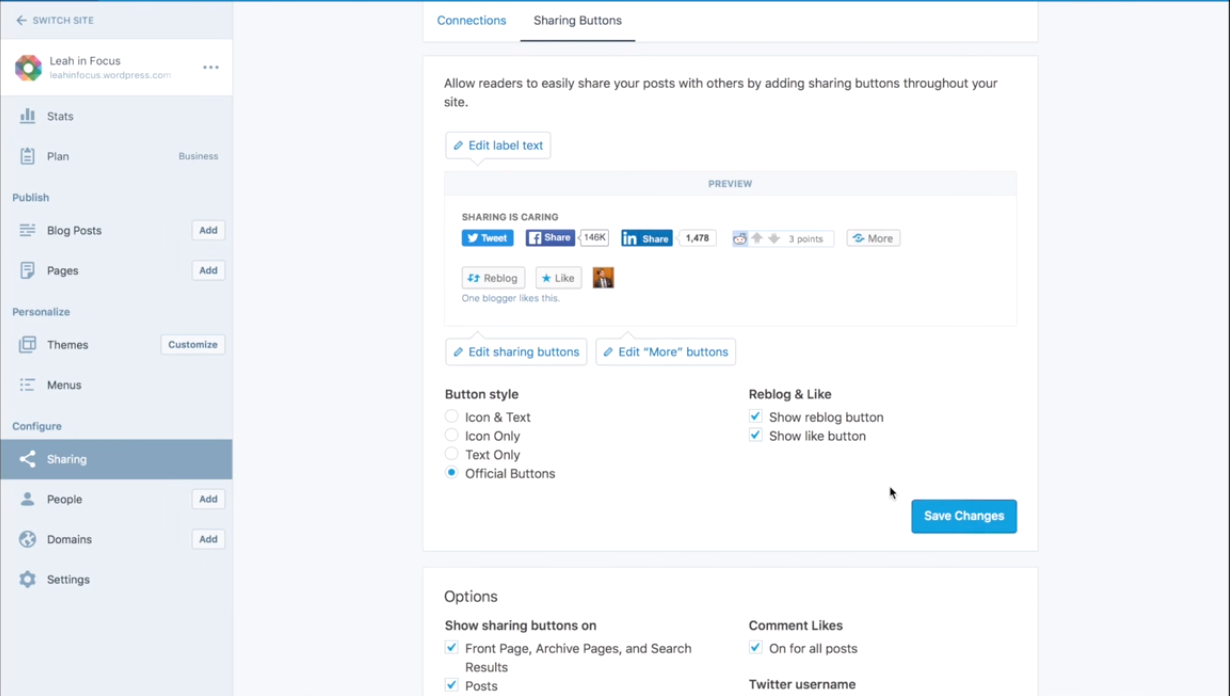
For the Reblog & like, there are two options that you can tick or untick the options to enable/disable them. The first selection is for reblogging and the second one is for like button:
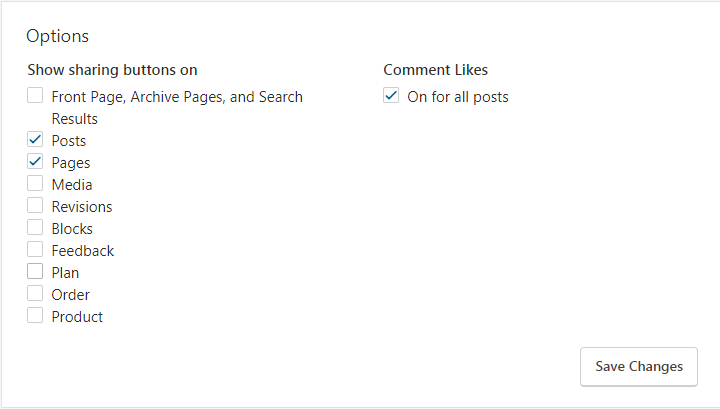
Step 5: Set up Options
Scroll down to the end, you can see the Options section, consisting of two more settings for Show sharing buttons on and Comment likes. Below the Show sharing buttons on, you can select where to display the sharing buttons, for example, in posts or pages. Tick on the box in front of the options to activate it and untick to deactivate. Similar to the Comment likes, check or uncheck on the box of On for all posts to enable/disable it.
Step 6: Click on Save changes
When you have completed all the above steps, select Save changes to help the system to record all your editing. If you forget or skip this one, everything you have done will become meaningless and you have to do the whole process one more time.
Conclusion
In conclusion, I have given you the guideline of how to insert sharing buttons on WordPress. This process is quite simple with only six steps in total that it will not take much of your time to practice. Moreover, images are added in the writing to illustrate steps that it would be easier for you to follow the steps. Hope that you can appreciate my effort and enjoy this post.

