Google Analytics is a charge-free tool provided by Google which helps you generate reports on traffic view, visitors' behaviors and more. However, you can enjoy this feature on WordPress site only if you use the Business Plan. Thus, if you are a WordPress Business site owner and you want to know how to set up Google Analytics on WordPress, following this topic to discover more details.
Set up Google Analytics on WordPress
Step 1: Open Google Analytics site
Go to the website of Google Analytics and log-in to your account. If you haven't had an account yet, you can register for one and move on to the next step.
Step 2: Select Create Account
After sign-in your account, click on the Settings and choose Create account to add a new analytics profile.
Step 3: Enter in the fields
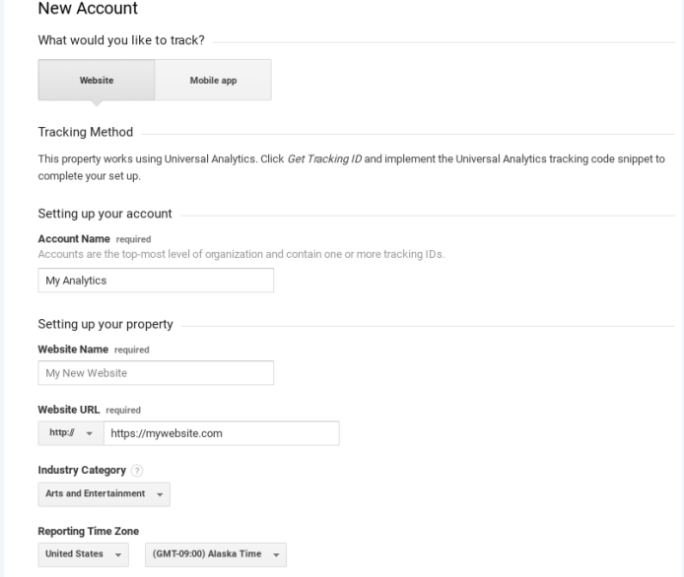
In the Setting up your account and Setting up your property section, ensure that you complete three important fields, including Account Name, Website Name and Website URL. You can use any title for the name of your account and website, however, for the Website URL you should enter the link of your WordPress site.

Step 4: Choose Get Tracking ID
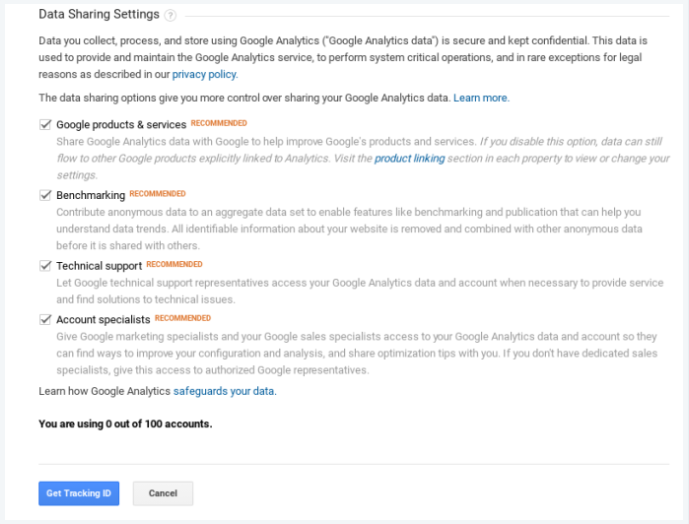
After filling in the fields, scroll down to the Data Sharing Settings and you will see that four settings are all chosen by default. You can read the description of each option and untick the one you don't want to apply for your account. If you are satisfied with the settings, click on the Get Tracking ID button right below this section.

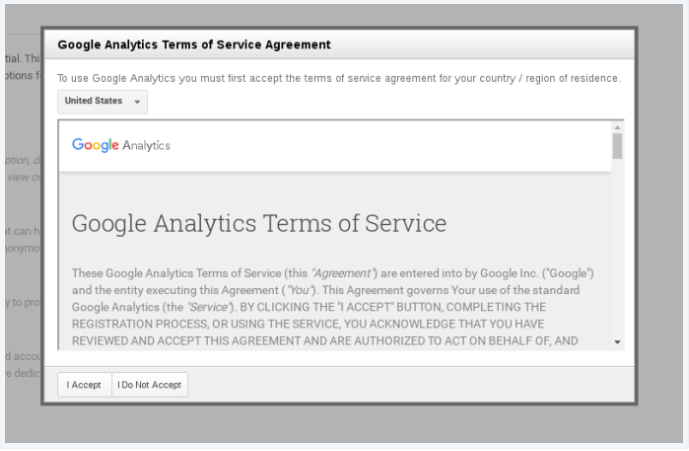
The system will ask you to agree with the terms of service provided by Google Analytics then you can read it and click on the I Accept button if you still want to use this tool. On the next page, copy the code you see in the Tracking ID field because you need it for the next step. This ID will be something similar to UA–90363941–1.

Step 5: Go to Traffic and find Google Analytics section
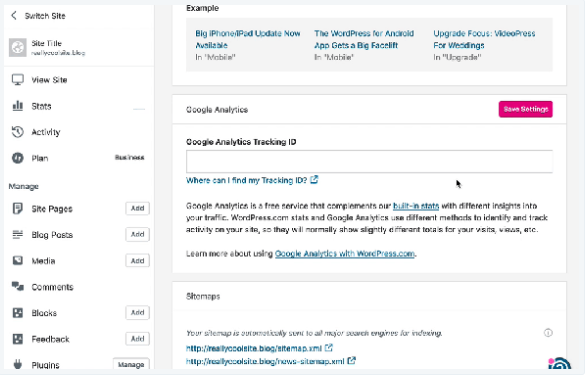
Open your WordPress account and head to My sites. After that, look for the Settings under the Configure section and click on it. There are five tabs in this part, including General, Performance, Writing, Discussion and Traffic. Press on the Traffic and scroll down until you see the Google Analytics section. Next, paste the ID you have copied in the previous step on the Google Analytics Tracking ID box and click on Save settings to finish.

Conclusion
Overall, this writing has shown you the process of how to set up Google Analytics on WordPress. Illustrated images are included in this post that it is easier for you to follow and imagine what it looks like in actual. Hence, hope that you enjoy the reading time and gain some benefits from it.


