
Sometimes you may need to enrich your post with photos to make it more interesting and attractive to readers. Viewers may find it boring when they see an article or a post without any picture and too many words and it is more chance that they will skip your writing even though its content is amazing. Hence, you can insert some photos to your post with sources from the Internet and Instagram is a good choice for this purpose. As you may know, Instagram is a popular social network which allows users to share their images with their friends, family or other users. Moreover, you can add pictures from Instagram to your post on WordPress.com just by some simple steps. If you want to discover the full process, follow this topic to know how to embed an Instagram photo on WordPress.
To embed an Instagram photo on WordPress
Step 1: Head to Post editor
Get access to your account on WordPress.com and select My sites. If you own multiple sites, click on Switch site and choose the site which includes the post you want to add an image from Instagram. After that, go to the Blog posts under the Manage section or in other words it stays right below the Site Pages. All of your posts will appear on the screen that you have to find the one you want to edit and press on it to open the post editor.
Step 2: Pick an Instagram photo
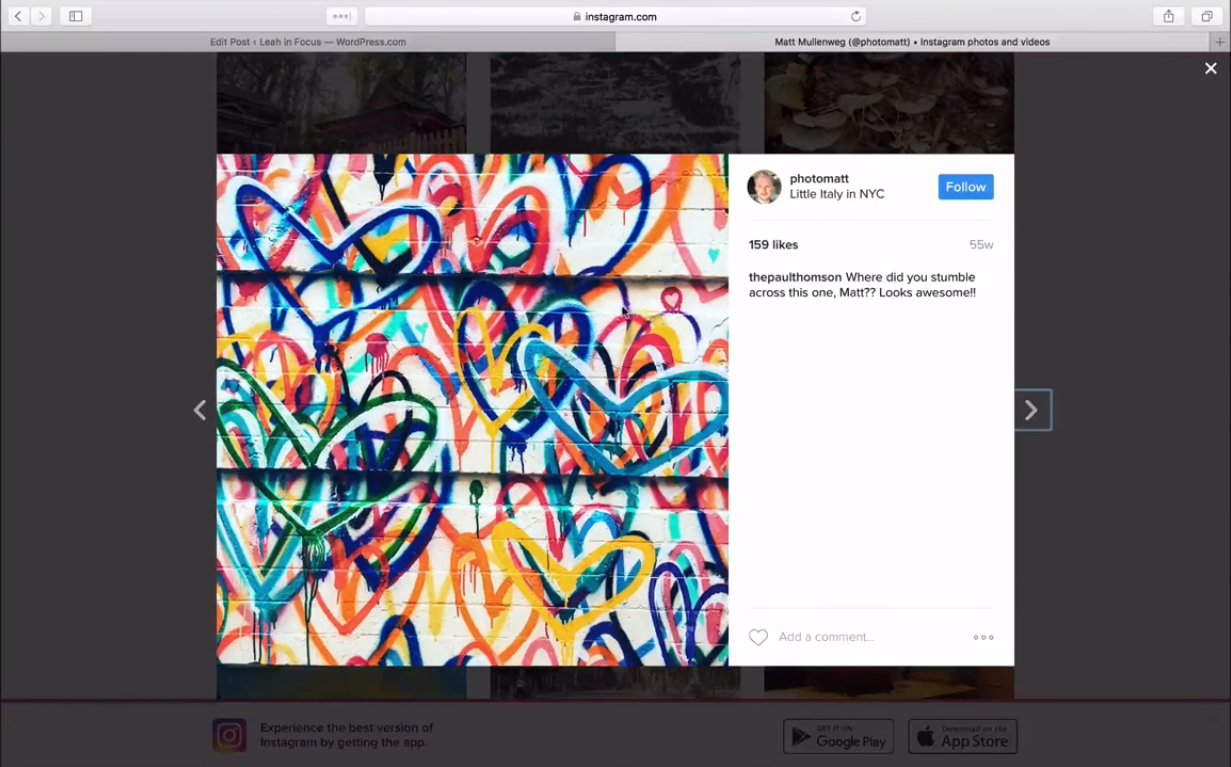
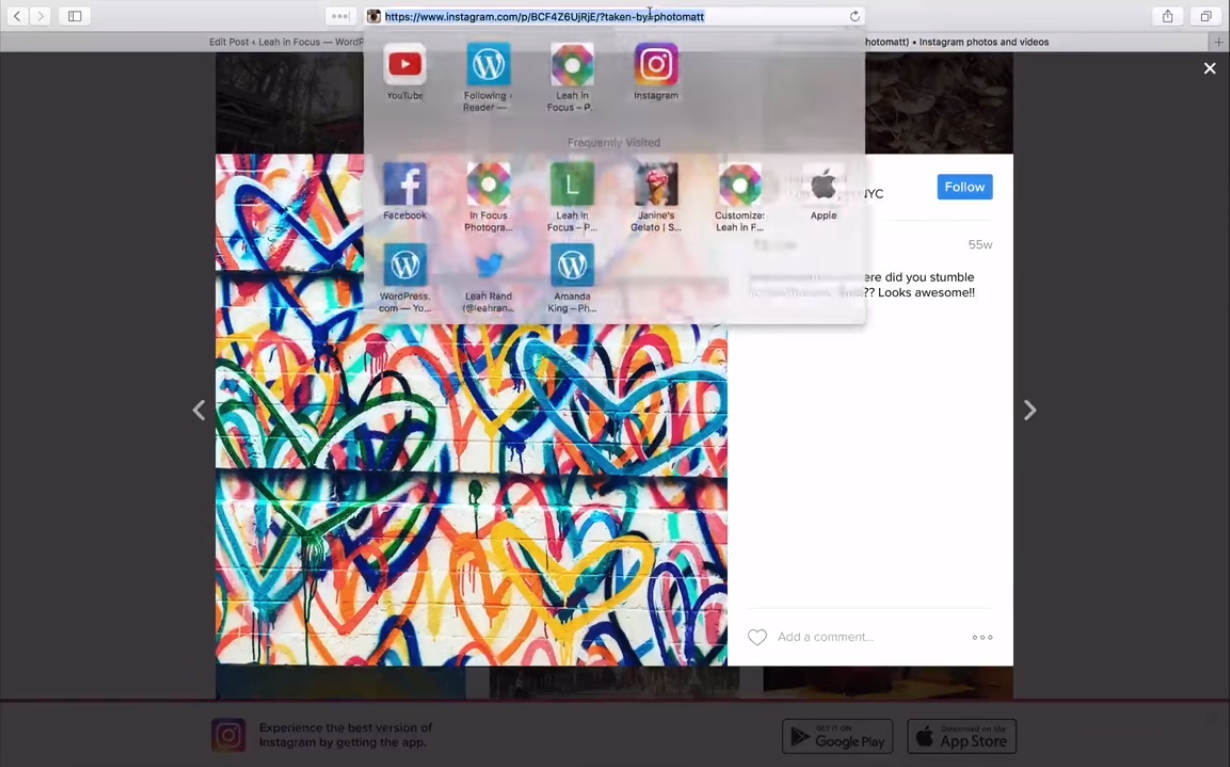
Visit Instagram.com with a new tab on your browser and find the picture you want to insert in your post. Before start searching, you need to sign in to your Instagram account because it does not allow non-user to look for its image storage. When you see it, press on it to view the image individually. All the information related to the photo will be displayed, including the posting date, photo owner, author's description, and comments. You can base on these details to get more understanding about it then you can know whether it suits your using purpose or not. If you are satisfied with the image, head to the address bar and copy its URL.
Step 3: Paste the photo's URL in the editor
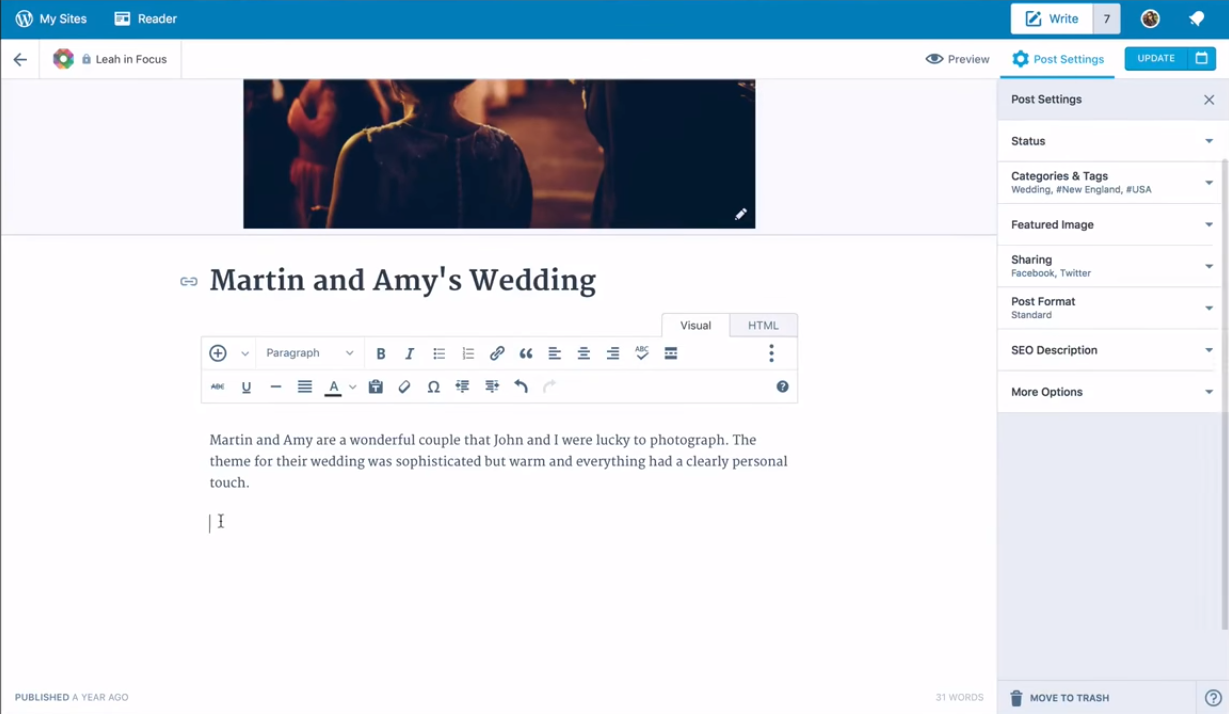
Go back to the editor of your post and move the mouse pointer to the position that you want the picture to appear on your post. For example, I want to show it below my first paragraph, I will click on that place and paste the link here. Please note that you should enter the link in a new line then it will not cause any displayed error on your post. You can also separate the picture with your text using a blank line then the presentation can be greater. Besides, it might take a few minutes for the image to appear on your post editor then be patient and wait for the system to load. You can click on Preview to see how it may look like when it publishes and check for its presentation.
Step 4: Select Update
When you have completed all the above steps, press on Update to save all your adjustment for the post. This is an example of how an Instagram photo may appear on your post:

If you want to add more than one Instagram image for a specific post, repeat the process again to achieve it.
Conclusion
In a nutshell, this writing has provided you with the guideline of how to embed an Instagram photo on WordPress. This is a simple yet useful process that you can easily follow and practice within two minutes. Moreover, because WordPress.com do not limit the number of Instagram photos you can use for a post then you can have more chance to apply these steps. Additionally, you can insert images from Instagram to your comments and pages as well that it is convenient to share your views. I also provided illustrated photos for almost all steps to help you imagine what to do in actual. With such an effort, hope that you enjoy the reading time and find this post helpful.

