
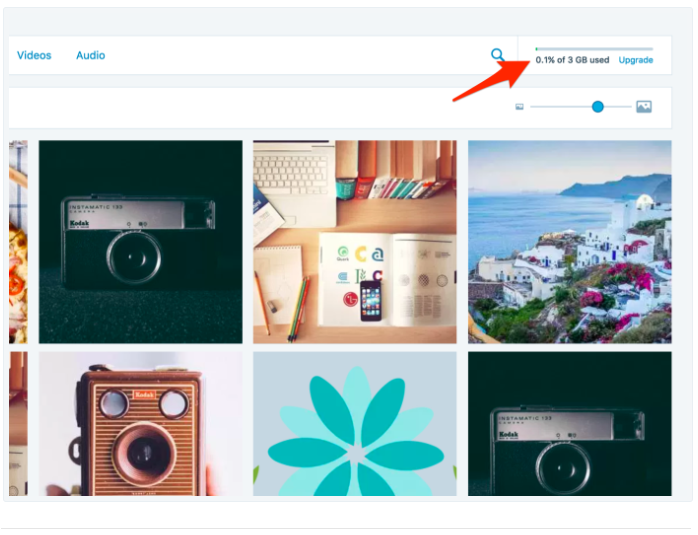
WordPress offers users with free storage of 3GB for all sites then you can use it to upload and save your files for your posts and pages. If your storage is run out of space, you cannot upload media files, such as photos, videos, audios or other document files on your sites. You can check whether your storage is full or not by heading to My sites then Media. You can see the amount you have used and the left one on the top right of the screen display as the following image:
In case you have used up your storage space, follow this topic to find out how to add Storage Space to your site on WordPress.
To add Storage Space to your site on WordPress
Upgrading a higher plan
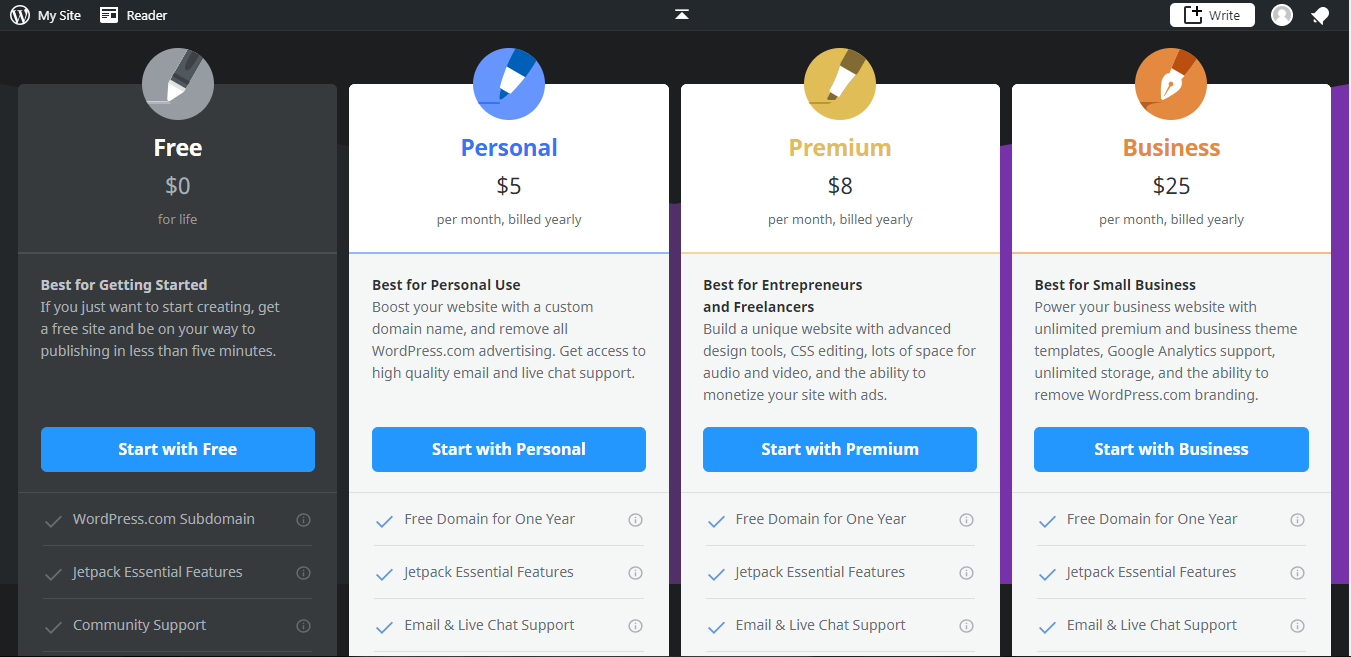
When you register for an account on WordPress.com, the system will ask you to choose the plan for your site, you can upgrade the plan to increase the storage for your blog. From the free version with the storage of 3GB, you are available to upgrade your plan to one of the three other kinds, including:
- Personal: Provides you with another 3GB which means you have a total of 6GB storage with the monthly fee of $5 and billed yearly.
- Premium: With the payment of $8/month and yearly billed, you will own the storage of 13GB for saving files and photos on WordPress.com
- Business: Using this plan, you can get unlimited storage space with a monthly charge of $25.
Hence, if you don't have enough space for uploading your files (including photos, audios, videos, documents, you can use a higher plan to enlarge your storage. After checking your storage space, you can change your plan by pressing on the Upgrade next to the number of storage space and choose the plan you want. Moreover, you can try other methods instead, like use other file hosting or file sharing service to upload and store file. Besides, external hosting service like Flickr or Youtube can be utilized and embed remote pictures and videos.
Deleting files
Another way to free your space is to remove files which are not important on your blog. Firstly, go to My sites and click on Media which under the Manage section. After that, you will see the list of all of you files appear on your screen display then you can delete them by selecting them and pressing on the trash icon. The system wants to confirm your selection then you need to choose the Delete button to permanently remove these files from your site. Be noted that, even images or files you used on your posts or pages will disappear forever if you delete them from the Media.

Conclusion
In conclusion, this writing has introduced to you how to add Storage Space to your site on WordPress. These tips are simple and easy to complete that you can apply immediately for your sites within five minutes. Thus, hope that you enjoy this article and gain some benefits from this.

