
There are cases that you may want to track transaction details on your sites on WordPress.com for accounting purpose or others. You are allowed to see all of your transactions, consisting of payments and refunds by visiting your Billing History. For more details, following this topic to discover how to view and track your billing history on WordPress.
To view and track your billing history on WordPress
Step 1: Go to Manage Purchases
Get access to your account on WordPress.com and click on the Account profile on the top right of the screen display. After that, the system will automatically move on the My profile section that you need to press on the Manage Purchases with the icon of a card next to it.

Step 2: Choose a transaction
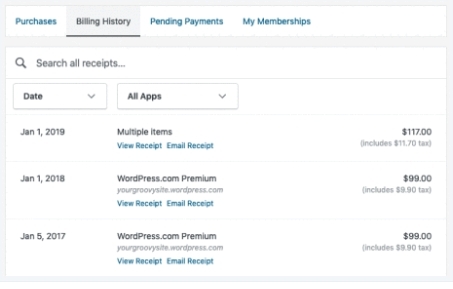
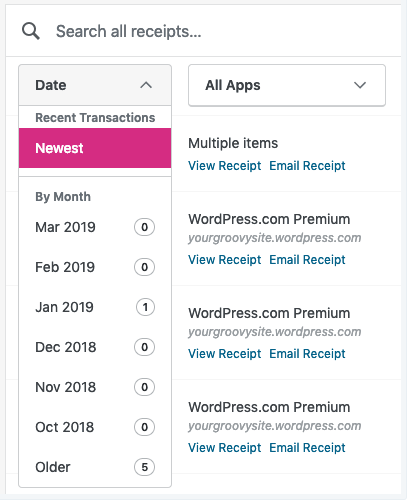
On the top bar, there are four options for you to choose, including Purchases, Billing History, Pending Payments and My Memberships. You need to click on the Billing History to see all the list of all transactions you have made. When the list appears on your screen, you can search for the transaction you want to check by enter its name on the search bar or use the Date to filter the list. If you use the Date function, press on it and choose the time frame you want to track. Transactions will be sum for six latest months and Older like in the picture below:
Step 3: View the transaction
When you find the transaction you want, you will see that below its title, there are two more options, which are View Receipt and Email Receipt. If you press on the View Receipt, detailed information of the transaction will be displayed. This is an example of how a receipt may look like:
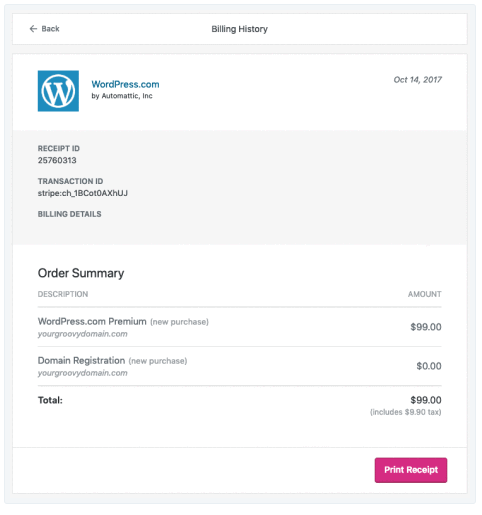
You can add information for the receipt if you want by entering the content under the Billing Details. For example, you can add some notes for this transaction, such as the name of who conducts the transaction or note to remind you of including it in your accounting book. If you are satisfied with the content of the receipt, you can print it out to use for an external purpose by pressing on the Print Receipt button. In case you want to have a soft copy of the receipt, select Email Receipt and a duplicate will be sent to the email you added in the Account Settings.
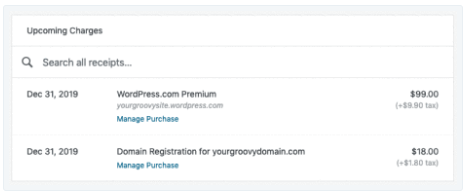
Moreover, you can check for the future payment by looking at the Upcoming Charges staying under the receipts list. It will show you the deadline you need to pay the fee, the payment reason and the specific amount, like in the following image:
Conclusion
In short, this writing has given you the process of how to view and track your billing history on WordPress. By practicing these steps, you can keep track of your transactions and easily manage your purchases. Hope that you enjoy the reading time and take advantages of this post.

