
VaultPress is a subscription service designed by Automatic that provides you with powerful real-time backups and automated security scanning, along with a support system from technical experts for your WordPress.com site. It is the backup plugin that is the most recommended by Wordpress as it offers myriads of great features allowing you to have total control over your security and monitoring features. VaultPress is just right for WordPress users who are concerned about backing up their content, as well as those who care about monitoring the security for their WordPress website (which should be everyone!)
After a Jetpack plan is purchased for your site, the VaultPress plugin should normally be installed and set up automatically for you as a part of the connection process. However, in the event that this does not work accurately, you will have to install the plugin manually.
In this article below, you will be guided through the most compact, easiest-to-follow to set up your the VaultPress plugin manually. As tiring as it may sound, the process of How to install VaultPress on your site on WordPress is simple to follow, whether you are in your 20 or 60.
To install VaultPress on your site
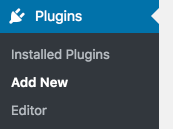
Step 1: Click Add New in Plugins
First, after loggin in to your Wordpress.com site, go to the Plugins section and click Add New.
Step 2: Search for VaultPress
To save time browsing, type the keyword "VaultPress" in the search box.

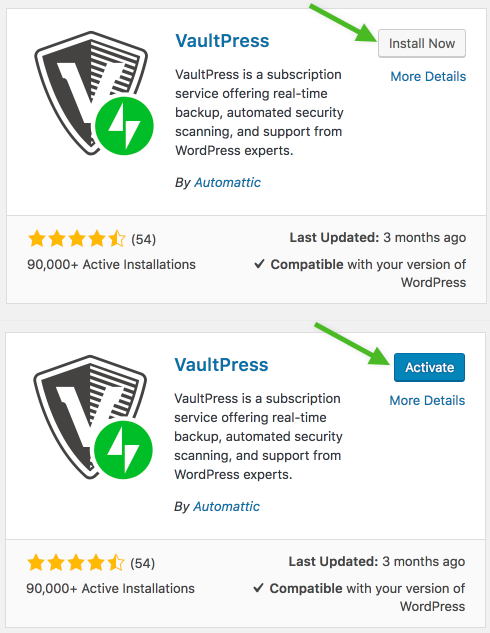
Step 3: Click Install and then Activate
The VaultPress plugin will now appear. Click the Install Now button to install the plugin automatically, then click the blue Activate button to get it activated.
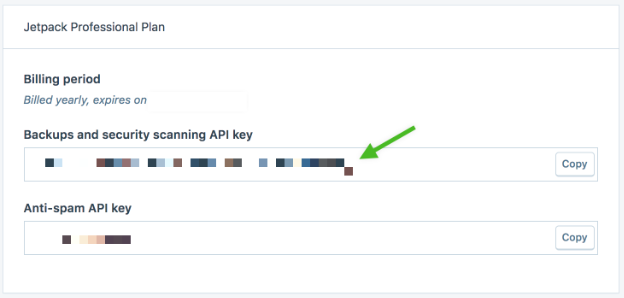
Step 4: Get your API key {#api-key}
Next, go to your Jetpack professional plan, in the Backups and security scanning API key box (here: https://wordpress.com/me/purchases/), find your Jetpack plan receipt, and copy your API key.
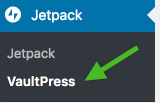
Step 5: Go to VaultPress in Jetpack then provide the VaultPress API key
After having the API key copied, go to the Jetpack section, access VaultPress.
In VaultPress, you will be asked to provide your VaultPress registration key. Paste the copied API key into the text box.
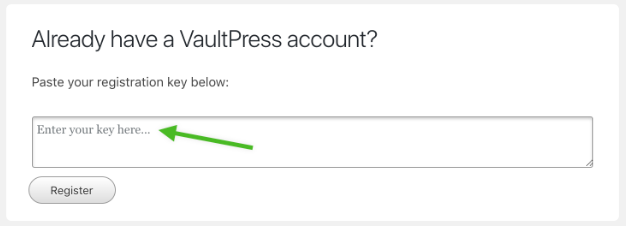
Step 6: Click Register
After you are done, click the Register button. VaultPress will automatically connect to the Jetpack servers and is immediately ready to work on your first backup.
Conclusion
Above is a quick and easy-to-follow instruction How to install VaultPress on your site on WordPress. Hope you have found it helpful.

