
Did you know that Twitter offers embedded, interactive timelines that allows you to display live Twitter feed on your Wordpress blog? This allows readers to interact: reply, retweet, or favorite tweets right from the platform of your blog or website.
The Twitter Timeline widget is a very effective tool designed to help display a Twitter timeline on your sidebar, or any widget area on your site.
So in this instructional writing below, you would be guided through a quick and easy-to-follow instruction on How to display the Twitter Timeline widget on a post on WordPress. Examples are included.
To display the Top Posts & Pages widget
Step 1: My Sites > Customizer > Widgets
First, from My Sites, visit Customizer, then Widgets.
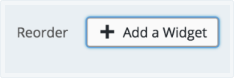
Step 2: Go to Widgets, then click Add a Widget
Next, go to the Widgets section, and click the Add a widget button.
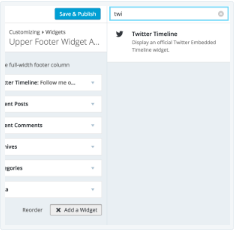
Step 3: Find "Twitter" from the search bar, and click to expand this widget's settings
Find "Twitter" from the search bar, and click to expand this widget's settings.
Step 4: Customize the widget settings
Once you're done adding the widget to your site, there are several widget settings you are required to customize. The widget settings might look something like this:
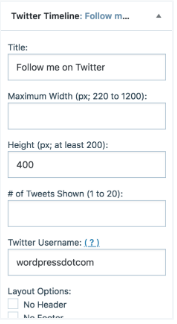
Here is a clearer explanation on what you are required to fill in those blank fields:
-
Title:
This is the custom text that will be displayed as your widget title. It is set as "“Follow me on Twitter” as default, but you could customize the text into anything you prefer.
-
Maximum Width:
This is the maximum width of your Twitter timeline in pixels. The timeline would be set to automatically fill the sidebar if you leave the space blank.
-
Height:
This is the minimum height of your Twitter timeline in pixels.
-
Twitter Username:
Add your Twitter user name, or the specific account whose public tweets you wish to be be displayed on your timeline widget.
-
Layout Options:
Play around with these options to figure out which one looks best as your timeline. Previews of these changes can be viewed from your Customizer.
-
Link/Border Color:
Customize your timeline, including the colors of the displayed links and border that best match your blog's theme.
-
Timeline Theme:
Choose whether to have your timeline displayed in the dark or light color theme.
Step 5: Click Save
Once you are done setting up, click the Save button and refresh your website to see changes in action.
Conclusions
Above is a detailed, step-by-step instruction on How to display the Twitter Timeline widget on a post on WordPress.**. Hope these little effort would bring you great result.

