
Have you ever heard of Press This? If you have not and want to discover what it is, then you are in the right place. As you might not know about, Press This is a tool of sharing content with WordPress that allows you to clip images, videos or texts from another site and get them published on your own blog.
Press This provides you with a fast way to get a link published to a post or page from every website to the blog without visiting WordPress. With Press This, you can share:
- A quote
- A link to a relevant blog post
- A picture with links back to the source (such as from Flickr and so on)
- Videos or clips from Vimeo or Youtube
- Tweets from Twitter
More importantly, if you would like to share a piece of content with your own readers, Press This is able to help you with that. Also, it even provides you with credits to what content you link with to send you less things to concern about.
While you are seeing the post or page you would like to share, it is easy to click the Press This bookmarklet.
In order to set up Press This, you should read this article since you will be instructed on how to configure Press This on your site.
How to configure Press This on your site
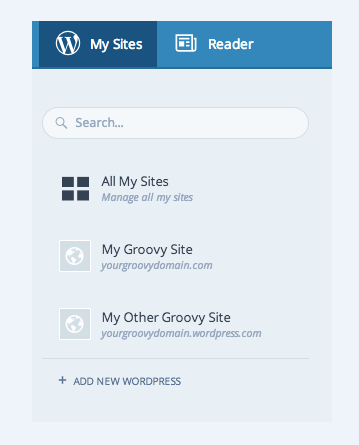
Step 1: Go to My Sites section
First, you go to My Sites section in your own dashboard. If it is necessary, you can choose your site and tell which site is chosen at the top of your sidebar.
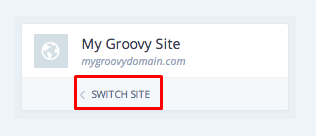
Step 2: Click on Switch Site
In this step, you can click on Switch Site like the picture below to help select a different site. Choose the one you love to begin with.
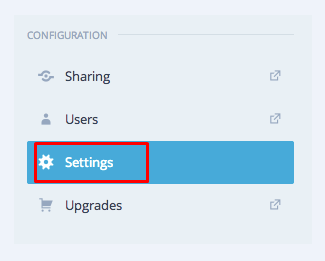
Step 3: Choose Settings
Move your mouse to the bottom of your sidebar, then go to Settings.
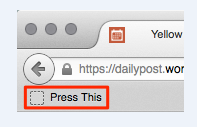
Step 4: Head to Writing
Click on Writing and you will notice your settings and Press This Bookmark. Go to Press This link to your bookmarks or your favorite region of the web browser. Depending on the browser, it might be different than that like the picture below.

How to use Press This
If you want to know how to use Press This, let’s take an example. Imagine that you bump into a nice photography post and you want to share this on your blog immediately. Here is the way you do.
All you need to do is to highlight the text you would like to take with the cursor before clicking on Press This bookmarklet in the browser. At that time, you will see a pop-up publishing window.
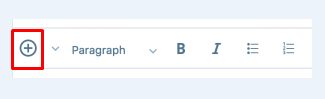
In case you want to insert more texts or images to this link, go to Plus icon located below your post title and select images you want to add. In addition, you can feel free to add your commentary.
After checking and finishing everything, don’t forget to choose Save Draft in order to save your post. If you are ready, press Publish to get your post published.
Conclusion
Obliviously, the updated Press This feature has great improvements for only computer users but also mobile or tablet users. While there might be some issues to figure out, you never feel that sharing content from another site has been so easy. If you already tried Press This before and found it slow and hard to use, you might need to pay another visit.
Hence, we hope that this post on how to configure Press This on your site is useful for any long WordPress users and even newcomers. If you have any problems or questions, kindly leave us a comment.

