
As you might not know about, custom fonts are known as one of the best ways to insert an amazing look to your website. You can easily customize custom fonts by following some simple steps below. In this tutorial, you will be shown how to customize and how to change your site fonts on WordPress.
To customize and how to change your site fonts
How to customize your site fonts
Basically, custom fonts function lets you change the fonts appearing on your own blog and site with just some clicks without requiring any coding knowledge. In fact, all of the sites can access to the collection of Google Fonts.
Get started
- Step 1: Head to
CustomizefromMy Site(s). - Step 2: Select
Fontsoption in Customizer section. - Step 3: Choose the drop-down menu located under the
HeadingsorBase Fontto check what kind of fonts are now available.
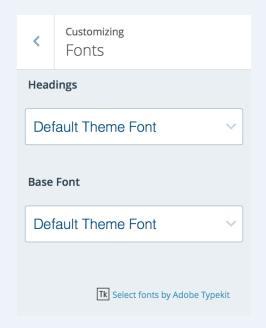
As you can see, fonts are grouped in pairs. One for the headings with the base font.
-
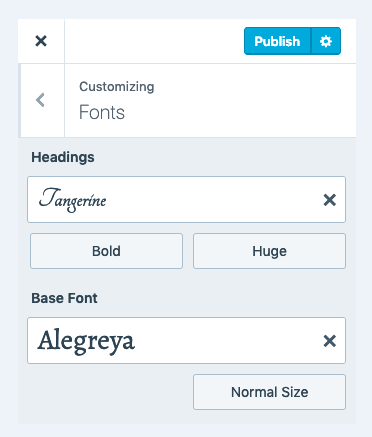
Headings: Select a font to apply all of your blog’s headings. Example of heading text consists of post as well as pages titles, widget titles, headlines or comment headers inside pages and posts.
-
Base font: Opt for a font to apply all of the main body text, then for all menus on the blog. Take note that whenever you change your font, the preview will be refreshed so that you can check how this font looks like on your own blog.
Adjust font size and style
-
Font style: In order to adjust the font style, all you need to do is to click on the option on the left of this font. The style can vary based on the font you have selected.
-
Font size: In order to adjust font size of your heading or base fonts, click on the size option on the right of the chosen font and head to size from your drop-down list.
Save fonts
Whenever you are happy with your font options, don’t forget to Publish your site or you have to Save Draft in case you still want to get it customized before you publish your site.
How to change your site fonts
When you are finished selecting your own custom fonts, it is time you can change them whenever you want.
If you want to change your custom fonts, you can head to Customize -> Fonts and opt for another Header and Base Font. Another way is to come back to the theme’s default by pressing on X located on the right of your custom font name.
Whenever you are contented with the changes you have made to your fonts, select Publish and Save Draft to keep customizing the site.
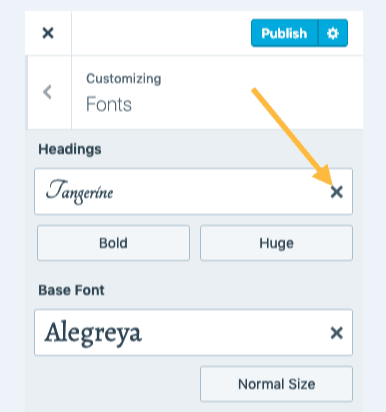
In order to reset fonts to your theme’s defaults, you just need to choose X located next to the current font.
You should bear in mind that you can easily add and install more fonts if you own a WordPress Business Plan through a plugin. It might be impossible to add more fonts if they are out of the curated collection.
Conclusion
The above steps on how to customize and how to change your site fonts is not too complicated to follow. If you have any problem or question, don’t hesitate to leave us a comment or contact us.

