
To offer users with a better experience, WordPress had partnered with Google to release G Suite integration into your site. Particularly, when you use G Suite, you will get a professional email using your domain name, 30GB Online File Storage for Google Drive, and more features related to other services of Google. Hence, if you want to know how to add G Suite to your site on WordPress, following this topic for details.
To add G Suite to your site on WordPress
Buying G Suite for a new domain
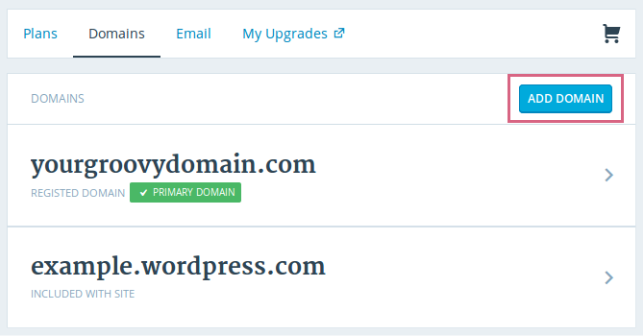
Step 1: Go to Domains
Get access to your account on WordPress.com and click on My sites. If you have more than one sites, choose the site you want by selecting Switch site then press on the Domains under the Configure section.
Step 2: Choose Add domain
A list of all of your domains will appear then click on the Add domain button which stays on the right corner of the page. You will see a search bar and some suggestions below it, thus, enter in the search field the name you want to use for your domain. If you have no idea for the domain name, you can fill in some keywords instead. When you find the one you like, select Add to register for it.
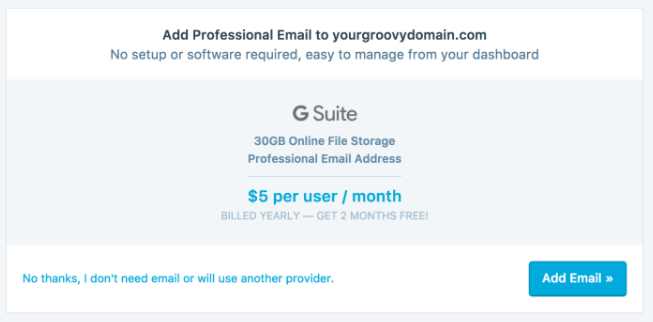
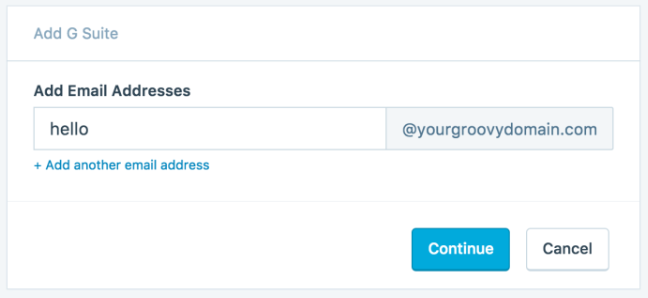
Step 3: Press on Add email
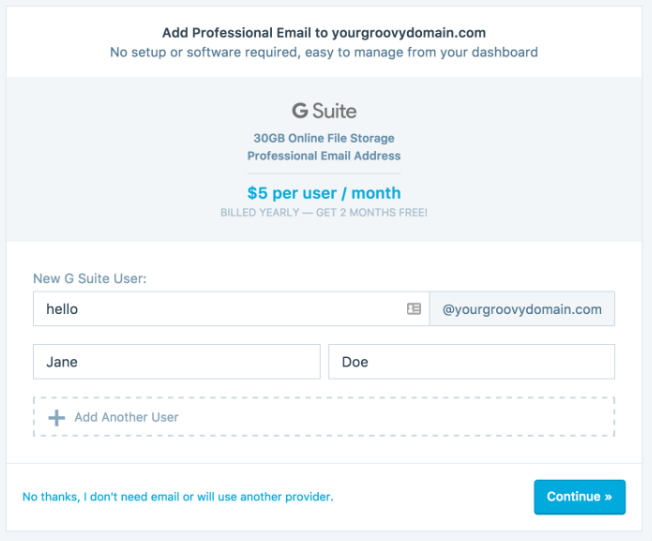
The system will ask you to use a G Suite to manage your WordPress account, hence, press on the Add email button to open the information form page. Enter the full email address in the Email Address field which indicates the account name you want to use with G Suite. The part after the @ is already filled with your domain name that you just need to specify the previous part and you can name it like hello for example. After that, add your name in the First name and Last name boxes. If you complete all this information, select Continue to move on to the next step. Your screen display can look like the picture below:
Step 4: Complete the information and checkout
Add in the information needed for registration and select whether to sign up with or without Privacy protection. When you activate this option, other Internet users cannot look for your data and use it for commercial or any other purposes. The system will move on to the checkout page, where you see all the items you are about to purchase. In this step, you can still remove any item if you no longer like it. When you ensure your cart selection, click on Pay to complete the purchase.
Purchasing G Suite for an existing domain
If you already registered a domain via WordPress.com or mapped one from an external provider to WordPress.com, you can buy G Suite by following these steps. The first step is similar to the previous part of this writing then I will start with step 2.
Step 1: Pick a domain
In the domain list, click on the one you want to add a G Suite for it. More settings will appear that you need to press on the Email to continue.

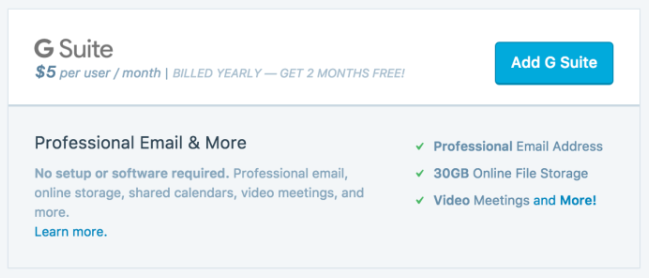
Step 2: Select Add G Suite
More information about what you get when using G Suite will appear that you can read through it to gain a better view of its functions. Press on the Add G Suite button after that. You need to enter the name you want to use for your account in the Add email addresses field. If you want to use more than one account, click on the Add another email address and fill in the box. Then when you are satisfied with your email(s), choose Continue.
Step 3: Finish the checkout
Your shopping cart will be viewed in the screen display then you can confirm what you will buy before paying for it. When you are done, click on Pay to complete it.
Completing registration
Step 1: Click on the link in the email
When the set up of G Suite is completed and it is activated on your account, you will receive a notification mail, which is similar to the following image:
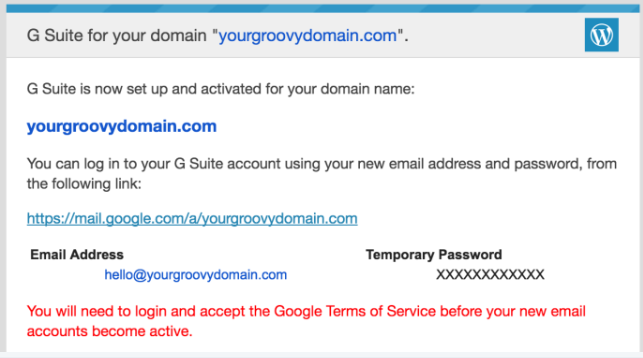
There is a link in that mail which starts with mail.google.com then you must click on it. It will direct you to the sign in page of G Suite, thus, fill in your full email address and password provided in the notification email. After that, press on the Sign in button.
Step 2: Accept the Google Terms of Service
The service provider which is Google will ask you to fill out the image CAPTCHA and agree with their Terms of Service. Hence, to continue, you need to click on I accept. Continue to my account.
Step 3: Change password
The password in the notification email is just a temporary one that you should change a new password to take control of your email address. Enter a series of characters and/or numbers that only you know and click on Change password.
Conclusion
In summary, this writing is all about how to add G Suite to your site on WordPress. This is a long topic that sometimes can make you feel boring and tired, however, it is a useful one which can help you manage your site more easily. Hence, thank you for reading it until the end and hope that this post benefits you.

