In some certain countries, the authorities ban websites that are critical of their policies. A website that is blocked by a government is much more difficult to access and publish content from it. Also, in troubled places with limited Internet connection, journalists or activists, for examples, would struggle to post new content on their blog. This could be a real problem for individuals and companies that rely their business on the platform of Wordpress.com.
To tackle this problem, Wordpress releases the Posts by email feature, which allows you to publish content without having to access your website.
This feature could also be useful when you are in schools, colleges, and office networks where there is limited, monitored, or logged access to external websites.
As you could send emails from any email client, from different devices such as laptops and cell phones, publishing posts using emails is quick, easy, and effortless.
However, of course before publishing by email, you first need to generate a special email address. As anyone who has access to this email address could publish posts to your blog, it is essential that you keep this email and password secret.
In this instructional writing below, you would find a detailed guideline on How to generate a post by email address. The dashboard referred to in this instruction is the WP Admin dashboard, which could be accessed by adding /wp-admin to the end of your website’s url.
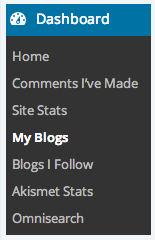
Step 1: In Dashboard, visit My Blogs

Step 2: Make Post by Email enabled in Screen Options
In the Screen Options section, make sure to keep the Post by Email option enabled.
Step 3: Click Enable under Post by Email in the blog you want to post
A list of blog name will be shown. Locate the specific blog that you want to post to, then click the Enable button under Post by Email.

Step 4: Add the email address to your address book (optional)
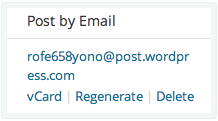
You have just generated a special email address that can be used to send posts. You could download this email address as a vCard if you wish to add it to your address book:

Step 5: Send your emails
Now that you had your Post-by-Email email address, your first emails are ready to be sent.
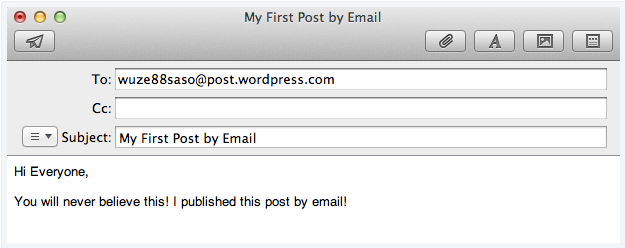
This is how your email should be structured: The email subject will be your post’s title. The email body is the post’s contents.

Shortly after your email is delivered, you would receive a notification email that informs you of your published post’s details.
- Note: Please be noted that the email should be sent to your secret email address, (not the one in the example above).
Conclusion
Above is a detailed, step-by-step instruction on How to generate a post by email address. This is a very simple and time-saving process. We hope that the article would help you generate an email address then use that to send posts to your blogs conveniently in no time.


