
Import CSV Files into Google Sheets: A Step-By-Step Guide

In the previous post, I have discussed with you the definition of CSV files and some important points about using these files on Shopify. So I suppose that you have already had a necessary background which is enough to understand the CSV files’ definition as well as their characteristic. Now we will turn to a higher stage in the process of mastering CSV file which is learning the method to import a CSV file into your Google Sheets.
Here is a brief instruction on how to import CSV files into Google Sheets for Desktop. I believe that after following these steps, you will be able to master it in no time.
Related Posts:
- How to Add Multiple Product Images in a CSV File on Shopify
- How to Import Products with a CSV File on Shopify
- How to Import Products After Making Changes to Your CSV File on Shopify
- 6 Steps to Export your Gift Card Products to a CSV on Shopify
To import CSV files into Google Sheets
Step 1: Open Google Sheets
First, click this link to login into your Google account. After that, you need to open your Google Sheets page.
Step 2: Click Blank
To create a new spreadsheet, click the Blank option which is on the Google Sheets page.

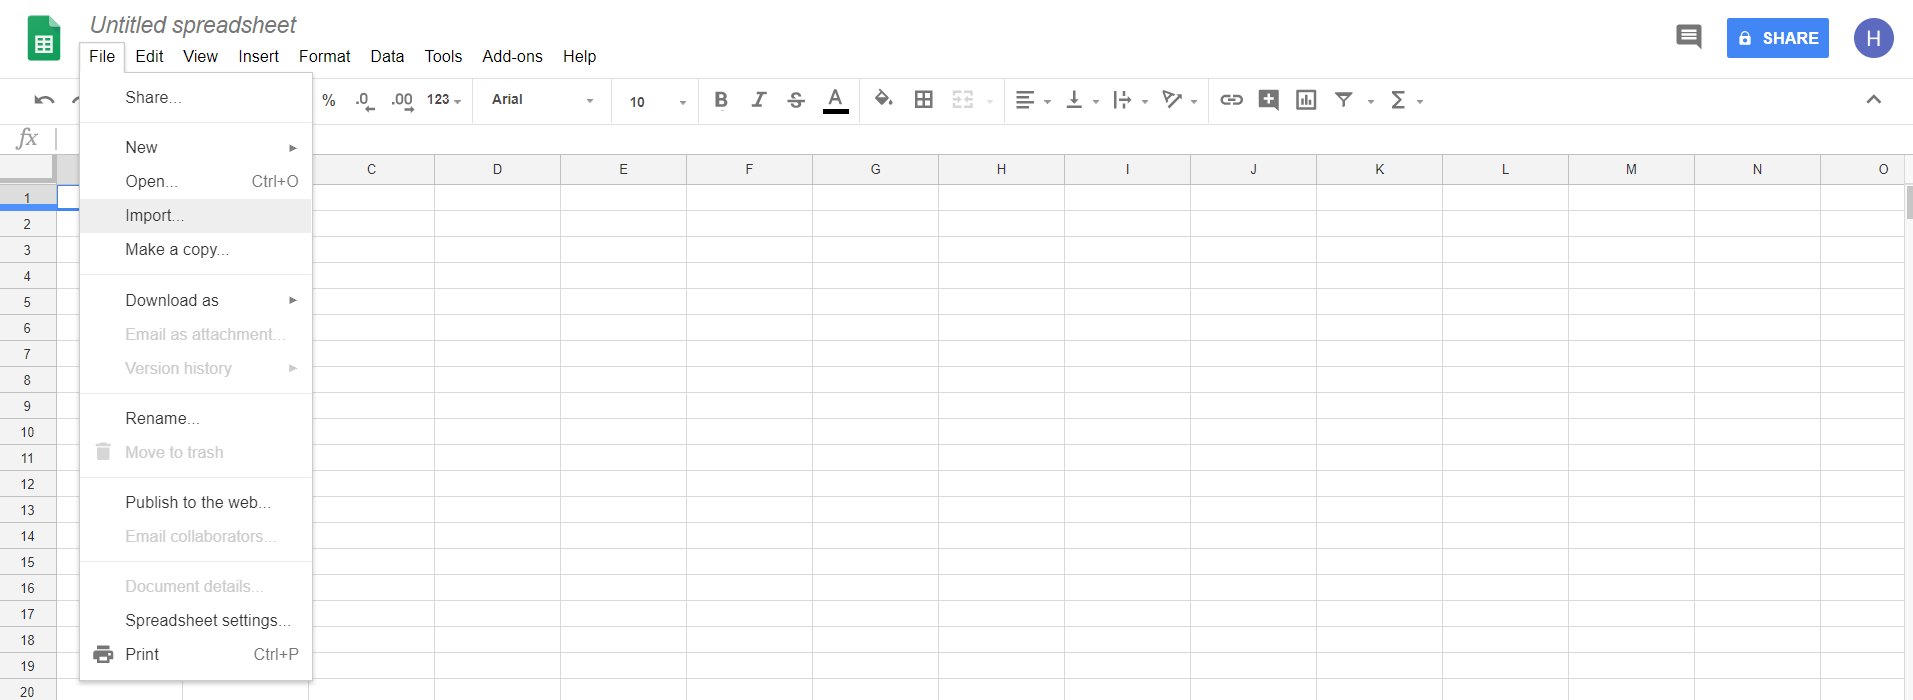
Step 3: Select Import
When a new spreadsheet which named Untitled spreadsheet appears, you then click the File section which is right under the name of that spreadsheet. After seeing a drop-down list, select the Import section which is in the fourth line of this list.
Step 4: Select a file {#select-file)
In step four, you will have to find and select the file that you want to edit. But there is one thing that you will need to memorize is that a CSV file with UTF-8 encoding is the only format which you are allowed to apply to import or export a file from your Shopify page. So, you can choose a file from various source such as My driver, Shared with me, Recent, or Upload as long as the file you select is a CSV file with UTF-8 encoding format.

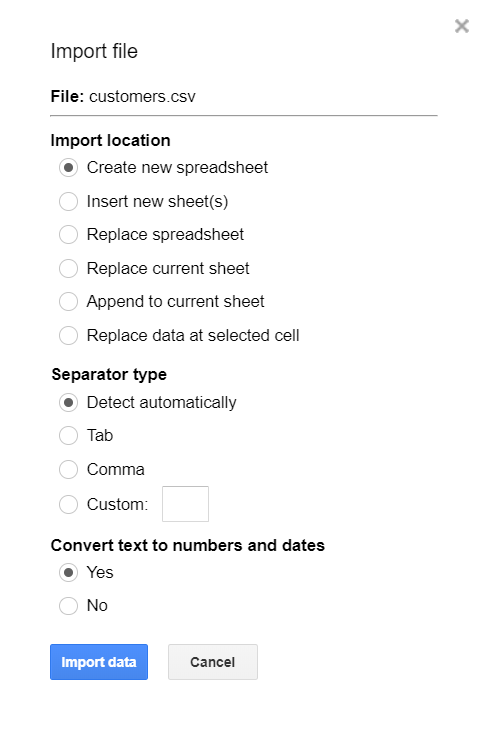
Step 5: Choose an option
After you have selected a specific CSV file, a dialog which is called the Import file dialog will appear. In here, you can choose the options which you prefer right under the Import action, Separator character, and Convert text to numbers and dates sections.
Step 6: Click Import
When you have finished choosing the options, click the Import button to complete the importing process.
Here is a picture to illustrate the CSV format before uploading:

After you have imported it into Google Sheets, it will look like this:

From the Untitled Spreadsheet, you can edit your CSV file. You can add more details, delete some information, change the name of this file, and so on.

Conclusion
The above information which you have just read is the step-by-step tutorial on how to import CSV files into Google Sheets for Desktop. Hoping that this instruction would become helpful for you and your crew when dealing with CSV files.


