
Shopify development store: What is it & How to Create?
By Sam Nguyen

Drive 20-40% of your revenue with Avada
As a Shopify Partner, you need to be acquainted with development stores. They come in handy in the first steps of signing up for Shopify, used for demos, and even for portfolio purposes. In this post, I will explain everything you need to know about development stores in detail. Let’s jump right into it!
Exclusive Offer: Get Shopify 33 days for just $1 + The Online Store Starter Kit
Start your 3-day free trial, and enjoy your first month of Shopify for 1$ plus the premium package designed especially for new Shopify merchants!
What are Shopify development stores?
A development store is a Shopify account that enables you to test themes or apps you make or to set up a store for a client. As a Shopify Partner, you can have unlimited development stores that you can use from your Partner Dashboard. They are free of charge, do not have time limits, and provide much of the same features as the Advanced Shopify plan. An infinite number of test transactions can also be processed. Until you turn to a paid schedule, though, you can’t:
- Install paid apps (except for Partner-friendly apps).
- Make more than 10 private apps.
It is important to remember that you need to set up a development store for any merchant you refer to in order to earn a recurring revenue share. For more information on what you will receive as a partner, you can check out Shopify’s revenue share.
How to create a Shopify development store
When you have access to unlimited trial periods, you can test, create, and discover as many development stores as you’d like.
Here’s how to create a development store:
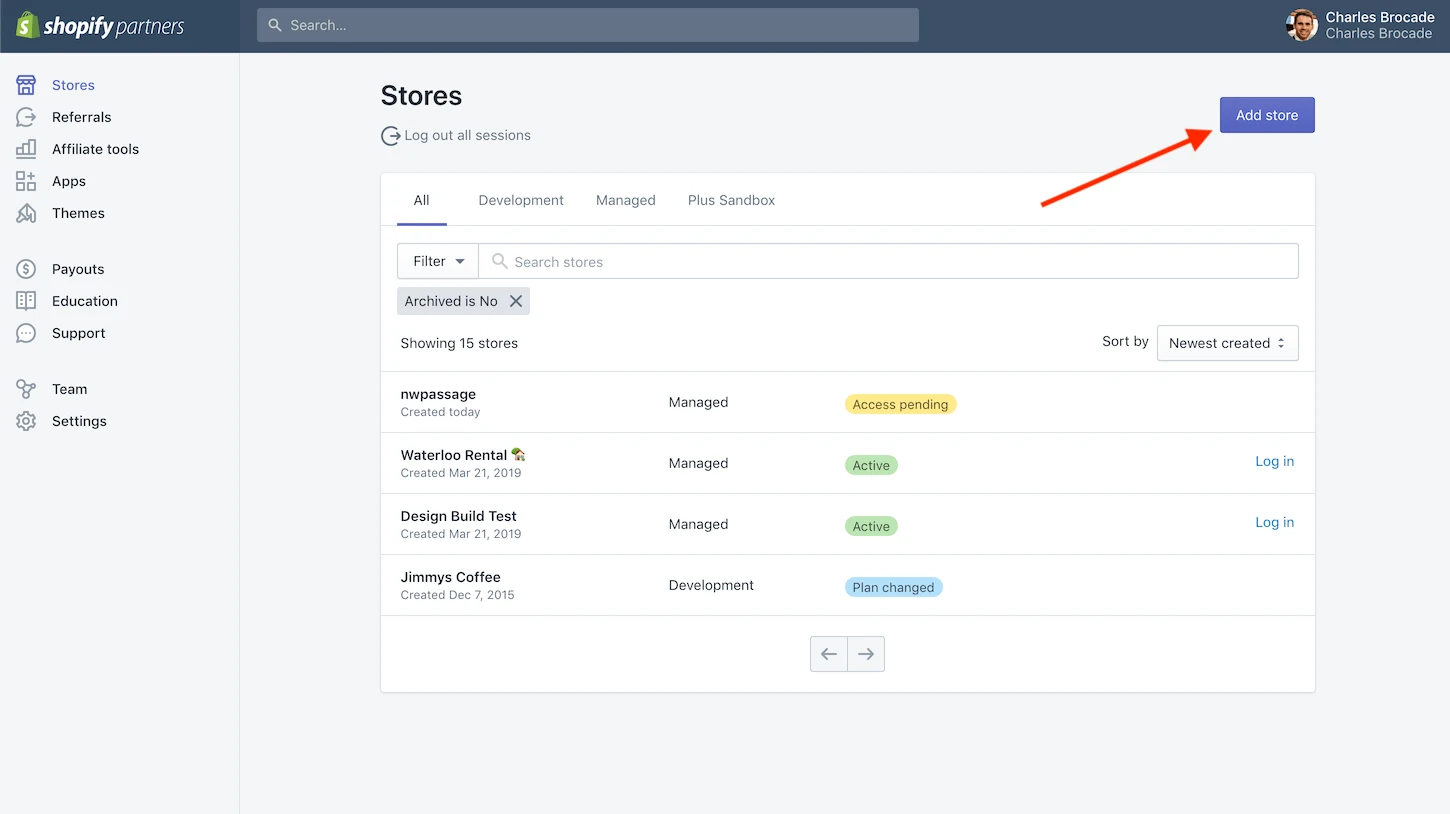
- Step 1: In your Shopify Partner Dashboard, click on “Stores.”
- Step 2: On the Stores page, click the “Add store” button.
- Step 3: Choose “Development store” for your store type.
- Step 4: When you finish, click “Save.”
After it is created, you will be able to log in to your new development store through the Stores tab of your Partner Dashboard. Now that you know how to set up a development shop, you can start creating.
How to add apps to your Shopify development store
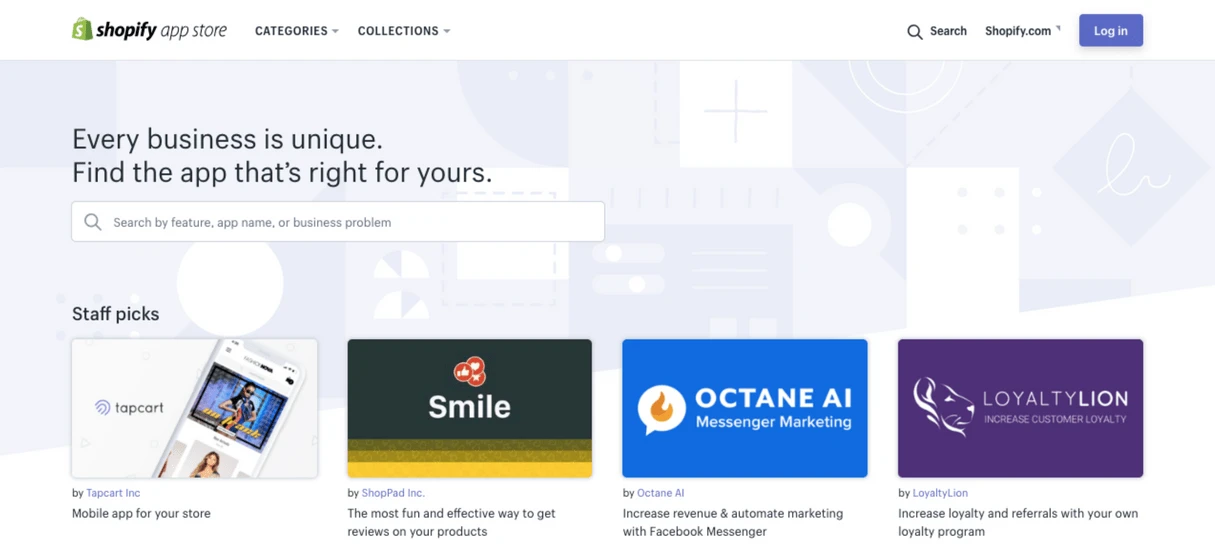
The Shopify App Store holds a set of applications that offer powerful features, services, and plugins that improve the functionality of the Shopify Store. All Shopify Partners have access to Shopify’s Partner Friendly Apps, which is free of charge when used in development stores. Paid applications on this list can only start charging after the development store has switched to a paid Shopify package. You should always test apps in your development store before adding them to the live store of the client to make sure they don’t cause any problems.
Here’s how you can install apps in your development store:
- Step 1: Go to the Shopify App Store, choose the app you want to add.
- Step 2: Click the “Add app” button.
- Step 3: Enter your development store’s link address to authenticate the app.
- Step 4: Confirm the installation of the app.
- Step 5: Start using the app.
If you want to install apps that are not in the partner-friendly group, you will incur a cost immediately.
How to transferring store ownership to your clients
When you’ve finished building a lovely development store for your client, it’s time to hand over the control. This is an exciting part, as your clients are now eager to discovering and running their store — all you have to do is pass the store ownership to them in a few easy steps:
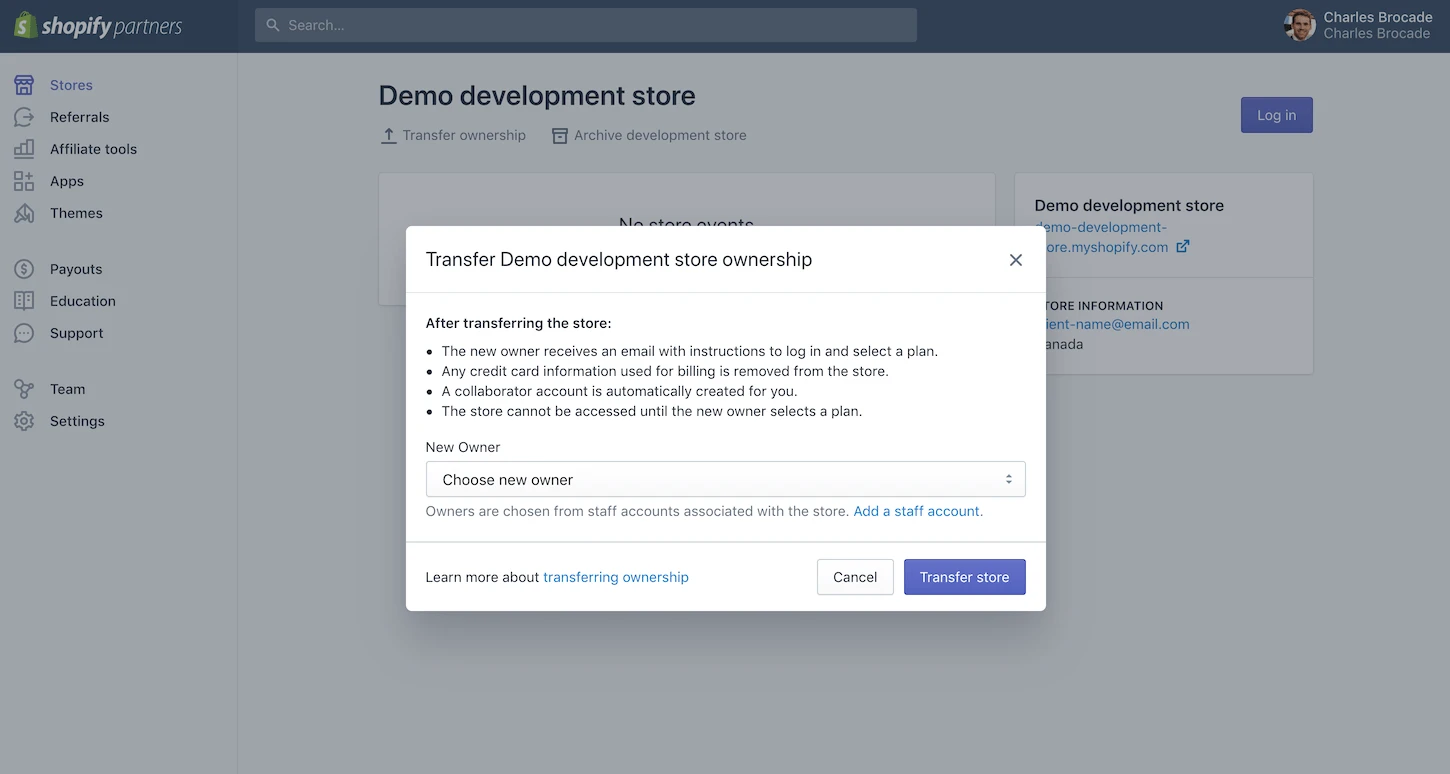
- Step 1: Log in to your Partner Dashboard, and click “Stores.”
- Step 2: Click the “Transfer ownership” option next to the store that you want to transfer.
- Step 3: In the Transfer store ownership dialog, choose the new owner from the list of eligible new owners. If you haven’t included your client as a staff member, click the “Add a staff account” option and create a new account for your client before continuing.
- Step 4: When you’re done, click the “Transfer store” button.
The new owner will receive an email with instructions on how to create an account and pick a plan. Not until the transfer is approved by your customer does the store can go live. After the client starts paying for a Shopify package, a collaborator account is automatically generated and you start collecting your monthly recurring revenue share. That’s everything you need to know about passing ownership of your development store to your client.
How to get access to existing stores
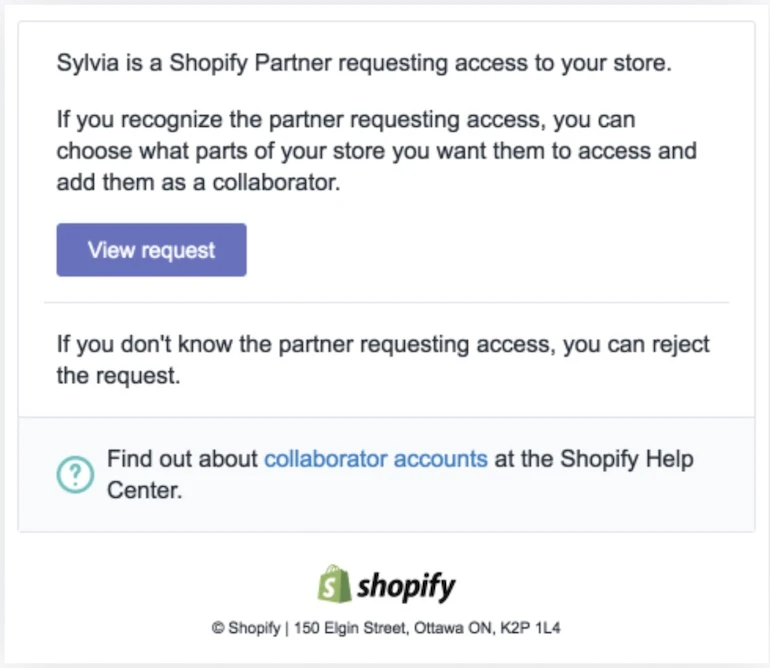
Development stores are used to refer a new client to Shopify, but what if you’re working with a client who already has an existing Shopify store? Ok, before you can start working on it, you’ll need to send a request to get permission.
Request access
You use a collaborator account to access the store of your client. To receive a collaborator account, you can send a request to the owner of the store via your Partner Dashboard. If you already have a staff account in your client’s store or have been requested by the owner of the store to trigger a staff account (but have not yet activated it), your request for a collaborator account will require the owner of the store to change your current account permissions to match those of your collaborator account.
Here’s how you can request access to a client’s store:
- Step 1: Go to your Partner Dashboard, and click Stores.
- Step 2: Click “Add store.”
- Step 3: Select “Managed store” for the store type.
- Step 4: Enter the store URL.
- Step 5: In the Permissions section, choose the sections of the store that you want to have access to, or check Full access. The account owner can alter these permissions after your account is created.
- Step 6: If you want to send a message to the store owner in your request, then write a message in the “Add a message” section.
- Step 7: When you’re done, click Save.
After you send a request, the owner of the store will receive an email about the request and a notification on their Shopify Admin homepage.
View your clients’ stores
You can view the stores you have access to on the “Stores” section of your Partner Dashboard. There is no limit on the number of collaborator accounts you can have, but you can only have up to 10 pending requests open at a time.
Archive a development store
You can also archive the development stores that you no longer work on. After archiving a store, if you want to continue working on it, you can unarchive it later.
Here’s how you can archive a development store:
- Step 1: Go to your Partner Dashboard, click Stores.
- Step 2: Choose the development store that you want to archive.
- Step 3: Click “Archive.”
Unarchive a development store
If you need to get back a development store that you have archived, then you can do so with these steps:
- Step 1: Go to your Partner Dashboard, click Stores.
- Step 2: Click Filter, and select Archived.
- Step 3: Find the store you want to unarchive, and click on it.
- Step 4: Click Unarchive.
Final words
That’s it. This is everything you need to know about Shopify development stores to get started. Development stores are the ideal test environment for you to create online stores for your client, without the constraint of a 14-day trial. You will want to make sure that you use them while creating and referring to client stores to earn a revenue share.


New Posts


