
As you might not know about, WordPress editor is known as a brand-new publishing experience WordPress editor is used for creating pages and posts with rich media in order to control and manage the layout. In fact, instead of focusing on alignment or organization of images, quotes, text or any element on a page or a post, you can now pay attention to creating.
WordPress editor can help with moving, editing or customizing each blog, hence, showing visual elements they might look on your site to save the time you might previously spend previewing as well as double-checking the content before publishing it.
In this article, you will be instructed in how to insert a block on WordPress Editor.
To insert a block on WordPress Editor
How to add a block
Basically, WordPress editor uses blocks to aid in transforming the way your content is created. It can help you turn a single document into the collection of elements with explicit.
New editors will bring about with new and effortless pages or posts to build in experience.
With block, you are able to insert as well as customize visual elements and multiple media that is using to ask for custom HTML code, shortcodes or embeds.
You can choose many block types which are organized by your category and by most frequent use. You can independently move and edit each block and sometimes, personal blocks can come with their formatting settings for better management of layout and function.
There exist many ways to insert a block and select its type you want.
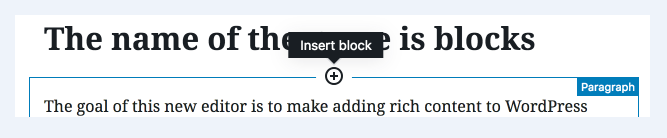
- Step 1: Choose ⊕ located on the left of your empty block.

- Step 2: Choose ⊕ located on the left of your editor.
- Step 3: Click on Enter/Return key from a block to make a new one.
- Step 4: Select ⊕ on the top center of your current blocks to insert a block above them.
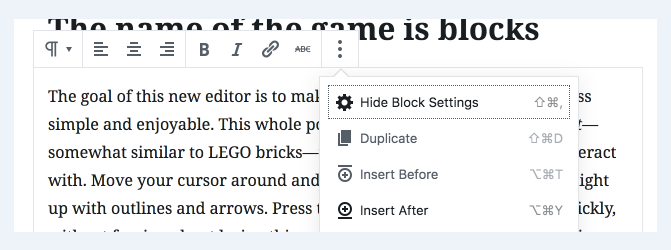
- Step 5: Head to the three little dots above the selected blog and opt for adding a block above or below your current block.
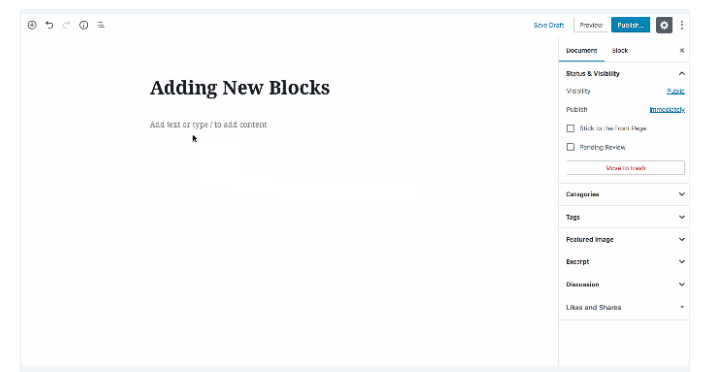
The default block type, actually, is a paragraph, which you can use for your regular text, however, you can go to different block type from this above icon. In addition, blocks can be searched by entering a forward slash arranged by your block name, such as /heading or /image.
Also, you can drag your blocks by clicking on and keeping the six dot-grid located next to the top-left corner of every block. Or, you can use the arrows to get a block bumped in the direction you wish.
How to configure a block
In general, each block will have its settings. If you want to find them, you had better choose a block since it can disclose a toolbar located on the top of each block. Besides, you can find more settings in your sidebar to the right of your editor.
The settings located on the top of each block often contain more formatting options and the option to modify the block type.
In your sidebar of the editor, you are able to switch between settings for your current block and those for your document.
The Document Settings is where tags and categories are added and you can select a feature image, check and modify the post’s status. Those options can be applied to both posts and pages.
You can also press on the cog icon located at the top right of your editor to display and hide the settings column.
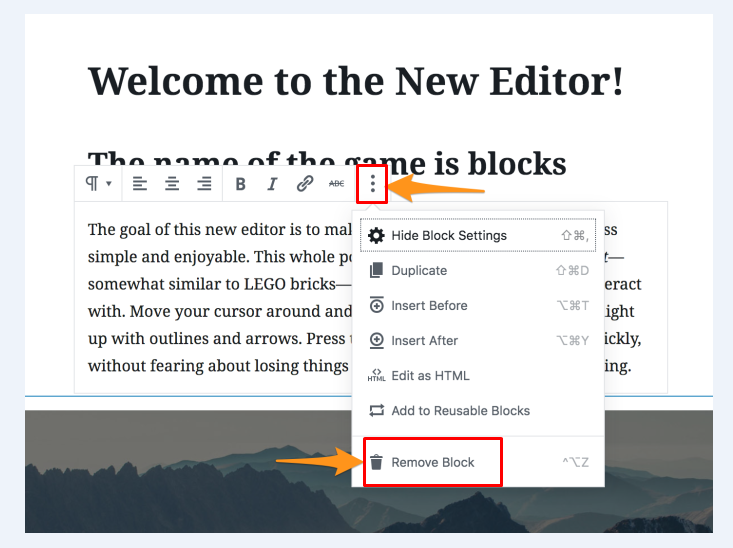
How to remove a block
If you want to remove your block, all you need to do is to choose that block and click on three dots above it. You will see the option to support your block’s removal.
Conclusion
With the above-mentioned post about how to insert a block on WordPress Editor, we hope that you can perform your task successfully. WordPress editor is also available on WordPress and users are able to switch between the classic editor and the new one. Don’ forget to help us share this article if you find it worth reading.

