
With more than 100 million active users and 1 billion created board, Pinterest has been becoming one of the world-leading sites for inspiration and cataloging ideas.
Unbeknownst to some people, Pinterest allows users to show their content from your site on WordPress. Displaying photos on WordPress is less complicated than any other social network.
If you are a Pinterest lover, you should not miss out this article. Since you are able to embed your Pinterest boards, profile, and personal pins by copying links and pasting them into each page or post.
In this tutorial, you will be shown on how to embed your content from Pinterest on WordPress.
How to embed your content from Pinterest on WordPress
How to embed your content from Pinterest on WordPress with links
-
Step 1: The first thing you need to do is to generate a page or post.
-
Step 2: Copy the link to your own Pinterest profile or to a particular pin or board.
-
Step 3: However, you need to make sure that the link is not a clickable hyperlink. If it is a clickable hyperlink, you should place the cursor in that link before choosing Unlink button in your Visual Editor toolbar.
-
Step 4: Here is your final result and you can check how it looks like.
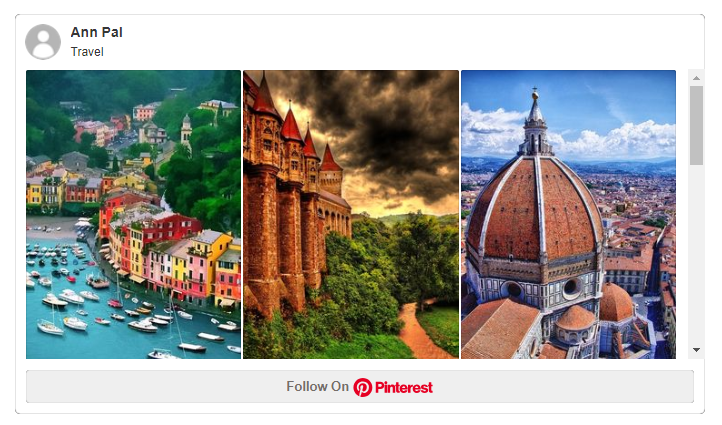
Board:
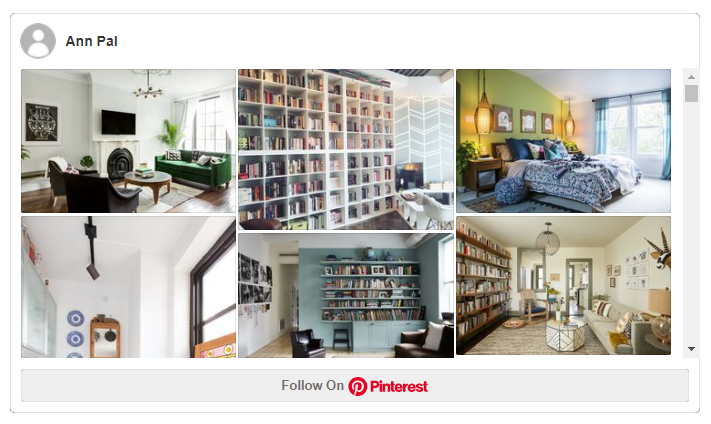
Profile:
Take note that you cannot embed Pinterest as your blog or page is marked as Private.
In addition, regarding Pinterest links, they must contain the .com extension. And links with .come.au will not be loaded.
How to embed your content from Pinterest on WordPress with a Pinterest widget
The second way to help you embed your Pinterest’ content is by constructing a Pinterest widget.
Then, the first thing to do is to choose a Pinterest picture you want to get it displayed on the WordPress site. You are highly recommended to do that on the desktop instead of doing on tablet apps or mobile. All you need to do is to copy the image’s URL to your own clipboard.
After that, you can go to the widget builder of Pinterest Developers. In addition, you can create your own widget that lets you display images on your WordPress site.
Next, you can add your image’s URL you want to display, select sizes and places you want to show the description. At the same time, Pinterest will create a preview of showing how your images look like on your WordPress site.
If you are satisfied with the result, then it is time to get your code embedded on your site on WordPress.
Take note that Pinterest’s widget builder can aid you in creating two lines of code. The top line has to be there you wish to display your images and the bottom line, actually, is the JavaScript that will help you power the embed and it also needs to be inserted once on each page. Therefore, if you enjoy embedding many images, you need to insert the bottom line.
You should bear in mind that it is suggested that you should add your JavaScript before closing </body> tag on your WordPress site. Basically, with low-to-medium traffic websites, it is ok to add the code to the bottom of the page or the post.
Now, you are willing to add your code. In fact, the procedure is the same as adding code to WordPress pages or posts. Additionally, you need to generate a new page and a new post or just simply edit your current pages or posts.
Next, you had better move to Text mode and look for the place you want to insert your Pinterest photos. Click on returning for two times to help add another new line for your Pinterest images. Currently, you can be back to your widget builder to copy and paste the top line of your code into your WordPress site.
After that, you have to come back to your Widget builder to copy the second line. Go back to the WordPress to scroll down to the post’ bottom and insert new lines. At this time, you can paste the second line of the code.
Conclusion
We hope that this article on how to embed your content from Pinterest is helpful to you. If you need help or seek any advice, you can contact us or leave us a comment.

