
When you use WordPress, you will have a custom domain if use higher plan like Personal, Premium or Business plan. You can set up email forwarding using your domain in your email address, thus, if people remember your blog, they also know your email address. All emails will be forwarded to an existing one which you are currently used or any email address you want. If you want to know how to activate email forwarding on WordPress, find out more in the next part of this writing.
To activate email forwarding on WordPress
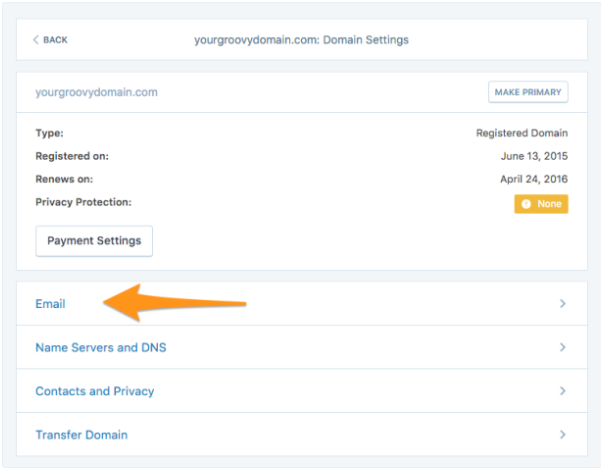
Step 1: Go to My sites then Domain
Sign in to your WordPress account and click on My sites. After that, look for the Domain under the Configure section and press on it.
Step 2: Select a domain
All of your domains will appear on the screen display that you can click on the one you want to set up the email forwarding to open the settings for it.
Step 3: Click on Email Forwarding
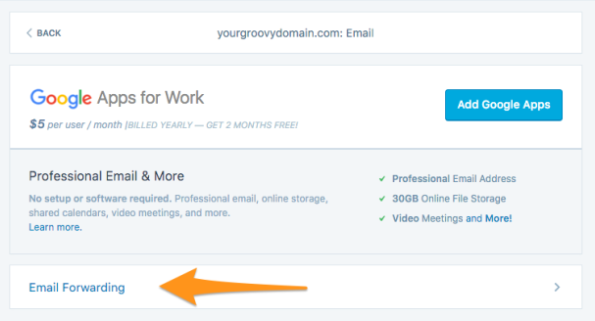
You will see the information about the domain and some settings below it. Select the Email to move to the email settings. In this page, click on the Email Forwarding to continue.
Step 4: Enter the email addresses
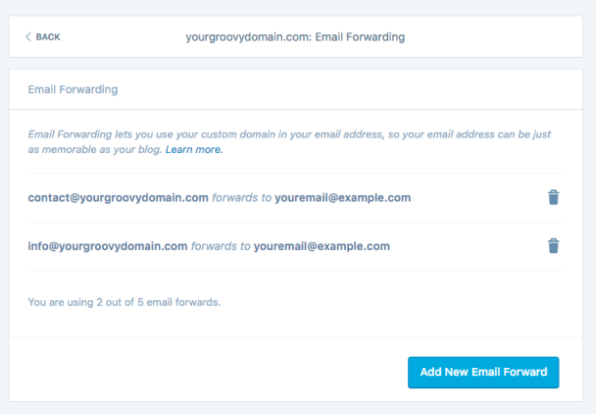
There is a short note at the top of the page which tells you the function of the Email Forwarding and there are two fields below it. The first one is Emails send to which you need to fill in the new email address with your custom domain. Meanwhile, in the Will be forwarded to box, you have to enter the address you want emails to forward to or in other words, the destination email. For example, in the first field, you can fill in as contact or info only because the left one is already set as your domain and enter your full existing email in the second one.
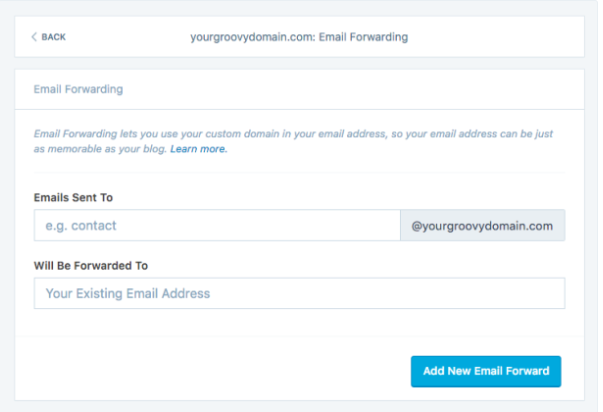
Step 5: Press on Add New Email Forward
If you have completed all the above steps, click on the Add New Email Forward to finish the action. The system will send a confirmation email to your destination email address that you need to press on the link in that mail to activate it. If you haven't confirmed yet, you will see a letter icon next to the email forwarding then click on it then the system can send another mail to your inbox.
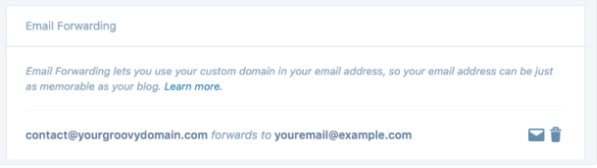
You can add up to 5 email forwards for a domain when using Personal and Premium Plan, while that number is 100 for Business Plan. If you want to remove any email, press on the trash icon beside it to delete. To edit the email forwards, you have to delete the old one and add a new one instead. You will see the number of emails forward you have added to your domain at the end of the settings like in the following picture:
Conclusion
To conclude, I have given you the instruction of how to activate email forwarding on WordPress. You can apply it to all of your domains due to its convenience. Hope that you find this writing helpful and have great reading time. However, if you need more advanced email functionality, consider utilizing a third-party email delivery platform like Mailtrap, which can be easily integrated into your WordPress application.

