
How to Make a Submenu in Shopify?

As a store owner, we always want to offer customer what they are looking for and give them a clear categorization. In this case, menus and submenus are considered to be one of the best ways to categories the products of the store. The more carefully we categorize these menus and submenus, there more easily our customer can get the products. Read more on How to add category in Shopify?
Imagine that you have more than one thousand products in your store. Then when one of your customer wants to find a t-shirt, then he will have too scroll thousands of products from top to bottom to find it. In another case, when you have your product categories in separate menus and submenus, that customer just need to navigate to the Clothing section, then for example, click on men’s wear, then t-shirt. Sounds so effective, right?
That’s why in this article today, I want to show you the way to add submenu to your Shopify store and its related matters. Here we go!
What is submenu?
A submenu is created as a menu that is contained within another menu, like a menu accessed from a more general menu. For instance, in most cases, a submenu is created with a small arrow pointing to the right at the edge of the option, and users need to navigate the menu to access a sub menu by pressing the right arrow key or press the left arrow key to collapse the submenu.
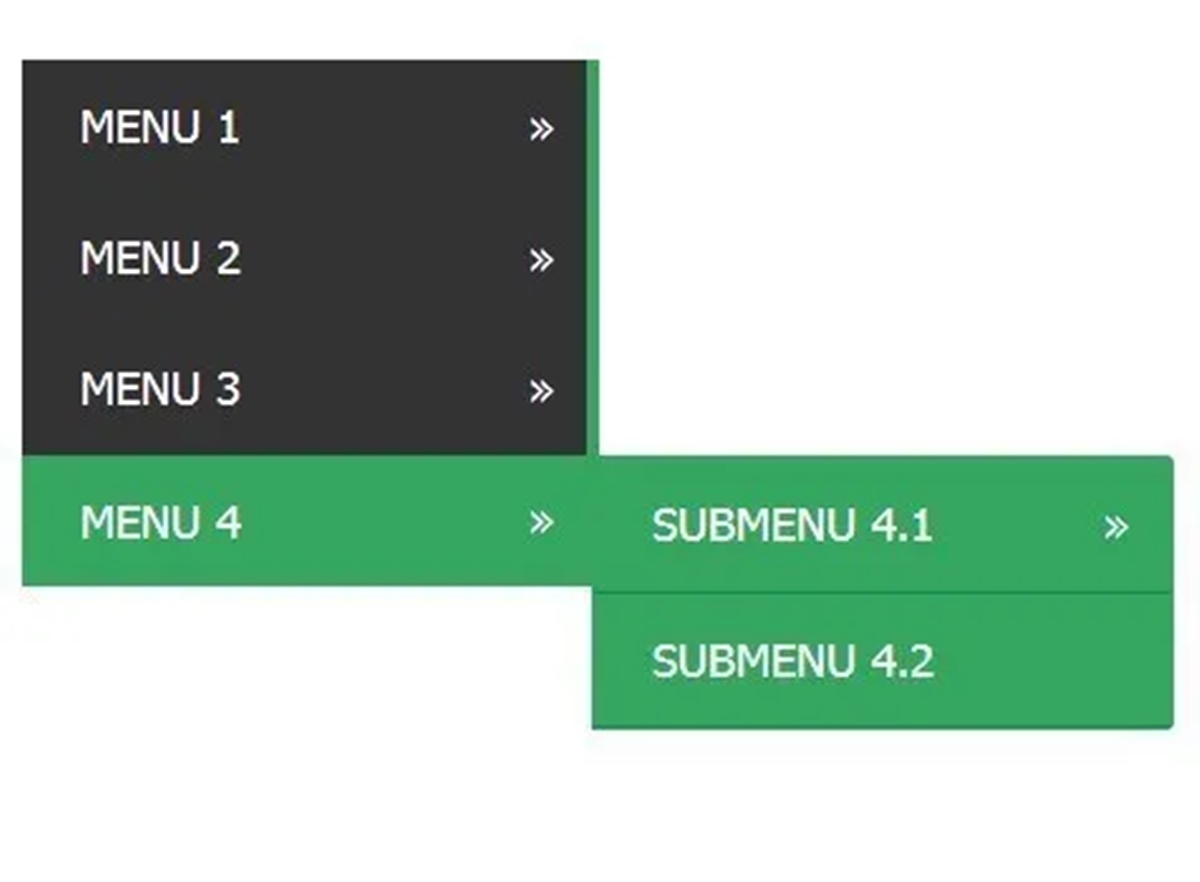
Actually, this is like a broad categorization of menu that will divide of menu into more particular groups. For example, in case your products are t-shirt, shoes and jeans in a menu, then you will be able to categorize this menu into more simple categories, like female wear, female t-shirt, then female jeans.
Why you should use submenus for your ecommerce website?
It is undeniable that submenus are really common on many other online retail sites. Also, it is used well and enables shoppers to take a shortcut to the product category or sub-category that they are looking for. At the same time, it also provides chances to promote certain products or offers later on.
Look from a design perspective, submenus are able to turn a ‘busy’ layout into tidied up one as it creates all of the sub-categories hidden away awaiting a mouse-over. Consequently, users will be able to reach lower levels of navigation quickly, and with a smaller number of clicks. Plus, they can filter and narrow the customer’s product selection, and then save the extra clicks for users.
If you have your submenu well-designed, then it can totally bring a variety of paths to the same product depending on how the customer wants to shop, for example, by Brand or by Product Type. However, when a submenu is not well-implemented, it might cause a problem for people seeing your sites on a mobile screen.
How to add submenu
Steps to add submenu
In order to add a submenu in your Shopify store, like categorizing the products on the basis of uses, quality, purpose and brands for the convenience of customers, you must follow four basic steps.
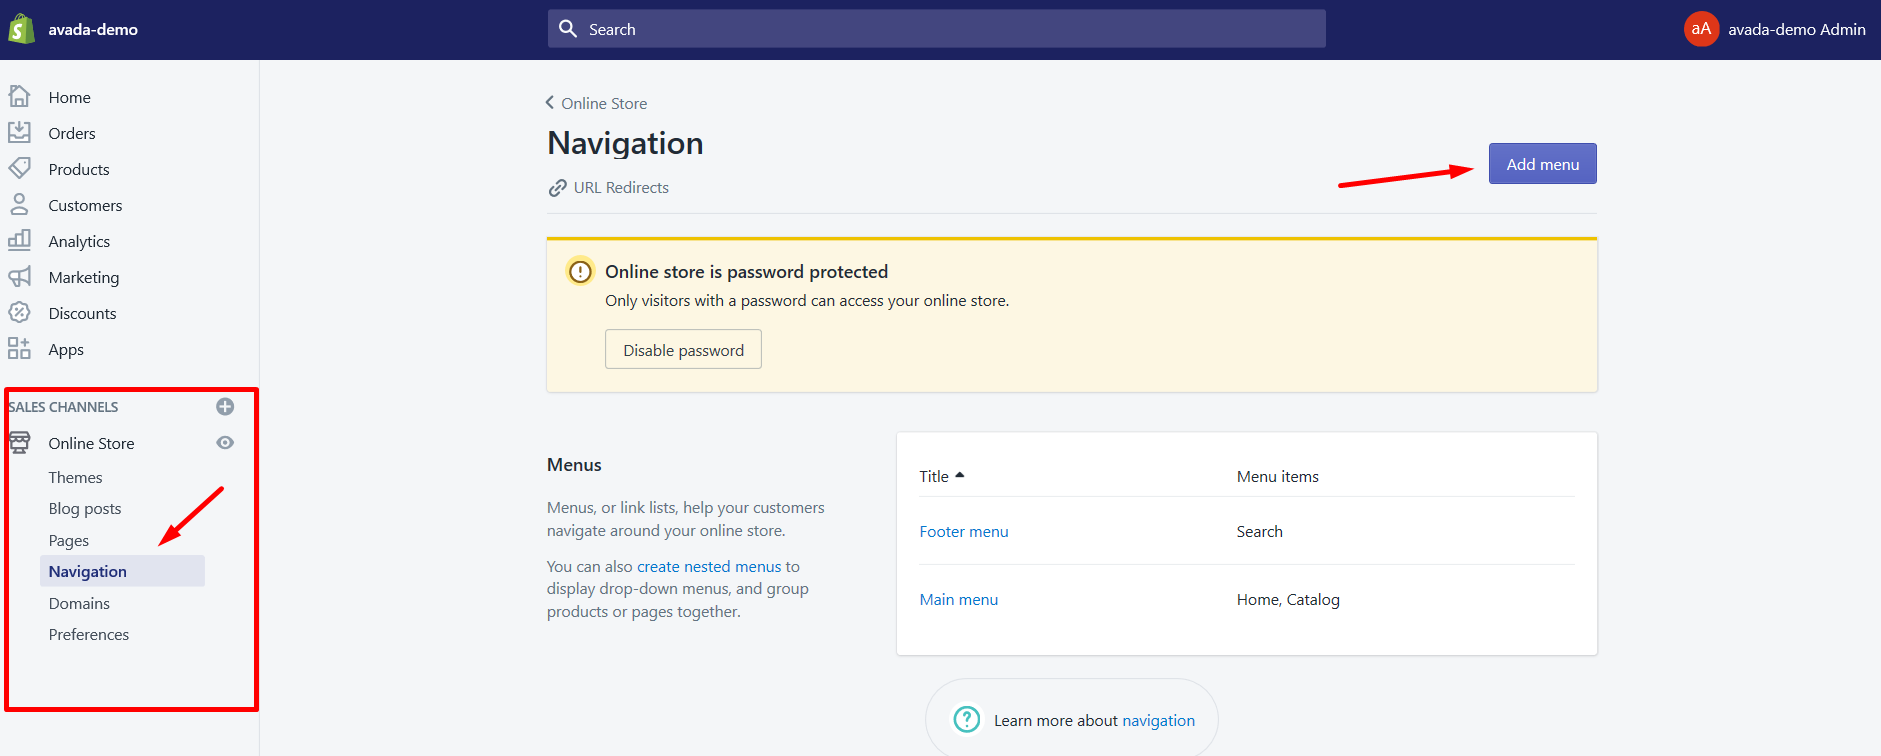
Step 1: Click Navigation
Make sure you have already logged in your Shopify account. From your Online store, hit a click on Navigation.
Step 2: Click Add menu
You will see there is the Add menu button on the top right corner of the screen. Just click it.
Step 3: Enter the name of your submenu
After that, you need to type the name of your submenu in the blank section. Make sure you got the name exactly the same with what you have in the main menu.
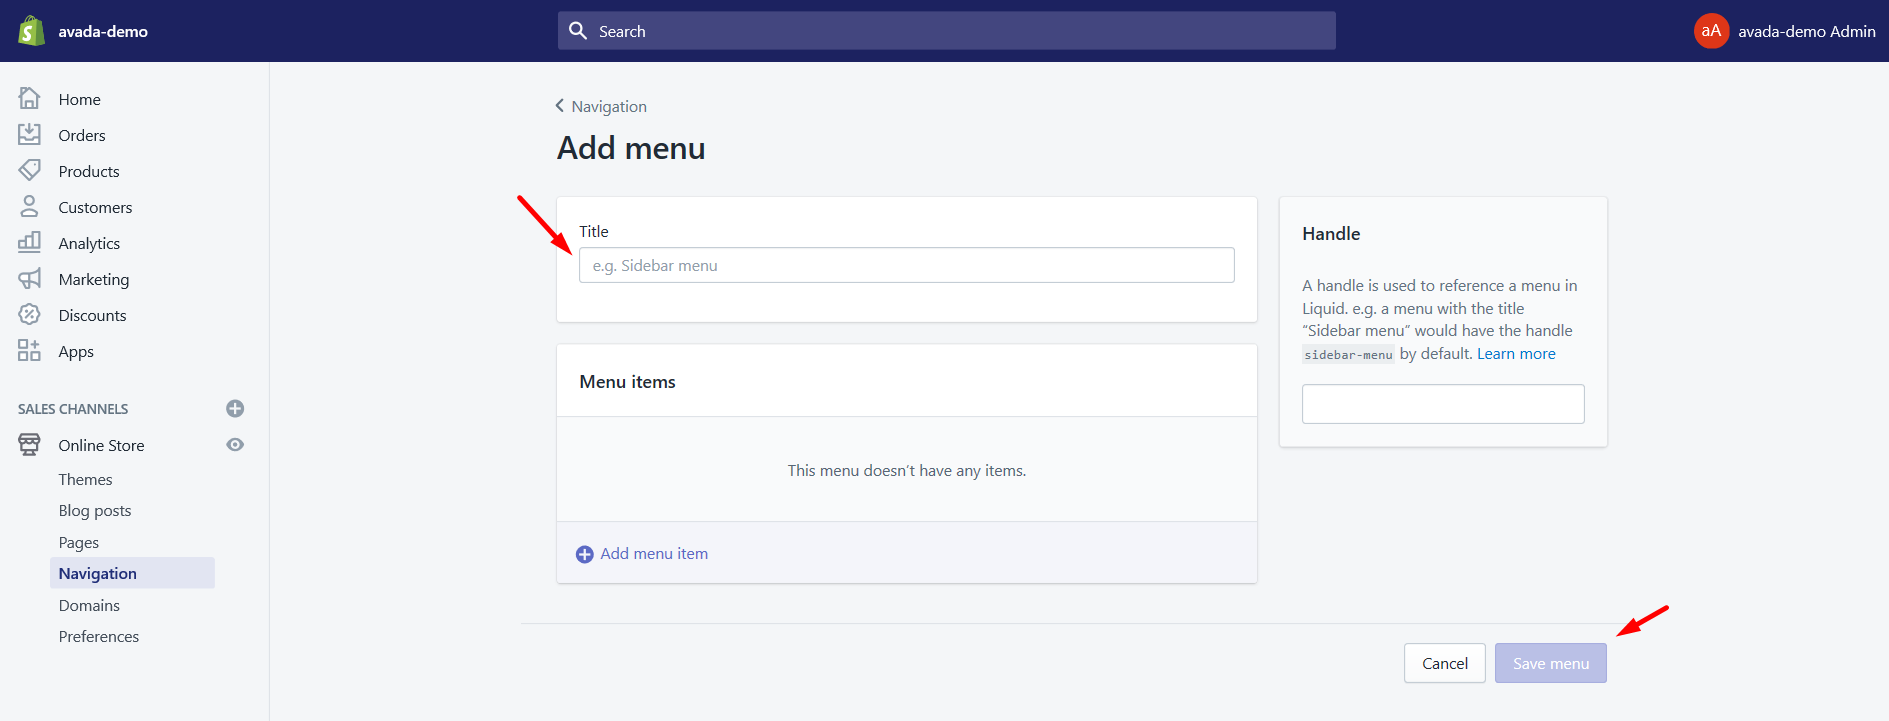
Next, Shopify will automatically generate a handle, which is known as a unique web address, to be put in the menu link.
Step 4: Click Save
Finally, a usual, click Save button. You are now successful in categorizing your product into different submenus that provide a convenient browsing of your store, at the same time, save times for the customers.
Create simple submenu with title
Step 1: Open your created menu
Yes, every work will be taken on your created menu, so you need to open it.
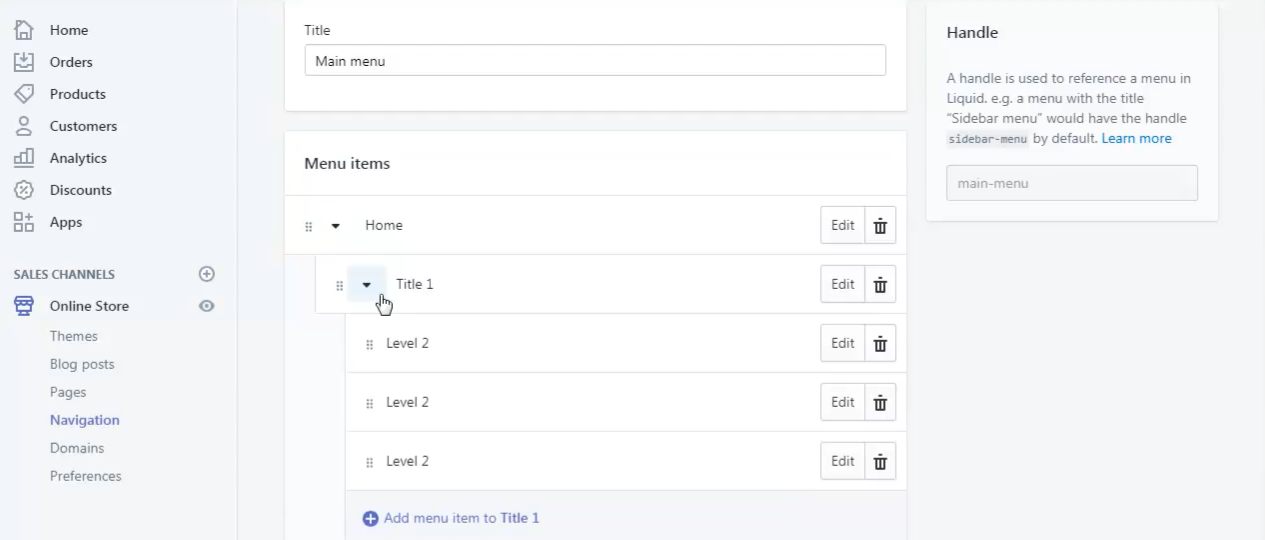
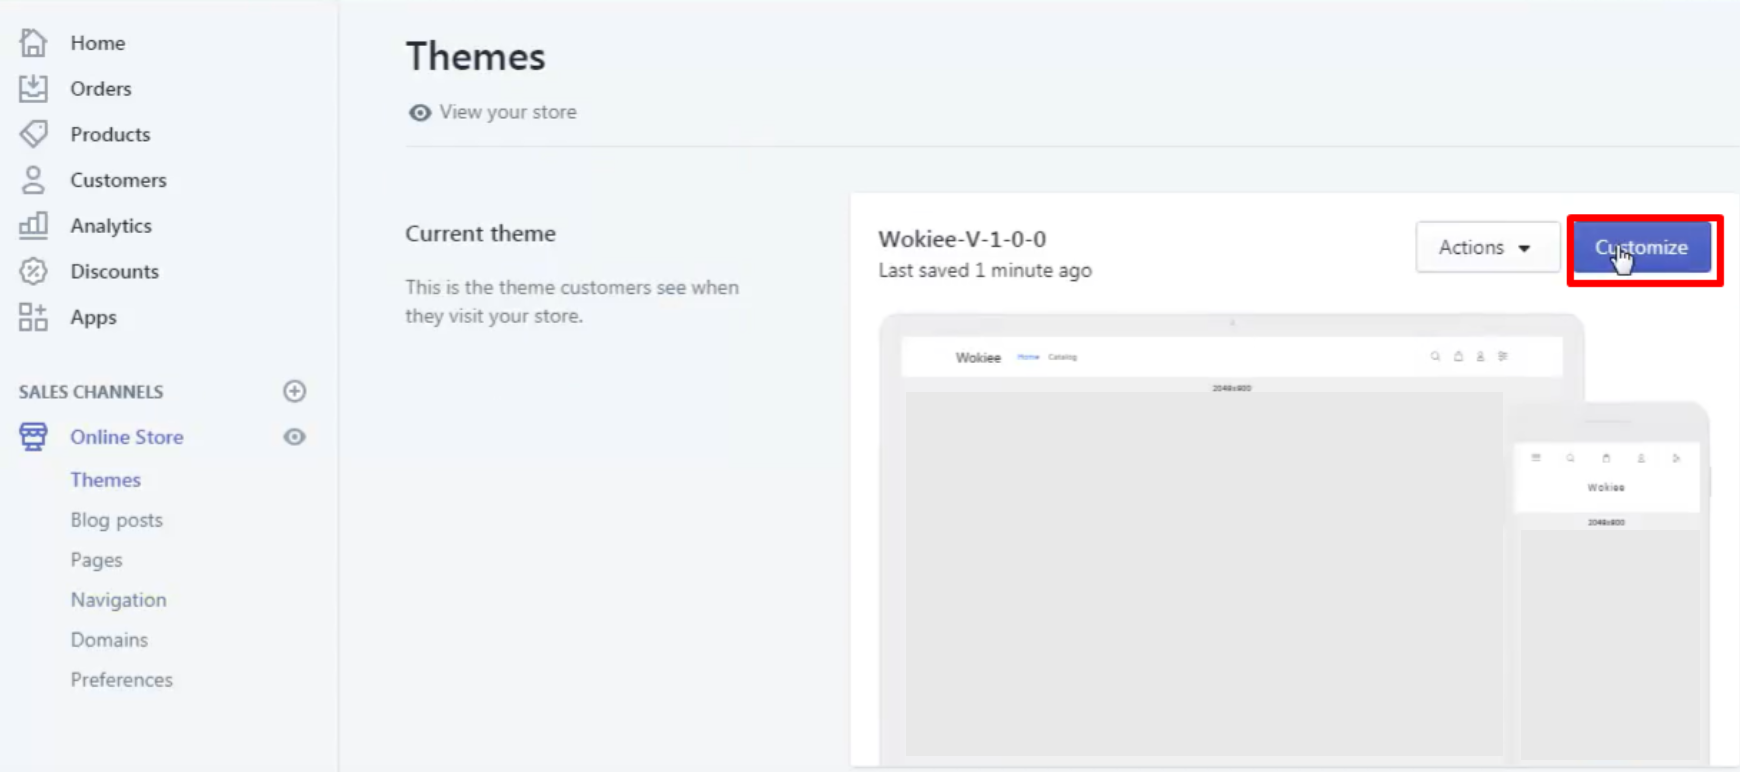
Step 2: Click to customize
Next, you need to navigate to Theme section to click on the Customize button. The click on the Header option on the left side of the screen.
Step 3: Create simple submenu with title
Scroll down to the end of the screen, you will need to click on the Add content option, and then choose Simple submenu with title. Next, add menus in special fields by entering in the blank section of the screen the name of your main menu.


Step 4: Click Save
Of course, you need to click Save in order to avoid loosing your previous work. Don’t forget to check your final result in the end!
Make submenu with 2 columns
Step 1: Open your created menu
Yes, every work will be done on your created menu, hence, you need to open it.
Step 2: Click to customize
Next, you need to navigate to Theme section to click on the Customize button. The click on the Header option on the left side of the screen.
![make submenu in your shopify store]https://cdn4.avada.io/media/shopify/J0Ttx9Z.png)
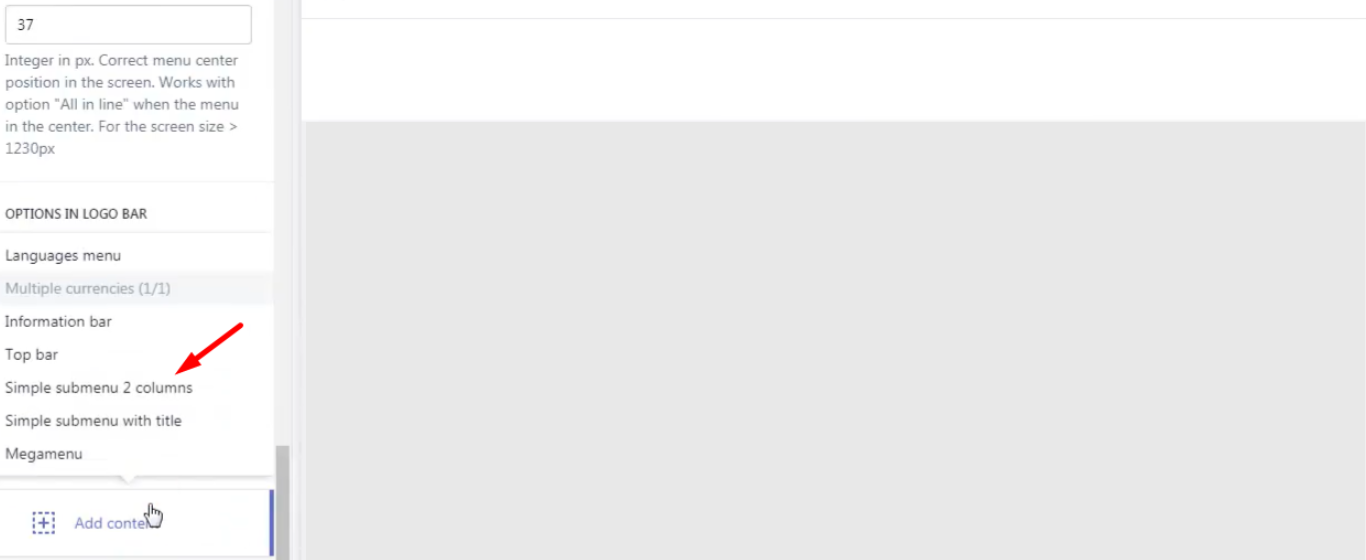
Step 3: Create simple submenu 2 columns
Scroll down to the end of the screen, you will need to click on the Add content option, and then choose Simple submenu 2 columns. After that, just insert menus in special fields by entering in the blank section of the screen the name of your main menu.
Step 4: Click Save
Of course, you need to click Save in order to avoid loosing your previous work. Also, remember to check the result again to make sure your work runs well.
Using Shopify Menu Apps
It is also a smart choice when you choose to utilize Shopify Menu Apps to support you complete your work with menus in general, and submenus in particular on Shopify. There are some apps that can generate manual and automatic filters to organize collection easily, there are some can generate mega menus within several minutes, and some enable users to present products to the search engine and many more. In order to know more about these apps, we have provided 10+ Best Shopify Menu Apps here for you to take a look.
Conclusion
That’s a wrap! I have just shown you all the necessary information you need to known about making submenu in your Shopify store. That seems easy, isn’t it? I really hope you find the content above helpful and successfully practice with your own submenu.
If there is something wrong during your practicing, feel free to contact us. Don’t forget to visit AVADA more to find many helpful tutorials on Shopify.
Related Posts:
- How to Edit Menu Items on Shopify?
- How to Create a New Checkout Language on Shopify?
- What Programming Language Does Shopify Use?


