
6 Steps to Set Up Email Forwarding

There is no email hosting provided by Shopify but you can purchase a domain through Shopify or transfer it to your online store. If you do, you can create an unlimited number of forwarding email addresses without paying any fee. However, remember that all new email addresses must be forwarded to an existing email address. If you are struggling with this problem, follow this topic to know how to set up email forwarding on Shopify.
**Related Posts:**
- How to disable automatic domain renewal on Shopify
- How to set up email forwarding on Shopiy
- How to buy a domain from Shopify
- How to edit your theme settings on shopify
- How to verify your domain with third-party services in Shopify
Step 1: Select Domains
Sign in your Shopify account and click on the Online store which stays below the Sales channels. The system will automatically move to the Themes section then you need to select Domains to continue.
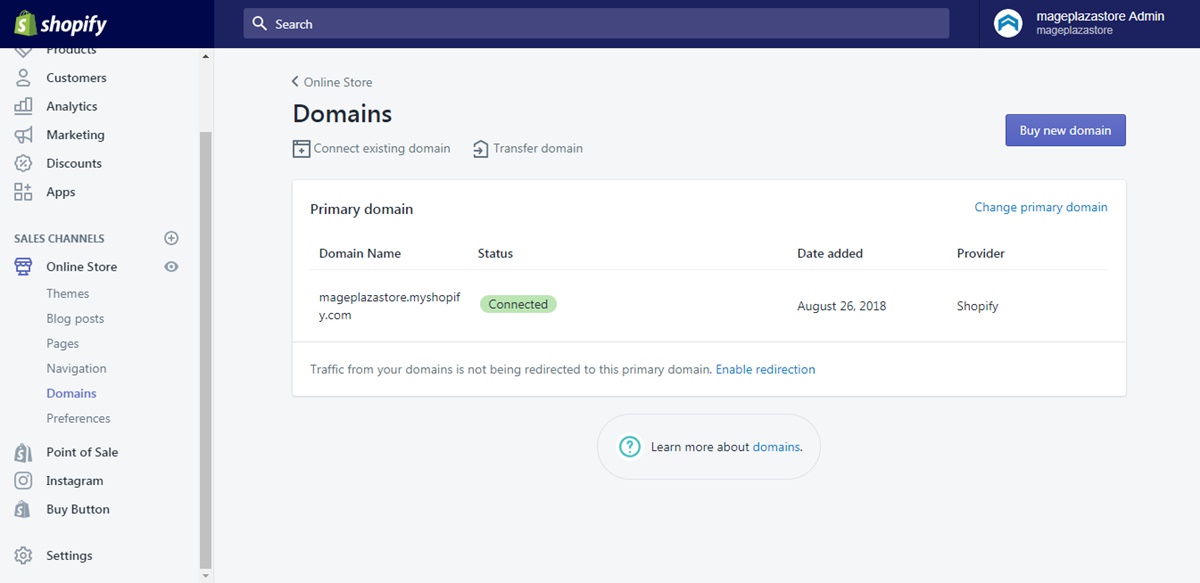
Step 2: Pick a domain
Look for the domain that you want to edit email forwarding in the Shopify-managed domains and press on its name to open.
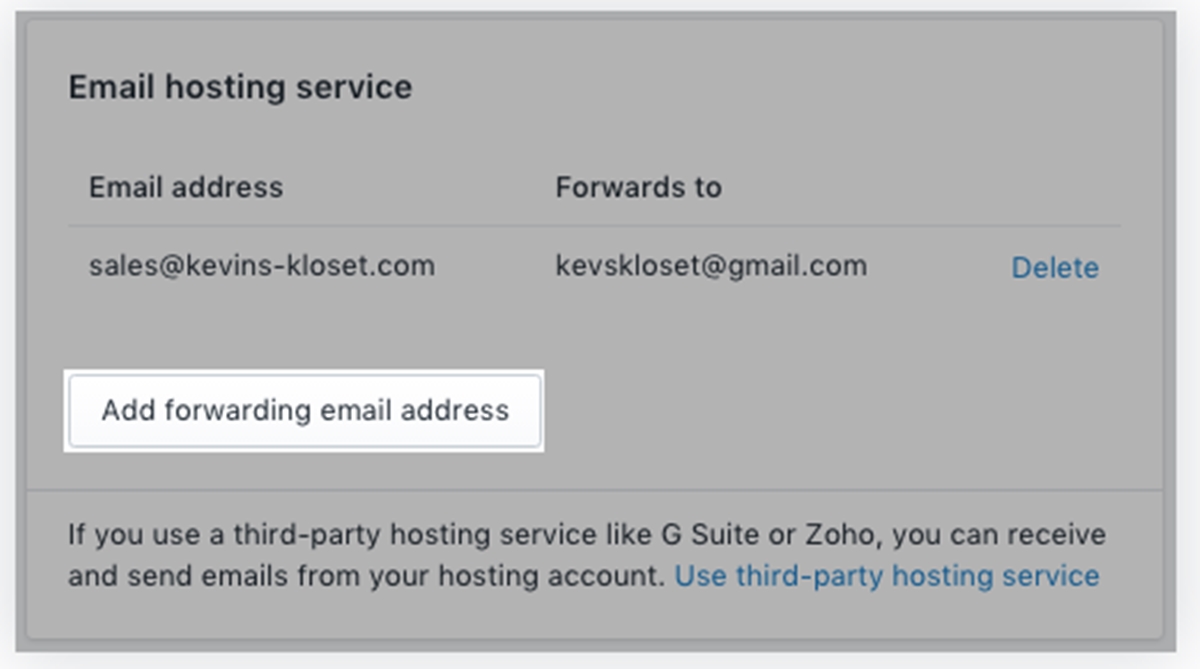
Step 3: Click on Add forwarding email address
In the detailed page of the domain, find the Email hosting service section and choose Add forwarding email address to move on to the next step.
Step 4: Fill in the Store email address
Another dialog box will appear that there is a space for Store email address. You need to enter the address that you want to create for your domain which is the one to receive responses from customers. Be noted that everything followed by @ is already available then you don’t need to type it.
Step 5: Add Forwarding email address
Below the Store email address is the Forwarding email address then you have to fill in the full destination email or the existing one.
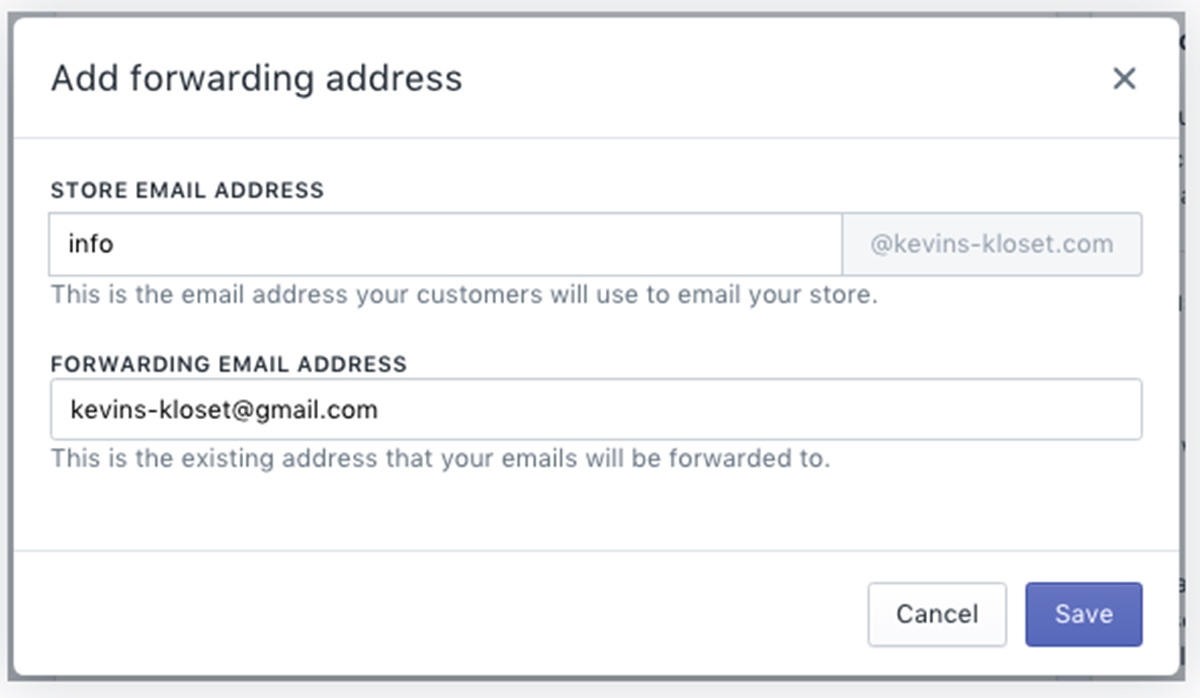
Step 6: Save email forwarding
If you are satisfied with your adjustment, click on the blue Save button to record all the changes and finish the process.
To set up email forwarding on iPhone and Android (Click here)
-
Step 1: Select Domains Open the Shopify app on your smartphone and go to
Storeat the bottom bar of the screen display. After that, tap on theOnline storeunder theSales channelssection. More settings for theOnline storewill appear that you need to scroll down and find theDomains. -
Step 2: Choose a domain Pick a domain which you want to change the settings for email forwarding then tap on its title to open the details.
-
Step 3: Press on Add forwarding email address In the
Email hosting service, press on theAdd forwarding email addressbutton to move on to the next step. -
Step 4: Enter the Store email address The
Add forwarding addressdialog box will appear which includes two spaces. Fill in theStore email addressbox the one you want to use for your domain. In other words, it also the email that customers will use to email your store. Moreover, there is a note that you don't need to include the information follow@because it is already provided. -
Step 5: Add Forwarding email address Ener the full destination email address or the one that is already used to receiving forwarding in the
Forwarding email addressbox.
-
Step 6: Tap Save After completing all the above steps, select
Saveto store all the adjustment. Do not choosexorCancelbecause it will close the dialog box and everything remain the same, which means that you have to repeat the process again.
Conclusion
In short, I have given you the instructions on how to set up email forwarding on Shopify. It seems to be complicated and time-consuming to practice, however, pictures and notes are attached in the writing that I hope you can spend time practicing these steps and take advantages from it.


