
6 Steps to Import Products With a CSV File on Shopify

In this post, you’re going to learn how to import products with a CSV file on Shopify. But before reading the main part of this guide, make sure that you know what exactly a CSV file is. Here is a brief about defining it. If you’ve known, skip that one and read the rest of the writing.
What is a CSV file?
A CSV file (.csv) is a special file type that you can create or edit in Excel. Instead of storing information in a column, the CSV file stores comma-separated information. When text and numbers are stored in a CSV file, it is very easy to move text and numbers from one program to another. That’s why Shopify uses a CSV file to convert the data from it into products.
Related Posts:
- How to Add Multiple Product Images to a CSV File on Shopify
- How to import products after making changes to your CSV file on Shopify
- Import CSV Files into Google Sheets - A Step-By-Step Guide
- 6 Steps to Export your Gift Card Products to a CSV on Shopify
How to import products with a CSV file on Shopify
Those products are imported would be useful and convenient for you when you want to switch to Shopify from another platform and even when you prefer to making plenty of changes to your products or inventory. Below is a detailed guide which is to show you how to import products with a CSV file on Shopify.
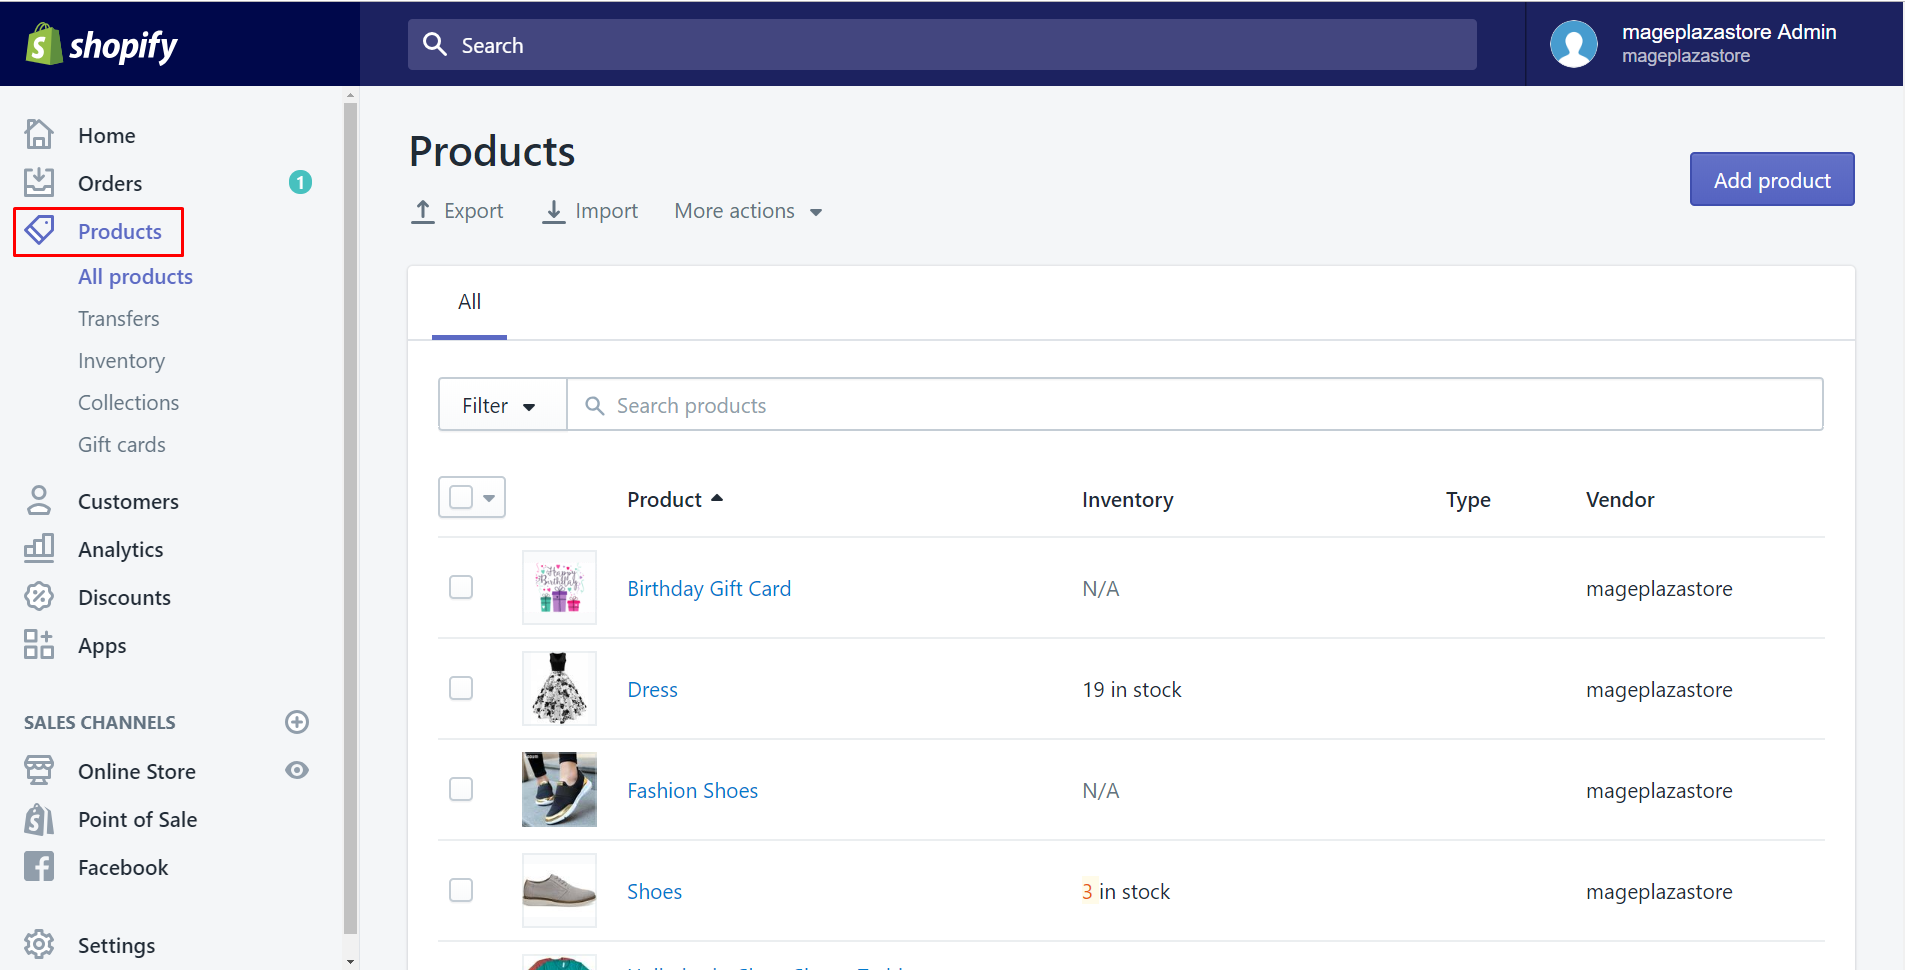
Step 1: Go to Products
Make sure to log in your Shopify account and then start head into your Shopify admin, select Products which is the third section on the left-hand side of the screen.
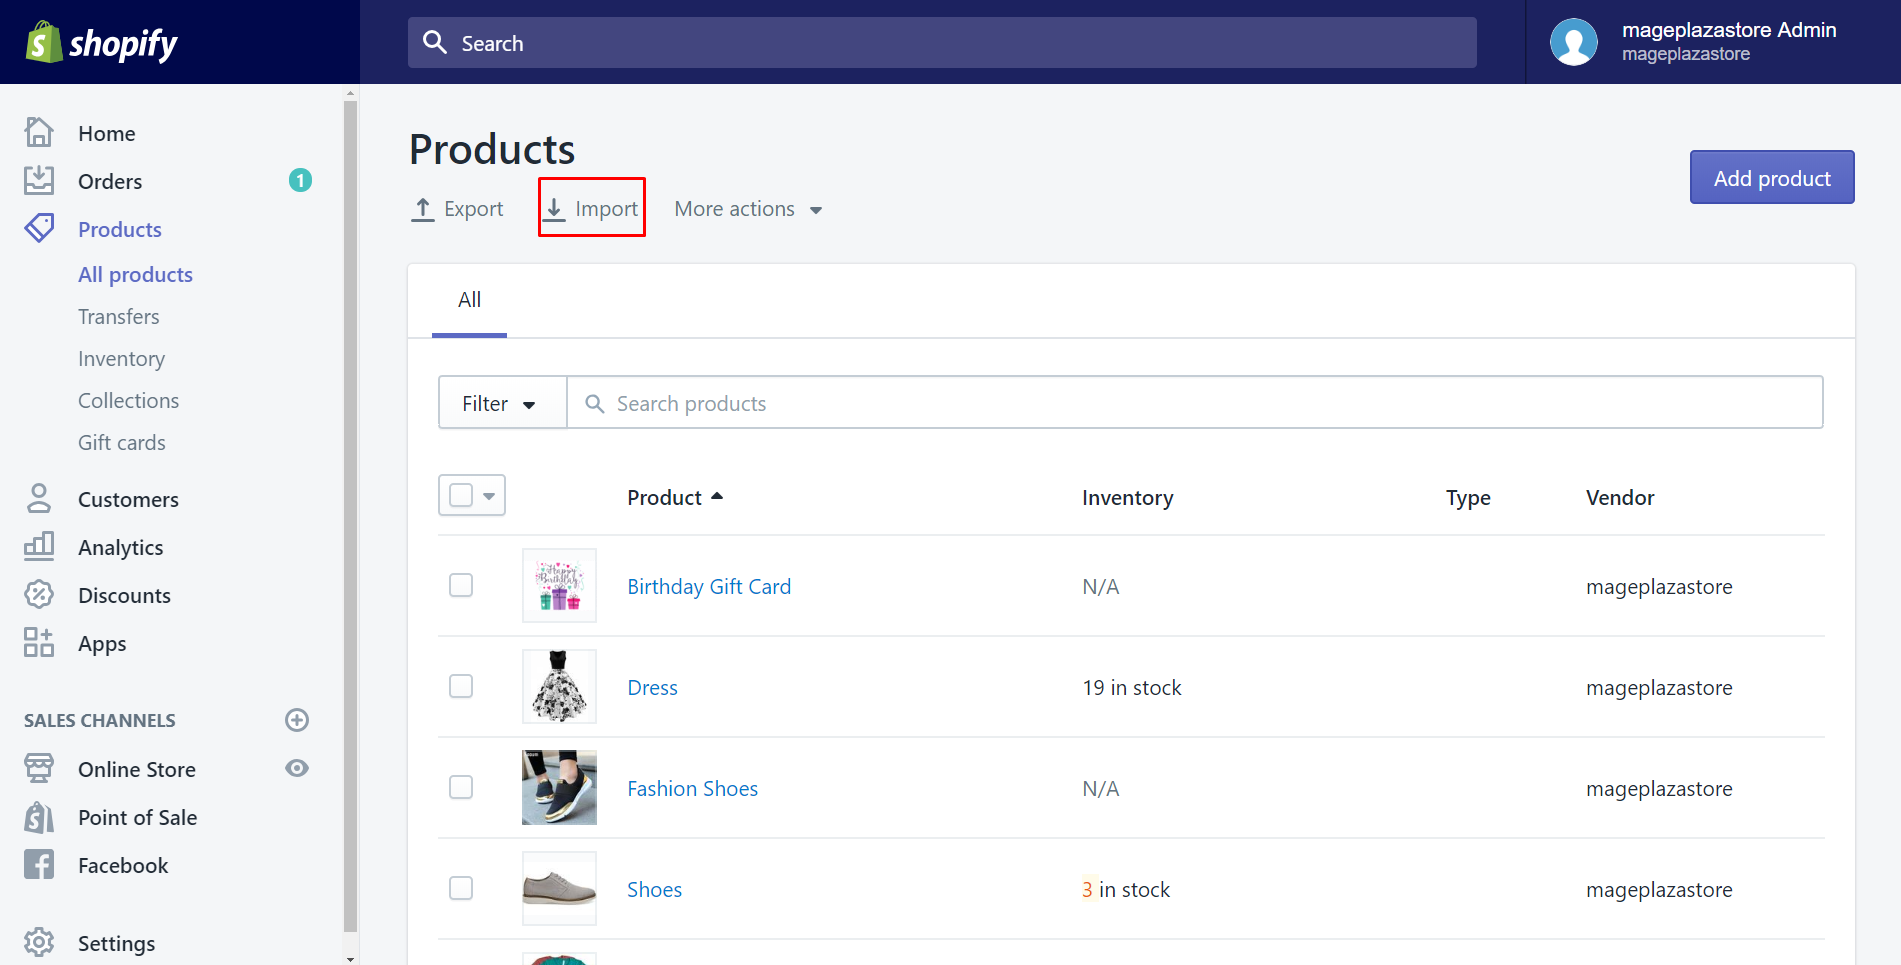
Step 2: Click Import
There will be All products. After taking a look all of your options, click Import to import CSV file.
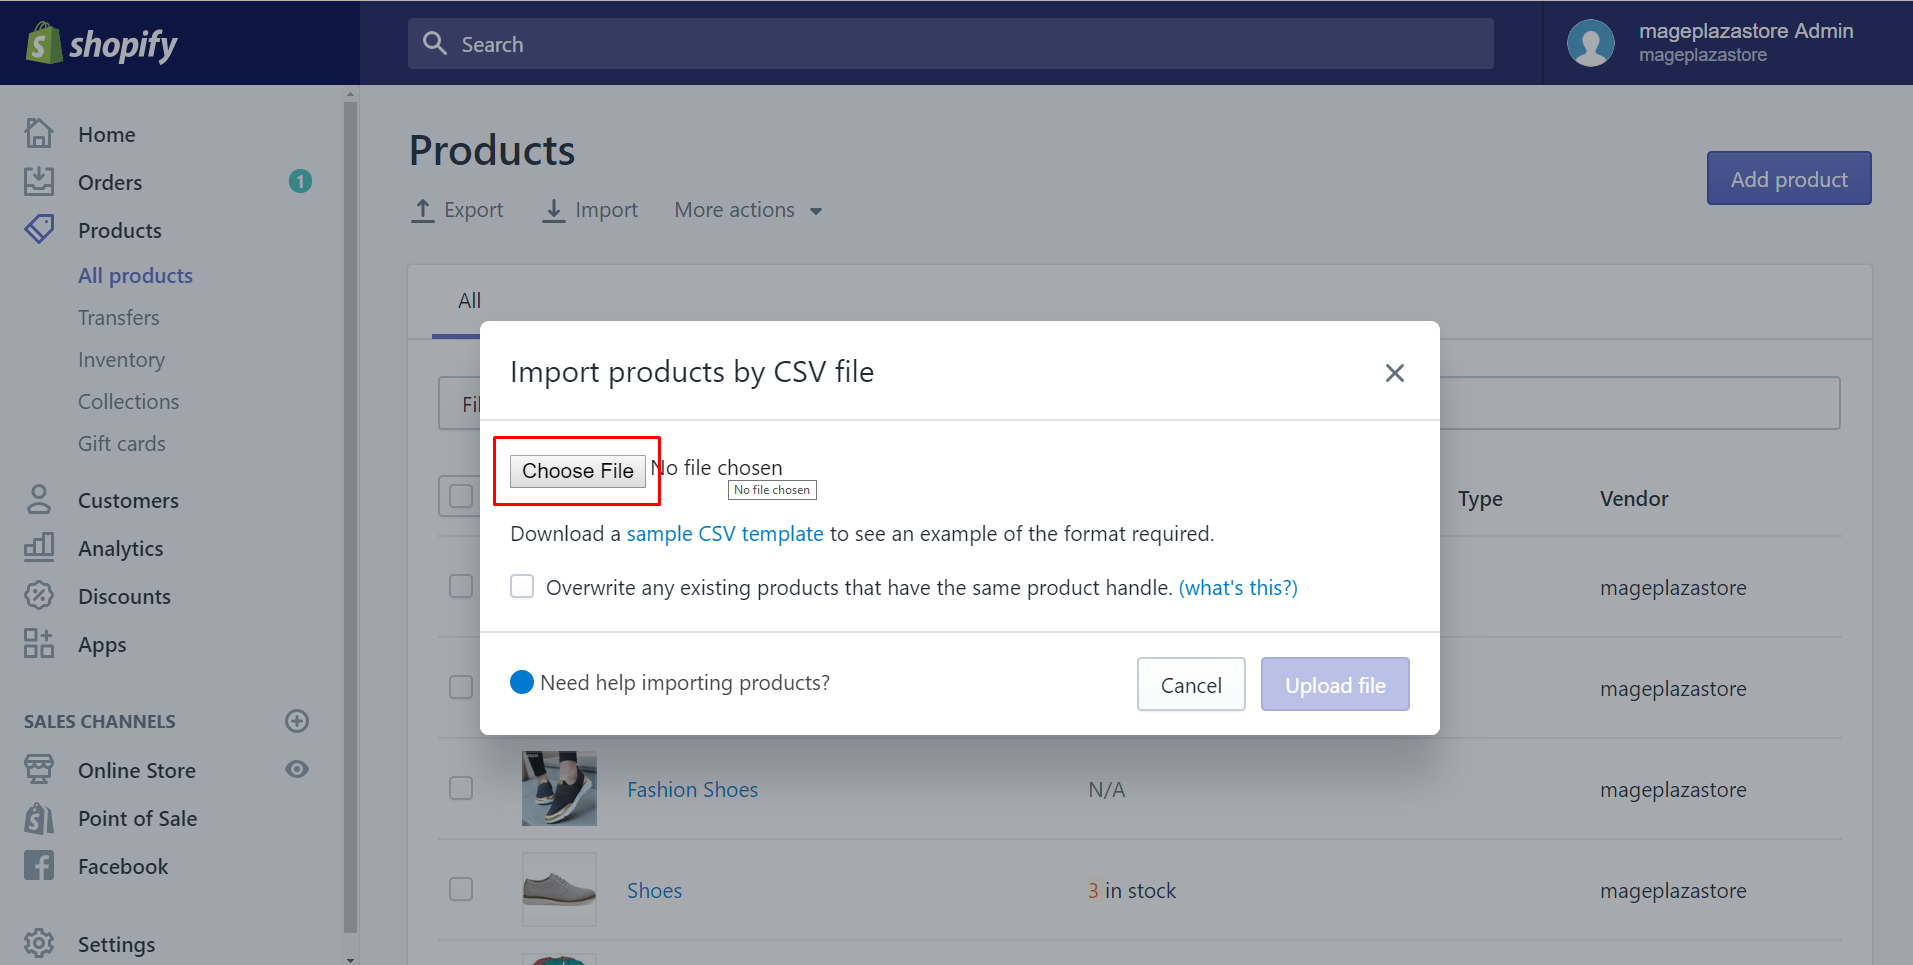
Step 3: Click Choose File
A small dialog which called Import products by CSV file appears. That’s is the main step we should take notice to import correctly. Tap Choose File to upload the specific file from your computer that you want it to be imported.
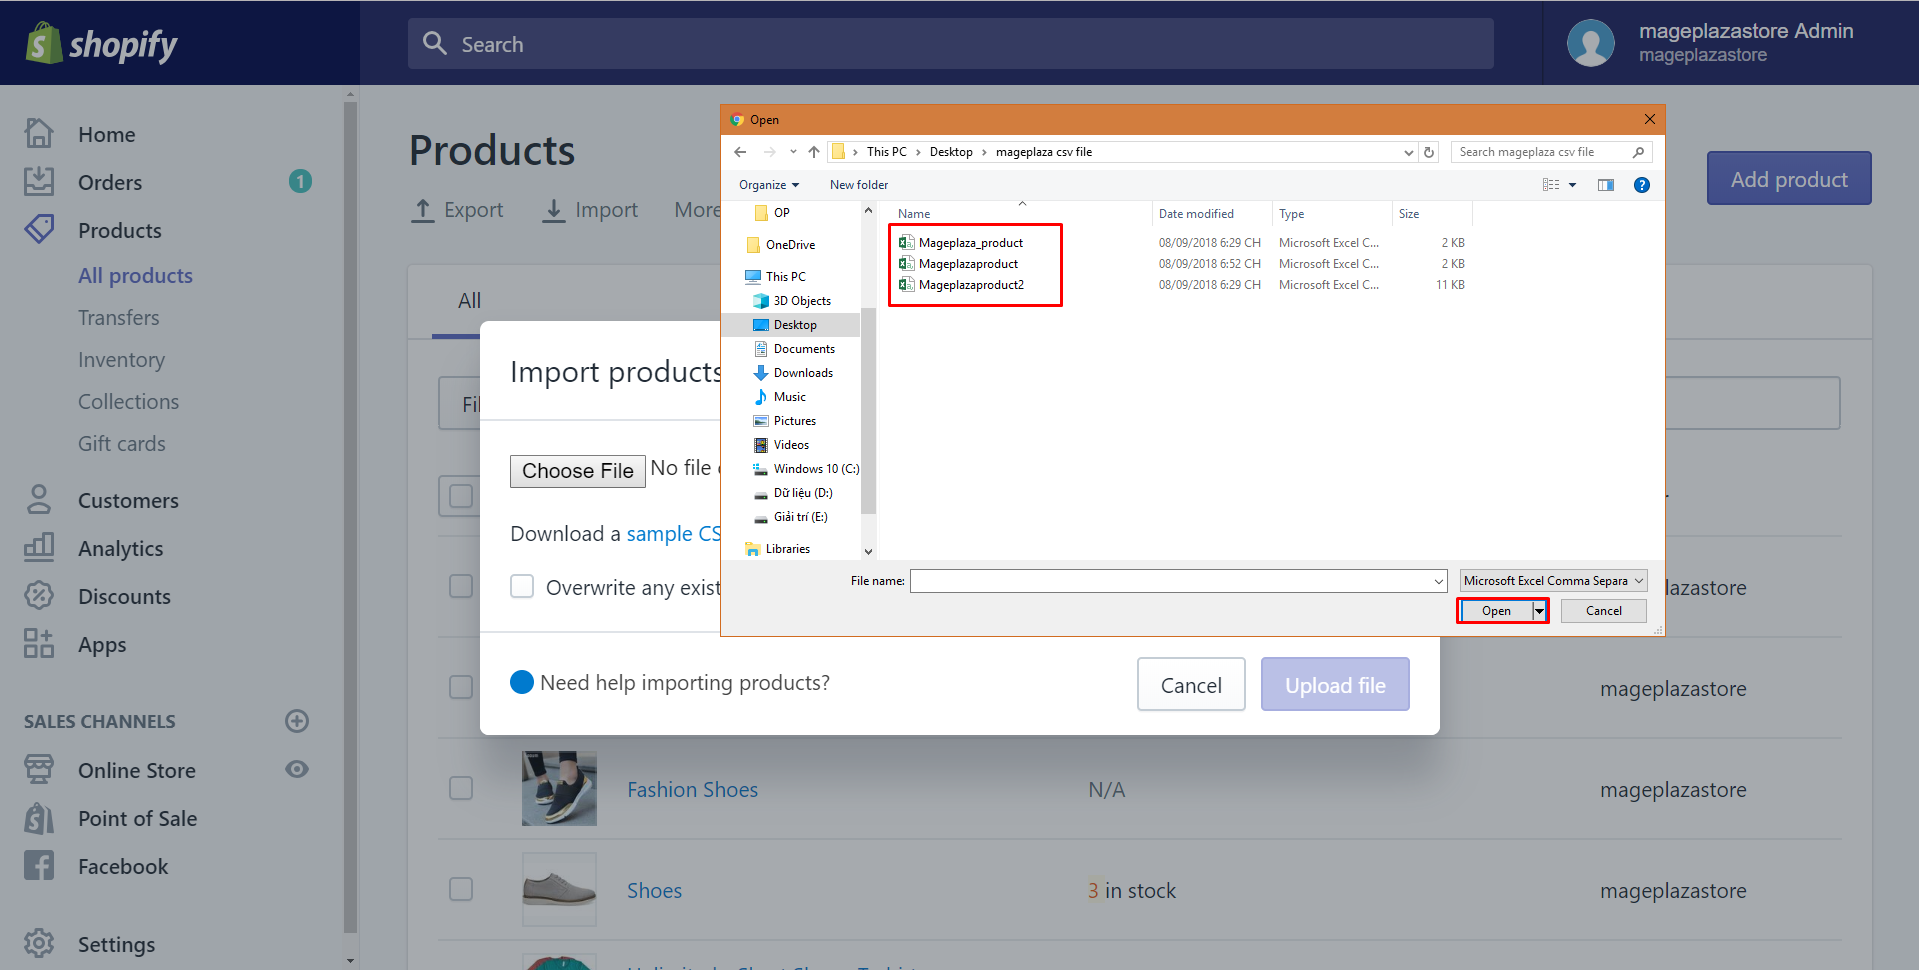
Step 4: Click Open
A new window is opened for you to find and select which one you prefer to upload. Remember that where you put your CSV file to save time. Then click Open. For example, I have two CSV files that in Desktop and I would like to choose Mageplazaproduct.csv and click Open to open that file.
Step 5: Upload file
See it again at the Import products by CSV file box to make sure that you’ve uploaded the right CSV. After all, click Upload file.

Step 6: Select Start Import
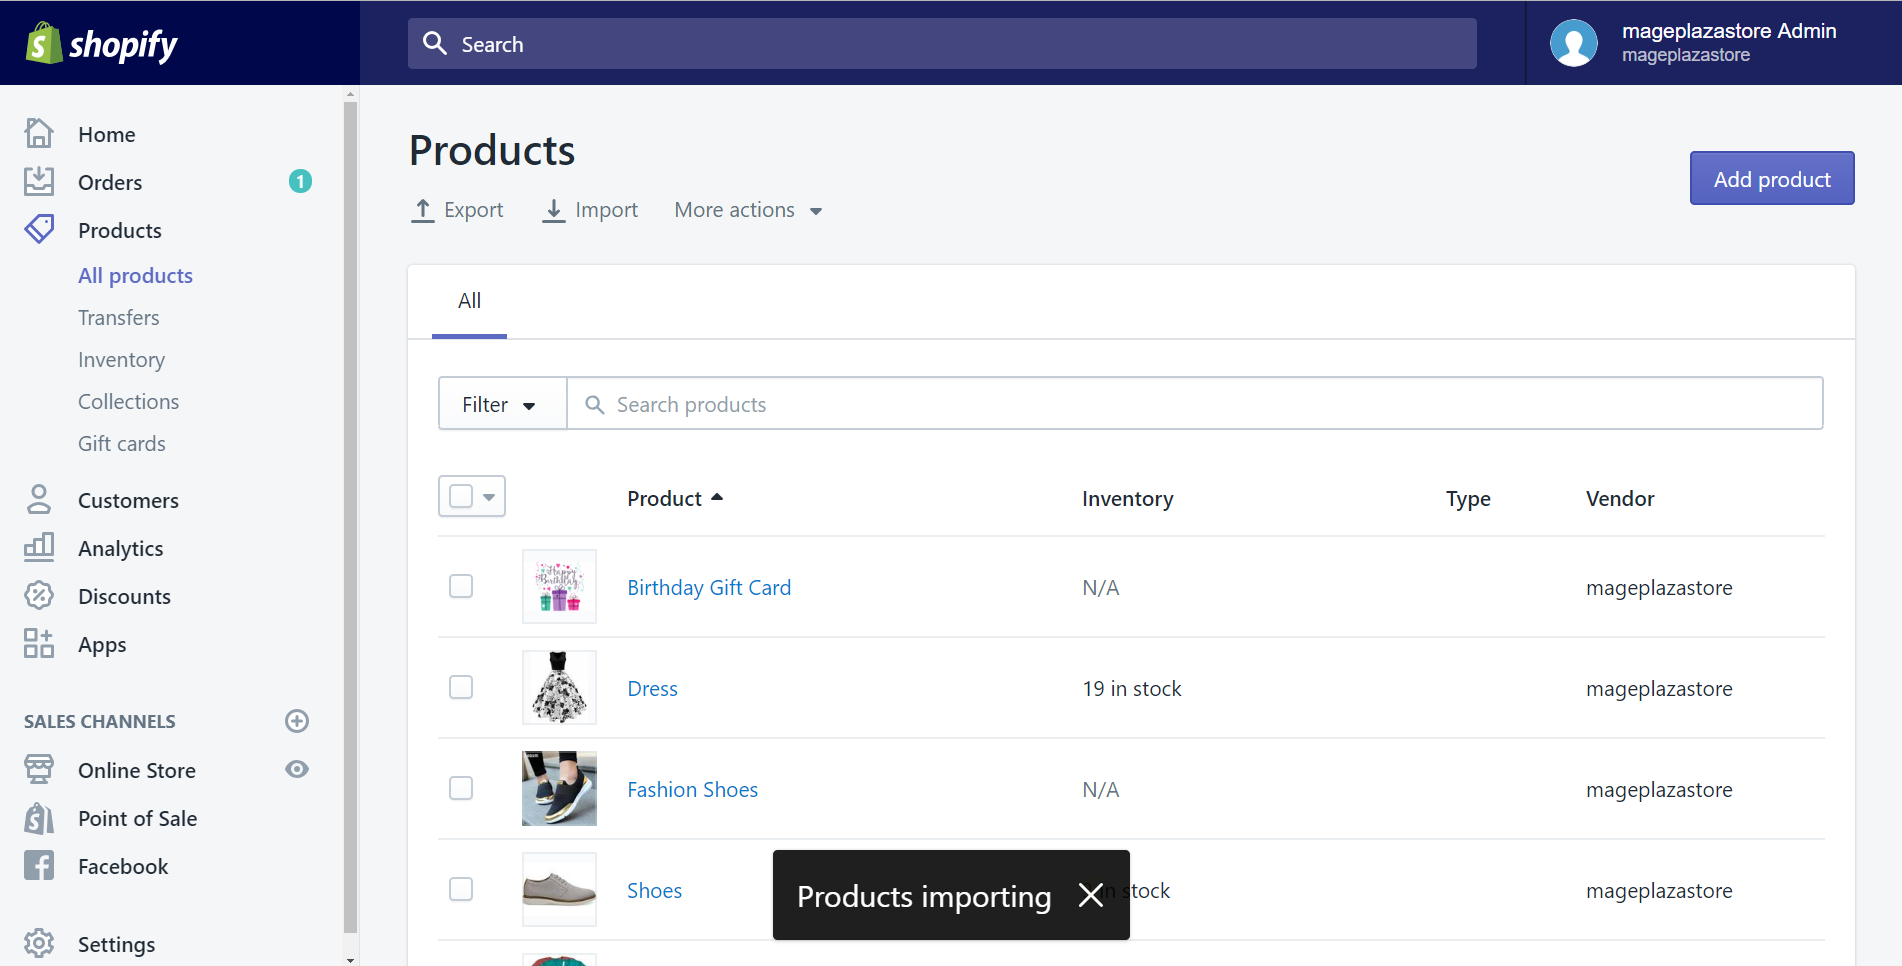
It will take a while for uploading. Then, a sample of your CSV information will be shown. Take a minute to make sure all things such as Title, description, variant and so on,.. look accurate. After all, select Start import to complete.
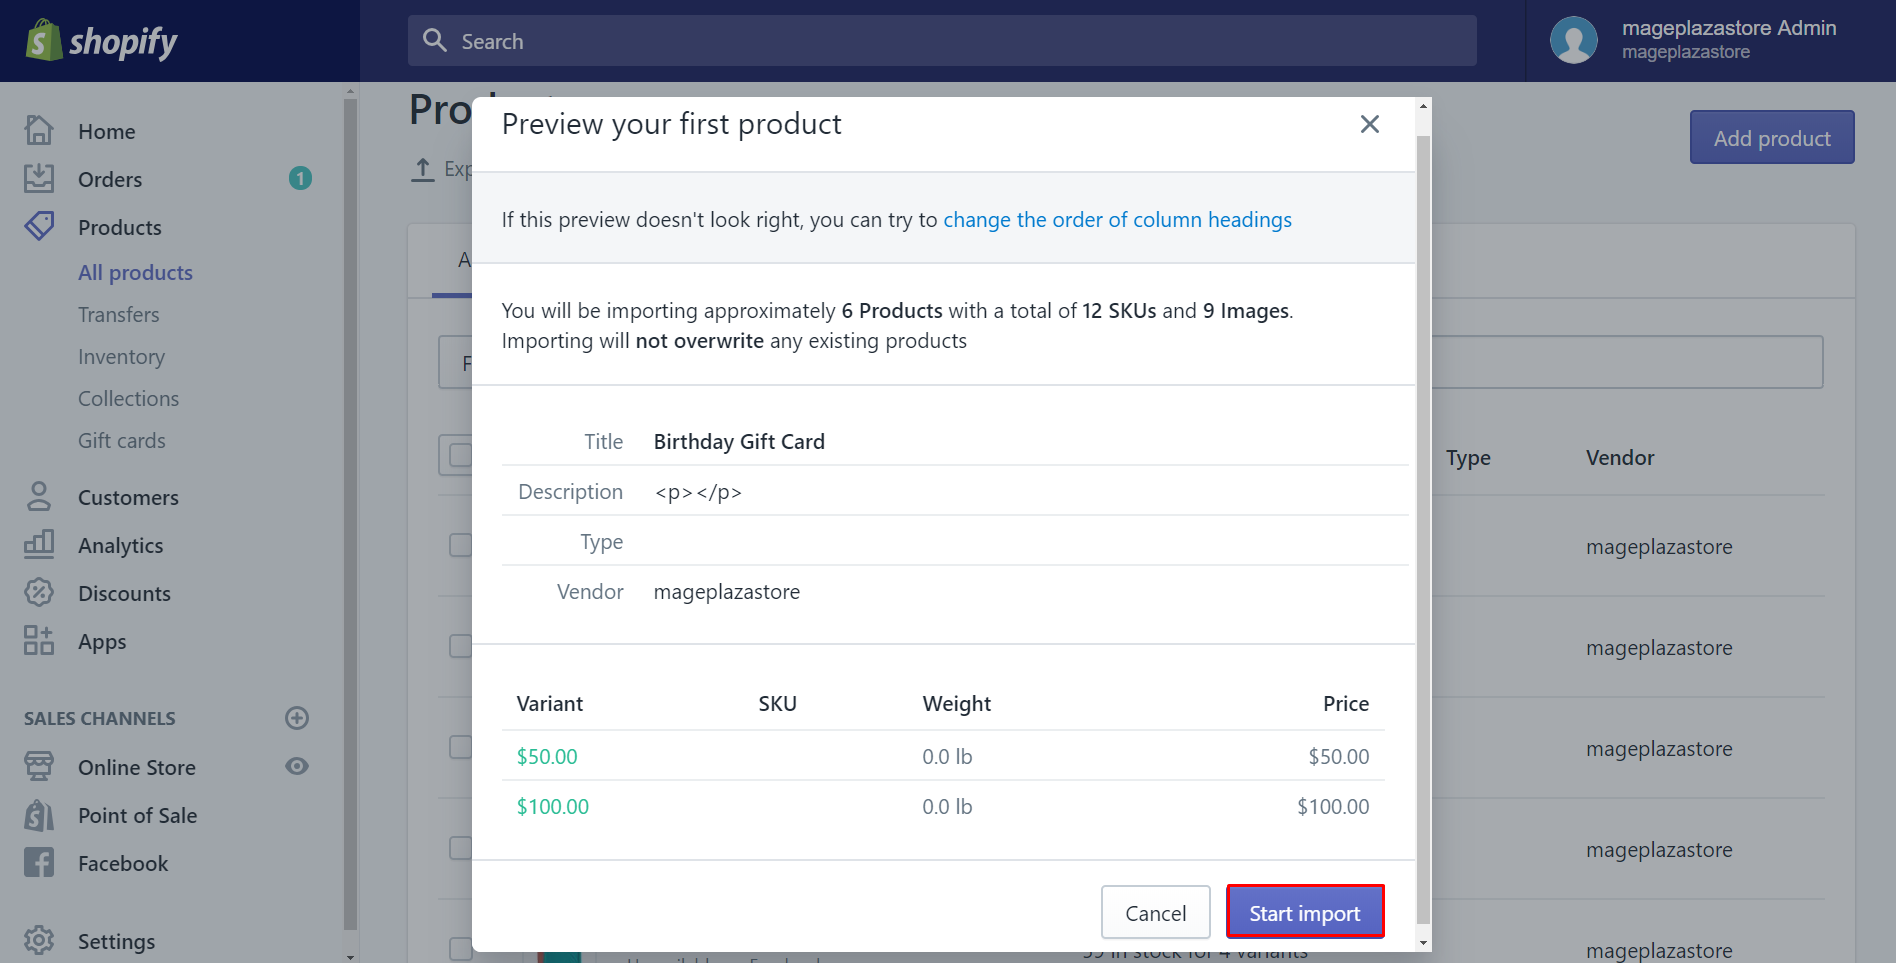
As soon as your CSV file is processed you will get a notification saying your upload has been successful. Finally, you can see your items in your product list.
Summary
Above is the writing which takes you through how to import products with a CSV file on Shopify. Hope you find more convenient to have a wonderful product list with plenty of good products. Please pay attention to another guide that we write to help you use Shopify to be a one of a kind online store.


