
How to Enhance Image on Shopify in 4 Simple Steps

Editing photos are very familiar to you due to the exposure to social media and the development of technology. There are programs and apps that help users to do things like adjust image’s color or contrast and brightness, however, you have to upload your file to the app then make changes. It is quite inconvenient and time-consuming because you have to complete a number of steps to edit then post it again to your website. If you are struggling with the same problem, don’t worry since Shopify allows users to edit the image online then follow this writing to know how to enhance an image on Shopify.
Related Posts:
- How to Add text to an image on Shopify
- How to Draw on an image on Shopify
- How to Resize an image on Shopify
- How to Add a Product Image on Shopify
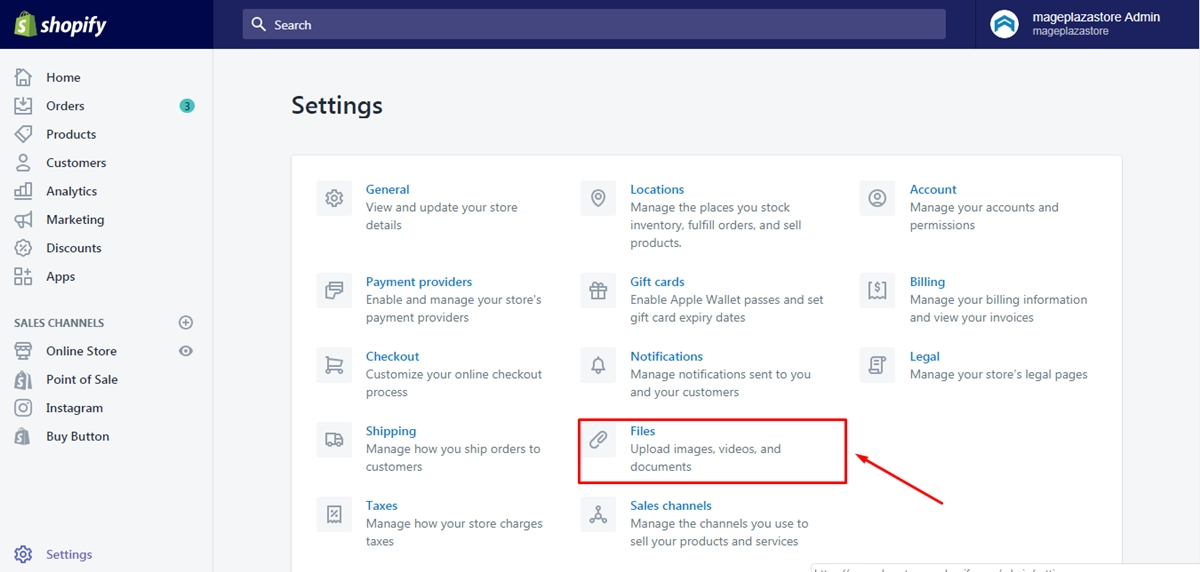
Step 1: Go to Files
From the admin page of Shopify, choose Settings which stays beside the gear icon. The list of Settings will appear in three columns that you need to go to the Files section at the second one.
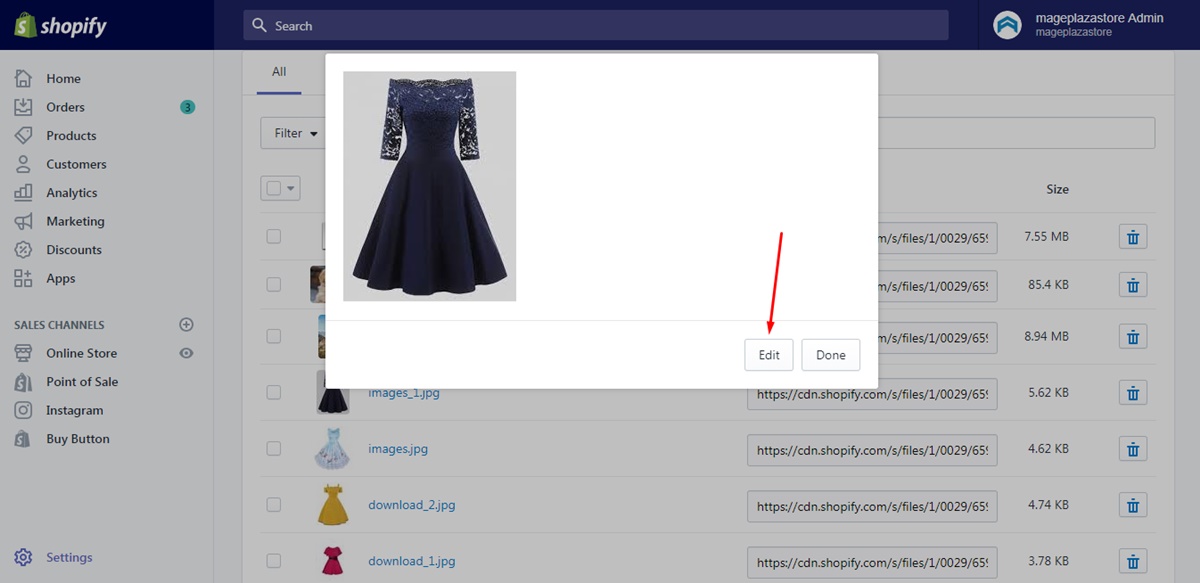
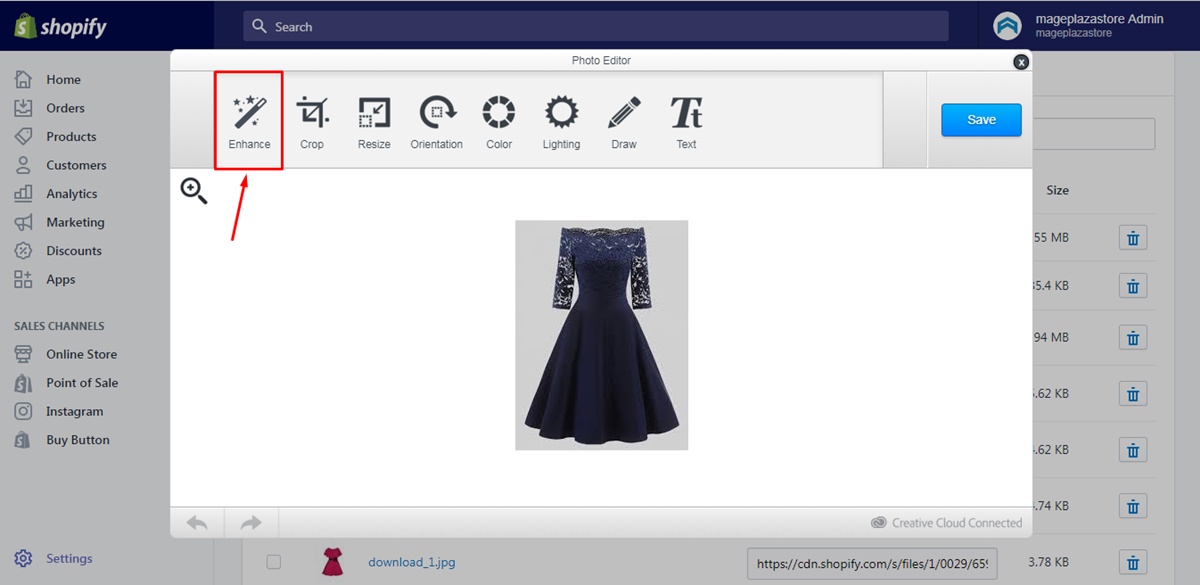
Step 2: Select Enhance
All of your files will be displayed then you have to pick a photo that you want to adjust. There is a preview for each image but it quite small that when you open it, the clearer version of the picture will appear and you can check whether it is the one that you want. If it is, you need to press on the Edit button below the image. After that, you will see another dialog box named Photo editor that includes many options. Click on the Enhance which is the first item in the bar.
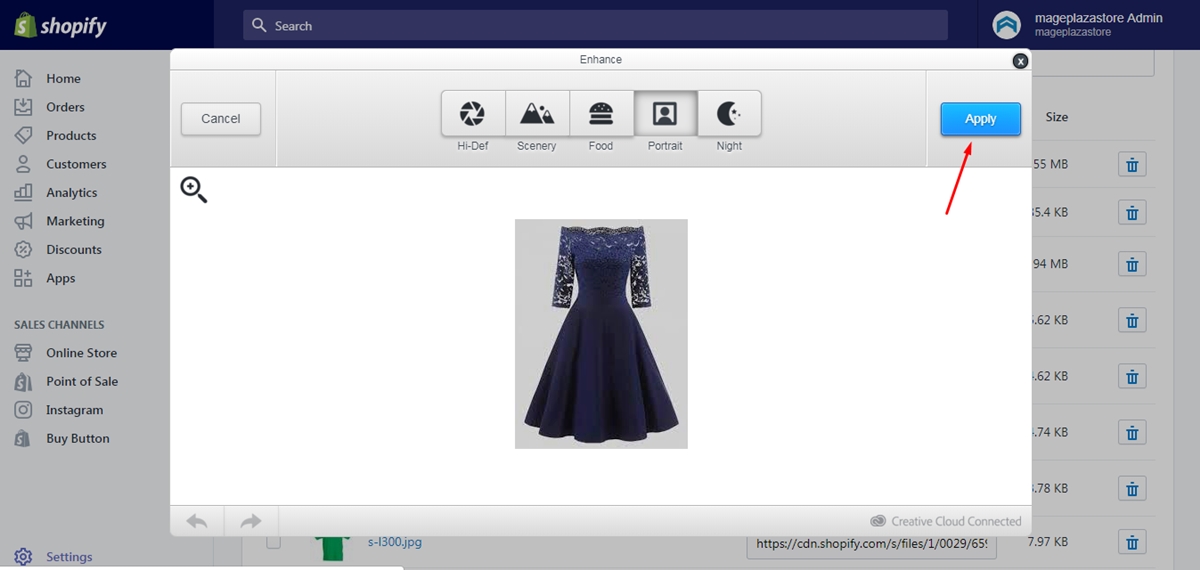
Step 3: Choose Apply
Details for Enhance will appear that you can decide one from the list to make change for your image. You can select Portrait effect for your photo for example and observe the result. If you don’t like it, you can pick another one or click again on that effect to see the original picture. After add adjustment, if you are satisfied, choose Apply to allow your editing. In case there is nothing that you want to use, you can press on Cancel to back to the Photo editor.
Step 4: Click Save
You can change other properties of the photo as well then when you are done, remember to press on the Save button to store all changes and end the process. Be noted that in the previous step, you have applied the Enhance effect for your photo but it is still a temporary version, you need to select Save to help the system record all changes.
Conclusion
In brief, I have given you the guidelines on how to enhance an image on Shopify. The process is quite easy, with just four steps in total and it will not take much of your time to complete. Moreover, this kind of action is useful for you because you can make a simple edit for your photos without the need of any other program. On the other hand, you can also use a variety of tools online to help enhance your product photos such as SnapEdit, CutOut. These AI photo editors provide alternatives to Photoshop or Shopify in-app tool for enhancing the quality of your images. AI algorithms rapidly improving in quality couples with faster editing speed will tremendously help Shopify store owners.
I hope this article has been useful and we will continue to put out more contents to help you perfect your stores.


