
How to Edit URL Redirects on Shopify

Sometimes, you will need to edit URL redirects. There are cases that you have already created a URL redirect but later you find some mistakes in the input information process. It is also possible that you change the link for redirecting and then you need to edit it in the settings page to help your customers find your products or your content. If you are looking for an instruction on how to edit URL redirects on Shopify, do not miss out this writing because that is the subject of this post.
Step 1: Pick a URL
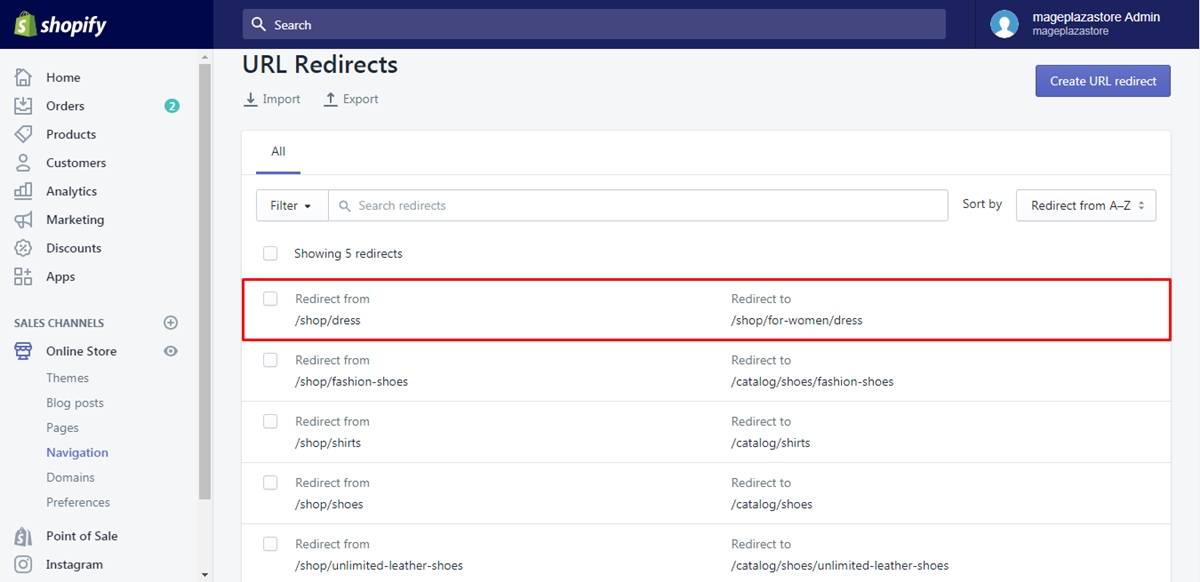
You have to sign in your account on Shopify first and go to the Online store after that. It will automatically move to Themes page but you need to open Navigation. Hence, click on the fourth option in the Online store list. In the Navigation section, you will see the URL redirects with the link symbol right below the page’s title. Press on it to show all of your redirects. Decide which one you want to edit and select it. For example, I want to adjust the first URL then I will choose it.
Step 2: Make adjustment
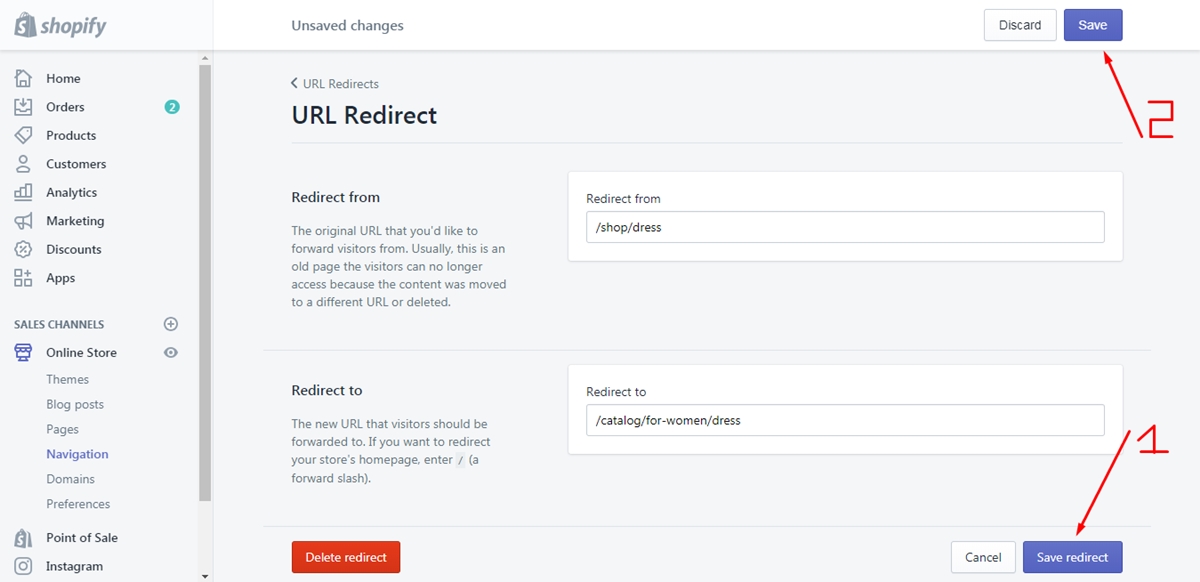
The details of the redirect will appear that you can replace the old content with the new one. You can change the information in the box of Redirect from or Redirect to or both of them. Moreover, the link added in the space can be the full URL (for example, http://www.example.com/collection/shirts) or just the relative one (for instance, /collection/shirts). Based on the purpose of your uses, you can choose whether to put in the full or the relative link. If you redirect outside the primary domain of your page, use full URL meanwhile fill in the relative link if others.

Follow my example in the previous step, the picture above shows you my editing for the Redirect to section. It is /shop/for-women/dress at first but I change it into /catalog/for-women/dress.
Step 3: Choose Save or Save redirect
After making the adjustment, you need to store it and there are two ways for you to do it. The first way is to scroll down to the end and choose Save redirects. The second one is to select Save on the top of the page. Once you make changes, the system can recognize it and remind you of Unsaved changes. Hence, you can press on that button to end the action. Besides, if you click on Discard or Cancel, everything will go back to the old version and you have to fulfill it one more time then don’t choose the wrong button.
Conclusion
In brief, I have introduced to you the process of how to edit URL redirects on Shopify. There are only three steps in total that it won’t take much of your time to complete it. Therefore, I hope that you can earn some benefits from this writing or at least you have a good time reading this topic. If you are interested, we have many other posts about selling online that you might want to check out.
Related Posts:
- Export your URL Redirects on Shopify
- Filter URL Redirects by Date on Shopify
- Delete URL Redirects Individually on Shopify
- Import your URL Redirects on Shopify


