
How to Create a Fixed Value or Percentage Discount on Shopify

In marketing, giving special offers to your customers is an attractive method to increase the purchasing power, gain more profits in a short amount of time and popularize your brand. Acknowledging this marketing strategy and its importance, Shopify provides all users several tools to create several types of special offers, such as creating a fixed value or percentage discount, creating a free shipping discount, creating a Buy-X-Get-Y discount and duplicating a discount.
In this article, we will find out how to create a fixed value or percentage discount on different platforms.
How to create a fixed value or percentage discount
Step 1: Go to Discounts
After accessing the Shopify admin interface, take a look at the list on the left side of the screen. There, you need to click on Discounts with a percentage-badge icon.
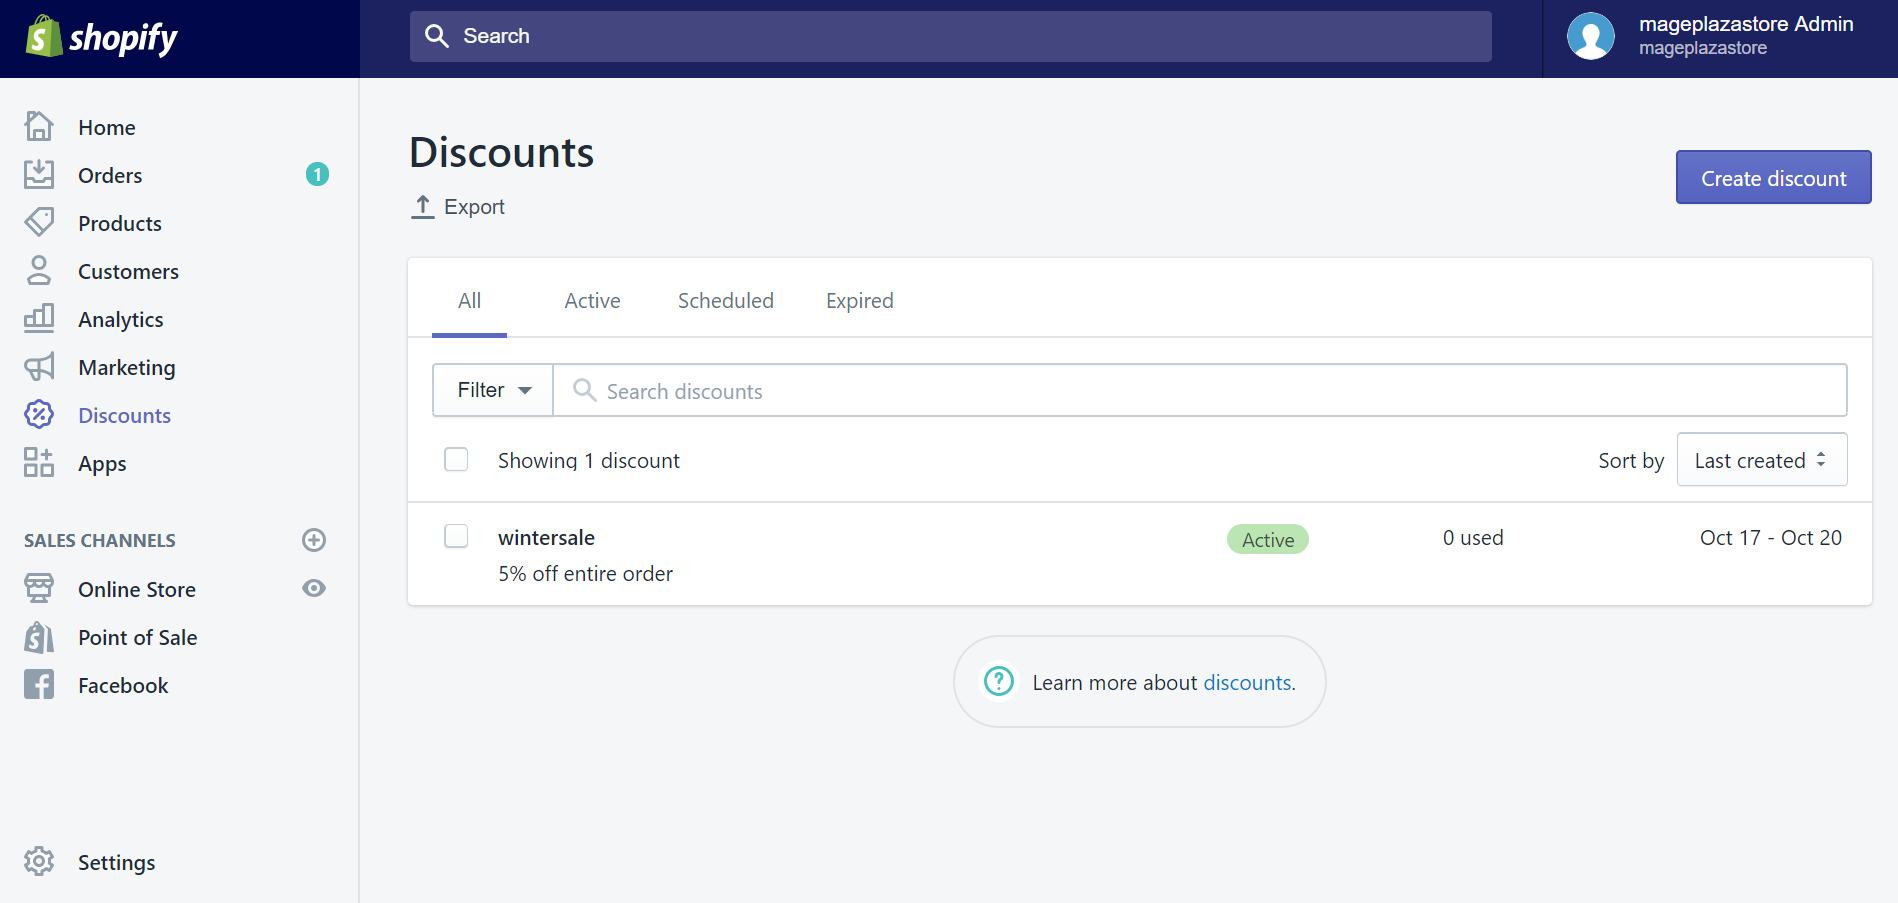
Step 2: Click Create discount
In the Discount section, click on the button Create discount at the top right corner to create a new discount.
Step 3: Configure the new discount’s attributes
In the Create discount code section, there are several areas with different attributes you need to set up for your new discount.
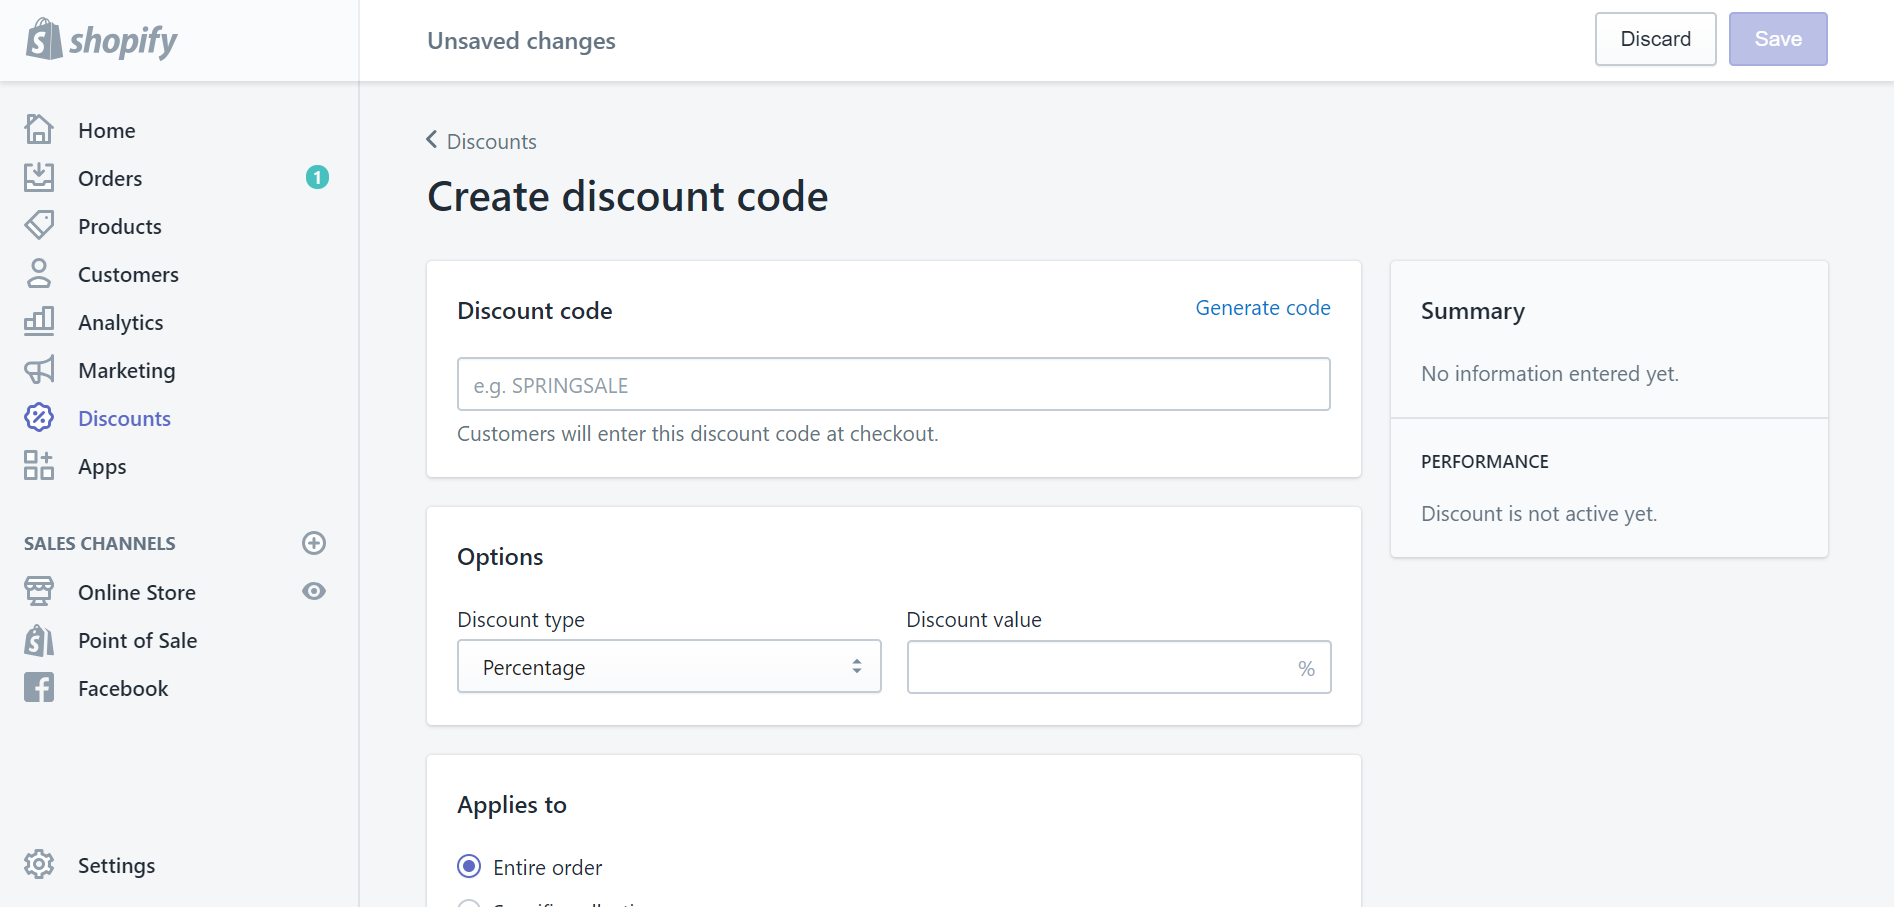
Discount code: In here, you can set up new codes that your customers will use to enter your discount at Checkout. You can also click Generate code to automatically generate new codes.
Options: In Discount type, you can choose the type of discount. Select Percentage or Fixed amount, and put the value of discount you want to create in the Discount value blank box.
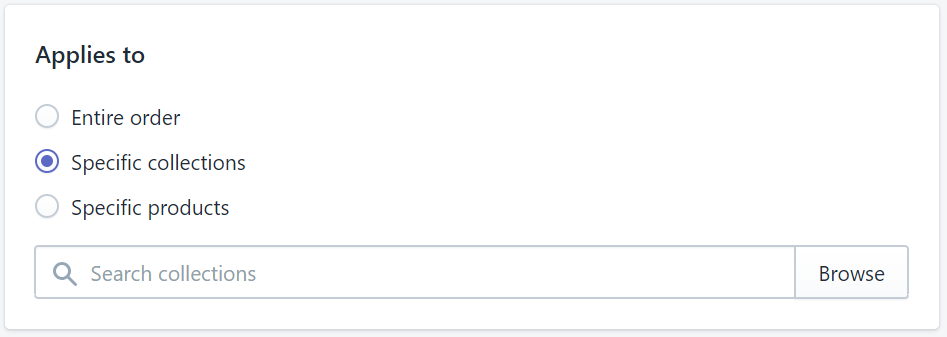
Applies to: This field helps you set the product scale, in which your new discount is available. You can choose Entire order to apply the discount for every product in your store. With Specific collections or Specific products option, you need to click Browse and select particular products you want.
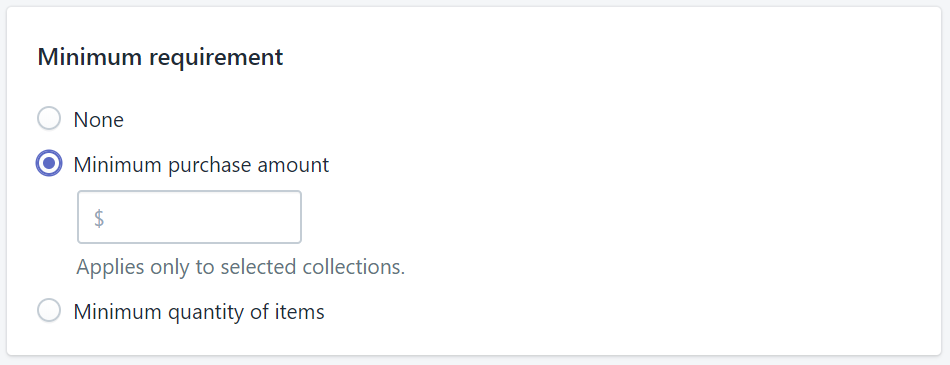
Minimum requirement: With this field, you can make a threshold of payment that your customers must exceed to activate the discount code. There are two ways to create a minimum requirement, by purchase amount or by the quantity of items. You need to input the value of the minimum requirement in one of those blanks.
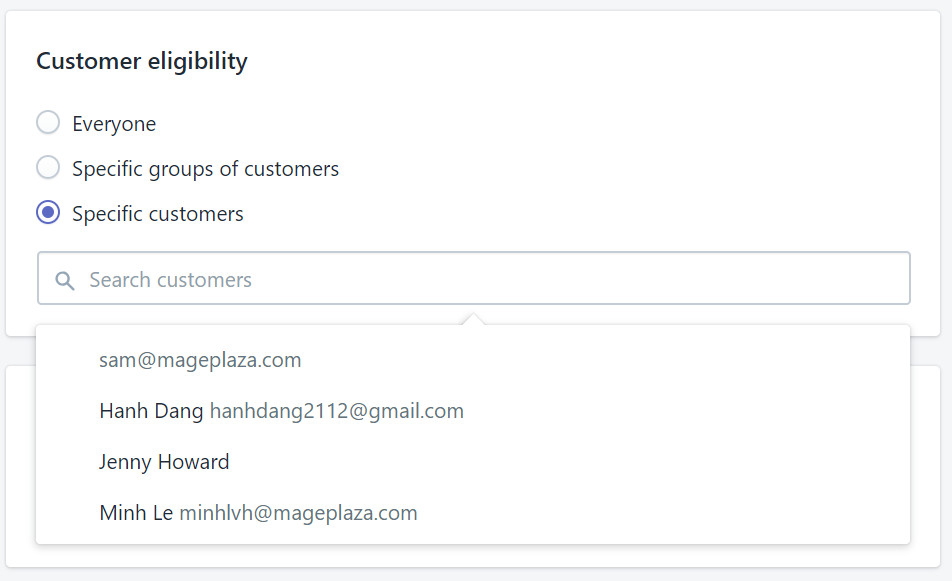
Customer eligibility: In this field, you can select particular individuals or groups of customers whom the discount will be available for. If the group of customer is not shown in the dropdown list, you will need to create customer groups as you want. If you select Specific customers, a dropdown list will show you all customers and their email addresses. In case some customers’ email addresses are not included in your data, other contact information will appear instead, such as phone numbers.
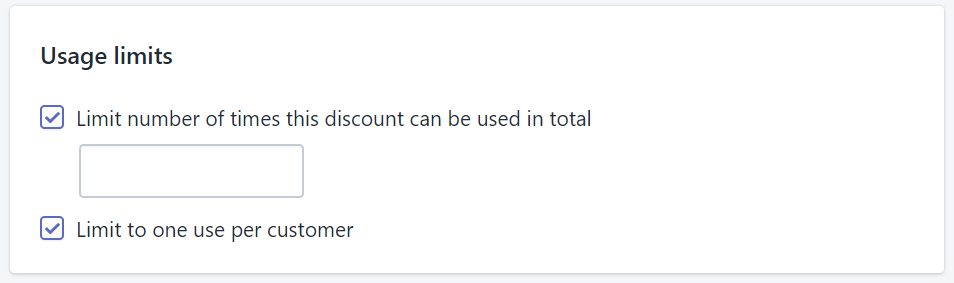
Usage limits: In order to limit the usage of your discount, you need to put a tick in one or maybe both options in this section.
You can Limit the number of times this discount can be used in total among all eligible customers, after putting the number of times in the blank. No matter how many customers use the discount, or how many times each eligible customer can use. You can also Limit to one use per customer.
Active dates: In this field, you can set the date when your discount becomes available. If you just want to make the discount active only in a period of time, then put a tick in Set end date option and make a deadline using calendar.

Step 4: Click Save discount
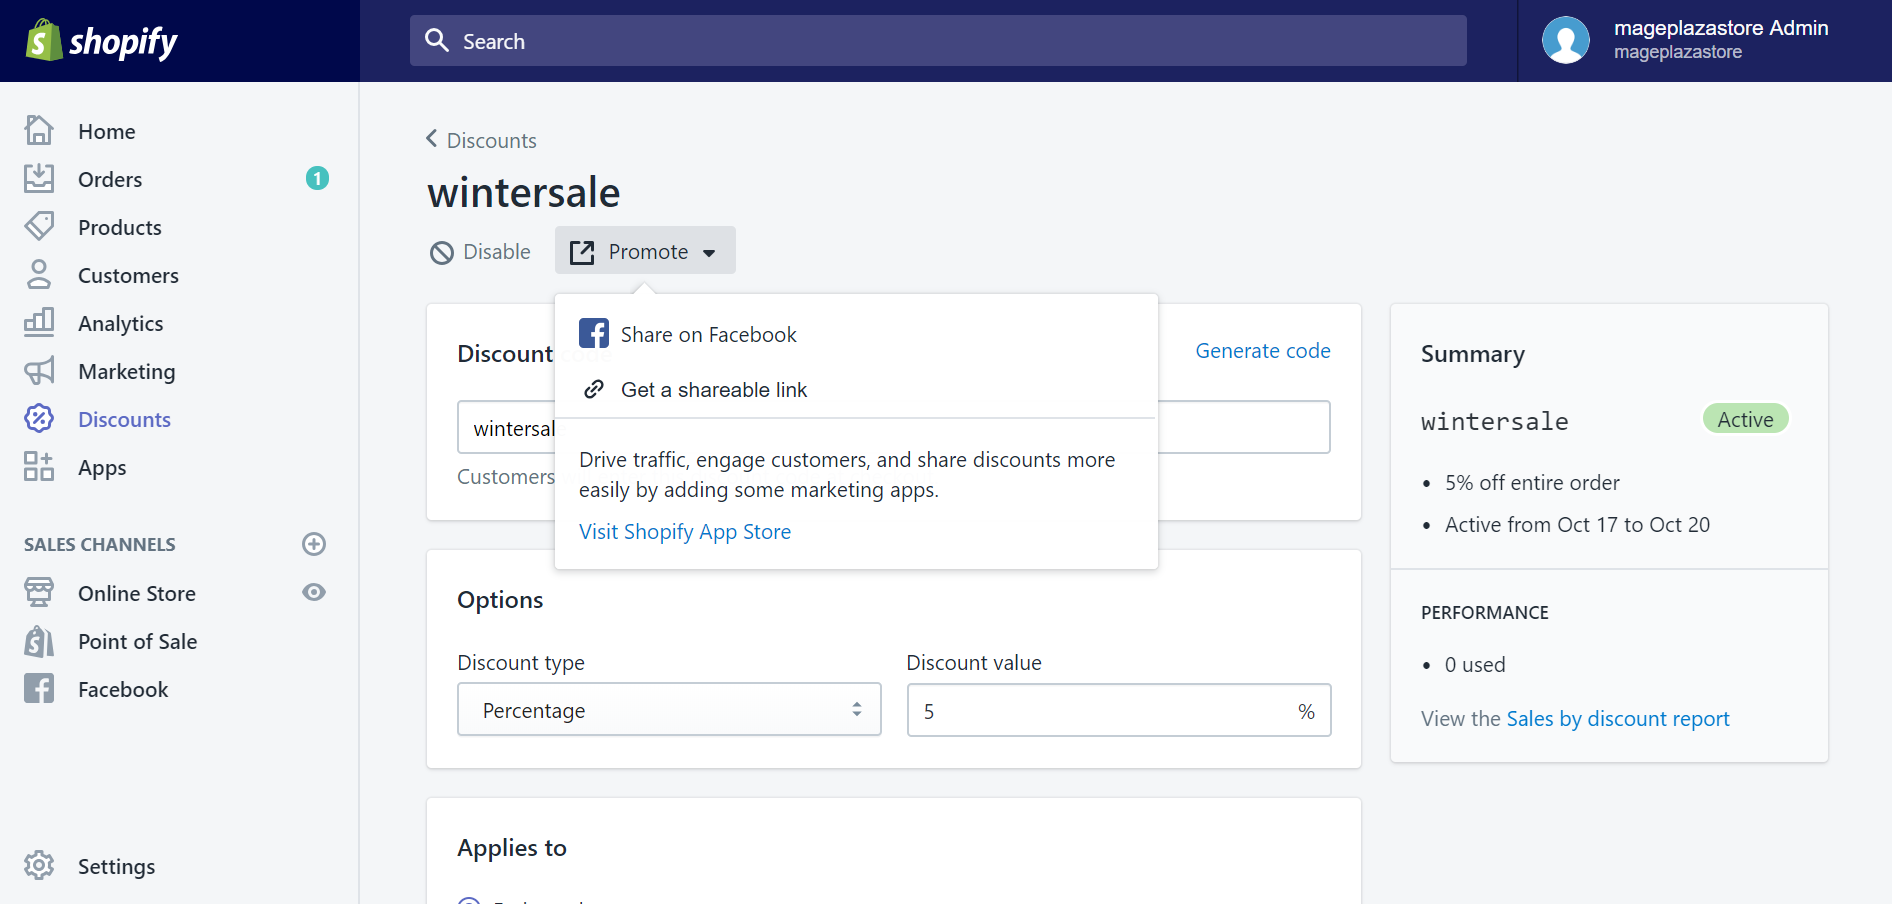
After setting details and attributes of the new discount, you will see it in the discount list. You can check and configure those details again by clicking on the discount, the specific discount section will appear right after. In here, by clicking on Promote, Shopify will give you some options to share your new discount to customers.
To create a fixed value or percentage discount on iPhone (Click here)
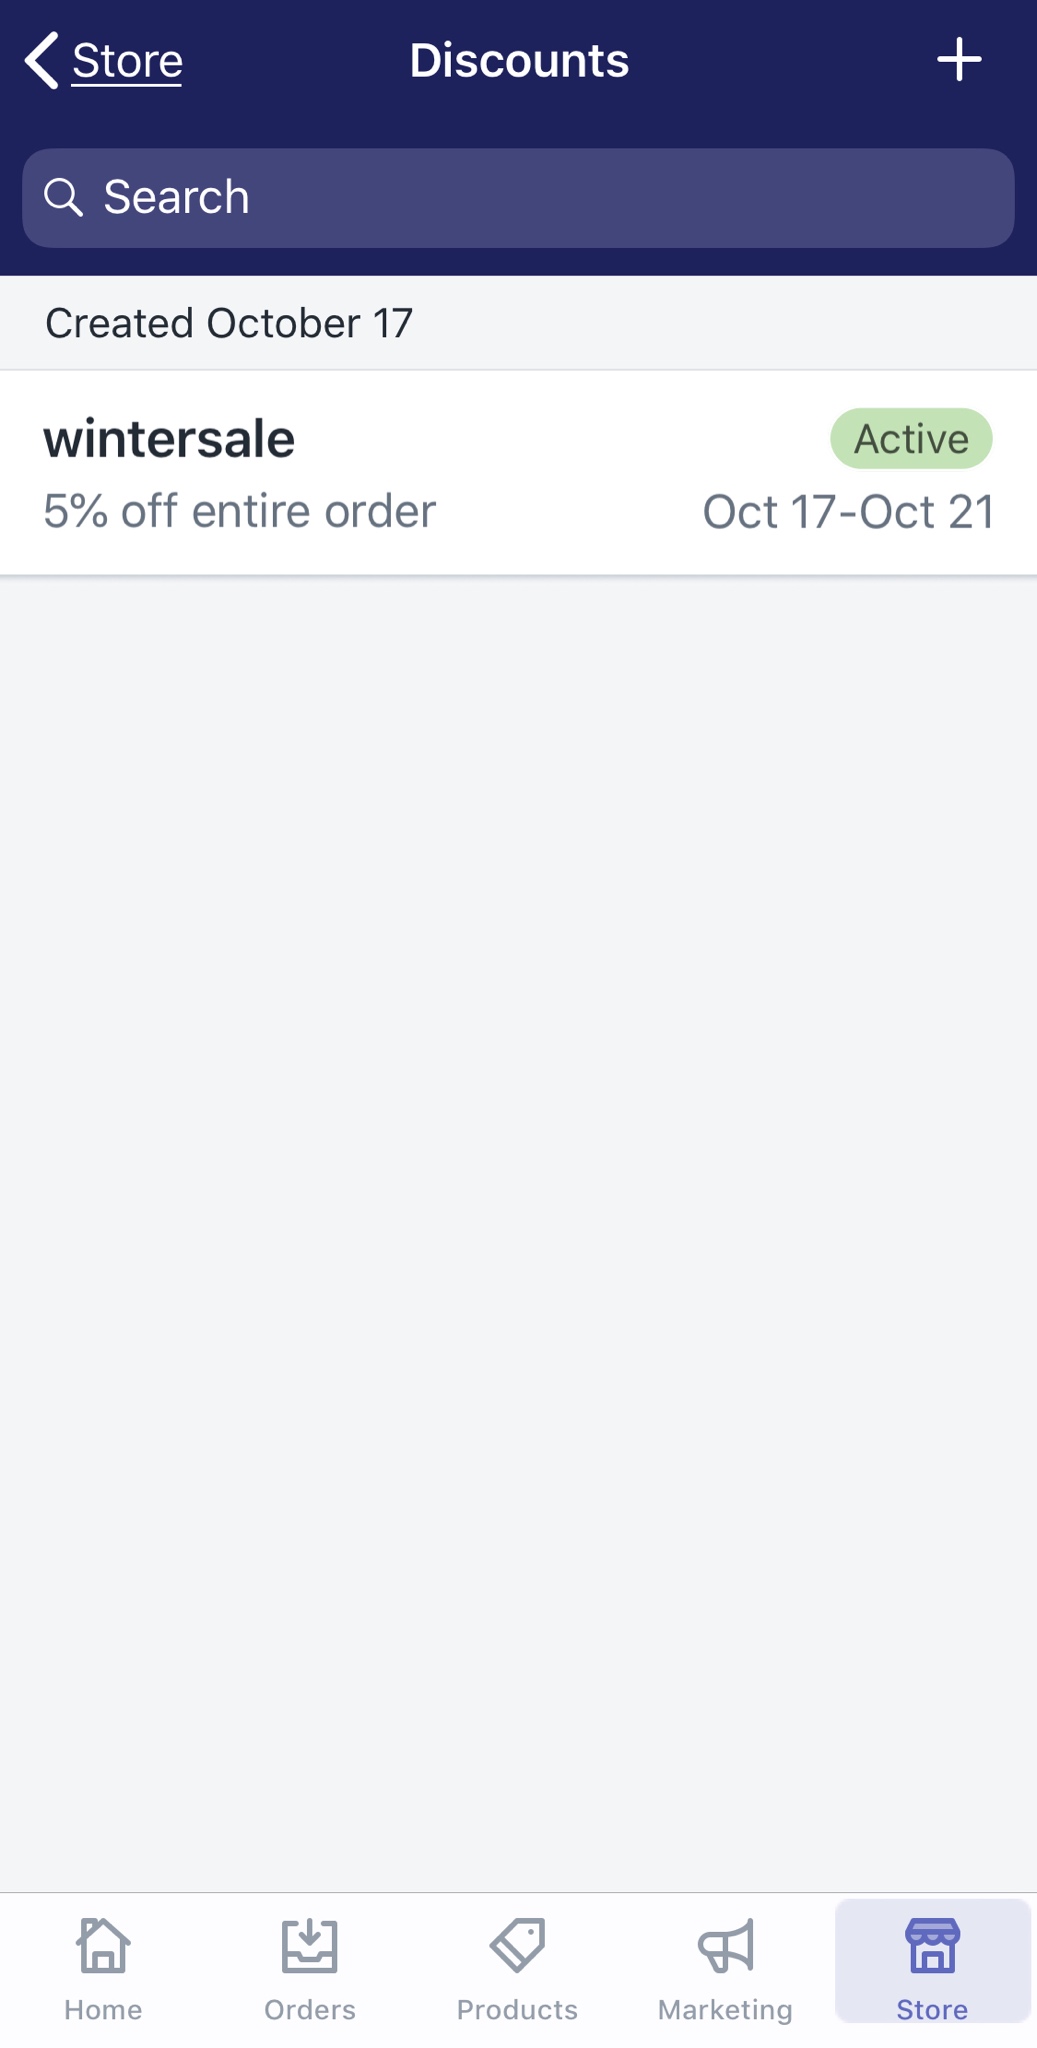
- Step 1: Go to Discounts
After opening the Shopify app and logging in your account, you can find the Store tab at the bottom right corner of your “iScreen” with ease. Then, tap Discounts with a percentage-badge icon in the menu.
- Step 2: Tap “+” to create a new discount
In the Discounts section, take a look at the top right corner of the screen, you will see a “+” icon. Tap on it and you will create a new discount.
- Step 3: Configure the new discount’s attributes

In the Create discount section, there are several areas with different attributes you need to set up for your new discount.
Discount code: In here, you can set up a new code that your customers will use to enter your discount at Checkout. By tapping in the blank field, a Generate code button will appear on your virtual keyboard. It will help you create new discount code automatically.
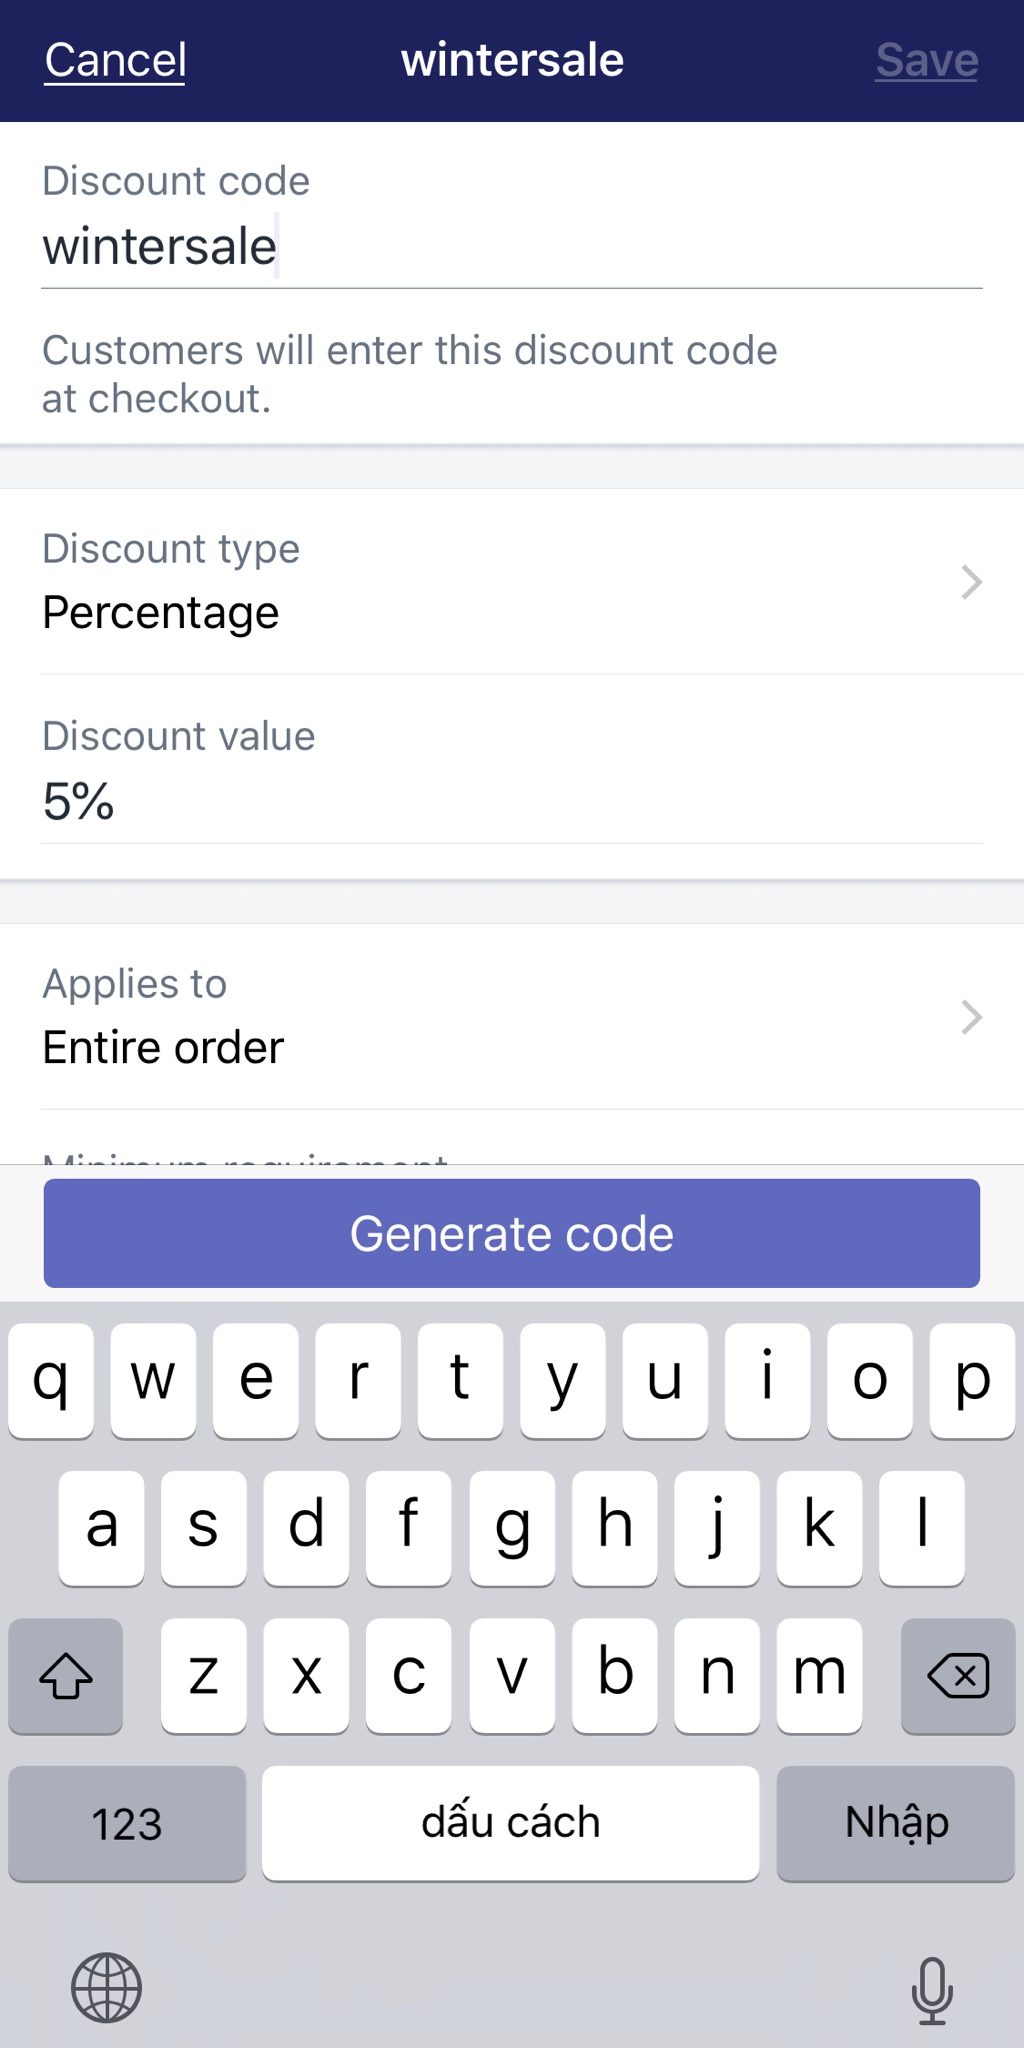
Options: In Discount type, you can choose the type of discount. Select Percentage or Fixed amount, and put the value of discount you want to create in the Discount value blank box.
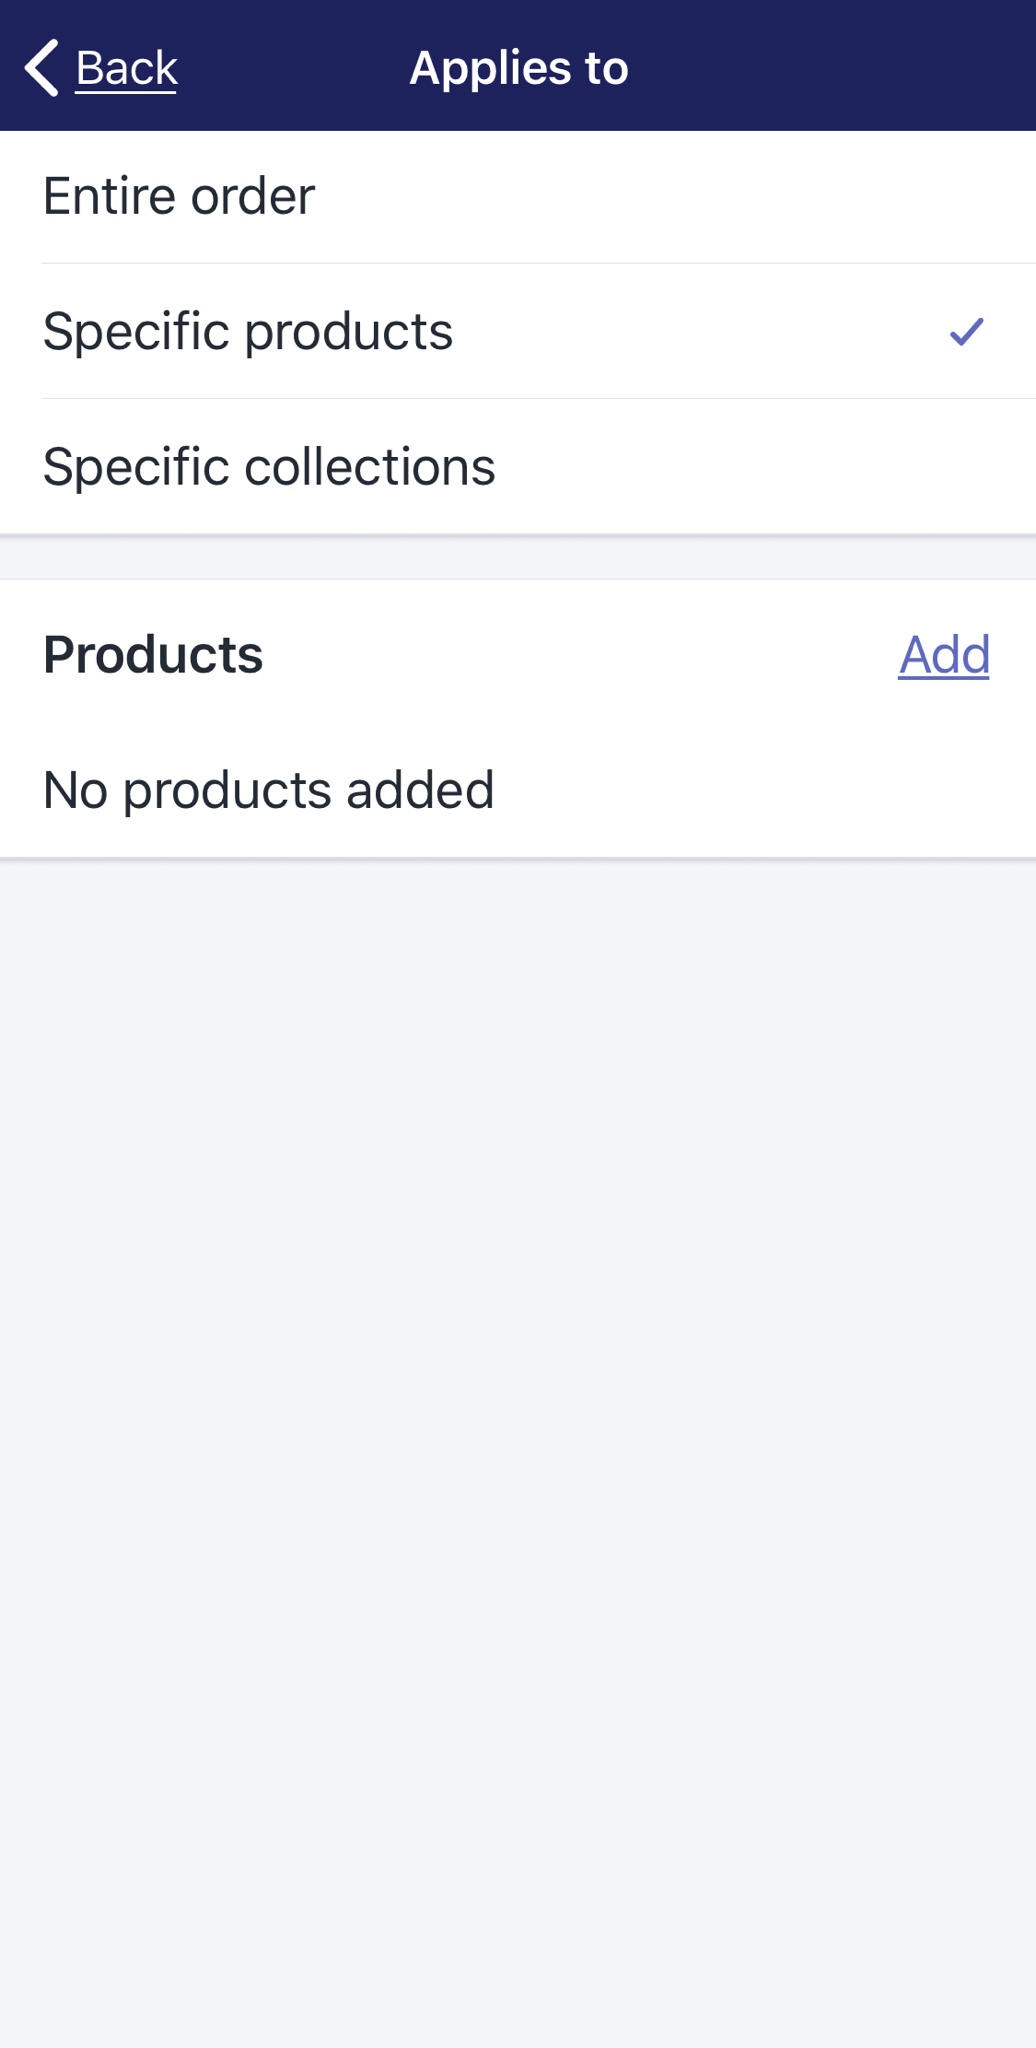
Applies to: This field helps you set the product scale, in which your new discount is available. You can choose Entire order to apply the discount for every product in your store. With Specific collections or Specific products option, you need to tap Add and select particular products you want.
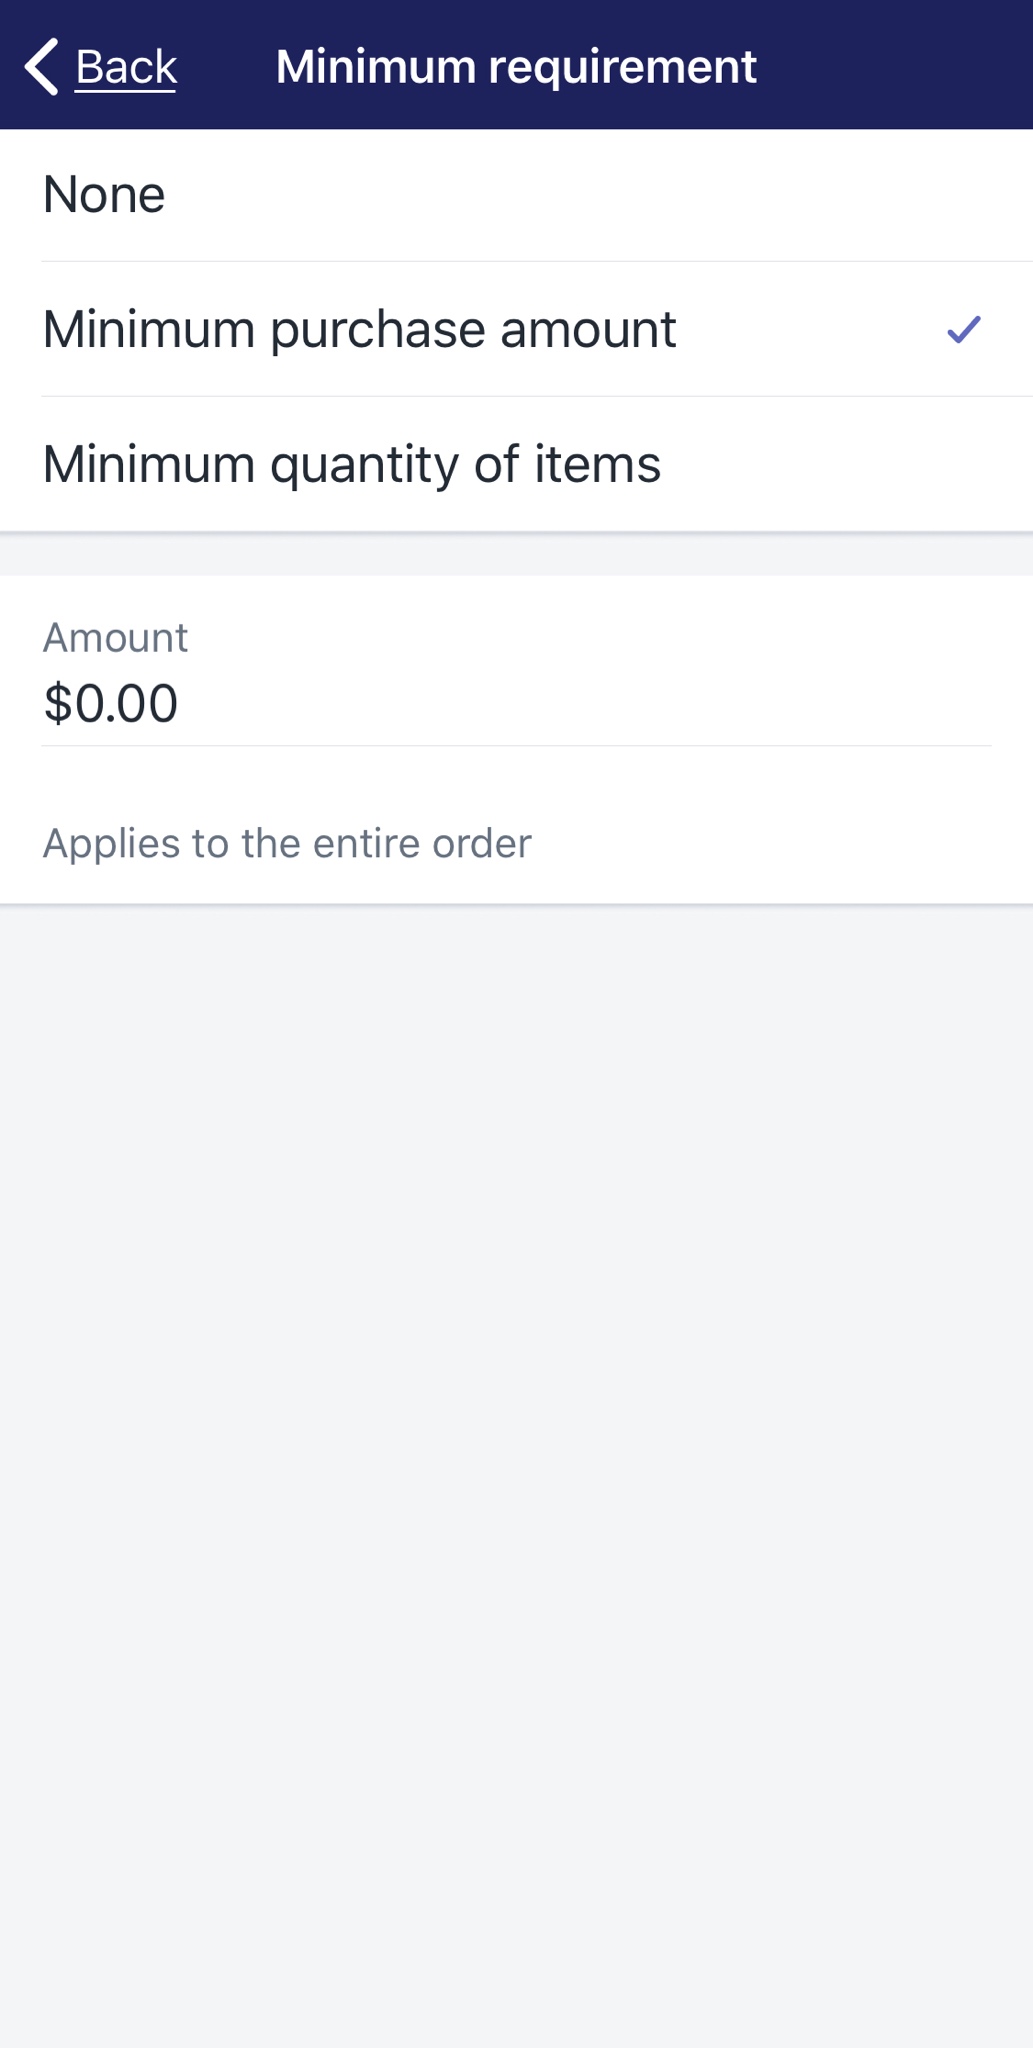
Minimum requirement: With this field, you can make a threshold of payment that your customers must exceed to activate the discount code. There are two ways to create a minimum requirement, by purchase amount or by the number of items. You need to input the value of the minimum requirement in one of those blanks.
Customer eligibility: In this field, you can select particular individuals or groups of customers whom the discount will be available for. If the group of customer is not shown in the dropdown list, you need to create customer groups as you want. If you select Specific customers, a list will show you all customers and their email addresses. In case some customers’ email addresses are not included in your data, other contact information will appear instead, such as phone numbers.

Usage limits: In order to limit the usage of your discount, you need to choose one or maybe both options in this section.
You can Limit the number of times this discount can be used in total among all eligible customers, after putting the number of times in the blank. No matter how many customers use the discount, or how many times each eligible customer can use. You can also Limit to one use per customer.
Active dates: In this field, you can set the date when your discount becomes available. If you just want to make the discount active only in a period of time, then turn on Set end date option and make a deadline using an in-app calendar.
- Step 4: Tap Save
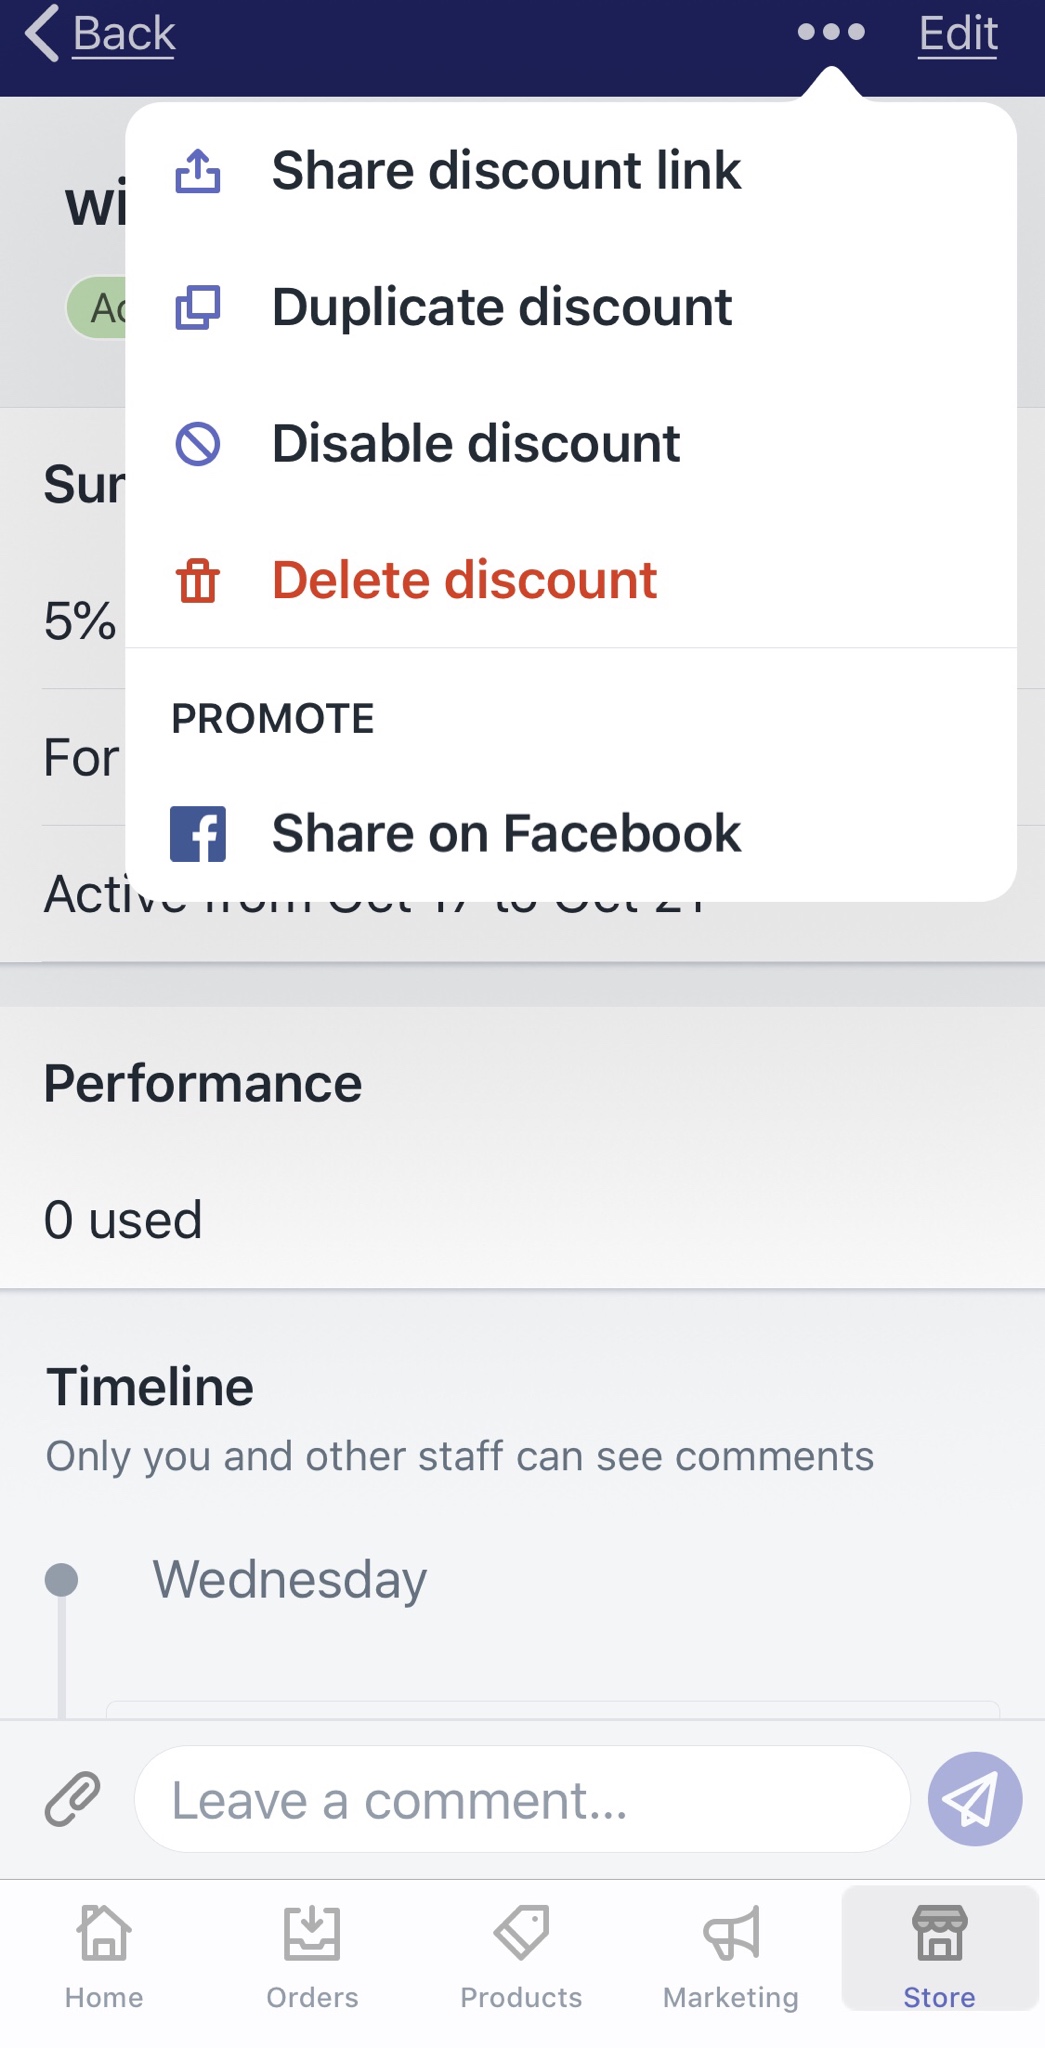
After setting details and attributes of the new discount, you will see it on the discount list. If you want to check the details of the discount again, tap on it, the specific discount section will appear right after. You can also configure those details by tapping on Edit. Right next to Edit, there is a “…” icon, tap on it, and Shopify will give you some options to share your new discount to customers.
To create a fixed value or percentage discount on Android (Click here)
- Step 1: Go to Discounts
After opening the Shopify app and logging in your account, you can find the Store tab at the bottom right corner of your “smartscreen” with ease. Then, tap Discounts with a percentage-badge icon in the menu.
- Step 2: Tap “+” to create a new discount
In the Discounts section, take a look at the top right corner of the screen, you will see a “+” icon. Tap on it and you will create a new discount.
- Step 3: Configure the new discount’s attributes
In the Create discount section, there are several areas with different attributes you need to set up for your new discount.
Discount code: In here, you can set up new codes that your customers will use to enter your discount at Checkout. By tapping in the blank field, a Generate code button will appear on your virtual keyboard. It will help you create new discount code automatically.
Options: In Discount type, you can choose the type of discount. Select Percentage or Fixed amount, and put the value of discount you want to create in the Discount value blank box.
Applies to: This field helps you set the product scale, in which your new discount is available. You can choose Entire order to apply the discount for every product in your store. With Specific collections or Specific products option, you need to tap Add and select particular products you want.
Minimum requirement: With this field, you can make a threshold of payment that your customers must exceed to activate the discount code. There are two ways to create a minimum requirement, by purchase amount or by the number of items. You need to input the value of the minimum requirement in one of those blanks.
Customer eligibility: In this field, you can select particular individuals or groups of customers whom the discount will be available for. If the group of customer is not shown in the dropdown list, you need to create customer groups as you want. If you select Specific customers, a list will show you all customers and their email addresses. In case some customers’ email addresses are not included in your data, other contact information will appear instead, such as phone numbers.
Usage limits: In order to limit the usage of your discount, you need to choose one or maybe both options in this section.
You can Limit the number of times this discount can be used in total among all eligible customers, after putting the number of times in the blank. No matter how many customers use the discount, or how many times each eligible customer can use. You can also Limit to one use per customer.
Active dates: In this field, you can set the date when your discount becomes available. If you just want to make the discount active only in a period of time, then turn on Set end date option and make a deadline using an in-app calendar.
- Step 4: Tap Save
After setting details and attributes of the new discount, you will see it on the discount list. If you want to check the details of the discount again, tap on it, the specific discount section will appear right after. You can also configure those details by tapping on Edit. Right next to Edit, there is a “…” icon, tap on it, and Shopify will give you some options to share your new discount to customers.
Summary
Creating a fixed value or percentage discount may have (quite) a lot of steps. But thanks to Shopify’s simple interface, it would be much easier when you practice. For more instruction posts like this, check out our tutorials on Promoting Marketing.


