
4 Steps to Create a Custom Manual Payment Method on Shopify

If your customers don’t want to make payment using the credit cards, you can set up the manual payments to help them make purchases. The pros of using this payment method is that you won’t be charged transaction fees and you can approve the orders after you receive the payment. There are two common approaches to manual payment, use a suggested manual payment method or create a custom payment method on Shopify. I have shown the first one before that I will focus on how to create a custom manual payment method in this writing.
Featured article: Shopify Free Trial 2023: Unlock 3, 14, 30, 60 & 90 Days for your Store
How to create a custom payment method
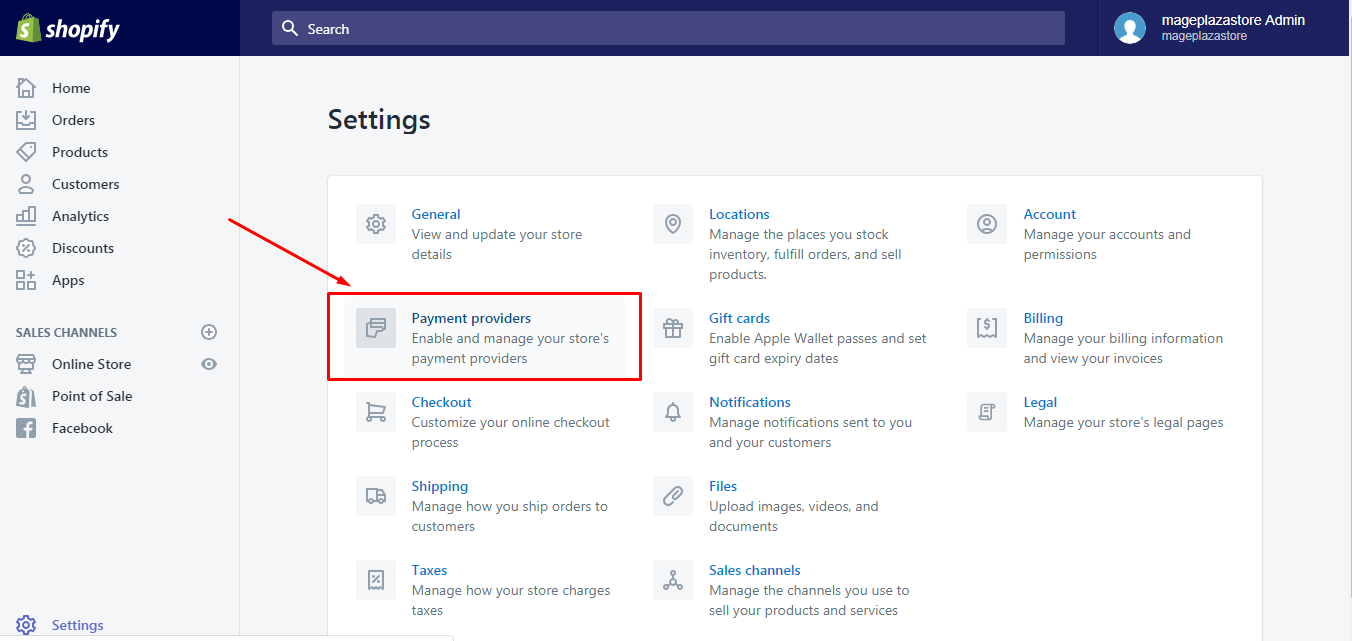
Step 1: Click on Payment providers
At the end of the admin page, press on the gear icon which is Settings and go to Payment providers.
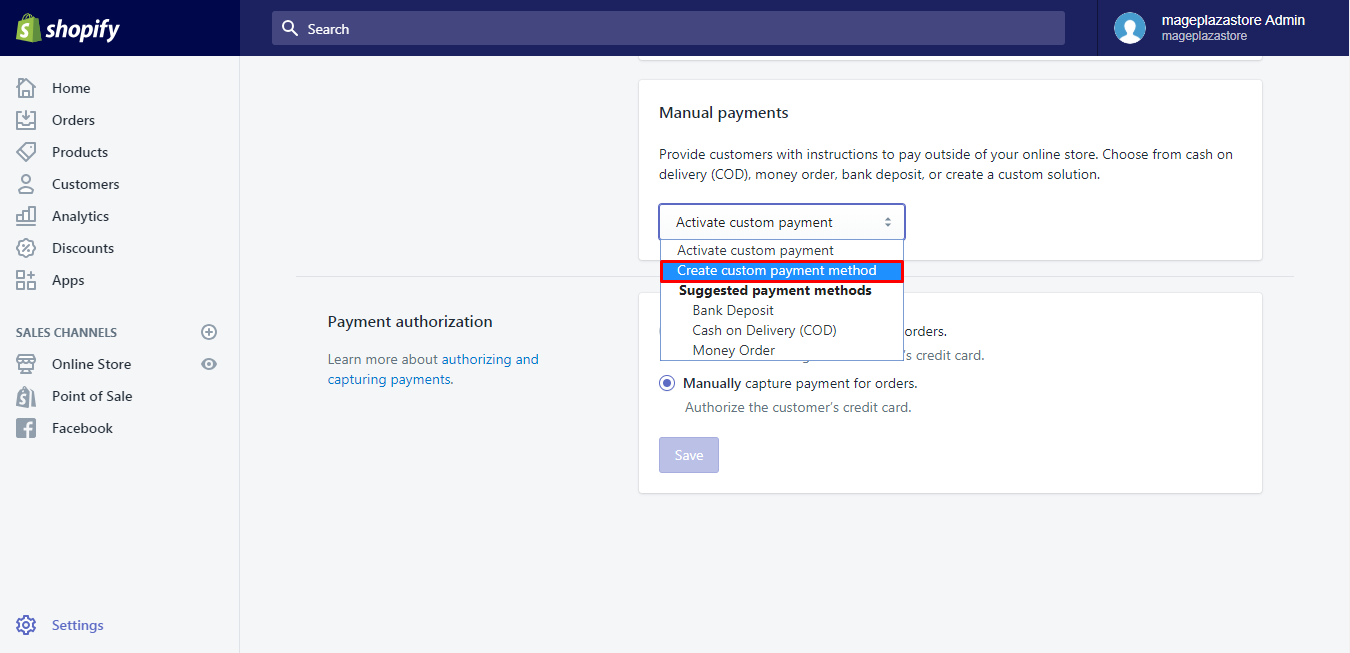
Step 2: Choose Create custom payment method
There are two parts in the Payment providers, Accept payments and Payment authorization. Drag down to the Manual payments section and select the Create custom payment method in the drop-down Activate custom payment list.
Step 3: Add the name and instructions
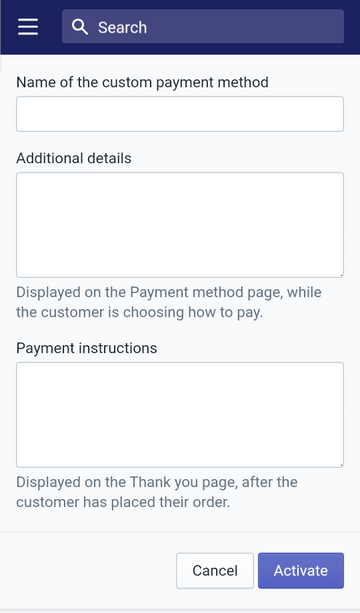
Detailed settings for the payment method will appear, including the Name of the custom payment method, Additional details and Payment instructions. You have to fill in the spaces below it, especially, the name and the guideline cannot be skipped. The instructions should be given in a clear and easy-to-understand way to help your customers know how to pay for their orders using this method.
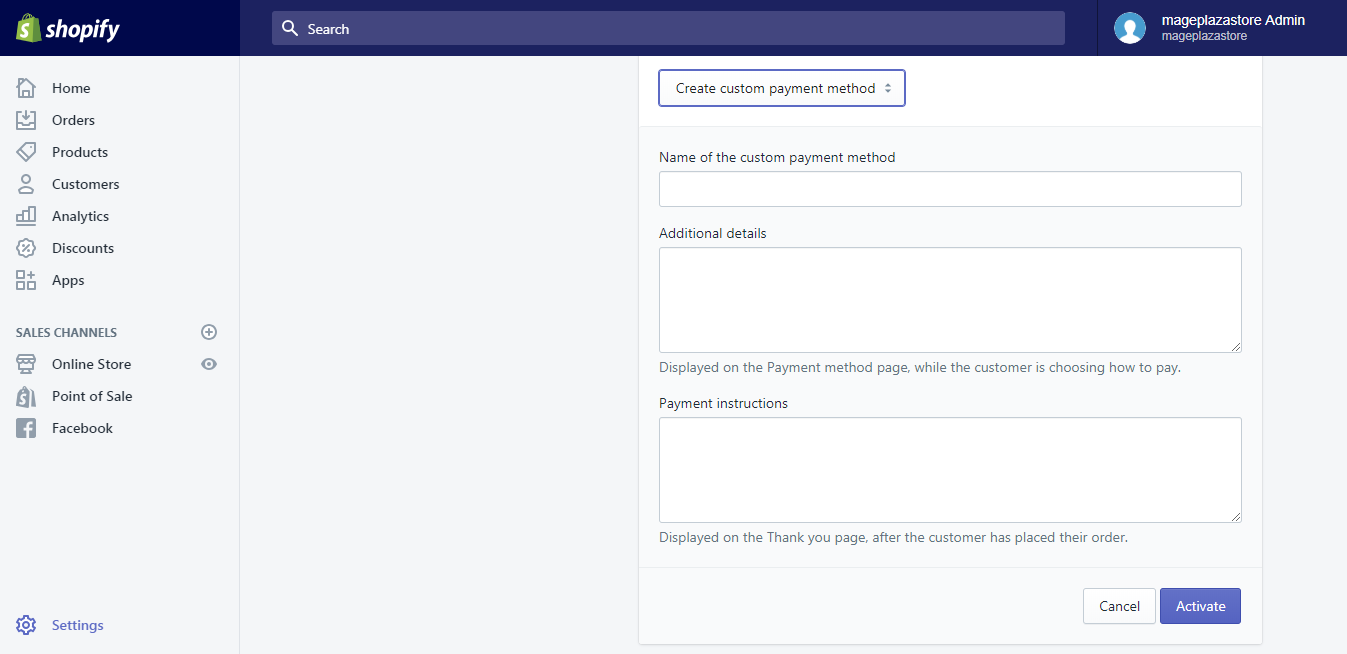
Moreover, the name you use for the payment cannot be the same as the following ones:
- Bank deposit
- Cash
- Cash On Delivery (COD)
- Custom
- External Credit
- External Debit
- Gift Card
- Money Order
- Store Credit
Step 4: Activate custom payment method
If you have completed all the above steps, click on the Activate button at the end of the settings to finish.
To create a custom payment method on iPhone (Click here)
-
Step 1: Select Settings Get access to the Shopify app and head to
Store. Next, press on theSettingsright above theSupport. -
Step 2: Choose Payments Look for the
Paymentsunder theStore settingssection. -
Step 3: Tap on Create custom payment method Find the
Manual paymentsat the end of theAccept payments. There is a short introduction of this payments method and aActivate custom payment methodbox. Click on this box and selectCreate custom payment methodat the second place of the list. -
Step 4: Enter the name and guideline Add the needed information into the spaces. You can leave the
Additional detailsblank but you have to complete the others, which areName of the custom payment methodand thePayment instructions. -
Step 5: Click on Activate To end the process, press on the blue
Activatebutton.
To create a custom payment method on Android (Click here)
-
Step 1: Select Settings Log-in to your account on Shopify app and select
Storeat the bottom bar. After that, tap on theSettings.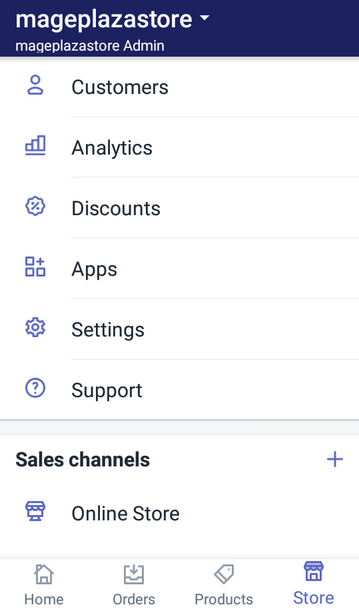
-
Step 2: Choose Payments If you have clicked on the
Settings, a list of options will appear on your screen that you have to press on thePaymentsin theStore settingssection.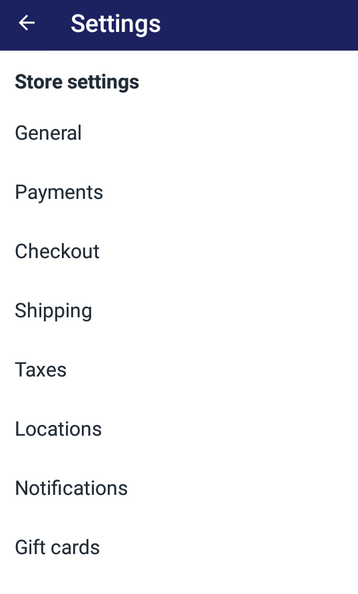
-
Step 3: Tap on Create custom payment method Under the
Payment providerstitle, you will see theAccept paymentsthen scroll down until you find theManual paymentssection. After that, select theCreate custom payment methodin the drop-down menuActivate custom payment.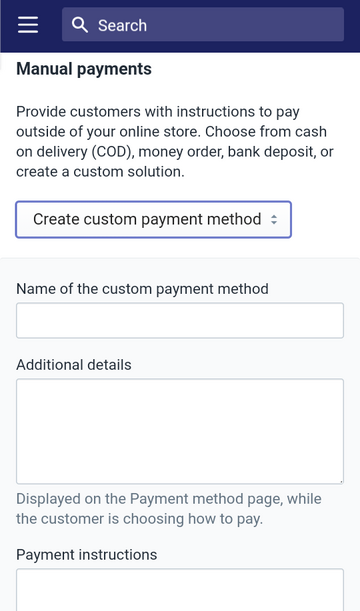
-
Step 4: Enter the name and guideline Put in the information for name and instructions for the payment method. Remember to check with the bank or the delivery services to ensure your writing for instruction is correct that the customers can follow it to complete the orders.
-
Step 5: Click on Activate To record all changes and allow the use of the payment method, tap on the
Activate.
Conclusion
To sum up, I have given you the step-by-step process and the illustration images of how to create a custom payment method on Shopify. I also add some notes about the name and instructions that you should pay attention to when setup the custom manual payment. Hope that you will appreciate my effort and enjoy the writing.
Related Posts:
- Activate an Alternative Payment Method on Shopify
- Use a Suggested Manual Payment Method on Shopify
- Deactivate a Manual Payment Method on Shopify
- Change Shopify Payment Method


