
Change Image's Orientation on Shopify in 4 Easy Steps

You may be familiar with the term editing image, which allows you to change some properties of the original file. There are programs and applications that let the users change the photo totally, can be named as Photoshop, or Illustration. However, it is the professional level, for amateur, they can still make some simple adjustment, like enhancing or cropping for example, by using basic tools. For Shopify shop owners, the system provides them will this feature that you can take advantages from it. In previous articles, I have already mentioned some kinds, I will show you how to change an image’s orientation on Shopify in this writing.
Related Posts:
- How to Add text to an image on Shopify
- How to Resize an image on Shopify
- How to Draw on an image on Shopify
- How to Add a Product Image on Shopify
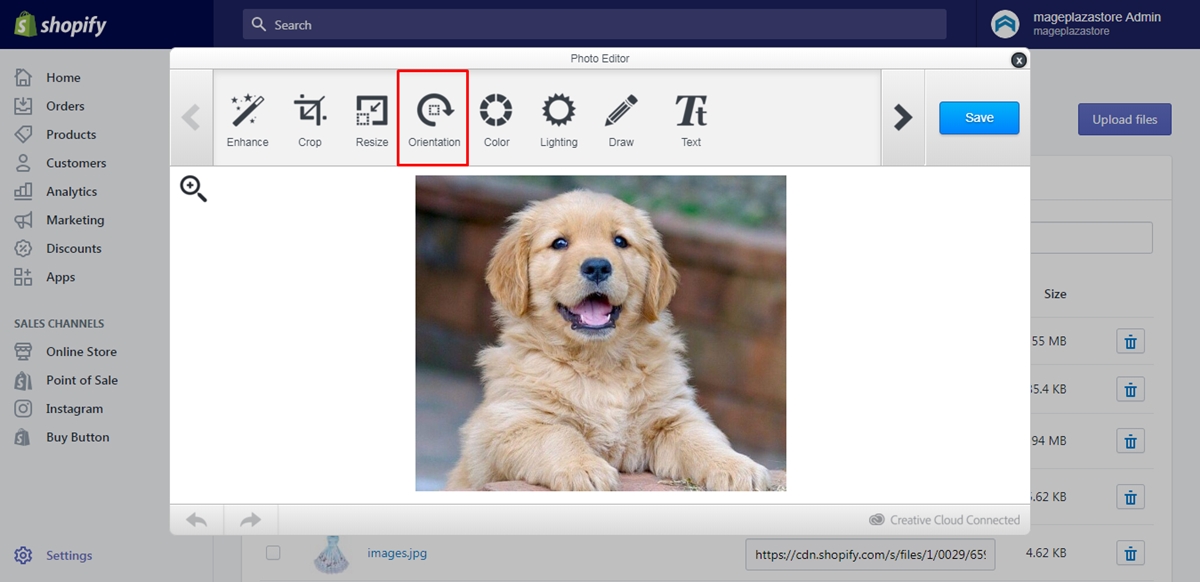
Step 1: Select Orientation
From the admin page on Shopify, you have to go to Settings first. You will see the list of Settings afterward then press on the Files which stays on the second column out of three. All of the images you have on Shopify will appear on the screen that open one of them. The full size of the picture will appear and there is an Edit button under it that you need to click on that. After that, select Orientation to move on to the next step.
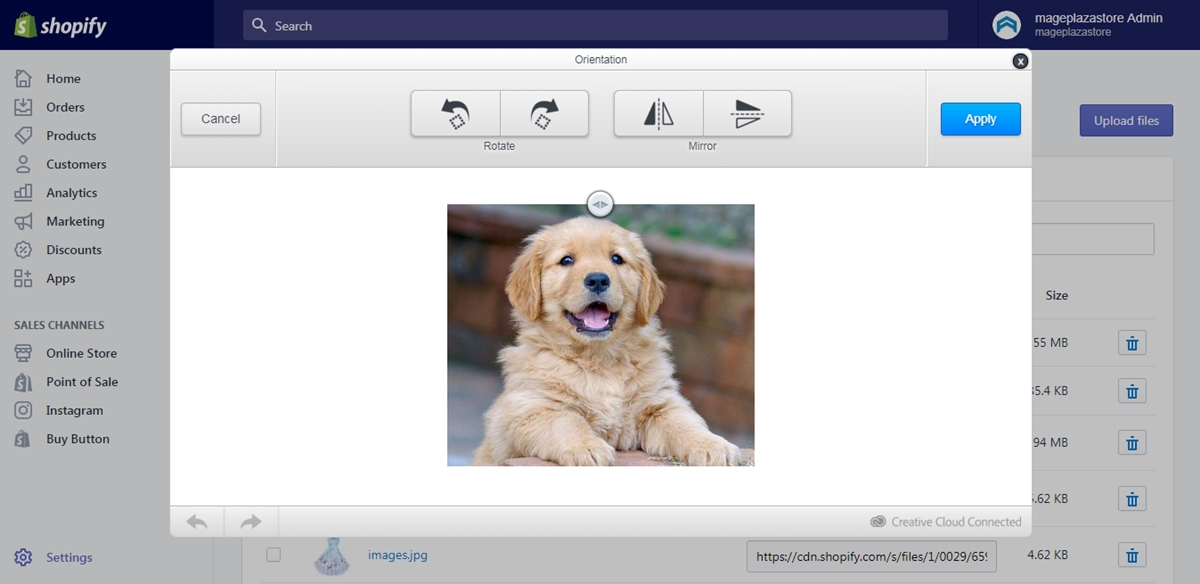
Step 2: Make changes
On the top bar of the Photo Editor dialog box, there are two types of Orientation settings, Rotate and Mirror
-
If you want to turn the picture clockwise, select the
Rotatebutton with the arrow to the right. Meanwhile, choose the one to the left to turn it counterclockwise. -
If you would like to flip the image vertically or horizontally, click on one of the two buttons of the
Mirror. -
You can hold and drag the arrow above the photo to tilt it left or right within its frame. There is a note that the part that is out of the frame, or in the black zone will be cropped from the image. Hence, you should consider it carefully before making the decision because it may affect the content of your photo.
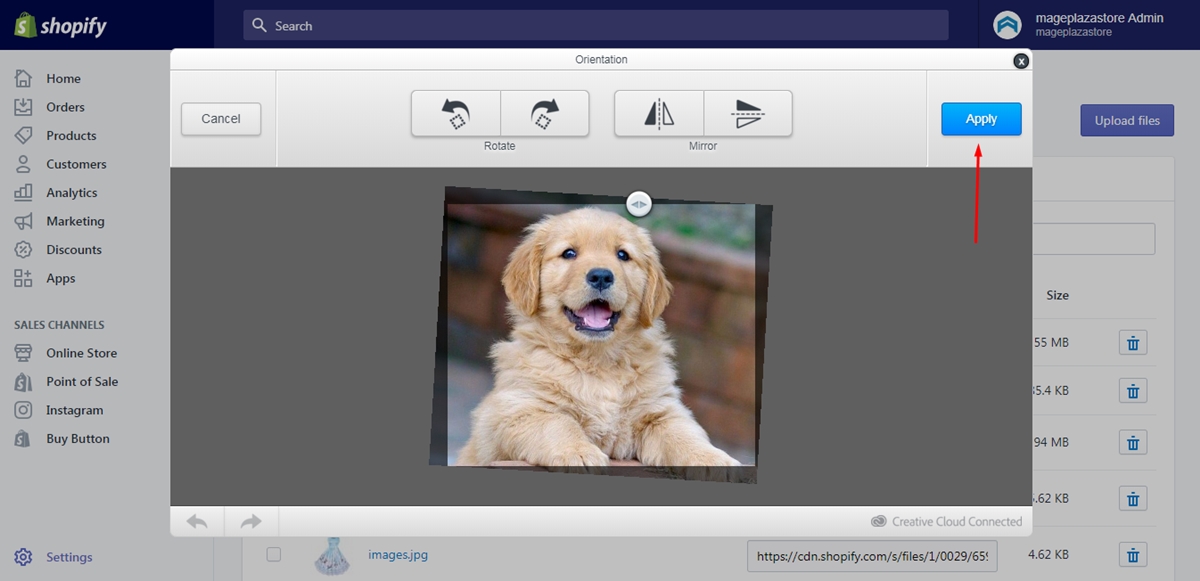
Step 3: Choose Apply
If you are satisfied with the editing, press on the blue Apply button, next to the Mirror option on the top bar of the box.
Step 4: Click Save
You may think that after selecting Apply, your image is already changed and saved. However, it’s not, it just the temporary version for you to check whether it reaches your expectation or not. Therefore, do not forget to click on Save to store your adjustment and end the process.

Conclusion
To conclude, I have provided you with instructions on how to change an image’s orientation on Shopify. There are just four steps in total that it won’t take much of your time to practice. Moreover, illustrated photos and note are also included in the topic that you can compare yours to the example to determine whether you do it correctly or not. Therefore, I hope you find it interesting and informative to read this writing, check out our posts on Productivity tools for more.


