How to Add a Bank Account to Pay for Your Invoices on Shopify
Adding a bank account to pay for your invoices is a necessary protocol to run an online store on the Shopify platform, especially when you have the Shopify Plus plans. Shopify provides store owners from all around the world different payment plans with diverse benefits. Some benefits from Shopify Plus plans you may want to know customization at a higher level, more staff accounts for larger businesses, no need for coding knowledge thanks to a more friendly interface, etc.
Whatever the plan you choose, the rate of each plan will be paid via the account you register in Shopify system.
Please keep it in mind that verified bank accounts are available to Shopify Plus plans only. Therefore, if you don’t choose the plan, you cannot follow this instruction.
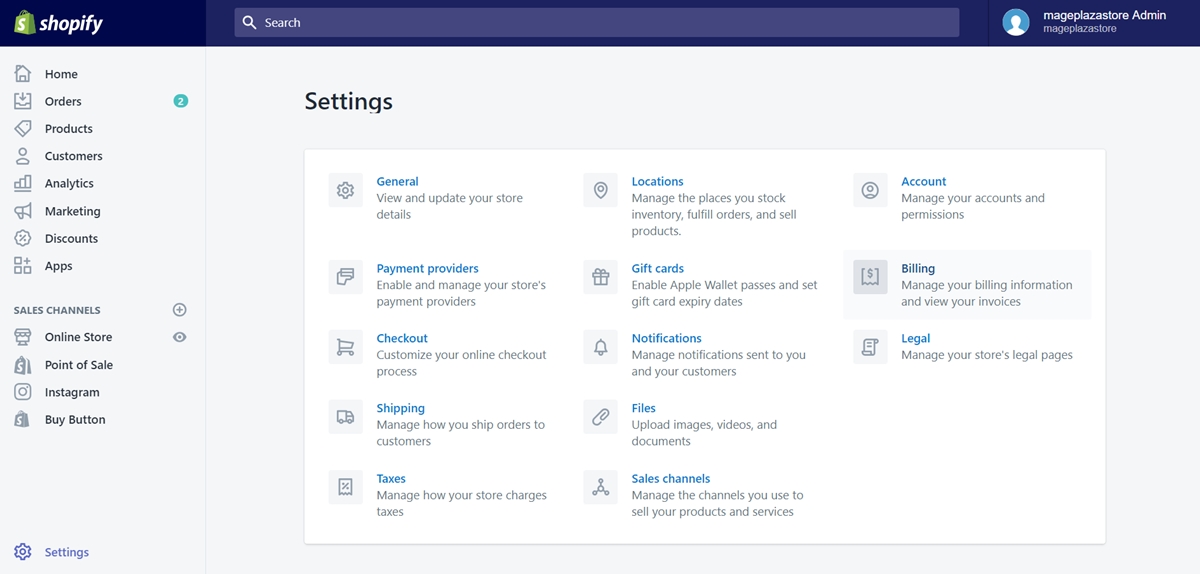
Step 1: Go to Settings, select Billing
After you are in the Shopify admin interface. Make a click on Settings option with a gear icon. You can find it at the bottom left corner of the interface.

Then, click on Billing.
Step 2: Click Add bank account
In the Billing information section, click on Add bank account button.
Remember that this procedure only works if you register Shopify Plus plans. Therefore, if you don’t, this instruction can’t be applicable.
Step 3: Enter billing information of the new bank account
After deciding to add a new bank account, you need to provide Shopify some information regarding the new bank account. You need to enter the account and its routing numbers that you want to verify. Some other details you also have to provide are the account owner’s name, and type of the account, Personal or Business.
Step 4: Click Start verification
Once you input all necessary information, you can click Start verification to proceed with the next steps.
Step 5: Confirm the deposits
After 1-3 working days, Shopify will deposit two small amounts (less than $1.00) to your bank account. Then, you need to input the amount of each in two blank fields in the Billing information section to confirm them.
Step 6: Make your verified account your active payment method
If you want to set the verified account as your active payment method, give a tick in the box of Make this bank account my active payment method.
Step 7: Finish verification
When you complete entering all required information, click Finish verification to confirm your sequence.
If your verification succeeds, the bank account you registered will be shown as Active. From now on, this account will be the prior account used to pay for your invoices.
In case your verification fails, then you will receive a message stating that verification for your bank account was not successful. In this case, you should contact your bank to learn more about issues you may have before trying the procedure for the second time.
Summary
Adding a bank account to pay for your invoices seems to require (quite) lots of steps. In order to make the procedure smooth without obstacles, make sure that you input the bank account’s information correctly. If you can’t verify your bank account, don’t hesitate to contact the bank for more instruction.
Related Posts:


