
6 Steps to Add a Drop-Down Menu from the Main Menu on Shopify

When selling online, if you offer a large number of kinds of products to your customers, you will want to group them in categories to help you manage it as well as help the consumers to shop easier. For example, you want to divide your products into 2 types, for men and for women, you can use a drop-down menu to do that and this is also the topic of this writing. In particular, I will show you the process of how to add a drop-down menu from the main menu on Shopify.
Related Posts:
- How to edit a menu item on Shopify
- How to change the display order of menu items on Shopify
- How to remove a menu item on Shopify
- How to access an app’s menu on Shopify
- 54+ Best Shopify Mega Menu Themes
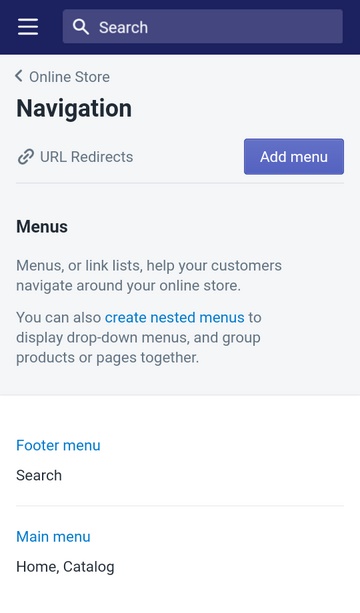
Step 1: Select Navigation
Sign in to your account on Shopify and choose Online store under the Sales channels section. The options list for the Online store will appear that click on Navigation, which is the fourth one.
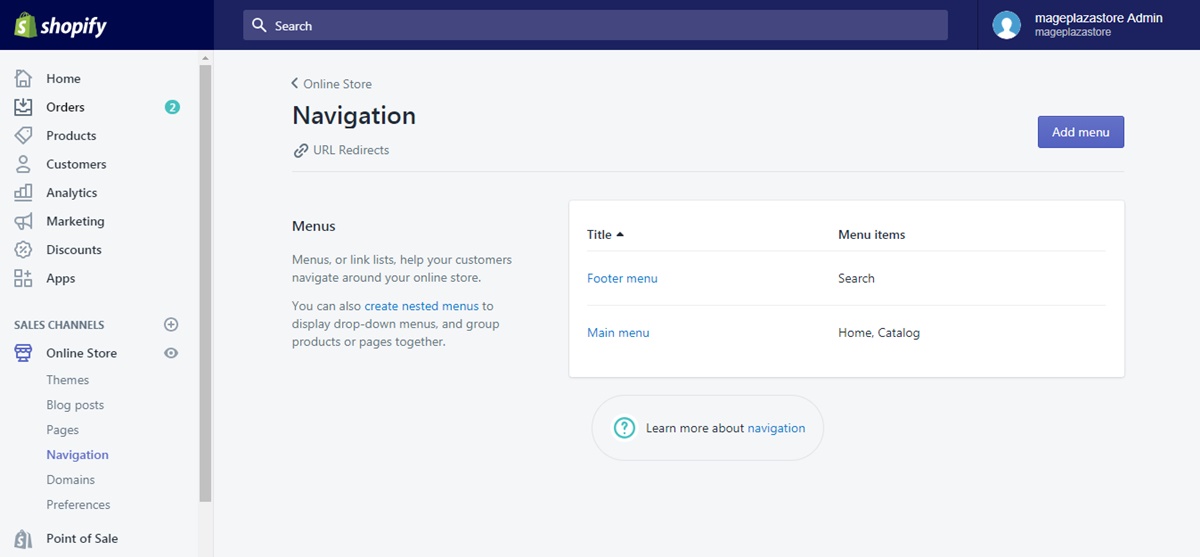
Step 2: Press on Main menu
In the Navigation, you will see the Menus part and your menu list. Find the one with the title Main menu then press on it.
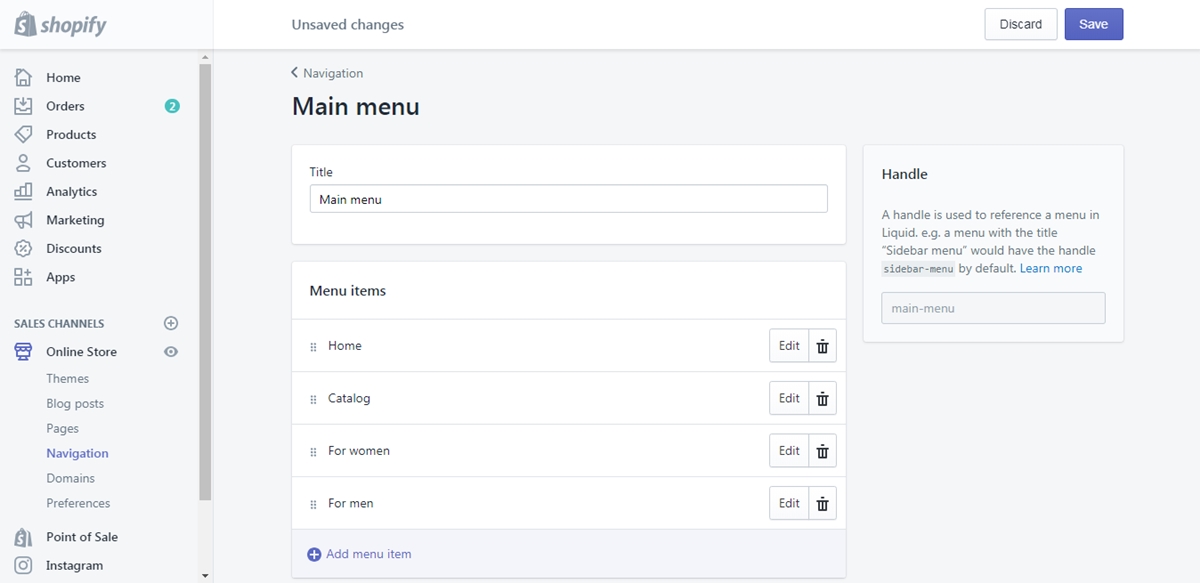
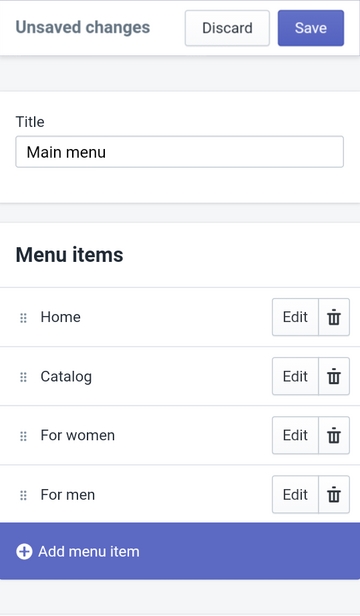
Step 3: Choose one item to be the header
You can select an item from your list to be the name of your drop-down menu or create the new one by click on Add menu item. Another dialog box will appear that fill in the Name and Link and choose Add respectively. If you don’t want the header to have a reference, you can add # in the Link field.
Step 4: Add menu item
If you use the new header for the drop-down menu, you can do the same to add items for that menu. Select Add menu item and put in the title as well as the destination for the link.
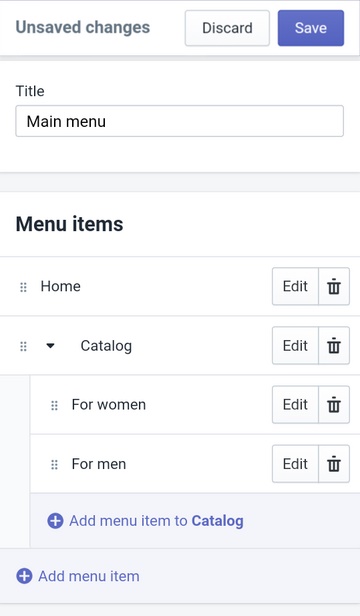
Step 5: Move the item
Hold the ⋮⋮ icon and drag the item to the place under the header of your menu. For example, my menu title is Catalog and I want it consists of 2 options For women and For men. I will follow the instruction and this is the result:
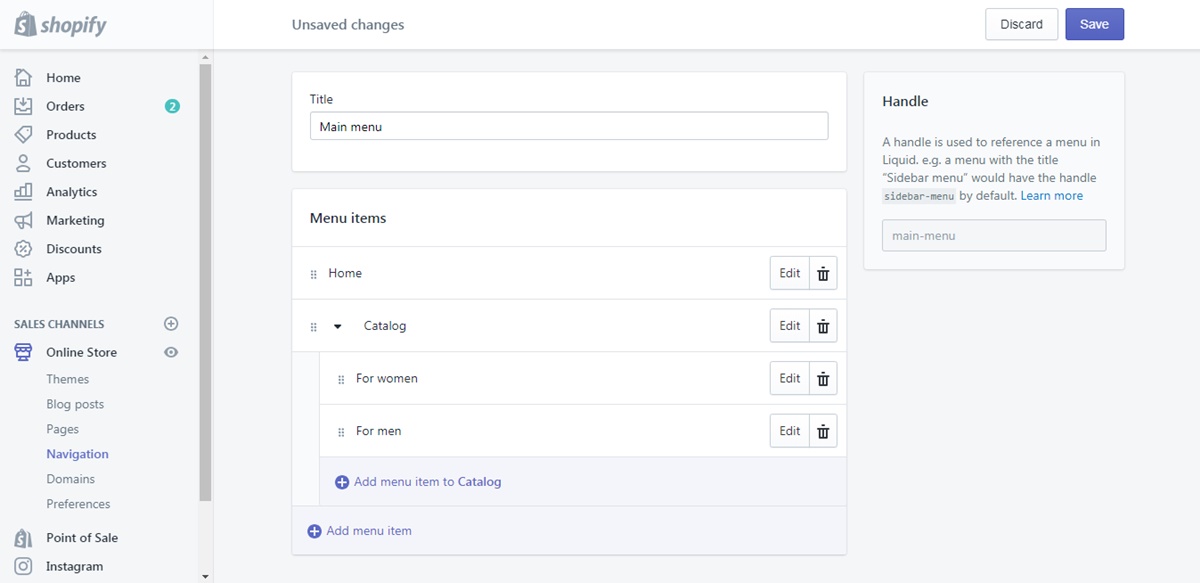
Step 6: Click Save menu
At the end of the page, you can see the Save menu button that press on it to store all changes and end the process.
To add a drop-down menu from the main menu on iPhone (Click here)
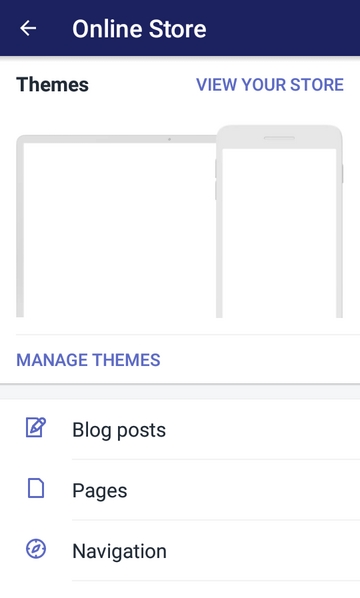
- Step 1: Select Store and Online store
Go to Store from your admin display. Next, press on the Online store which is right below the Sales channels section.
- Step 2: Tap Navigation
Look for the Navigation in the settings list of the Online store, it stays at the fourth place and also under the Pages.
- Step 3: Click on Main menu
In the detailed page of Navigation, you will see the list of all of the menus on your store. Tap on the one named Main menu.
- Step 4: Pick an item to be the title
Below the Title as Main menu, you can see Menu items section which consists of all the items in the Main menu. Decide one to be the header of the drop-down menu or add a new item instead.
- Step 5: Include items in the menu
Choose Add menu item to create a new item for the drop-down menu. If you click on it, a new box will appear that you have to enter the name and the link for the item. Instead of picking a destination from the list, you can put in # to mark that there is no reference for this item.
- Step 6: Change the position of items
Tap on the ⋮⋮ symbol and move it to the nest under the title of your drop-down menu. Once you change the place of an item, you will see that there is a 🔻 icon next to the header.
- Step 7: Choose Save menu
After completing all these above steps, select Save menu to finish and help the system record all your adjustment.
To add a drop-down menu from the main menu on Android (Click here)
- Step 1: Select Store and Online store
Get access to Shopify app on your smartphone with the log-in account. Choose Store and Online store respectively.
- Step 2: Tap Navigation
On the top of the Online store settings, it is the Themes section and the preview of your store theme. Scroll down and find the option named Navigation.
- Step 3: Click on Main menu
All of your menus will appear in the Menus that you have to press on the one with the title as Main menu.
- Step 4: Pick an item to be the title
Decide a name for your menu header by choosing one from the items list. If you want to put in a new title, you can select Add menu item and enter the needed information in the boxes.
- Step 5: Include items in the menu
You have to choose Add menu item again but this time, you will create items for the menu you just named. Fill in the Name and Link respectively then tap Add. You need to complete these two details but there is the case that you don’t want to include any reference to the item, you can enter # in the Link instead of choosing a destination.
- Step 6: Change the position of items
Press on the ⋮⋮ symbol and drag the item to spot under the name of your drop-down menu. After you’re done, a 🔻 will appear beside the drop-down title that if you click on it, it will show/hide the components of the menu.
- Step 7: Saving
When you make any adjustment, the system will remind you of Unsaved change then remember to tap on Save at the top of the display or scroll down to the end of the page and select Save menu.
Conclusion
To conclude, this writing is the instruction of how to add a drop-down menu from the main menu on Shopify. You can change the default menu for most themes that you can apply what you’ve learned in this topic regularly. Hope that you enjoy this post and find it helpful to you.


