
How to Connect Mailchimp to Shopify

Connecting Mailchimp to Shopify is nowadays not unfamiliar to Shopify online store runners and users thanks to its convenience and quickness in generating targeted email marketing campaigns. Unfortunately, no longer does the Mailchimp app exist in the Shopify app store for some reason. Yet for users, no worries, there are still plenty of other options to get Mailchimp and Shopify stores connected including the employment of 3rd party integrations that can enable 2 platforms connection.
In this How To Connect Mailchimp To Shopify writing today, you are going to go through some services that offer Mailchimp and Shopify integration and some basic information that any user should be aware of. If you already have an account with MailChimp, follow the instructions below to get your Shopify store connected to Mailchimp. However, you haven’t, just create one and be ready to go.
Related Posts:
What is Mailchimp?
Mailchimp is a marketing automation platform and a marketing service regarding emails from the US. This all-in-one marketing platform brings in many tools for you to focus on target customers, build your audience, and make your brand more attractive. With Mailchimp, you can generate a lot of eye-catching, branded emails that make you look professional. By doing that, you are engaging your audience with email marketing and growing your business.
According to many studies, email marketing is one of the best ones that offer the highest return. That’s what Mailchimp for! It comes with ready-to-use templates and a drag-and-drop page builder. Also, it is famous for email automation which allows business runners to easily reach the right person at the right moment. Creating personalized campaigns is a must if you want to boost sales and the best way may be to turn insights into action and send marketing messages that match people’s needs.
Things to be aware of when adding Mailchimp code to Shopify
If you are trying adding Mailchimp code to Shopify, then you should notice some following points.
We all know that adding Mailchimp’s site code to your Shopify store will help connect it to Mailchimp. However, this way gives you permission to use popup forms and Google remarketing ads but does not allow you to access other e-commerce features such as reports and recommendations.
If you are familiar with custom coding, then this advanced task is recommended. Yet if you are in need of assistance, please contact Mailchimp Experts.
Ways to Connect Mailchimp with Shopify store
To connect Mailchimp with your Shopify store, you have not only one but several solutions. Now let’s take a look at these options to find the one that works for you.
- Add Mailchimp site code to Shopify
Mailchimp comes with a custom code that you can embed on your Shopify store to activate some specific features including popup forms and retargeting ads.
- 3rd Party integrations
Third-party integrations, such as Zapier, ShopSync, and Automate.io, support most of our available e-commerce tools, including syncing store data, triggering automation, and so on.
The table below gives you information on what platform supports what feature.
| ShopSync | Zapier | Automate.io | Mailchimp Site Code | |
|---|---|---|---|---|
| Sync Contacts | o | o | o | x |
| Purchase Activity Segmentation | o | o | o | x |
| E-commerce Tracking and Reports | o | x | x | x |
| Product Content Block | o | x | x | x |
| Product Recommendation Content Block | o | x | x | x |
| Promo Code Content Block | o | x | x | x |
| Order Notifications | o | o | o | x |
| Abandoned Cart Automations | o | o | o | x |
| Product Retargeting Emails | o | x | x | o |
| Pop-up Signup Form | o | x | x | o |
| Google Remarketing Ads | o | x | x | o |
| Merge Tags | o | x | x | x |
| Price to Connect Shopify | Free | Starting at $20/month | Starting at $25/month | Free |
Those 3rd party platforms, including ShopSync, Zapier, and Automate.io, give you the ability to connect your Mailchimp account to Shopify.
Connect Mailchimp to Shopify using ShopSync
As previously mentioned above, you can employ ShopSync as a 3rd party platform to send your Shopify customers and order data to Mailchimp. You are allowed to generate targeted campaigns, raise traffics, and access most of Mailchimp’s e-commerce features once you connect.
As you can see, ShopSync is a free integration, also having the most features of all methods. So, the instruction below will help you figure out the way to utilize ShopSync to connect Mailchimp to Shopify.
Step 1: Login
First and foremost, you need to log in to your Mailchimp account from the ShopSync app page first. And then, log in to your Shopify store.
Step 2: Go to Shopify App Store
Then, navigate to the Shopify App Store section.
Step 3: Find the app
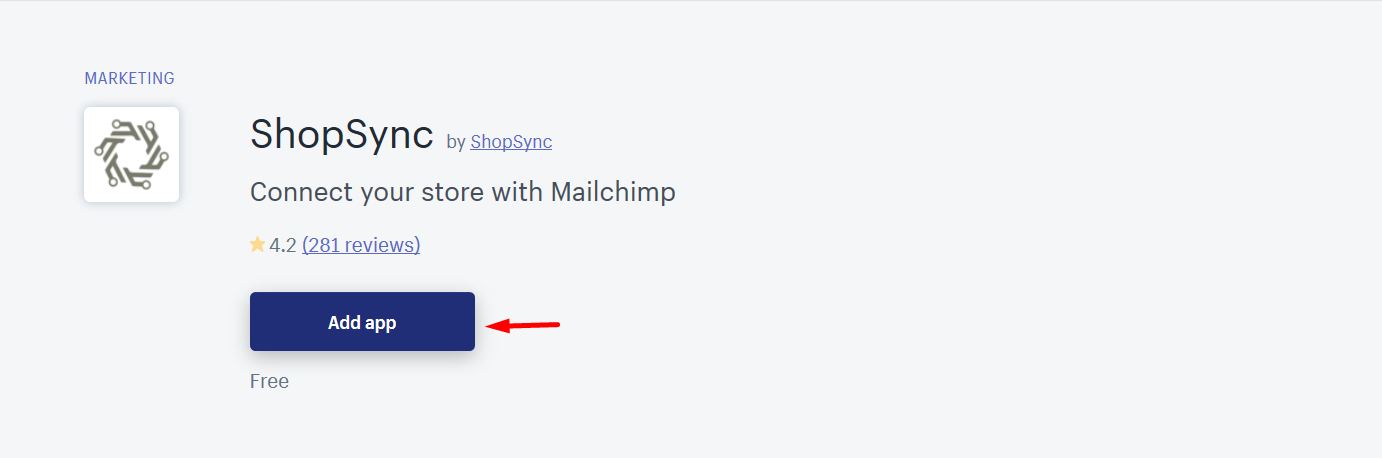
Find the ShopSync on the list.
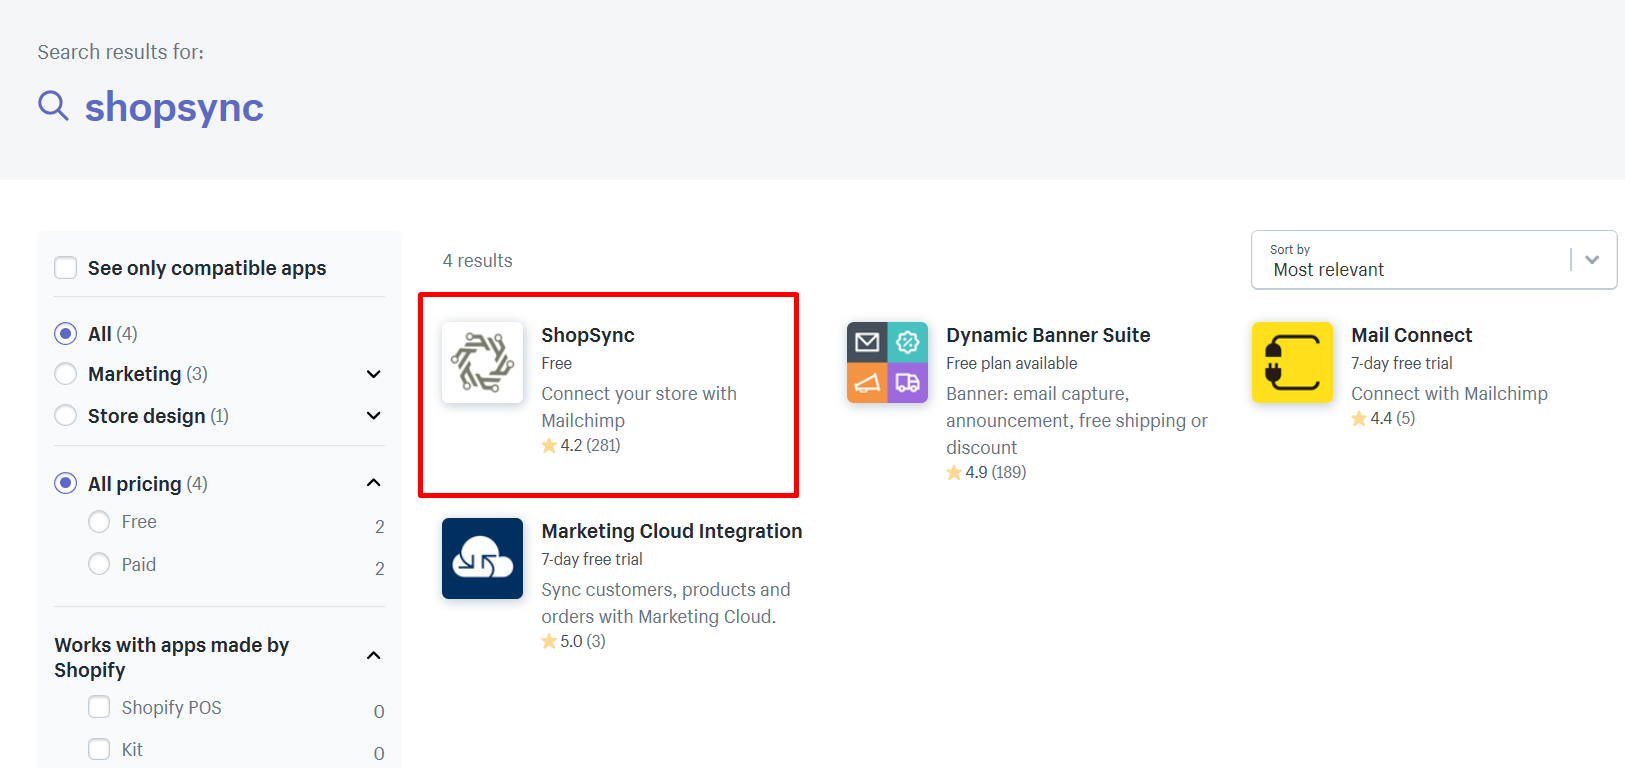
Then click on the Add app.
Step 4: Install the app
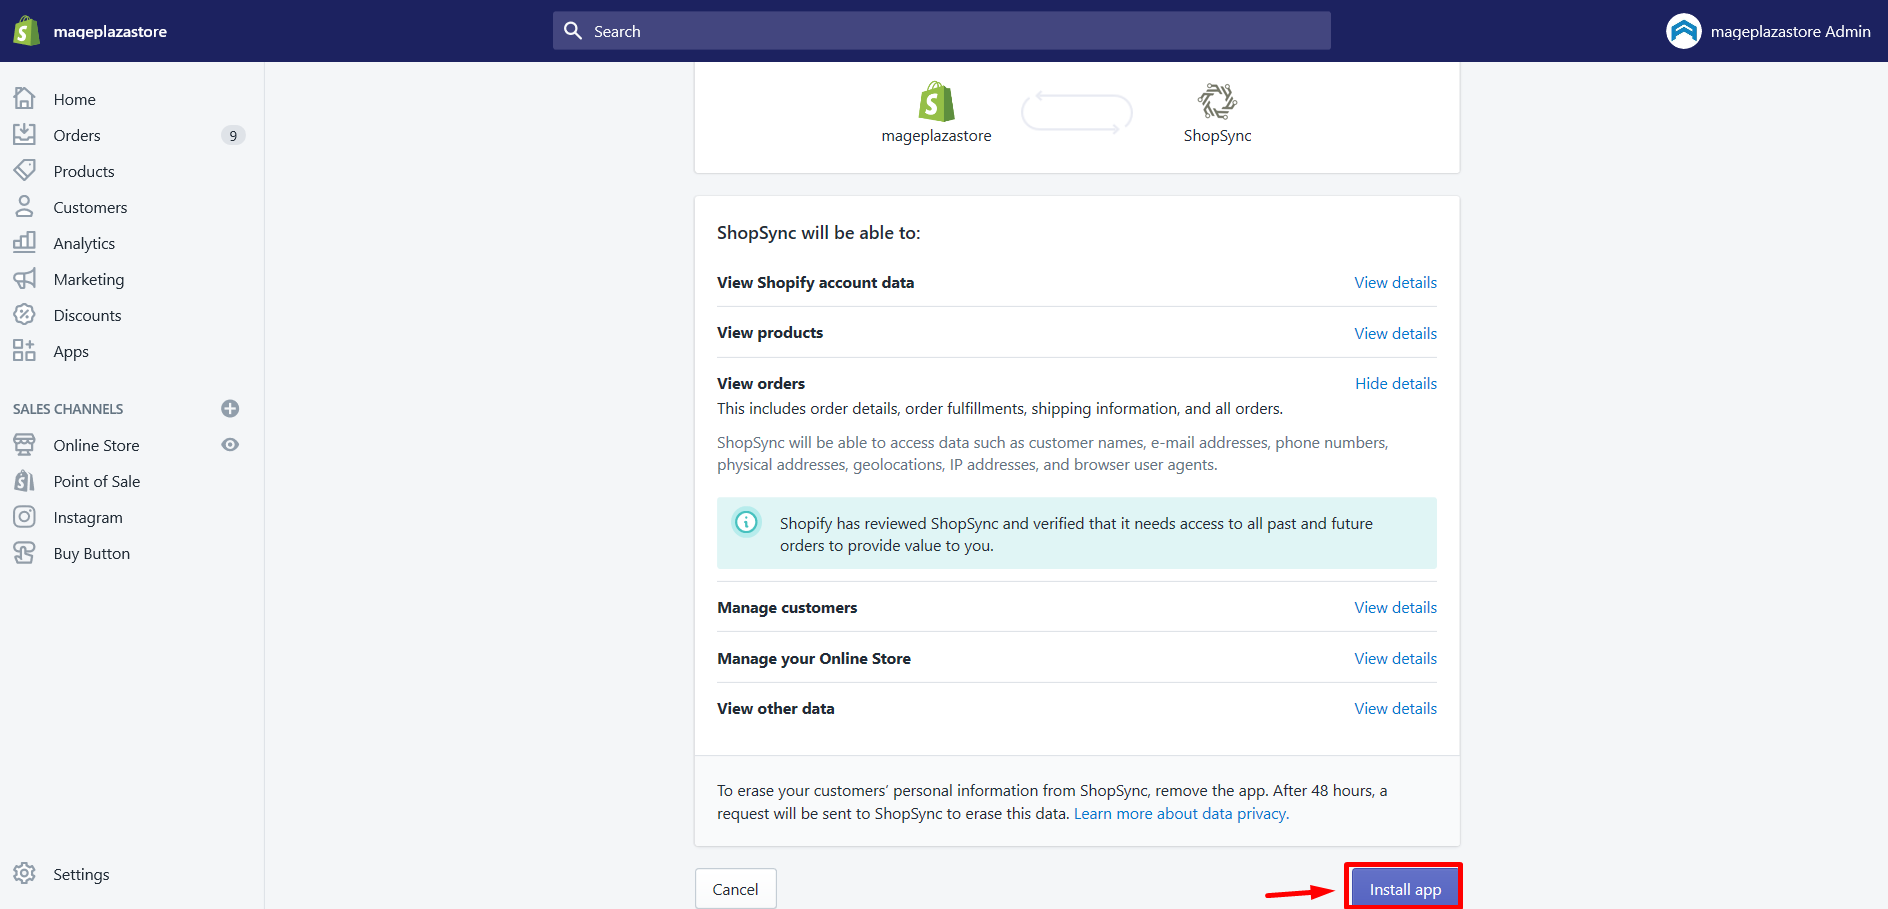
After that, the website will navigate to your Shopify admin account. From here, click on Install app
Step 5: Connect the app to your account
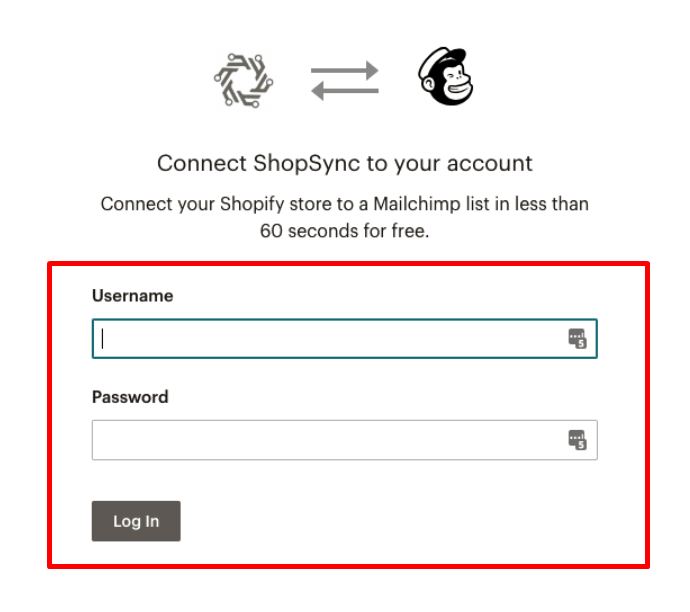
Hit on the Connect button.

There will be a popup window, just type your Mailchimp credentials and click Log In.
From this step, it’s your job is to create a list, choose your double opt-in settings, and then map these merge tags.
Finally, just click on Start Sync.
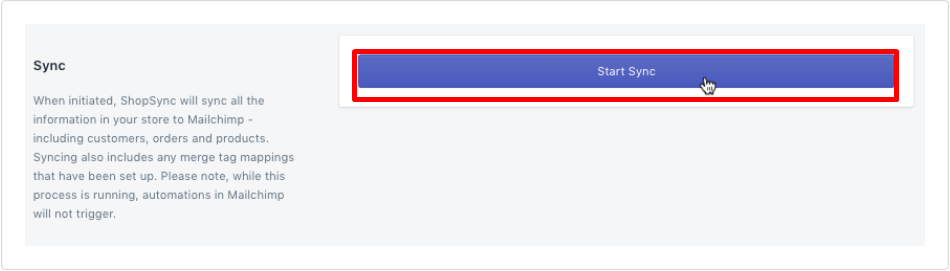
That’s the end of the process in this part. Subsequently, ShopSync will start to sync your store information to Mailchimp right after that. The time will depend on account data and the number of orders in your store. You are now able to send your Shopify customer and order data to Mailchimp, as well as create targeted campaigns, attract new customers, and access most of our key e-commerce features.
How to Add the Mailchimp Popup Code on Shopify
To connect your Shopify to Mailchimp by inserting the Mailchimp Popup Code on your Shopify store, you have to ensure two major steps that are getting Mailchimp Popup Code and adding it to your Shopify.
How to get Mailchimp’s Custom Website Code
If you want to get a Shopify popup signup form, you have to locate the right Mailchimp popup code that you want to use first. For evert popup generated by you, it will populate the list that is connected to. Hence, you will have to choose the email list that you want your subscriber to join in.
Please follow these steps listed below to get the site code.
Step 1: Select Signup forms
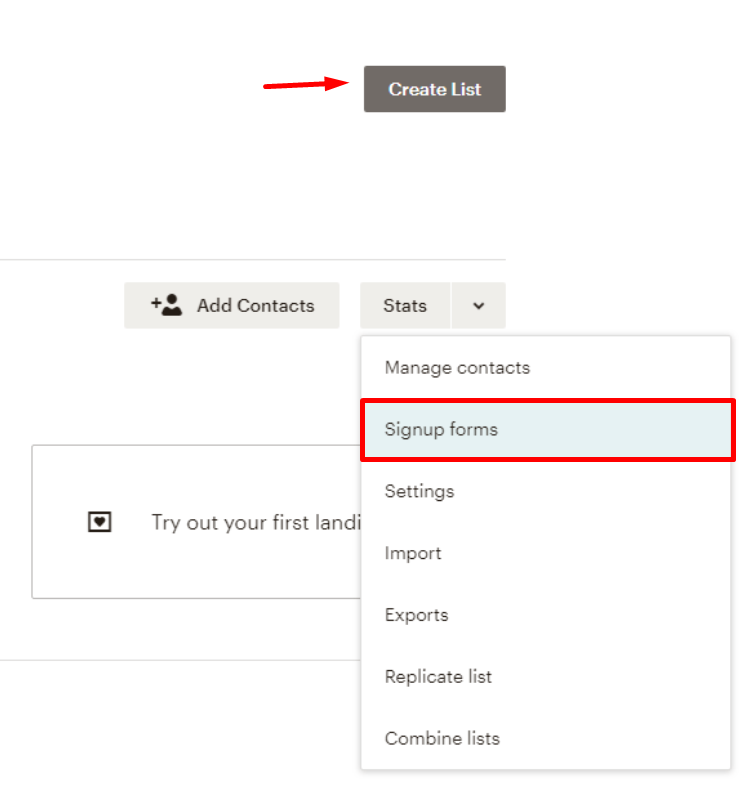
Log in to your Mailchimp account and hit click on Lists. Then, select the Signup forms for the list you want to embed to. You are also able to create a list from here too.
Step 2: Choose Subscriber pop-up
After that, choose the option: Subscriber popup on the screen.
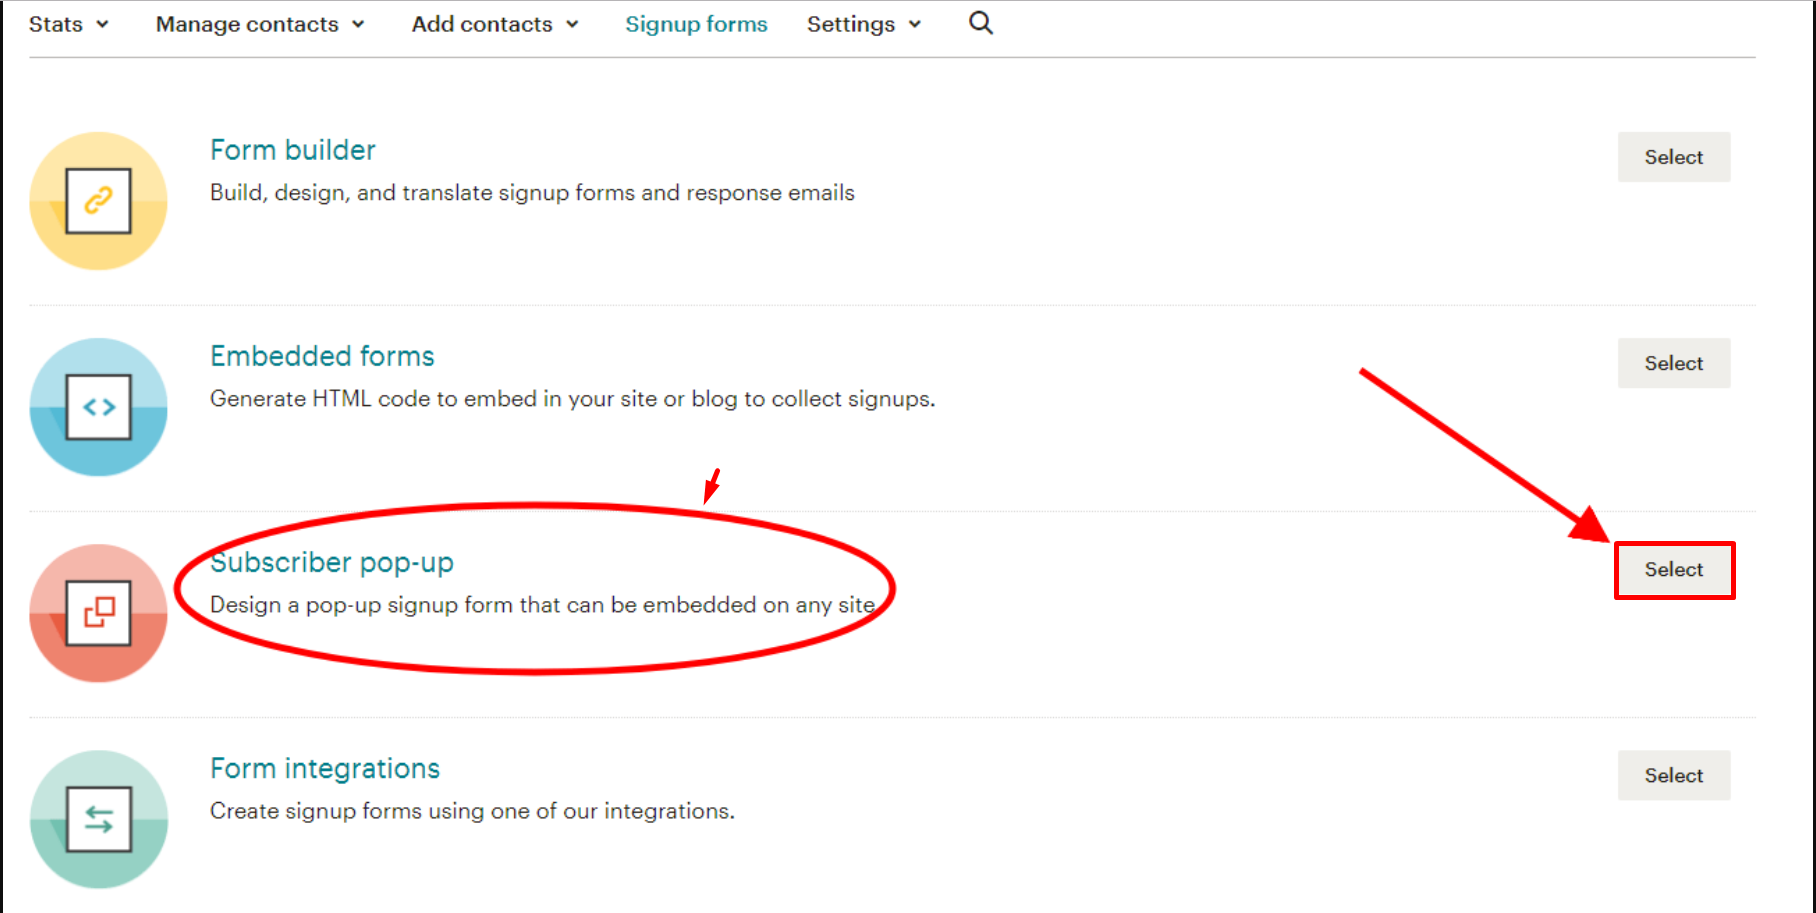
In case you have already generated the code, the Generate button will change to View Code every time you view popup. But if you haven’t created or designed any, generate one code and then copy over to Shopify.

Step 3: Copy the code
Finally, the code will show up, it’s your job to copy all the code you see.
Well-done! But not finished yet, you will add the custom website code to your Shopify next.
How to Add the Mailchimp Popup Code on Shopify
Now follow these steps listed below to add the code to your Shopify store.
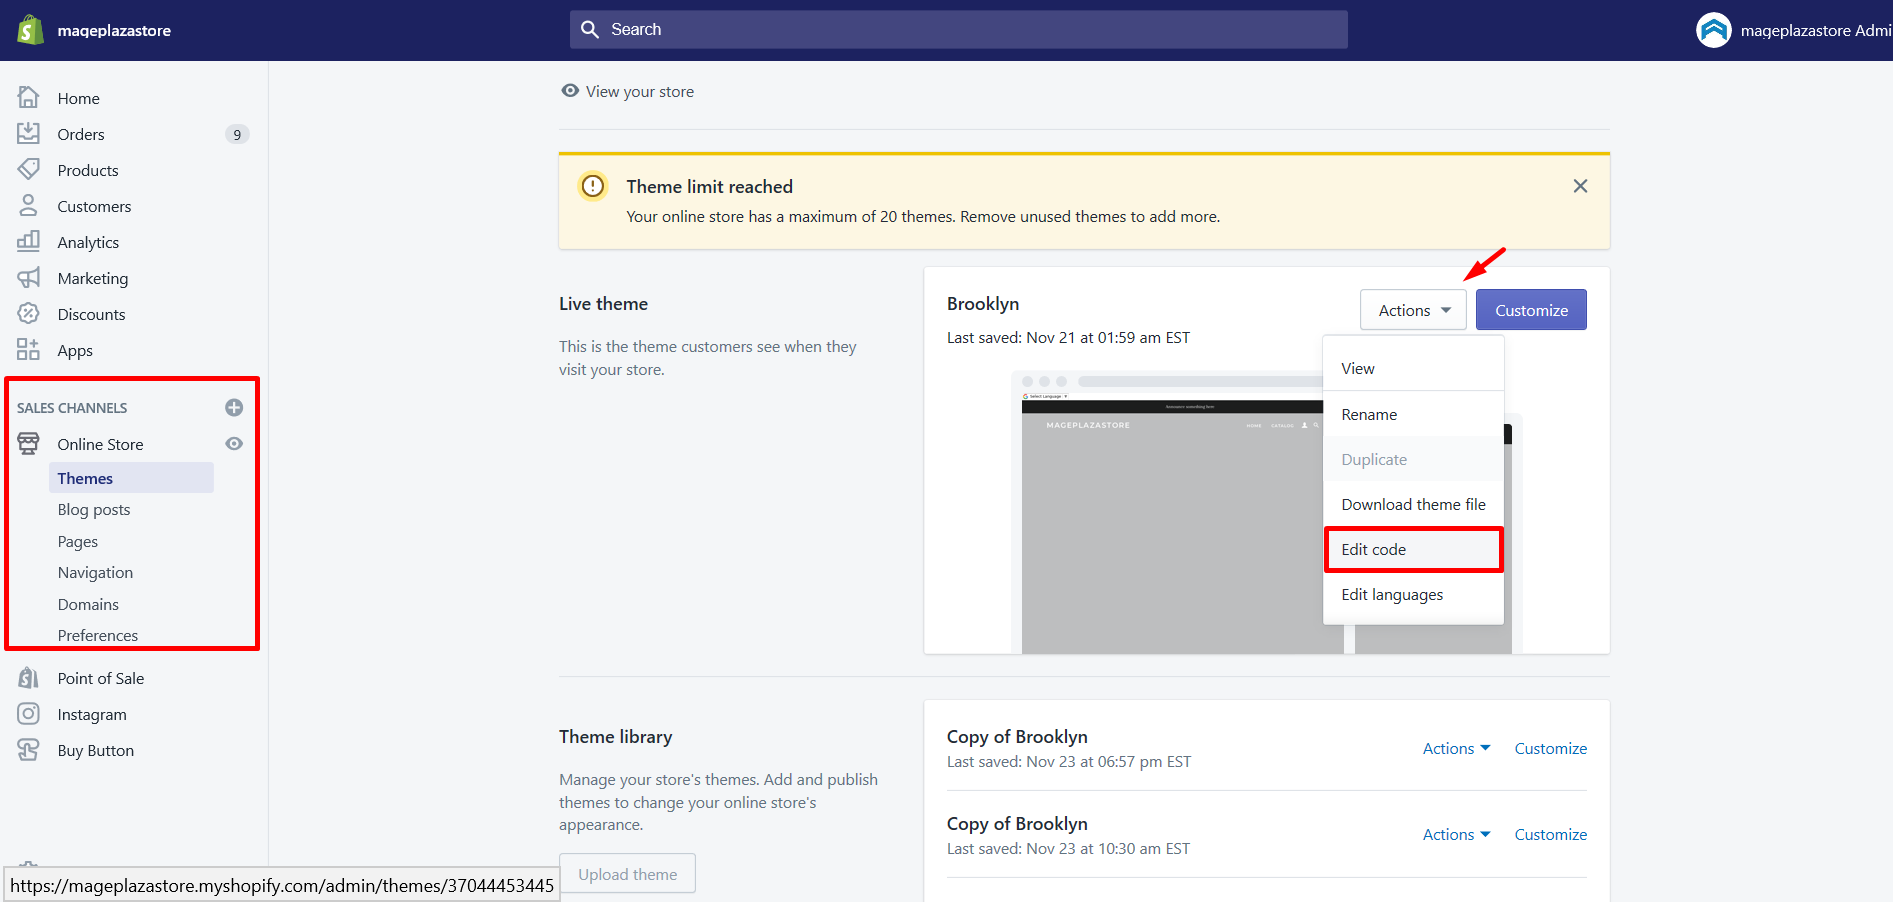
Step 1: Choose Edit code
First of all, log in to your Shopify admin and navigate to Themes section. Choose Edit code button in the Actions menu.
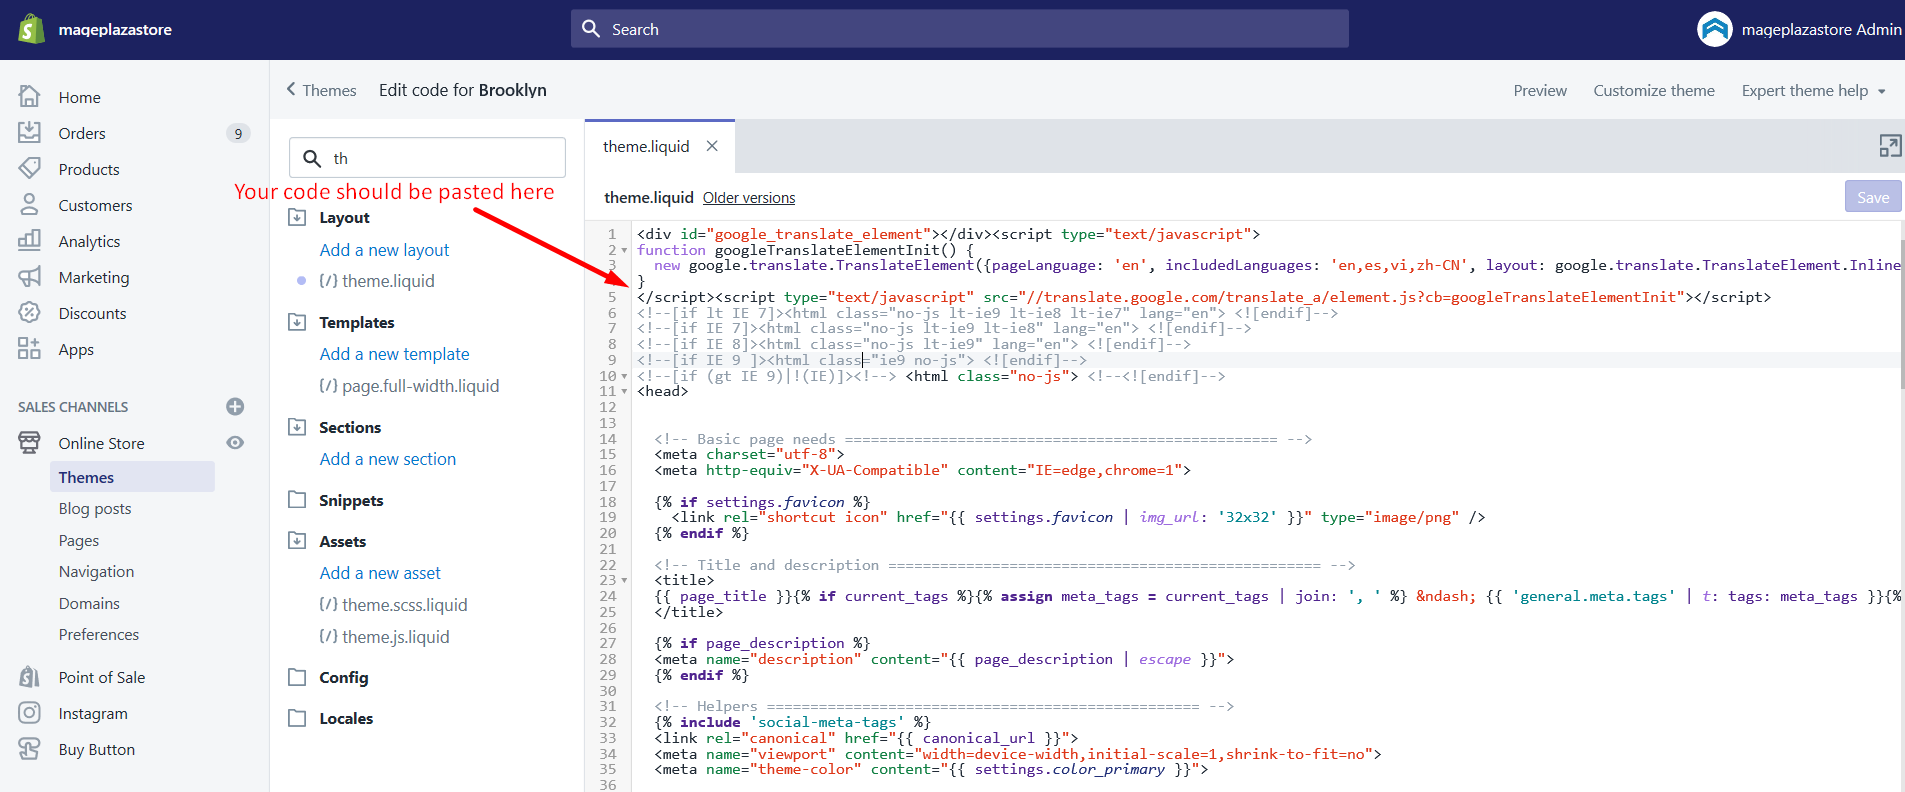
Step 2: Find the place to add code
The theme that you are currently using will be shown under the Layout section. This will be where the Mailchimp popup code you copied will be added to your theme’s code.
Step 3: Add code
Next, scroll down to the bottom of the code then, the place Mailchimp popup code right before the </body> tag.
Step 4: Save
Subsequently, click Save button and then you have already succeeded in adding the popup to your website. That’s it! You are now having your Shopify store connected to Mailchimp.
It’s all good now! You will see a confirmation message and be redirected to the detail page for your website after your connection is verified.
After adding the Mailchimp site code to your Shopify store successfully, you can access some specific tools from the site details page, which include popup registration forms, product retargeting emails, Google marketing ads, and so on.
Test your Mailchimp Popup on your Shopify Site
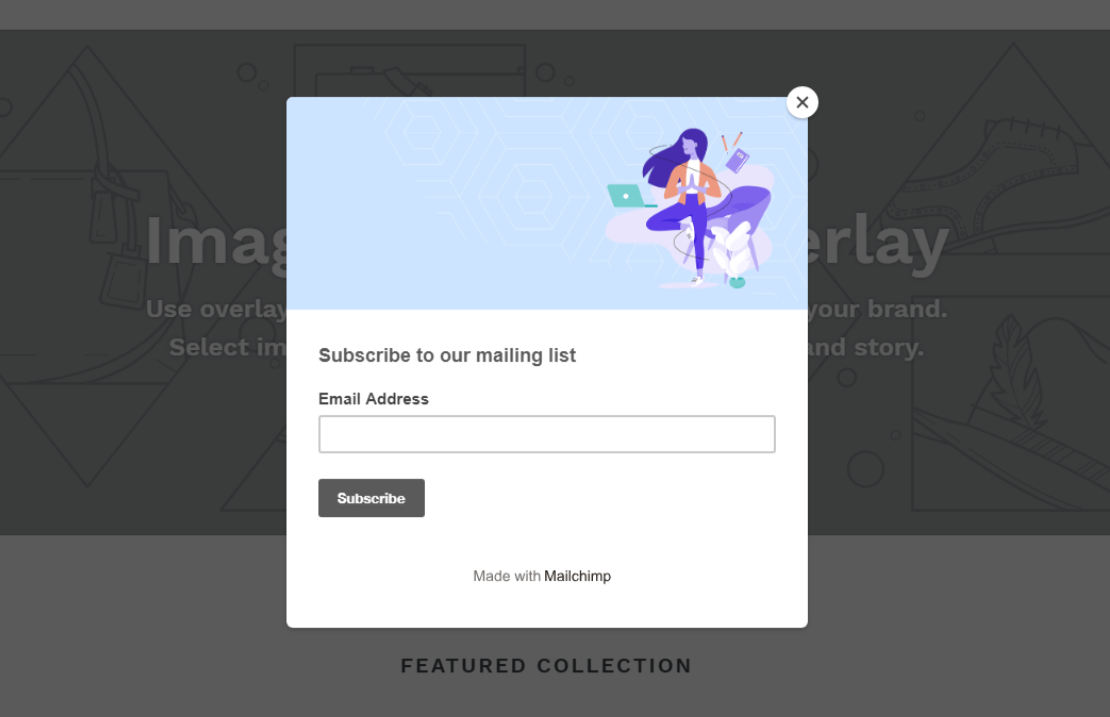
Now I bet that you are now done with the connecting part. Nevertheless, you might still want to make sure whether your Mailchimp Popup worked well with your entire Shopify store or not. You are totally able to test the situation of your process by using a new browser or Google Chrome’s incognito mode.
You can launch a small test by opening a new browser or Google Chrome’s incognito mode so that your Shopify store will recognize you as a new visitor like this:
Conclusion
Due to Shopify’s policy updates and customer’s privacy, Mailchimp is no longer in the Shopify App Store. However, adding Mailchimp forms to Shopify stores is still not that hard. After you successfully connect Mailchimp to your Shopify store, you can access multiple tools from the site details page including the product retargeting emails, popup signup forms, Google remarketing ads, and many more.
Hope this article is clear and detailed enough for you to follow and practice right away. If there are any troubles happen while using, don’t hesitate to contact us via email or comment below. We really appreciate your feedback and supports!


