
How to arrange products in Shopify

Running a Shopify store requires that you may have to deal with many tasks, and one of them is arranging products in Shopify. It occurs when you have already created the Shopify collections in the shop, so arranging and adjusting them is the next important step so that the user can browse and have access to your collections.
Therefore, this writing aims to help you figure out how to arrange products in Shopify. We hope that by reading it, you have a clue about doing it correctly and manage your store effectively.
Related posts:
- Shopify Product Listing Apps
- The Simple 5-Phase Process to Find Products for Online Business
- Shopify Product sorting Apps
Products sorting options in Shopify

To arrange products in Shopify, you can present links in the top menu or on the home page with the list of collections that you make and show to store collections on the homepage and alter the order of products in your collections. Below are products sorting options that you can take into consideration selecting:
Sorting Manually
The simplest way to arrange your items is sorting manually. Choosing this option means you can sort things based on your choice.
Sorting by Alphabetically
You can also opt for the alphabetical type of sorting. Based on product title, you can arrange your items in alphabetical order or reverse order. The alphabet order A to Z or Z to A will replace your default order.
You can go to your admin section of Shopify and browse to Products, then tap on the Collections section, and the next steps are SUPER easy for you to sort alphabetically.
Sorting By Best Selling
You can also arrange your items based on best-selling, depending on the all-time number of orders that the product creates.
Sorting By Price
Another sorting option is by price. You can sort the items based on the highest or lowest product price.
Sorting By Date
You can take into consideration sorting by the newest or oldest product, in other words, you can base on the date of manufacture to decide on arranging your items.
To arrange products in Shopify:
You will enjoy looking at all the fantastic items in your shop by sorting or filtering your items with the Shopify Platform. Or via the sort and filter functions, you can use it to identify a single product or a collection of products.
The sorting tool arranges your items by increasing or decreasing values, enabling you to browse and change your items visually. The filter feature from Shopify enables you to conveniently extract product information as well as save searches for later use.
Sort Shopify products list
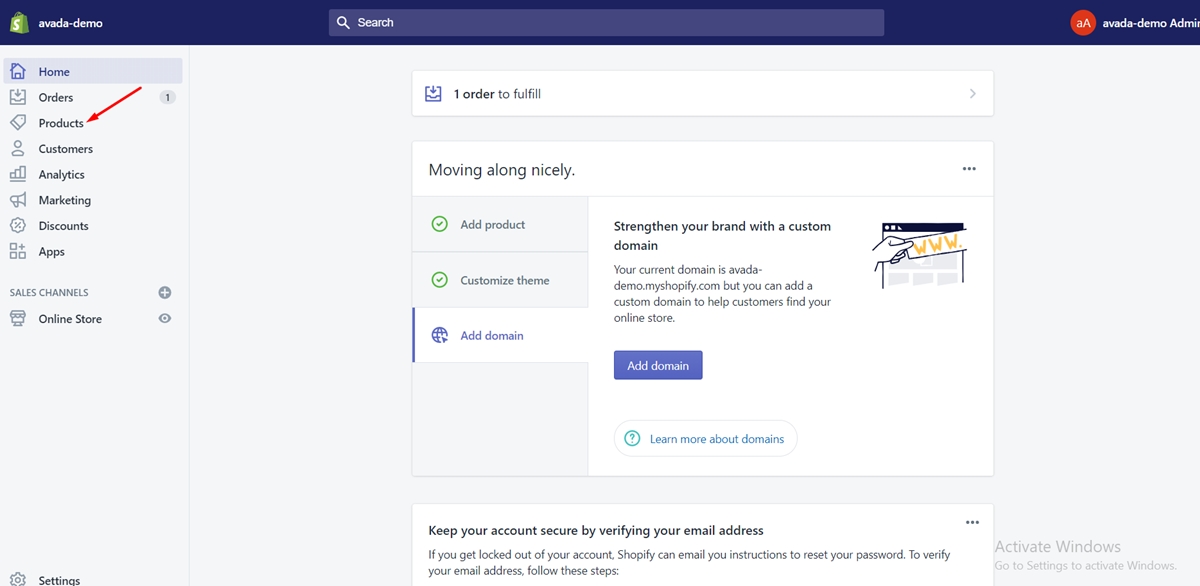
Step 1: View your products
Proceed to your Shopify admin and tap on Products to view your items.
Step 2: Tap on one of the headers
Tapping on one of the headers will sort the page. For instance, tapping on Inventory will sort your product list in the increasing or decreasing order based on the quantity of items obtainable in your inventory.
Step 3: Tap on the triangular button:
You can edit the display ranking by tapping on the triangular button.
Filter Shopify products list
Step 1: View your products
Proceed to your Shopify admin and tap on Products to view your items.
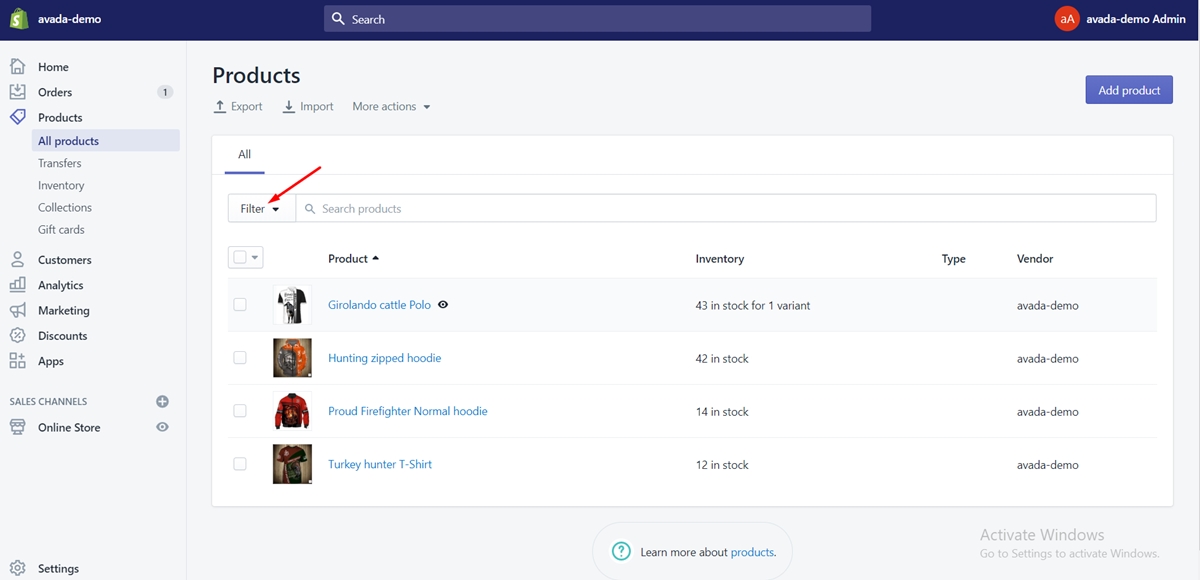
Step 2: Tap on the Filter Products dropdown
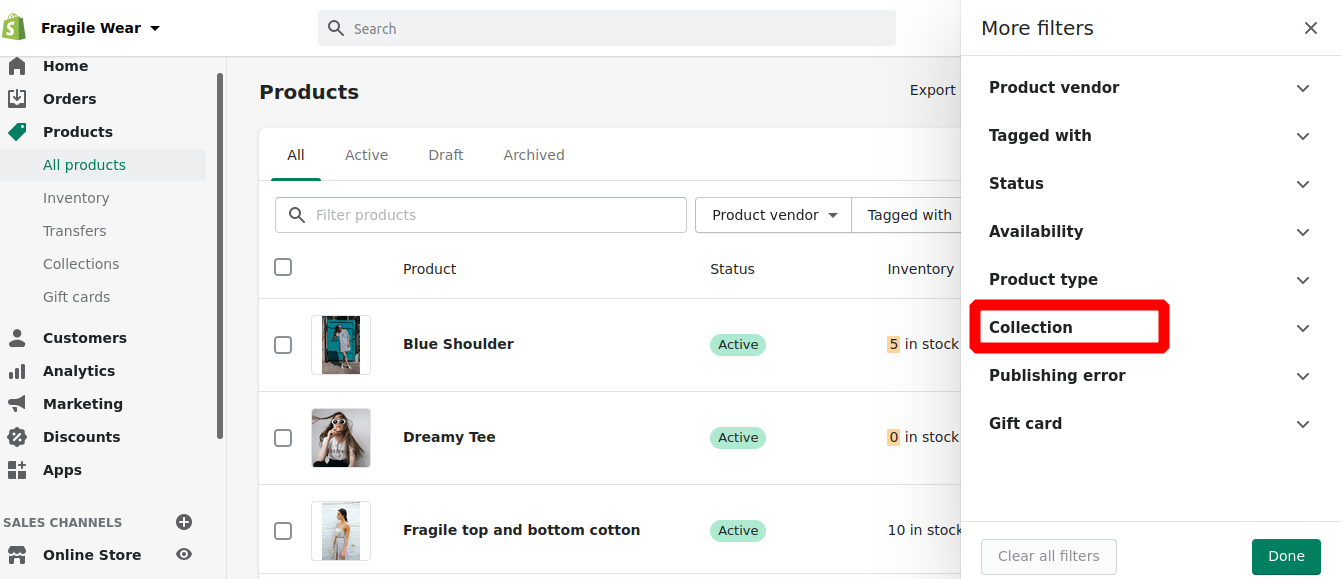
Step 3: Select your filter type
In this case, take Collection as an illustrator.
Step 4: Choose the filter’s value
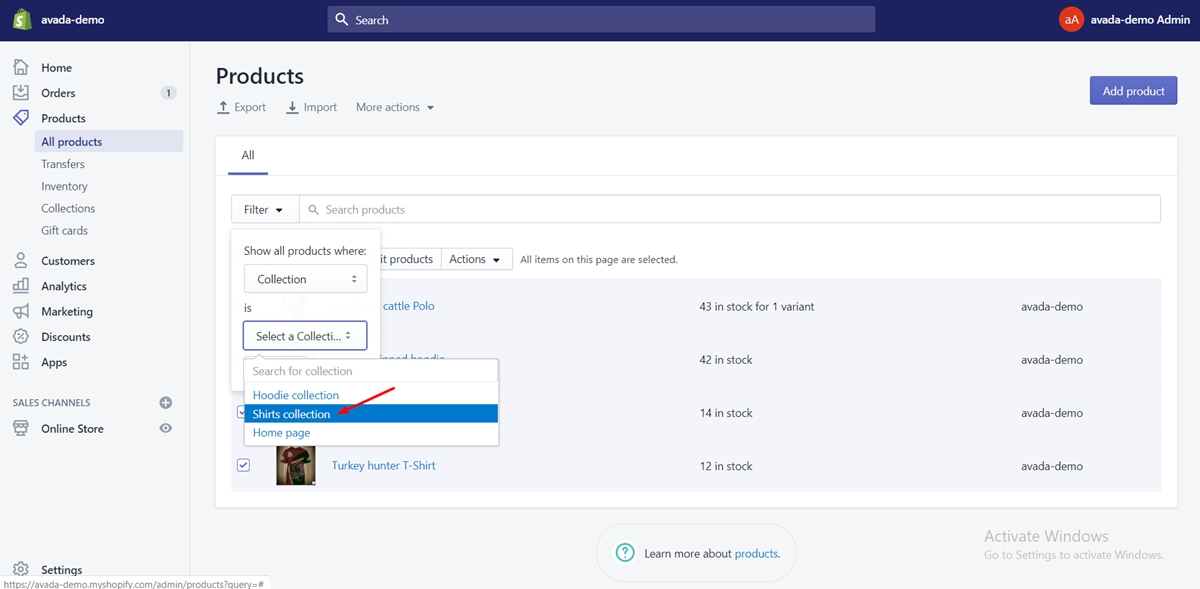
Step 5: Tap on Add filter button
After you select the filter and its value, tap on Add filter:
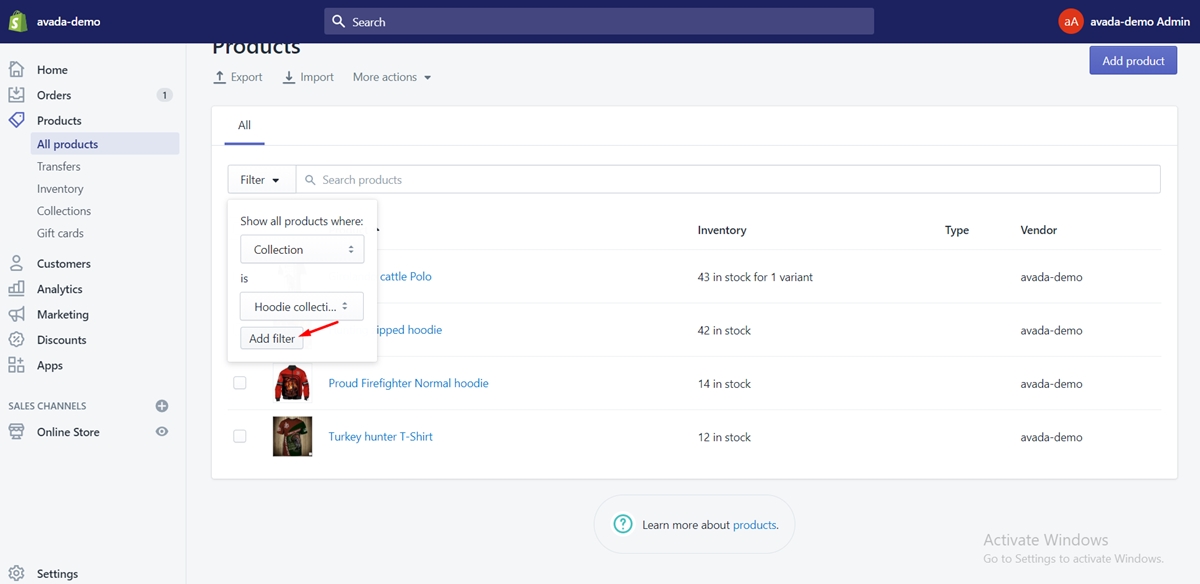
You can notice your filter’s condition shown in the box right above your filtered products.
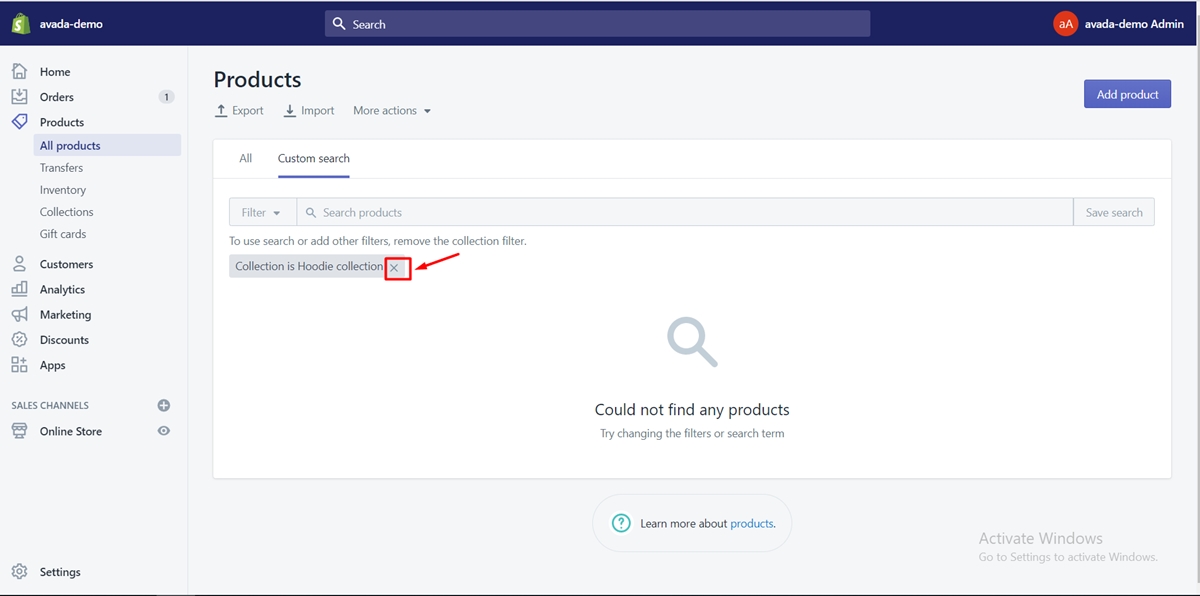
Step 6: Tap on “x” button to remove your filter
You can have the option to eliminate your filter by tapping on x.
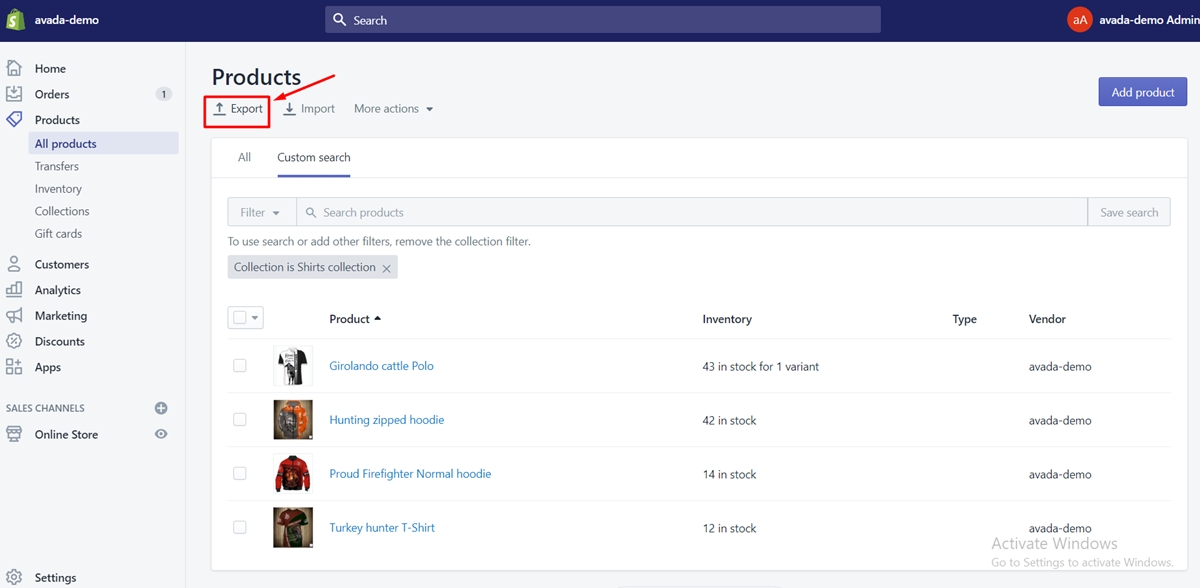
Step 7: Tap on “Export” button
You can also export your results by tapping on Export at the top of the page.
Step 8: Tap on Export Products button
Choose your exported result as “4 products matching search”, select your export CSV file type, and then tap on the “Export Products” button.

Step 9: Tap on Save this search
Shopify enables you to save your filtered results for later use. Once you have already applied your filter, tap Save this search.
Step 10: Insert the search’s name
Insert the search’s name in the pop-up window that accompanies and then tap on Save:
Step 11: Complete the process
There you go! In the future, if you open the items’ list, you can see your latest saved search in a new tab. Its information will be accessible when you tap on the tab name. Not only that, streamlining product management will be a piece of cake when you utilize sort and filter functions from your Shopify backend.
How to change the sort order for the products in a collection
You can follow the simple steps below to change the sort order for the products in a collection
Step 1: Go to Products section
In your Shopify admin, proceed to the Products section.
Step 2: Click on Collections
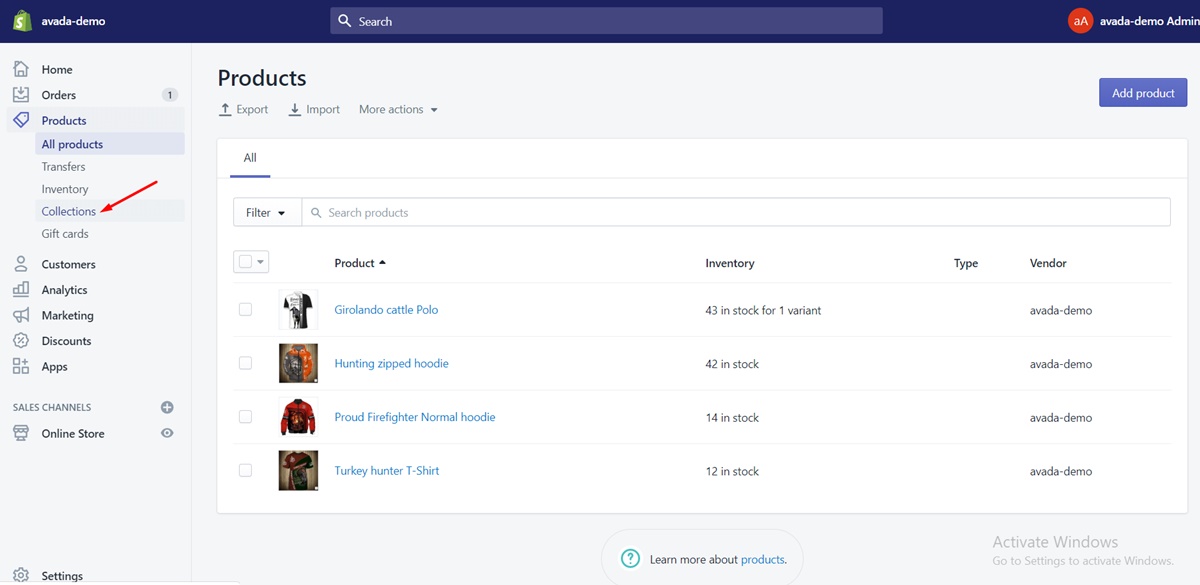
Step 3: Pick a sort order
From the Products section, tap on the dropdown list next to Sort, and then choose a sort order.
Step 4: Reorder the products
The next step is to tap on and drag the products on the list to rearrange them if you choose to sort manually.
You can also tap on and choose one or more items in the list. Tap on Move to reorder them to a certain place in the collection.
Step 5: Tap on Save
Now, you are certain that you have changed the sort order for the products in a collection. However, the steps above only describe how to do that manually. If you want to find out how to do that automatically, check out our post: Change Sort Order for Products in a Collection on Shopify
Conclusion
So far, we have helped you to answer the question: How to arrange products in Shopify? by describing the steps with some illustrative pictures. We hope that the task will be so much easy if the article is clear to you.
In case you may need to edit the options of a product in detail on Desktop, iPhone, and Android, visit our post: How to Edit a Product’s Options on Shopify (on Desktop and Mobile) for more information. Also, should you have any queries, comments, or concerns, please let us know. Do not hesitate to contact us.


