
Guide to Using Web Push Notifications for Shopify
By Sam Nguyen

Drive 20-40% of your revenue with Avada
When new visitors first land on your Shopify store, they may not be comfortable sharing personal details like their email address. Due to this, many online stores lose out on capturing these visitors as subscribers, missing an opportunity to send them promotions and turn them into customers. With web push notifications, merchants can solve this issue and successfully capture a large percentage of shoppers as subscribers.
If you’re unfamiliar with this marketing channel, we’ll help you understand what web push notifications are and how you can use them to increase conversions and generate revenue.
Web Push Notifications 101
What are Web Push Notifications?
Web push notifications are short messages sent to a subscriber’s screen through the desktop or mobile browser. Unlike email or SMS, you don’t need any third-party platform to receive these notifications.
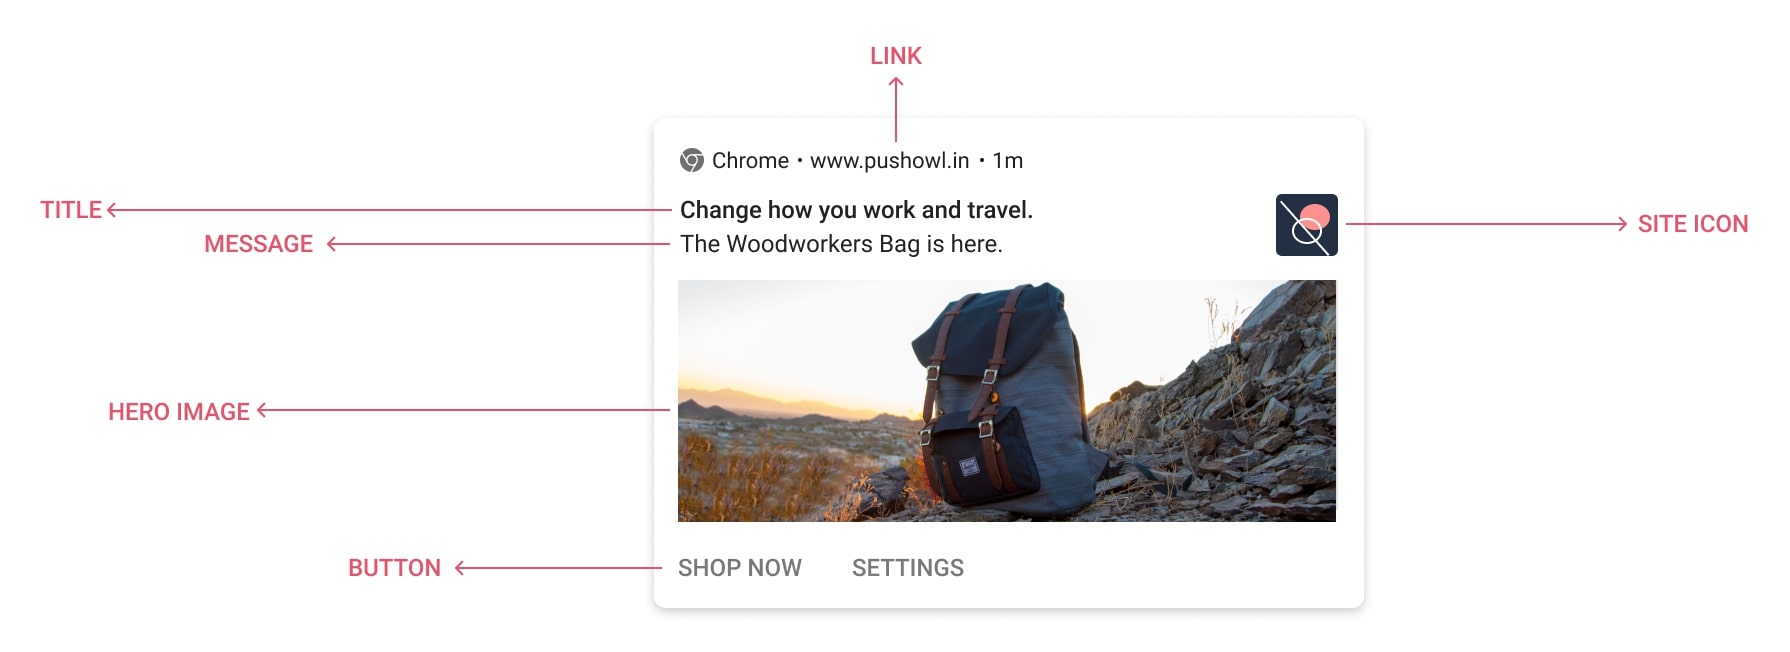
There are a few key elements in a web push notification that define the content of the notification.
Learn more: Top 9 Best Web Push Notifications Services
-
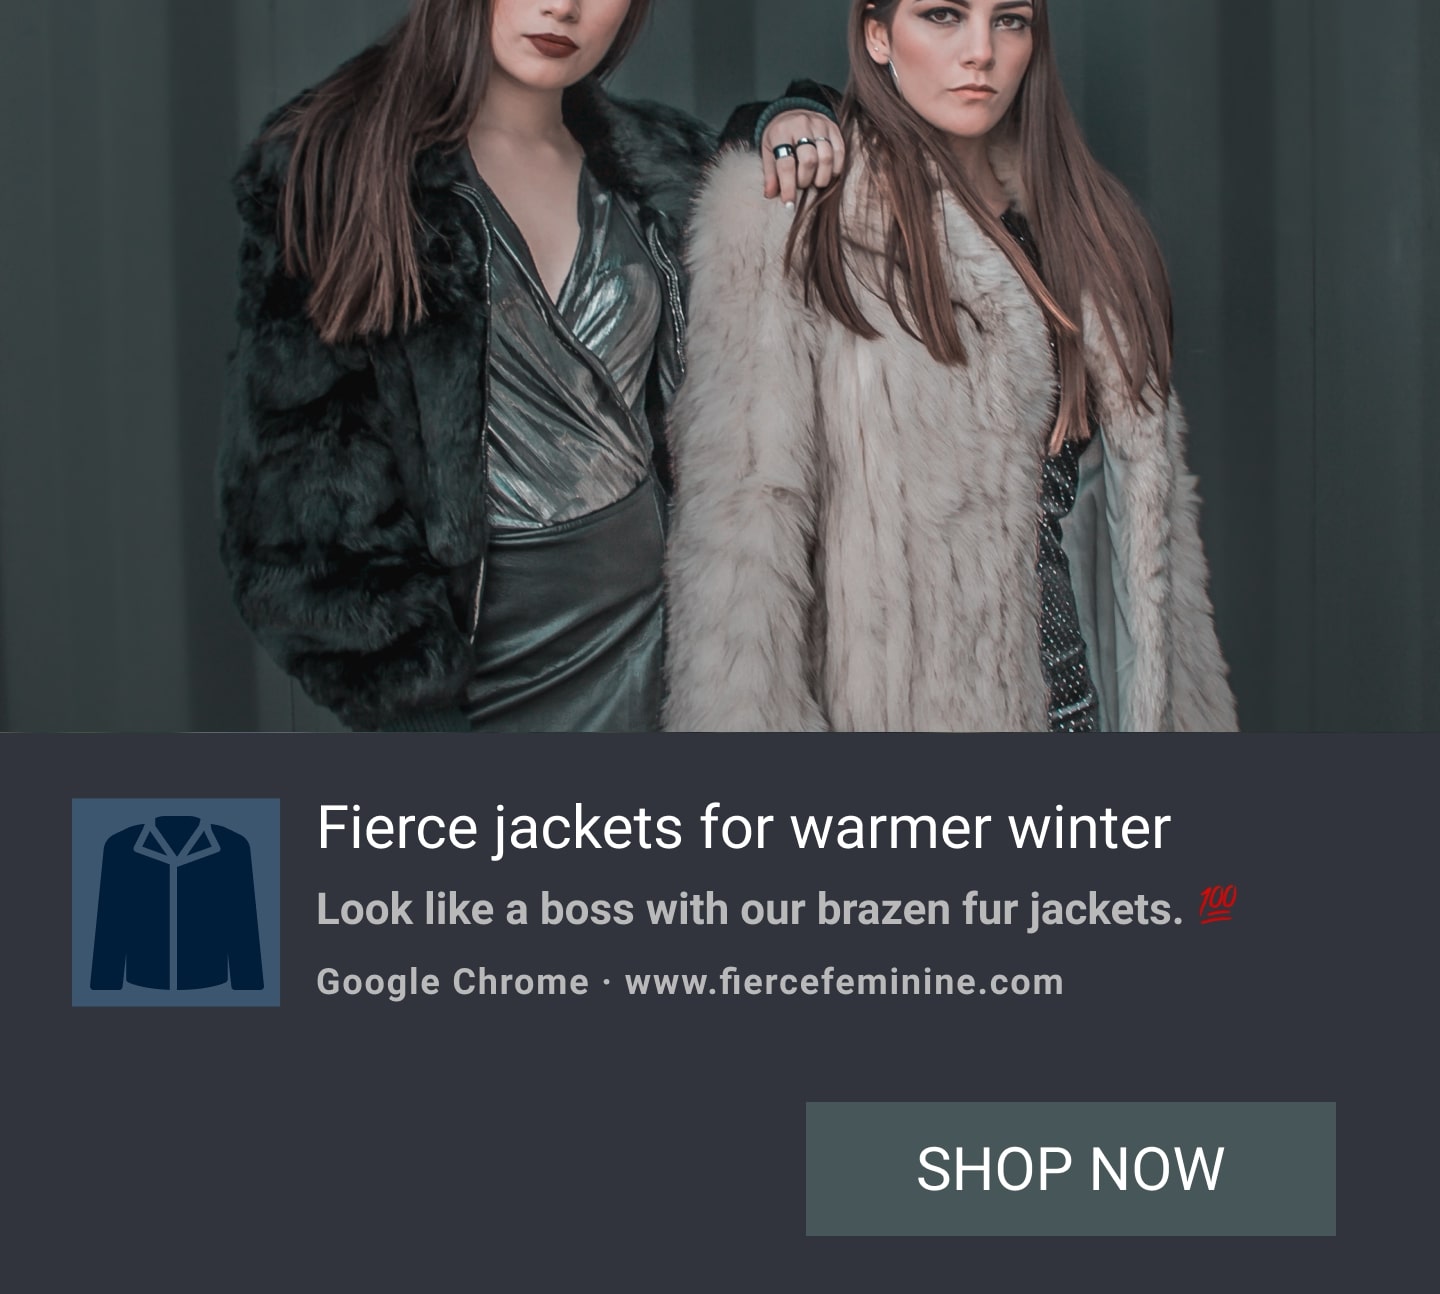
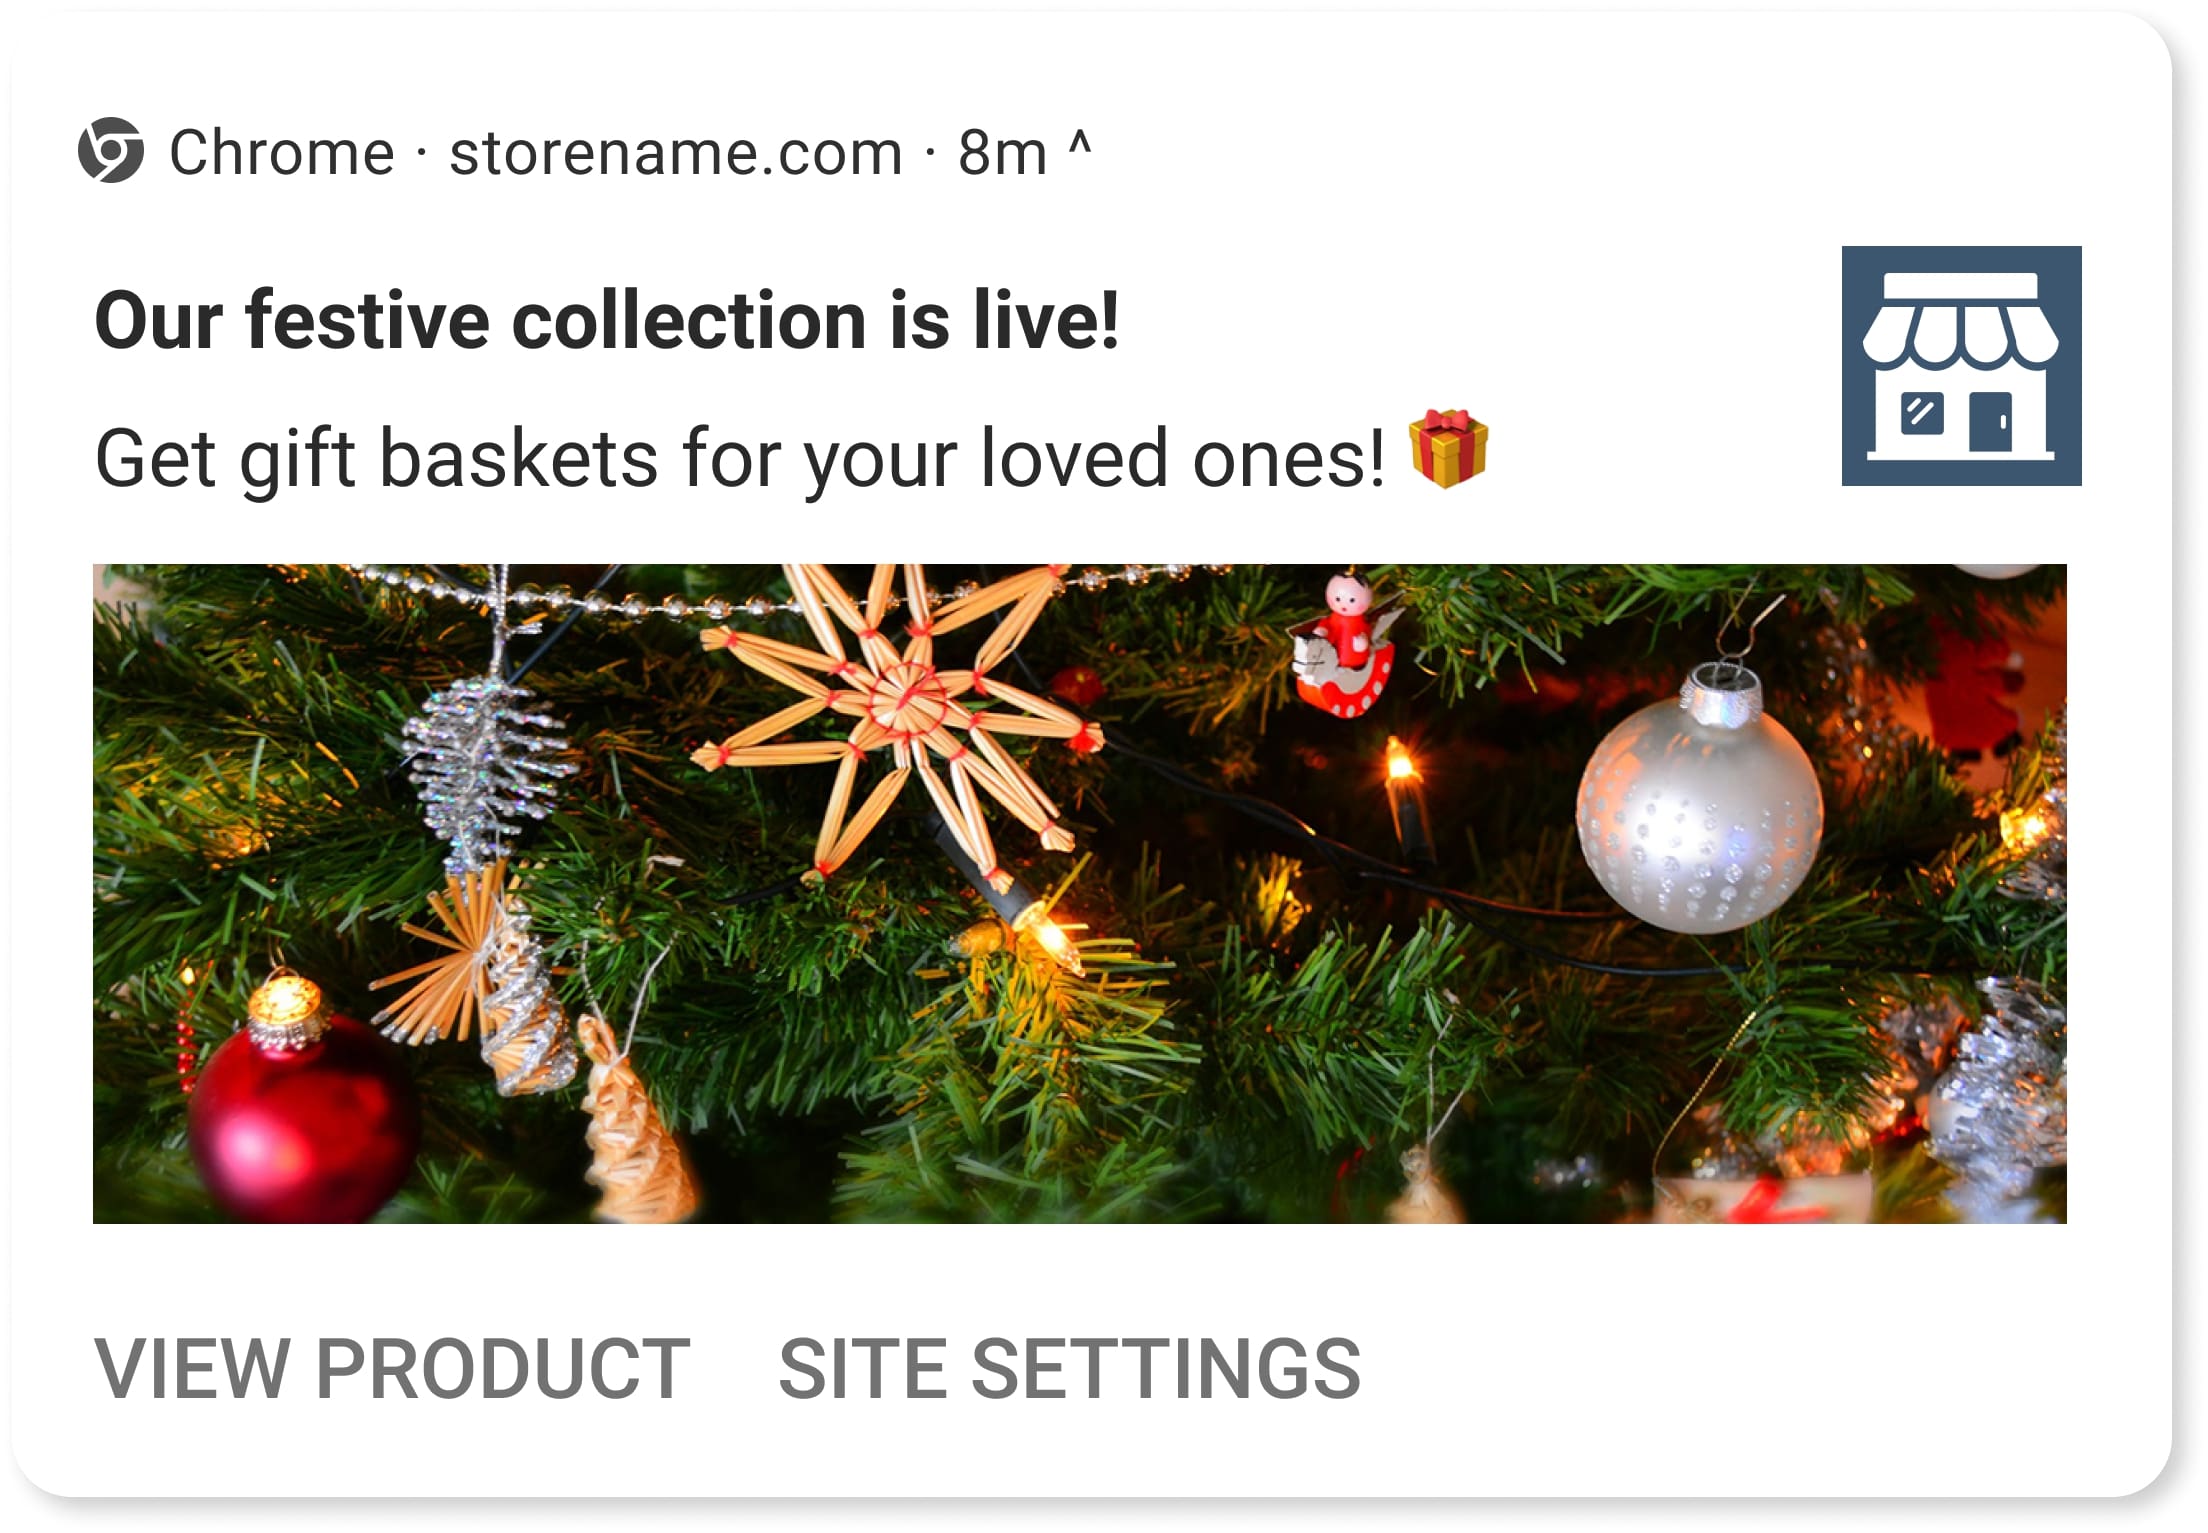
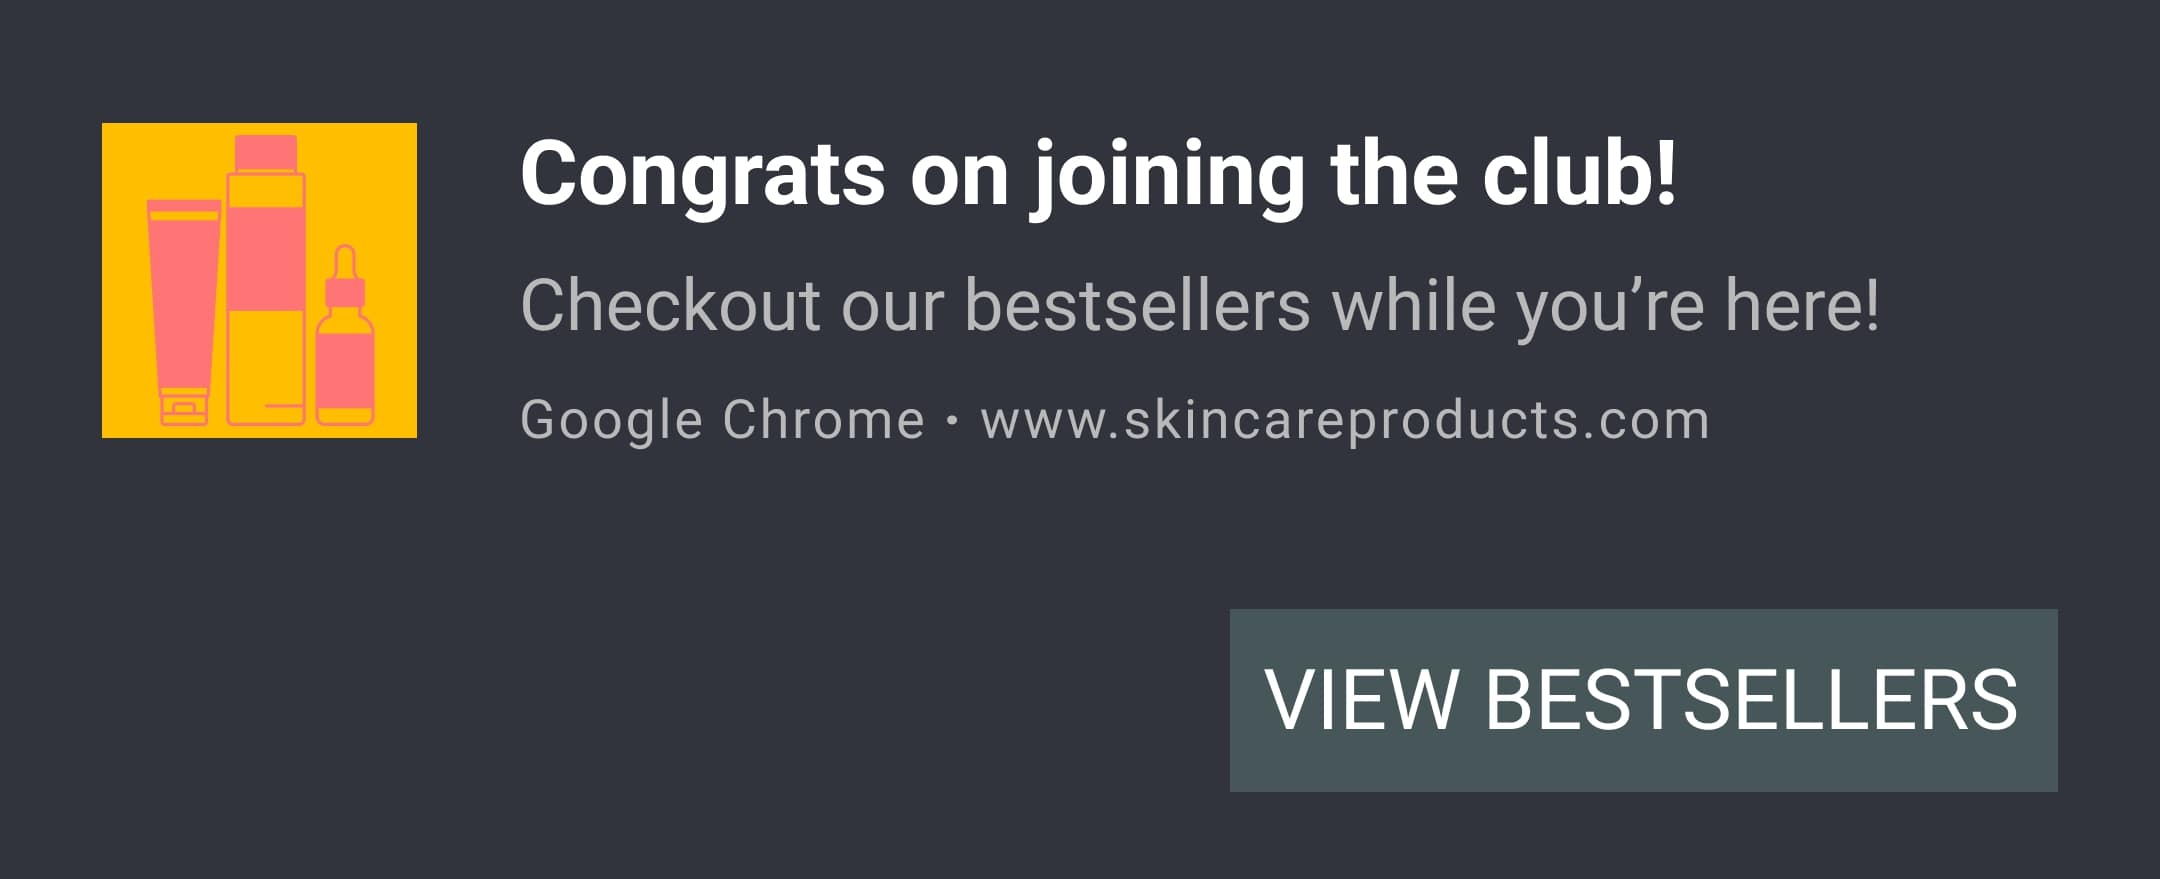
Title: The title is the first copy seen in the notification. This is usually used to establish what the promotion/notification is about and capture subscriber attention. Based on the device and browser, the length of the title is 34 to 63 characters long.
- Message: This is the second copy in the notification. Most merchants add an additional text explaining the promotion further. Based on the device and browser, the length of the message can be 39 to 128 characters long.
-
Hero Image: This is an image added to the notification to make it rich and appealing. This feature of a web push notification is only shown on Chrome Windows and Chrome Android. Other devices/browsers don’t support it.
-
Link: The URL of the site that the notification is being sent from. This link is based on your site URL and is not editable.
-
Buttons: With buttons, you can add a CTA link to make your notification actionable. You can add up to 2 buttons to your notification that take subscribers to specific pages on your store.
-
Browser Icon: The icon of the browser through which the subscriber receives the notification from. This can’t be customized.
- Site Icon: The logo of the store/site sending the notification. This can be customized within the ‘Settings’ of your web push - platform.
Subscribing to Web Push Notifications
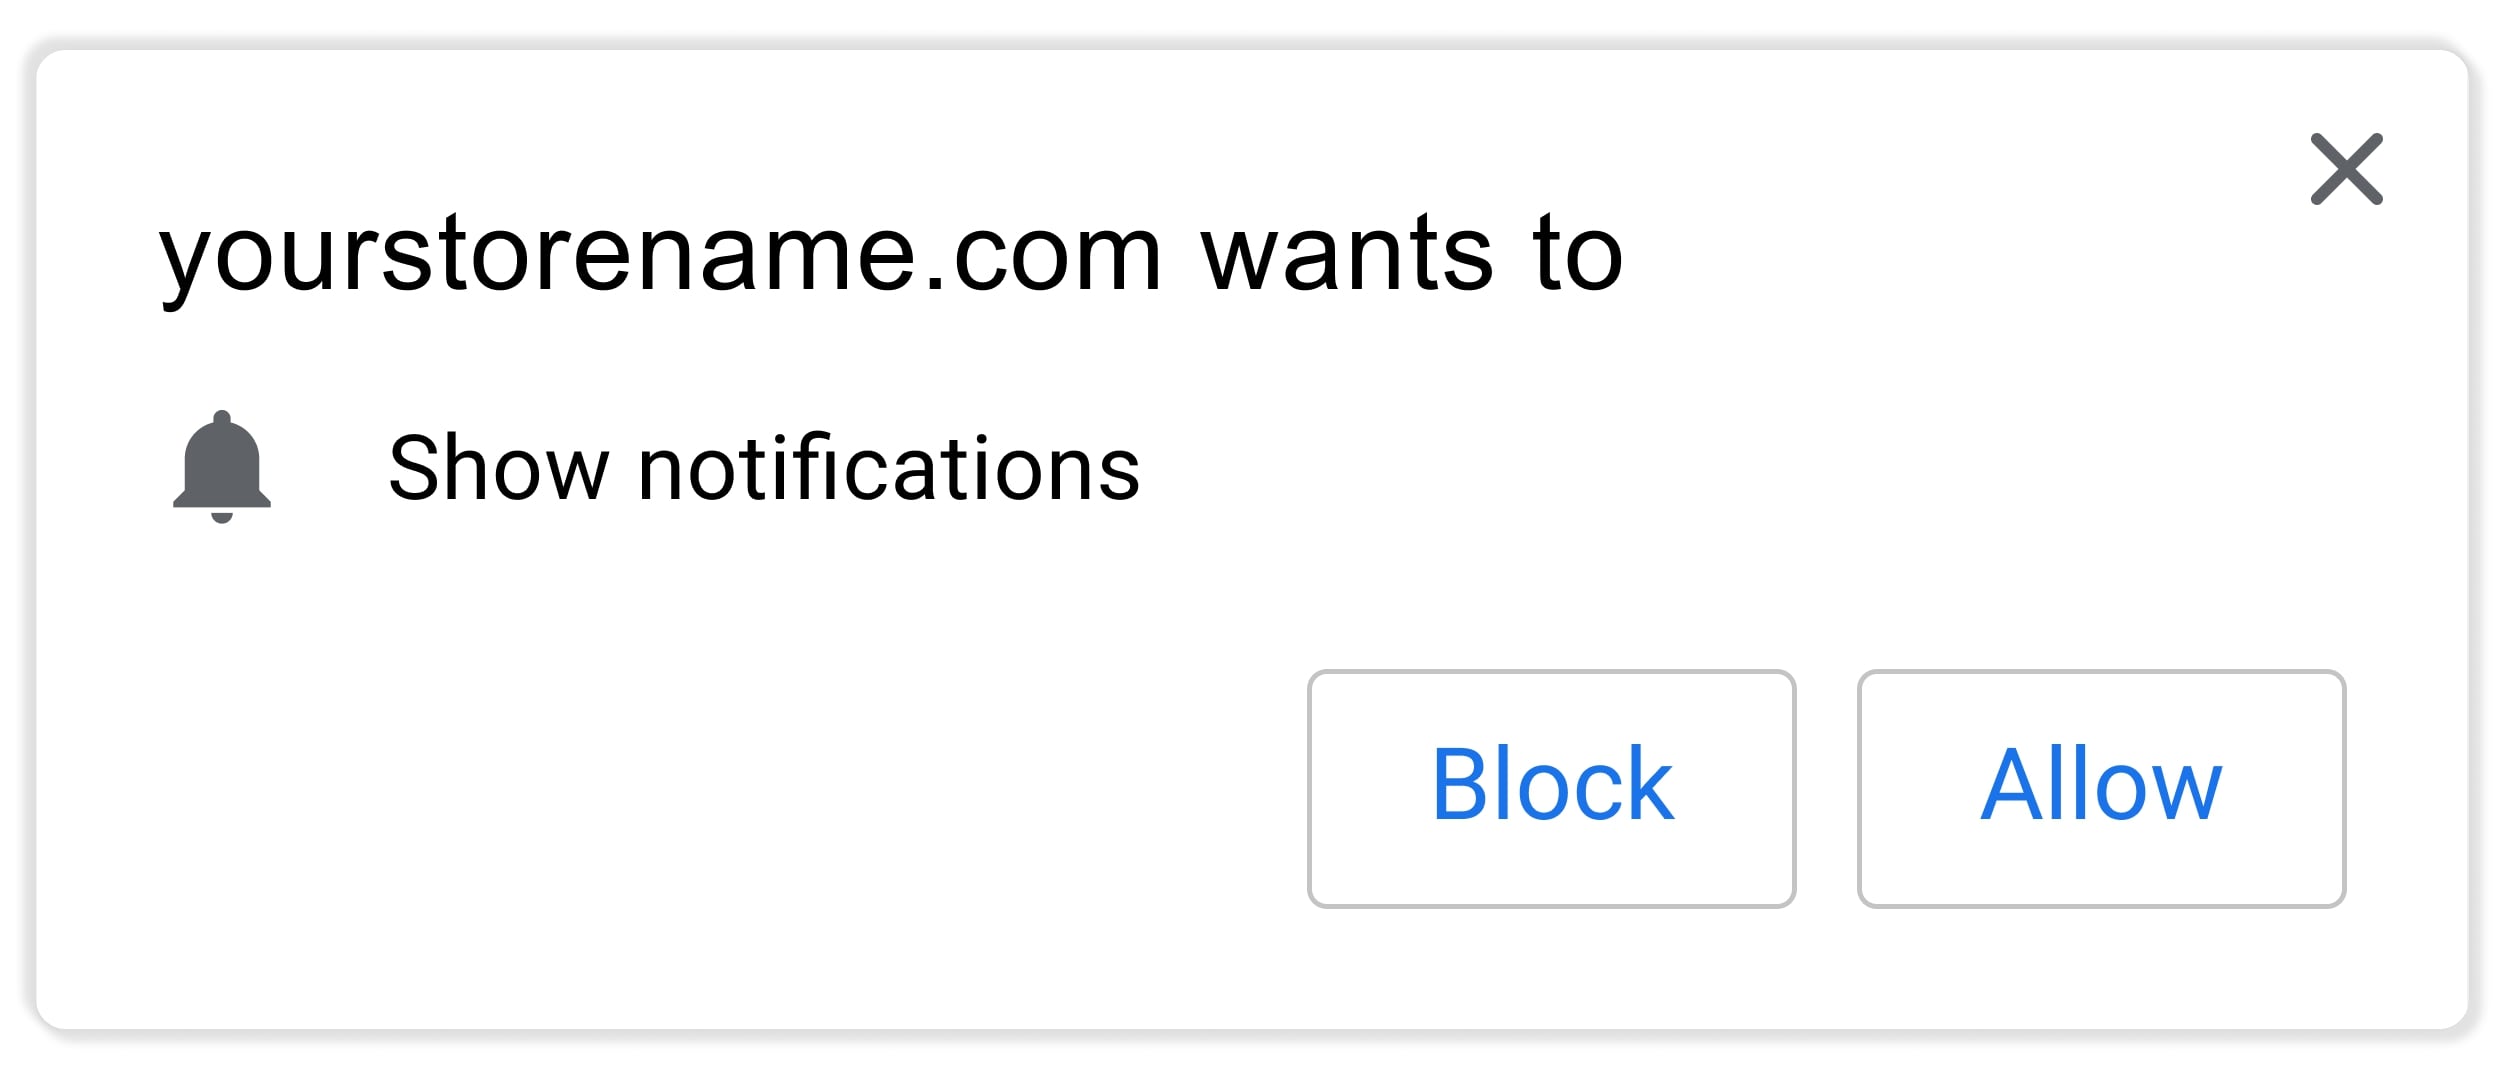
Subscribing to web push notifications is done through the subscriber’s browser. The visitor is shown a browser prompt when they land on your Shopify store. Since this prompt is sent by the browser, it is not customizable. Here’s how the browser prompt looks:
Since browser prompts can’t be customized, you can add more context and entice your visitors to subscribe with a Custom Prompt. A Custom Prompt lets you show a customizable opt-in which can be placed on different parts of your Shopify storefront with a well-written copy that explains why visitors should subscribe.
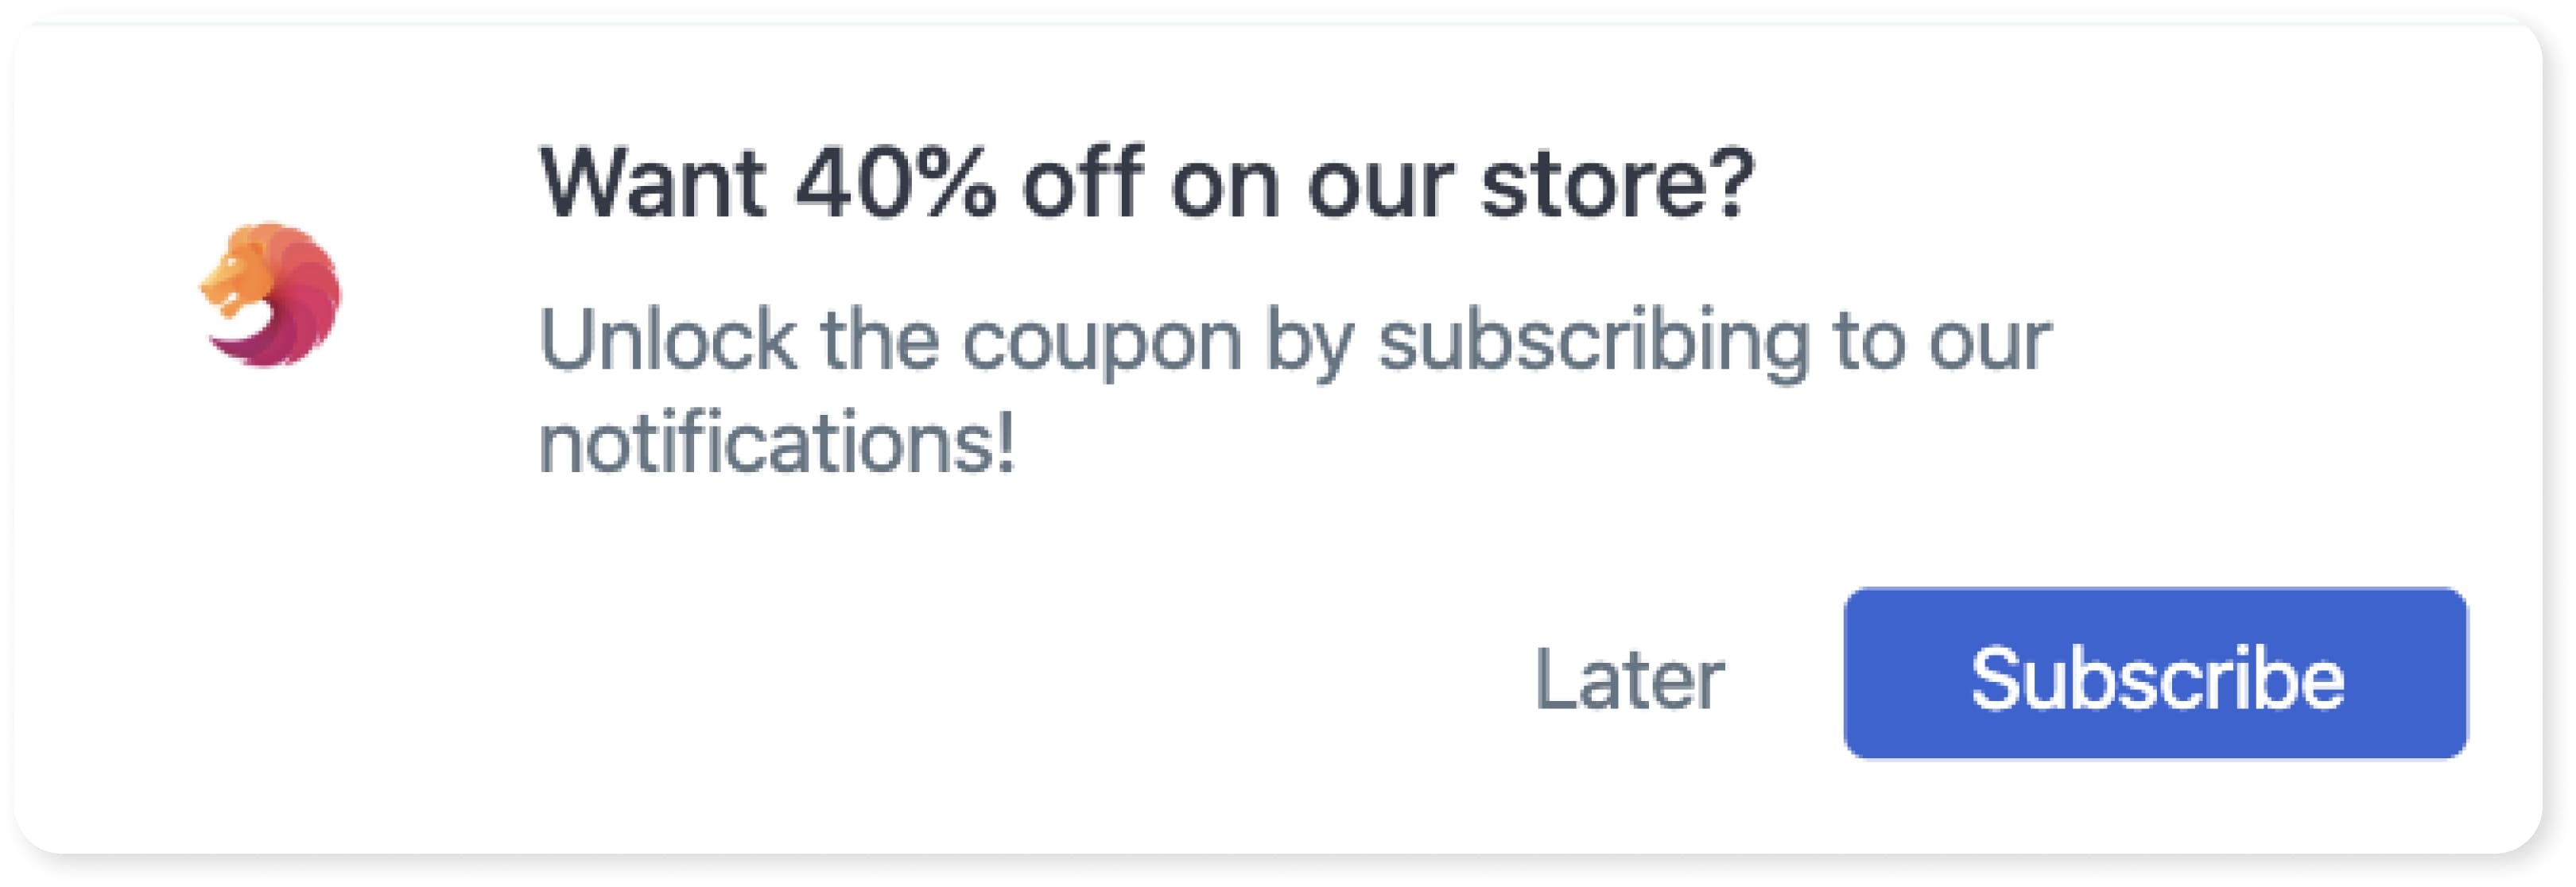
Pro-tip: Add a time delay for your opt-ins to let store visitors browse your store before being asked to subscribe. We suggest a 5 to 10-second delay.
Read more:
- 13 Best Font for your Shopify Stores
- How to Buy a Shopify Store?
- How Much Does It Cost To Build A Website On Shopify
- How to Build A Shopify T-shirt store?
Types of Promotions You Can Send Using Web Push Notifications
Setting up promotions on your web push notifications app is easy. There are many kinds of promotions you can send, whether they are one-off campaigns or triggered to be sent based on specific conditions.
1. One-off campaigns
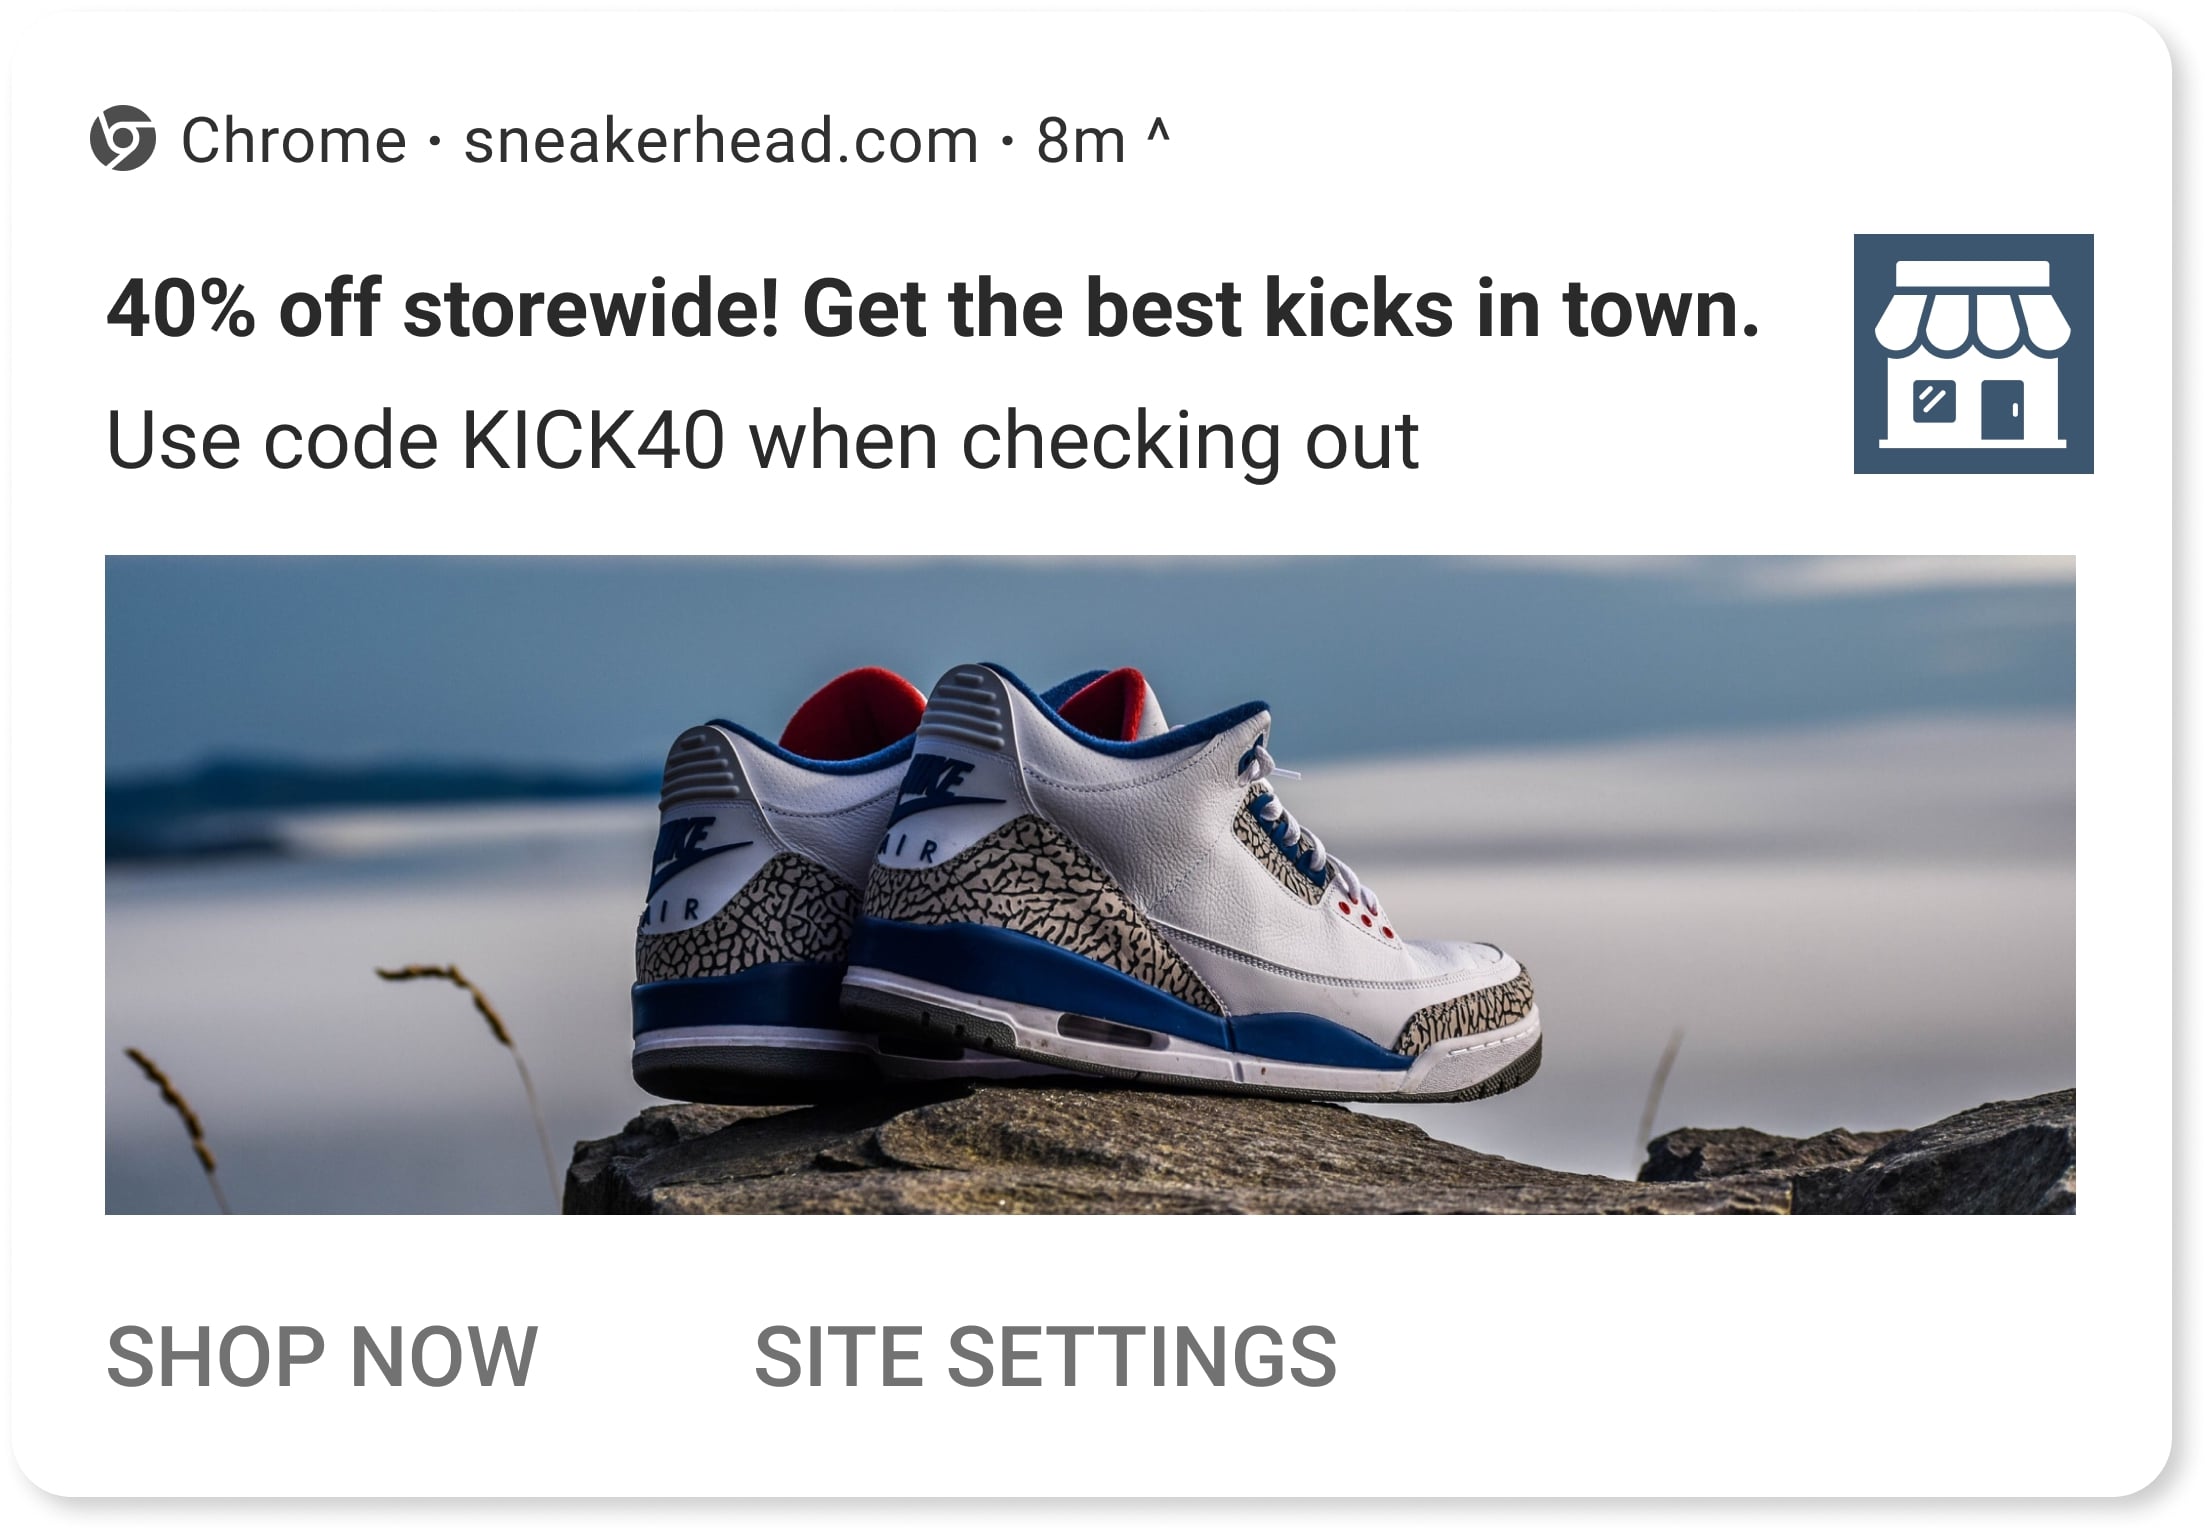
Sending a web push campaign is similar to how you send email campaigns to your email subscribers. You can create a campaign based on the offer you are running or feature a product you want to highlight. Once you’ve put together your campaign, you can choose to send or schedule a time for when this notification should be sent to your subscribers.
Here are a few types of campaigns you can send:
Sale
Promote your store offers by sending web push campaigns to your shoppers enticing them to visit your store. You can include the discount amount and expiry date of the sale so that shoppers are quick to click through.
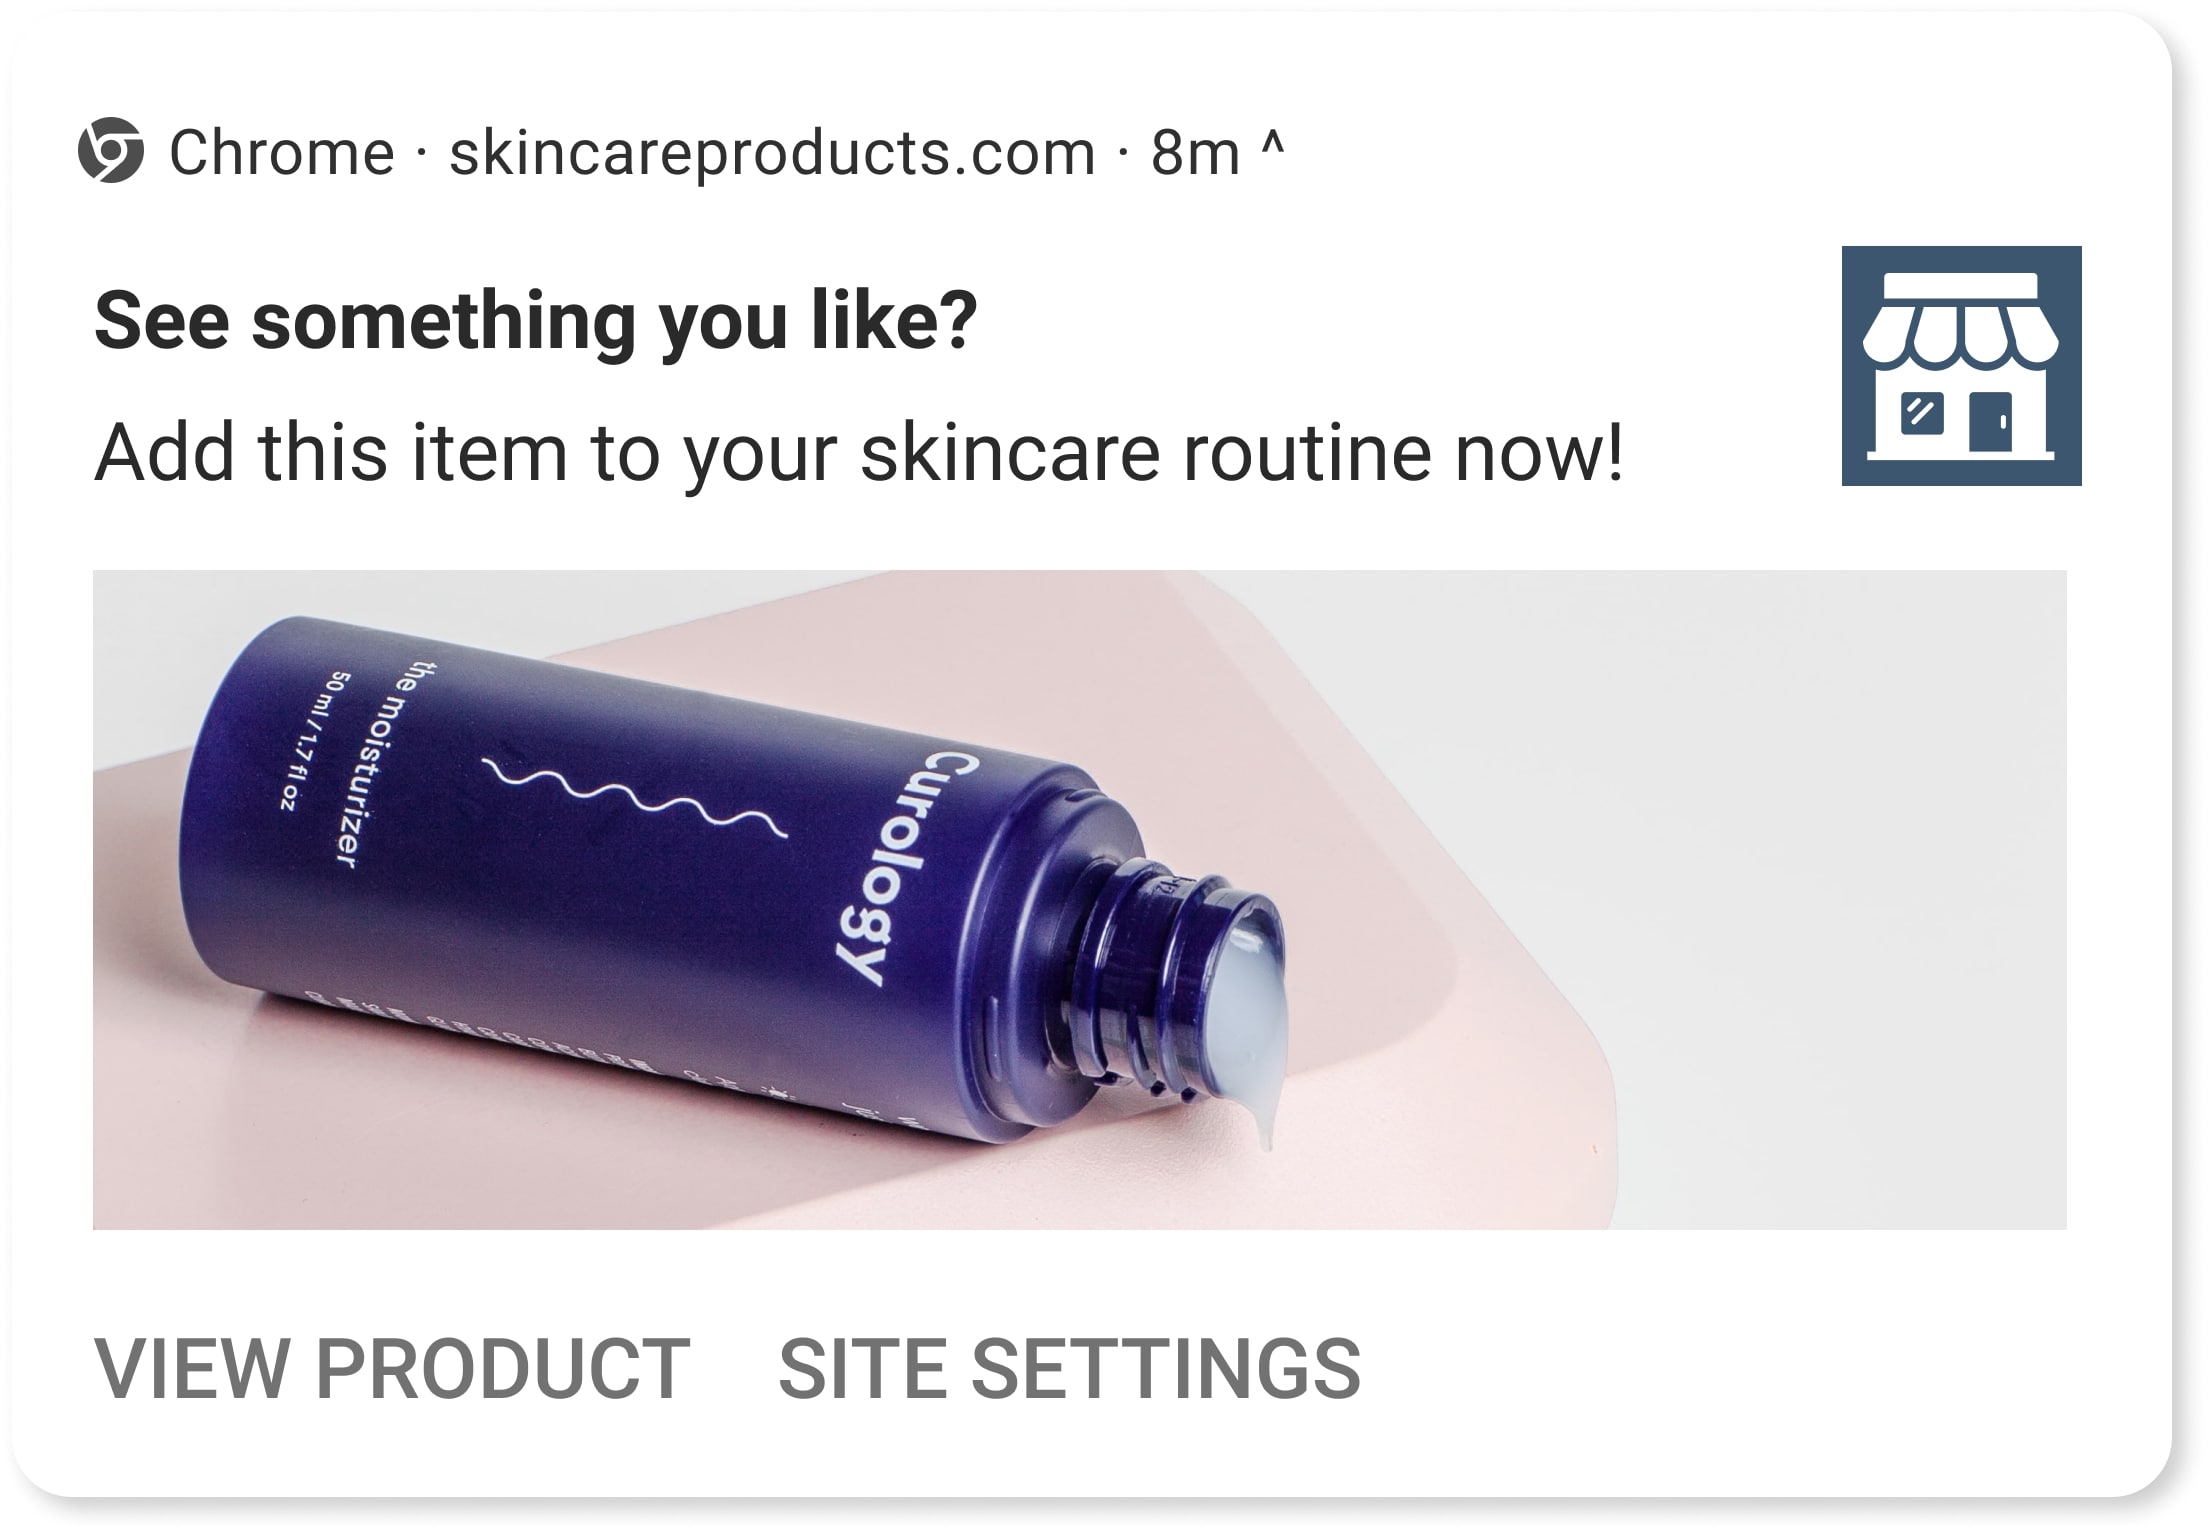
Product promotions
Send a web push campaign that highlights and promotes a product on your store. You can promote a product that is not selling well enough to nudge more sales or a bestselling product that you want your subscribers to take notice of.

New Product Launch
When launching a product, you need to get it in front of your shoppers and tap into ways to get them to visit the product page. Send a web push campaign to instantly grab shopper interest about your new product.
Holiday Promotion
Use web push notifications to promote holiday sales like Christmas and Easter. Add warm wishes within your message to make your subscribers feel good.
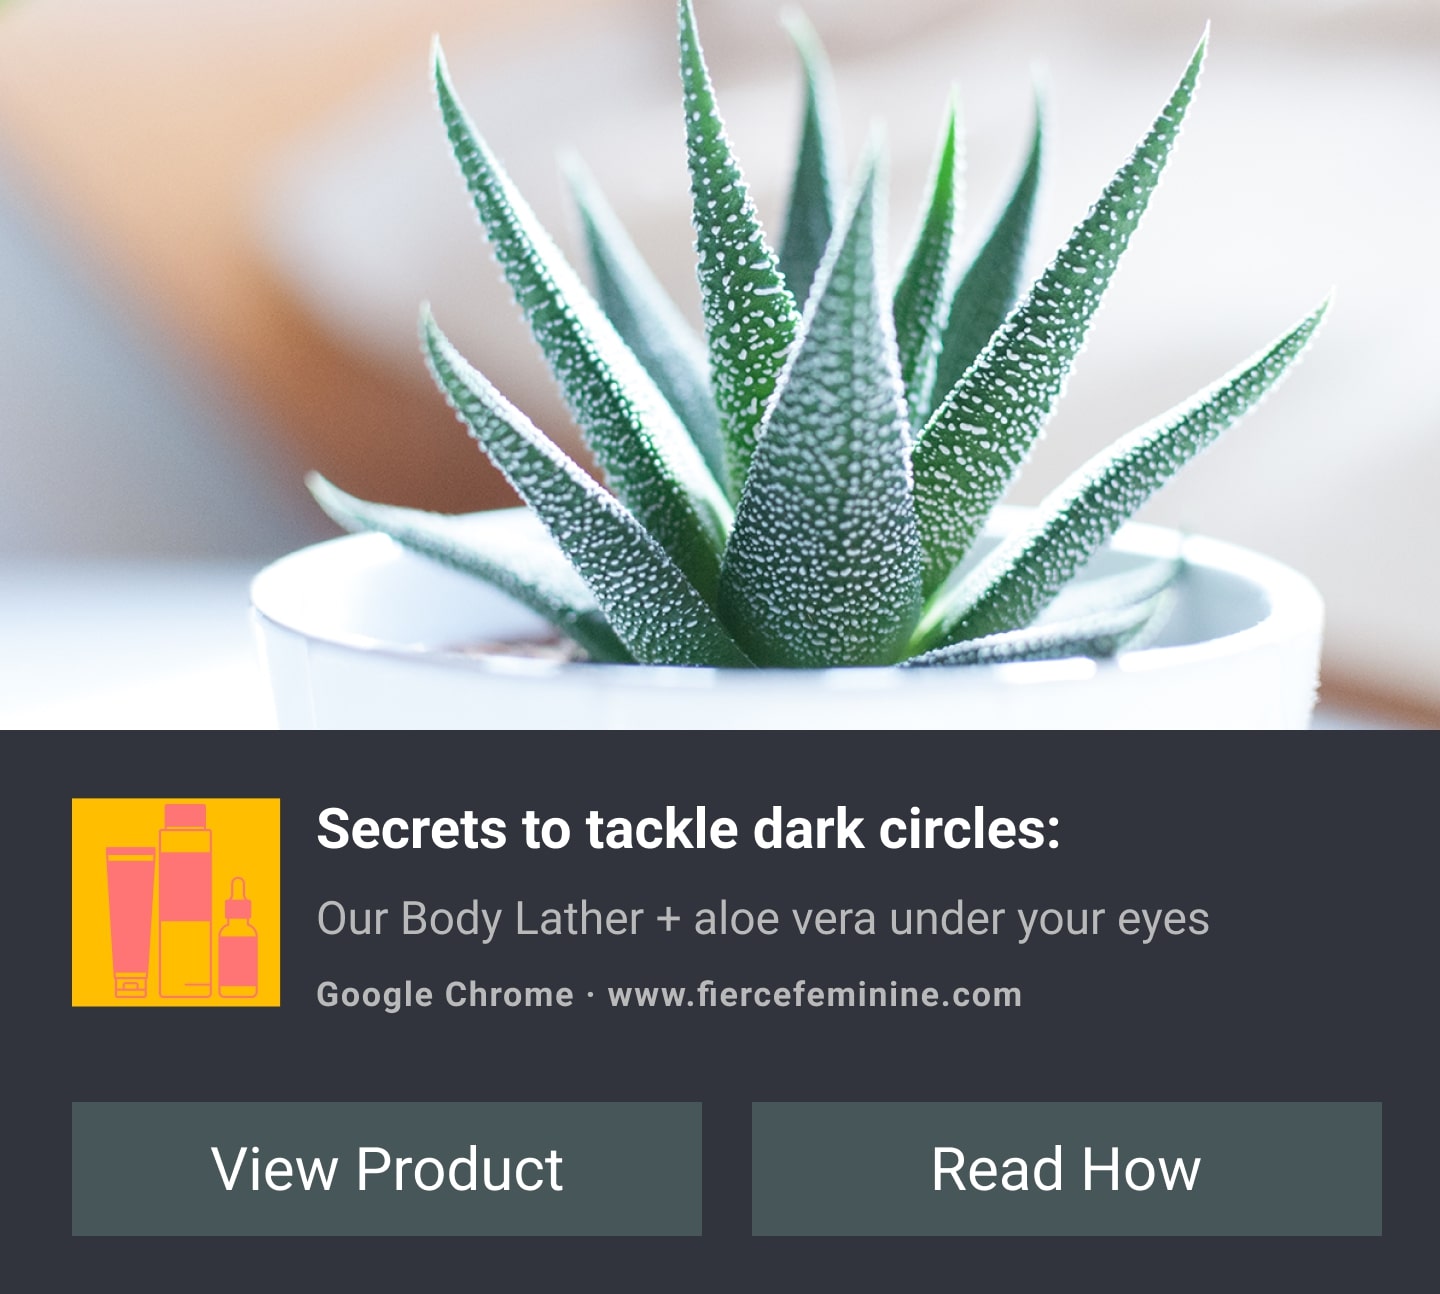
Product Hacks and Tips
Adding value to your customers can help you build a relationship with them, making them more likely to choose your brand when they are looking for products similar to what you sell.
Send promotions about tips and advice to your subscribers. This can either be advice on how to use your products or general tips related to the industry you have created products for.
2. Automated notifications
These are 5 types of automated notifications you can set up:
Abandoned Cart Reminders
One of the most powerful web push features is the abandoned cart reminder. This automation allows you to set up a sequence of 3 notifications that are automatically sent to subscribers who abandoned their cart to bring them back to checkout. Brands like Headphone Zone have been able to generate $123,279 from abandoned cart reminders in just 7 months!

Browse Abandonment
Set up Browse Abandonment notifications to bring back store visitors who viewed a product on your store but didn’t take any action. This feature helps you ensure that you can reel back subscribers who browsed and get them to add items to their cart.
Welcome Notifications
Welcome Notifications allow you to create a positive first impression. They are sent to your subscriber as soon as they subscribe to your store.
You can use this message to welcome the subscriber to your community, provide an offer to nudge their first purchase, or just confirm their subscription.
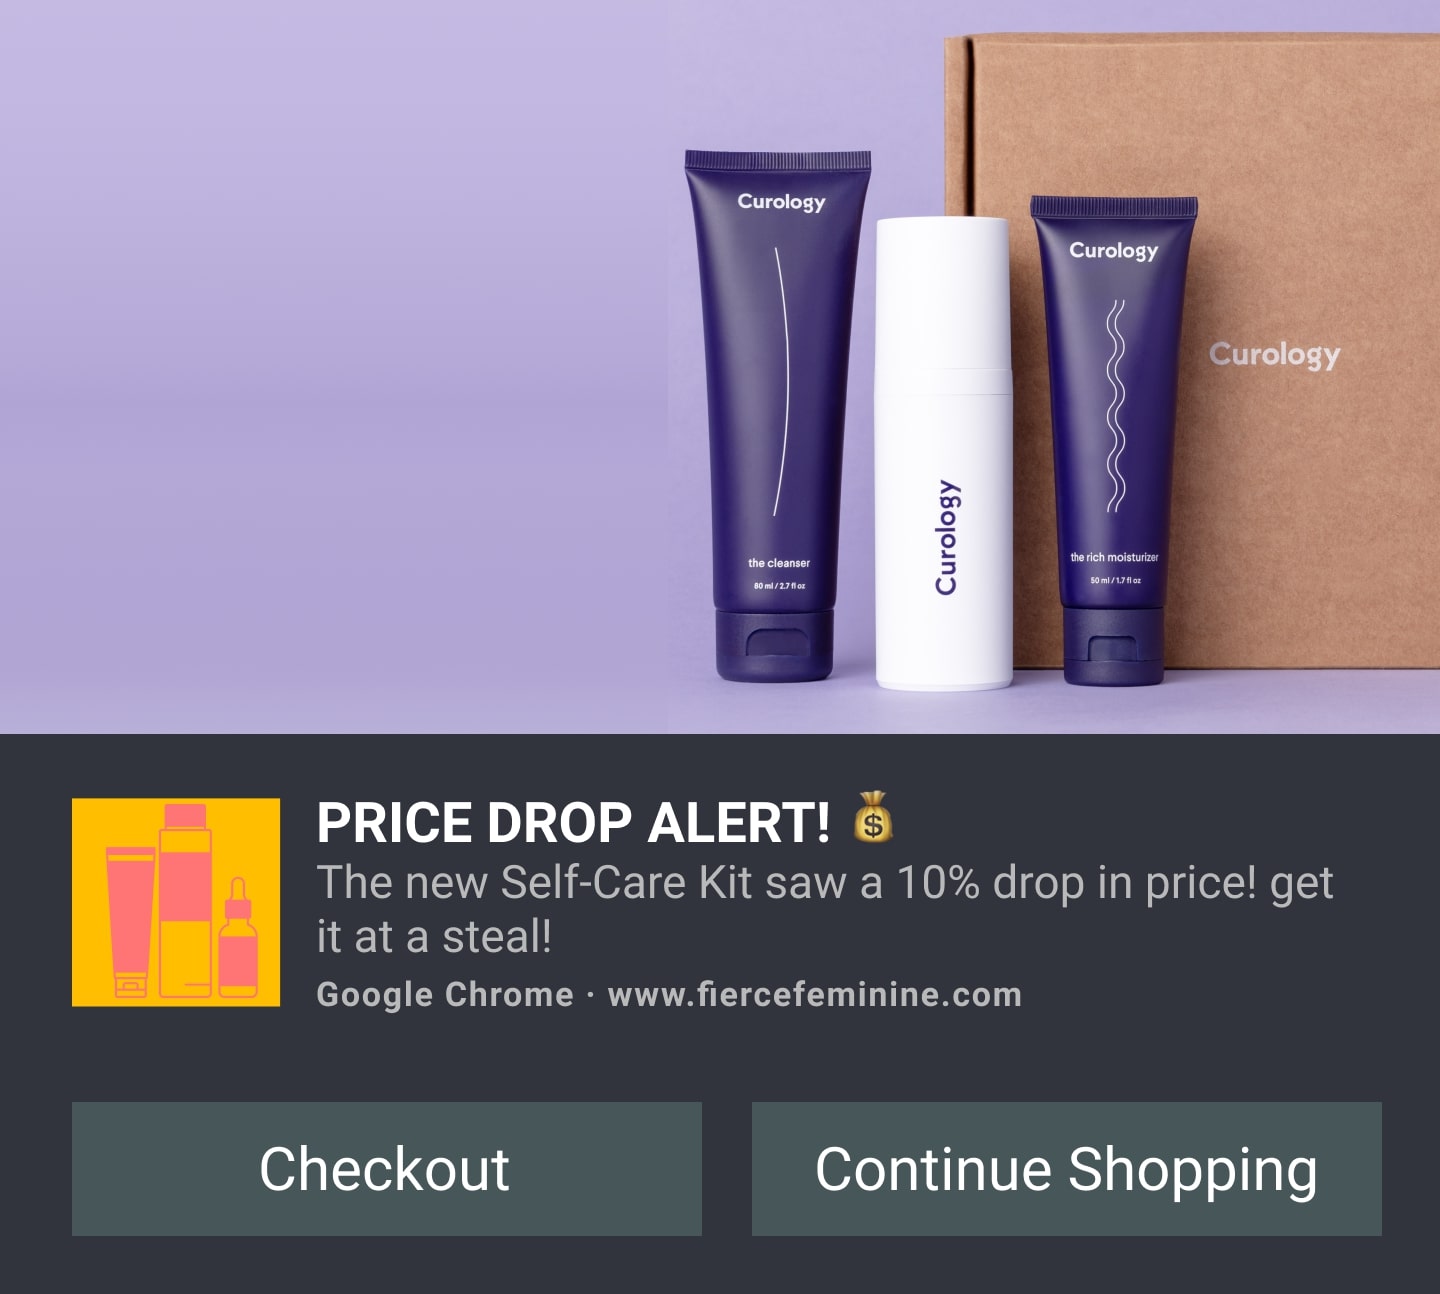
Price Drop Alert
You can cater to deal-hunting shoppers by setting up a Price Drop Alert on your product pages.
Shoppers who are interested in your products but don’t want to buy it at that price can subscribe to be notified when the product’s price drops. When the price drops, they will automatically receive a price drop alert, successfully bringing them back to your store.
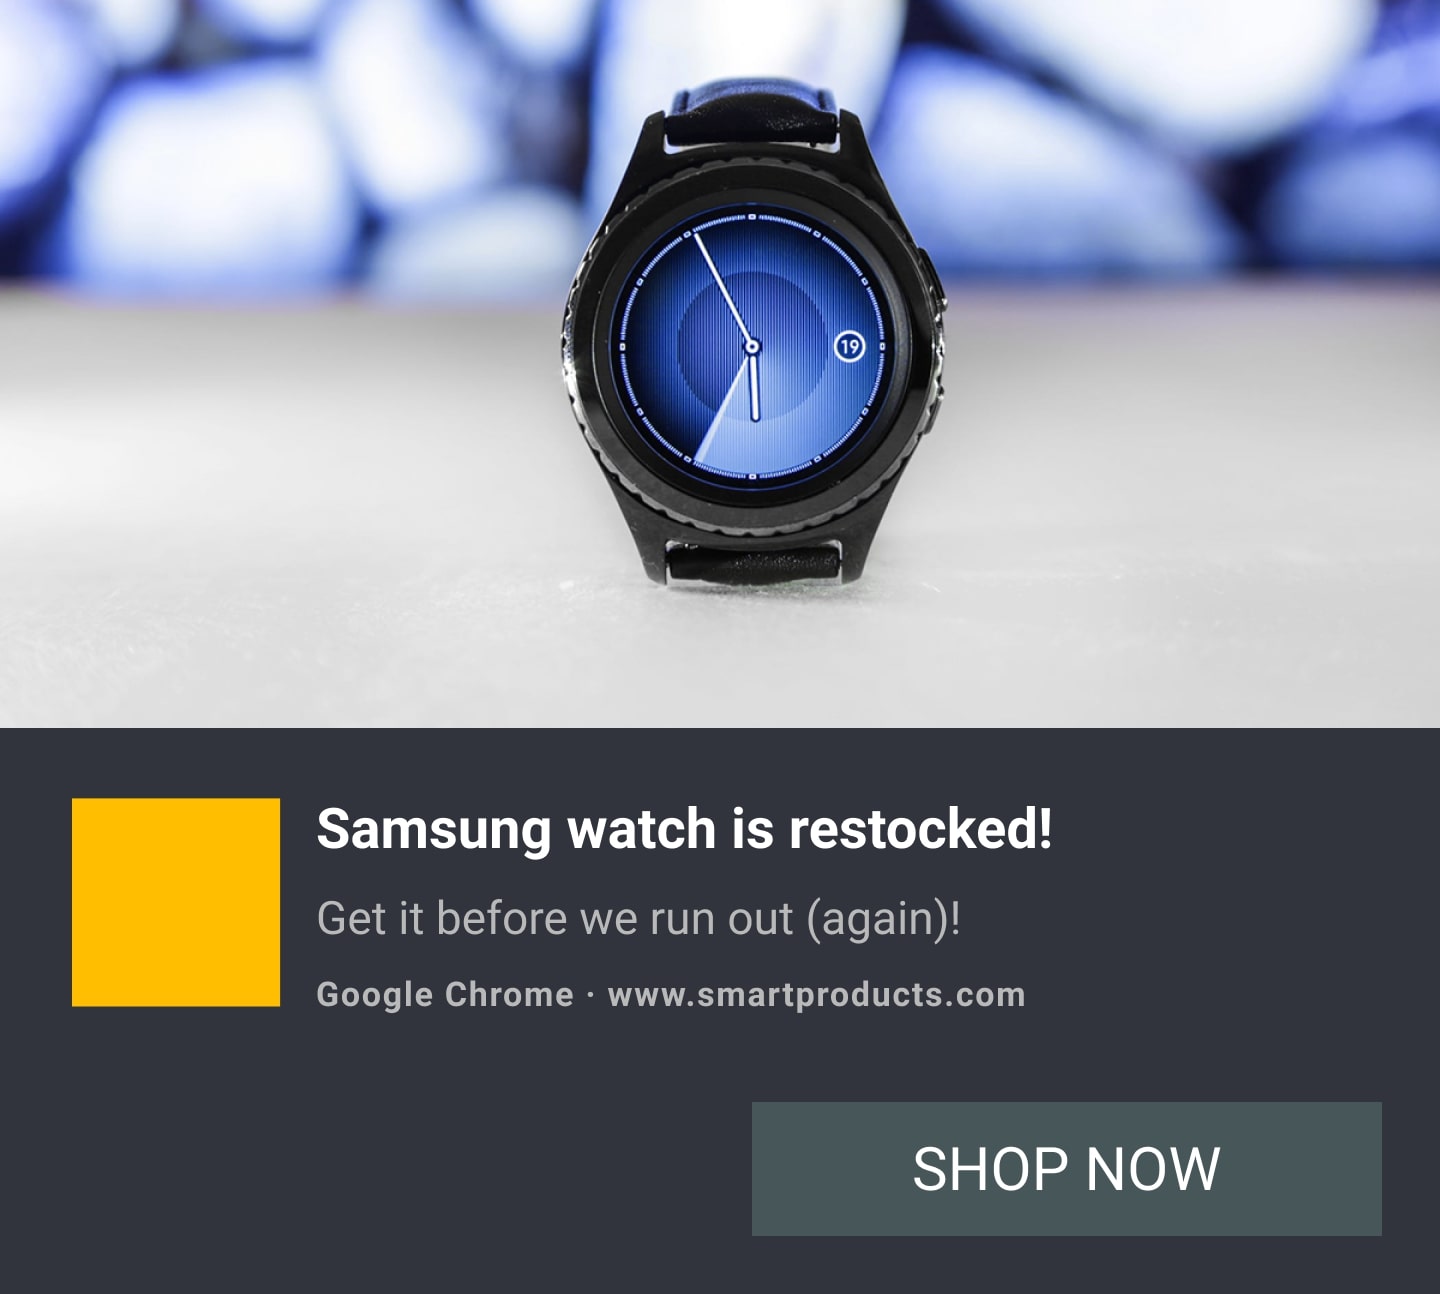
Back in Stock Alerts
To avoid losing shoppers to product unavailability, you can set up Back in Stock alerts on your store.
Shoppers who are interested in a product that is stocked out can subscribe to be alerted about its re-availability. Once the product is back in stock, the shopper will be sent a notification so that they can come back to your store to purchase.
Related posts:
- 19 Checklist Before Launching Shopify Store
- How to Build the Perfect Shopify Homepage?
- How to Start a Successful Shopify Store?
- 10 Tips to Make the First Sales on Shopify
6 Steps to Start Web Push Notifications woth Shopify
1. Install PushOwl
Start by installing PushOwl. PushOwl is the leading web push Shopify app, allowing merchants of all sizes to use web push notifications as a marketing channel.
The Shopify app has a free plan with robust features. You can test out advanced features with the free trial available for all merchants or even avail the Early Stage plan available for small businesses.
Bonus offer: Use code AVADA30 to get a 30-day extended free trial for the PushOwl Business plan.
Install PushOwl to start generating revenue using web push notifications.
2. Upload your store logo
Once set up, upload your store logo on the PushOwl dashboard. This logo is shown within all your web push notifications, allowing your subscribers to instantly recall that the promotion is from your store.
3. Customize your Custom Prompt to capture more subscribers
The Custom Prompt lets your store visitors understand why they should subscribe to you. Many stores use the Custom Prompt to let their visitors know that they can unlock a discount by subscribing or they inform them about what they stand to gain once they subscribe.
4. Optimize your Welcome Notifications
Your welcome notification helps you connect with your subscriber better and make a memorable impression. If you promised a discount in your Custom Prompt, you can use the welcome notification to share the discount link or code with your subscriber.
5. Set up Abandoned Cart Reminders
If you’ve availed the Business plan or are on a free trial for this plan, you can enable abandoned cart reminders to automatically remind shoppers who left their cart and successfully bring them back to checkout their cart.
6. Start sending campaigns!
Once you’ve acquired more subscribers, you can start sending campaigns and bringing back visitors to shop your products.
We hope this guide helped you understand the benefits of web push notifications and how you can start generating revenue using web push for free.
Start generating revenue using web push notifications with PushOwl!


New Posts


How To Set Up Google Analytics 4 For Your BigCommerce Store
