
The Ultimate Guide To Using Optinmonster: Everything you need to know
By Sam Nguyen

Drive 20-40% of your revenue with Avada
If you want to expand your email list and acquire more leads, you’ll need a tool that can help you execute conversion-optimized strategies. OptinMonster is one of the best tools to help you do just that. It allows you to build a range of pop-ups and opt-in deals that connect directly to your favorite email marketing service.
But where OptinMonster has several features, but it’s mainly all about its advanced targeting, triggering, and customization features. This helps you to tailor your promotions for particular content and customers, which can increase your engagement rates and help you compete more effectively. In this analysis of OptinMonster, I’m going to use this powerful tool to help you determine if it’s right for your website.
Five Reasons to Use OptinMonster
First, let’s review some of OptinMonster’s biggest benefits that you can have.
Multiple Types of Popups
When thinking of OptinMonster, most people think of “traditional” centered lightbox popups. OptinMonster, however, actually enables you to create six different types of opt-ins (or offers):
- Popup
- Floating bar (AKA notification bar)
- Fullscreen
- Inline
- Slide-in
- Gamified
The most unique choice here is undoubtedly Gamified, which allows you to create an interactive spinner wheel. This is particularly useful for eCommerce stores because it lets you build a “Spin to Win” wheel that deals with discount codes.
Drag-and-Drop Popup Builder (and Pre-Built Templates)
Another major advantage of OptinMonster is how simple it is to build great-looking pop-ups without needing a designer or any special technical expertise. There are two variables that are part of this. First, when you build a new popup, you can select from a number of pre-built templates you want to use. This lets you get started quickly with a great-looking opt-in that was designed by a professional designer. Then, to help you customize stuff, you can customize your template using the drag-and-drop editor. You’re going to be able to:
- Control styles for all elements
- Re-organize elements using drag-and-drop
- Add or remove new elements if needed
Detailed Targeting and Trigger Rules
One of the strongest features of OptinMonster is its detailed rules for targeting and activating popups. Compared to most other popup solutions, particularly WordPress plugins, you simply get more options to target where your popups appear, who sees them, and when they appear. You can also combine all these rules in infinite variations, which gives you even more flexibility.
OptinMonster categorizes its targeting and trigger rules into four groups:
- Trigger
- Personalization
- Targeting
- eCommerce
Trigger rules allow you to choose when your popups display. You can trigger by these criteria:
- Time on site
- Inactivity
- Time on page
- Date
- Date & time
- Time
- Month of the year
- Day of the week
Targeting rules allow you to target conditions such as:
- If a visitor clicked a link
- Content on your site
- Geolocation
- Ad-blocker usage
- Referring URL
- Browser cookies
- Scroll distance
- Anchor tag
- URL queries
With the free OptinMonster WordPress plugin, you will also be able to target all WordPress categories and tags, as well as whether or not a visitor is logged in to WordPress. Personalization rules let you aim at the basis of user behavior such as:
- Exit intent
- New vs returning visitor
- Visitor device (e.g. mobile vs desktop)
- Whether or not they have closed a certain OptinMonster campaign
- Whether or not they have converted from a certain OptinMonster campaign
- Whether or not they have visited a certain page
- Whether or not they have seen a certain OptinMonster campaign
The most important rules that Optinmoster offers, I believe, are the rules of personalization. Personalization is a perfect way to improve your conversion rates, and OptinMonster gives you all the power you need to customize your campaigns. For instance, if you already know that someone is interested in WordPress (because they’ve already converted to a WordPress offer in the past), you might use this information to show more WordPress-related offers to them, which will have a much higher probability of converting.
You may also show them an offer that relates directly to the previous offer. For example, if they have already been converted to your “How to Create a Blog” offer, you might show them a “How to Get Traffic to Your Blog” offer that is related to that first offer. The one place where OptinMonster falls a bit flat v.s dedicated WordPress popup plugins is in some more advanced WordPress-specific targeting. For instance, most WordPress popup plugins make it easy to display/hide popups for certain WordPress user roles, rather than just logged-in visitors. This is what you can do with OptinMonster. However, you may need to use a custom code snippet and modify it according to your needs, which can be a little frustrating for non-technical users.
Easy Analytics and A/B Testing
To help you develop your offers, OptinMonster provides valuable analytics for all of your popups and also gives you the ability to quickly run A/B tests to compare various popups against each other. OptinMonster offers you two ways of collecting/viewing analytics. Next, OptinMonster has its own simple analytical method that will let you know:
- Total impressions
- Top-converting pages
- Conversions
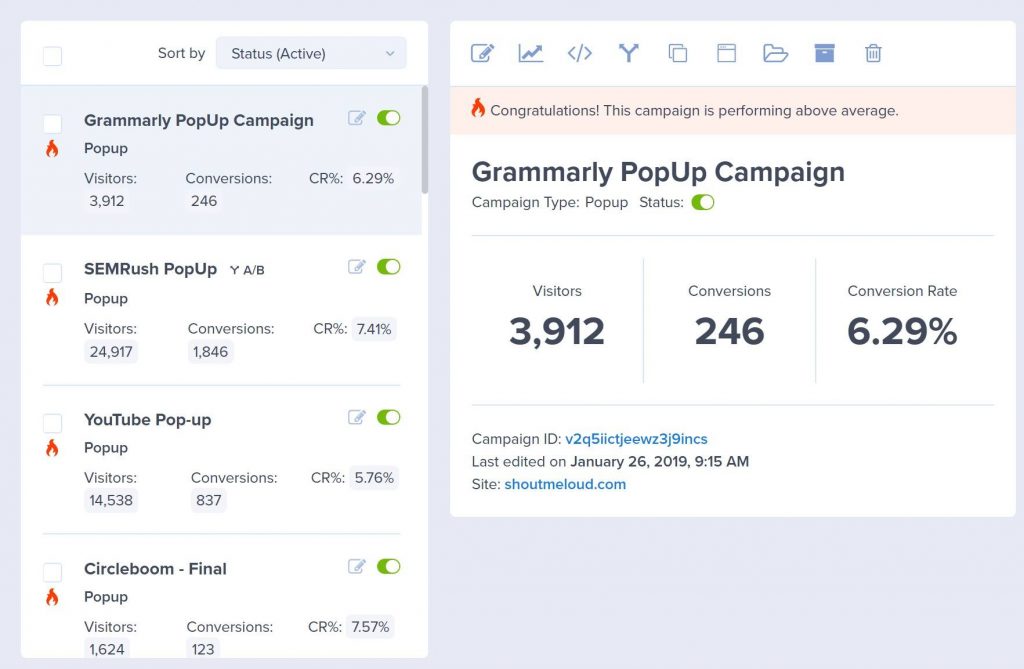
If you want to see more comprehensive analytics, OptinMonster also has a built-in Google Analytics integration that lets you see even more detailed details in your Google Analytics dashboard. With Google Analytics integration, OptinMonster can set up Event Monitoring so that you can see the conversion information in Google Analytics. You will also be able to integrate this information with all other Google Analytics reporting options. Besides letting you know how your popups are doing, OptinMonster often makes it easy to build A/B tests to assess various variations.
Dedicated eCommerce Features
If you run an eCommerce shop, you’ll really enjoy some of OptinMonster’s dedicated eCommerce features. OptinMonster comes with integrations for common eCommerce tools like Shopify, WooCommerce, and BigCommerce. You will be able to tailor your deals on the basis of the following conditions:
- If a shopper has added a specific item to their cart
- The total number of products in a shopper’s cart
- The total value of the products in their cart
- The specific product that a shopper is viewing
This will open up a lot of fantastic marketing opportunities. For example, if a shopper adds a certain item to their cart, you can activate an upsell offer. Or, if you see that their cart value reaches a certain amount, you can activate a free shipping offer.
How to Use OptinMonster to Create Offers
Now that you know some of the most powerful features of OptinMonster, let’s take a more general look, and I’ll present to you how to use OptinMonster to create popups.
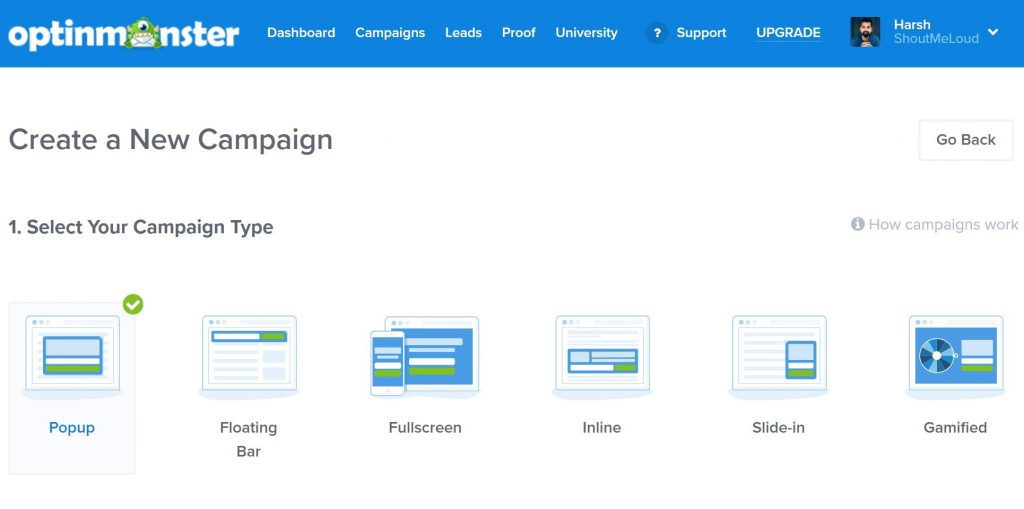
Step 1: Create a new campaign
In OptinMonster, each opt-in form that you create is called a “Campaign”. When you set up a new campaign, you’ll need to first choose the type of campaign. Again, you can get six different options:
- Popup
- Fullscreen
- Floating bar (AKA notification bar)
- Slide-in
- Inline
- Gamified
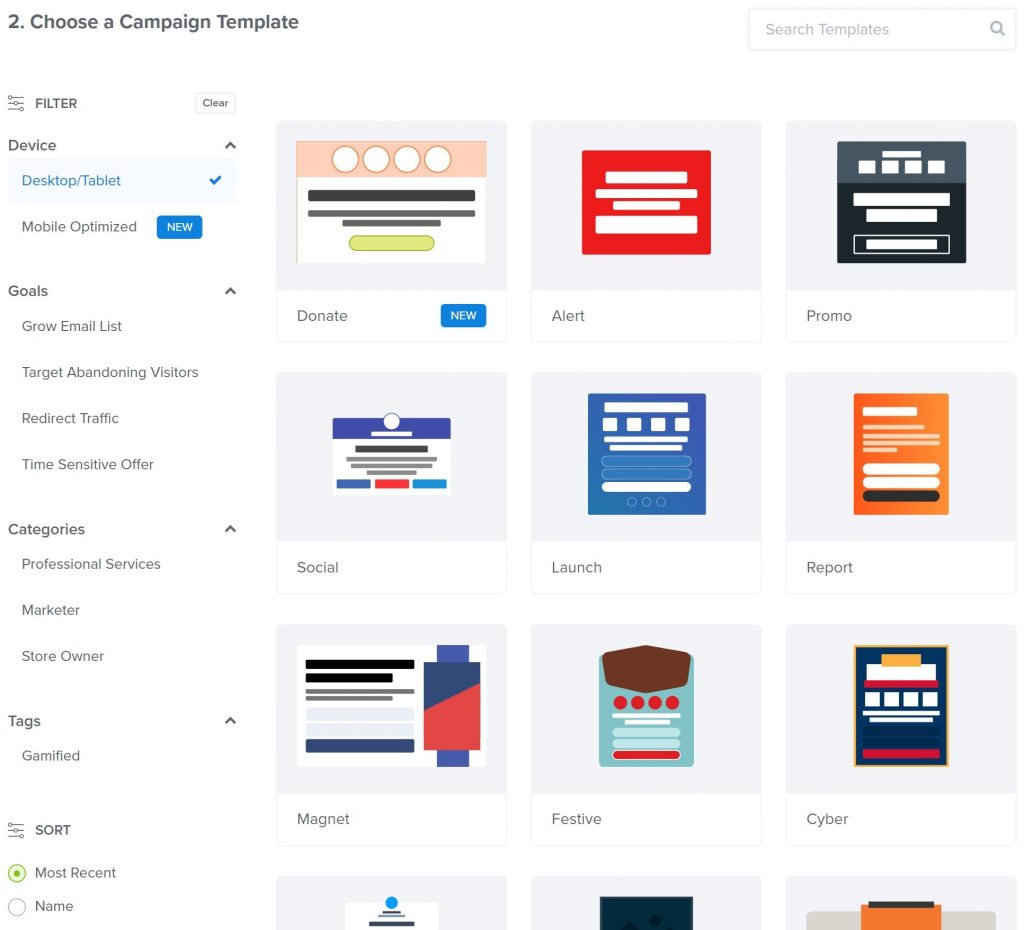
Once you pick the type of campaign you want to create, you’ll see a list of templates that relate to that campaign. You can also use the side filters to filter various targets, devices, groups, etc. The exact number of templates depends on the form of opt-in, but you have a reasonable option for all of them. For example, the category “Popup” has 55+ different templates:
Step 2: Design your opt-in
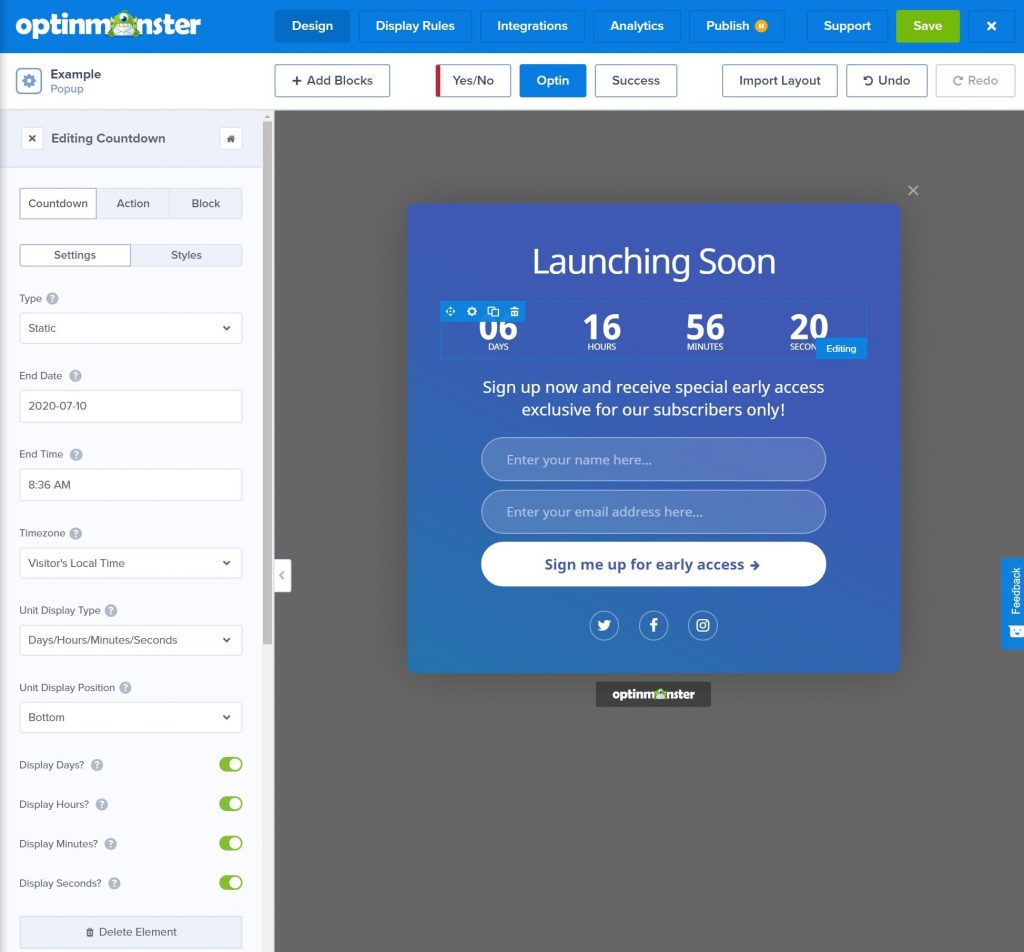
Once you have selected your start template, OptinMonster will open a visual drag-and-drop editor. You’re going to see a live preview of your opt-in. All you need to do to rearrange the components is drag-and-drop them. You may also use the sidebar to check other design settings, such as colors and fonts:
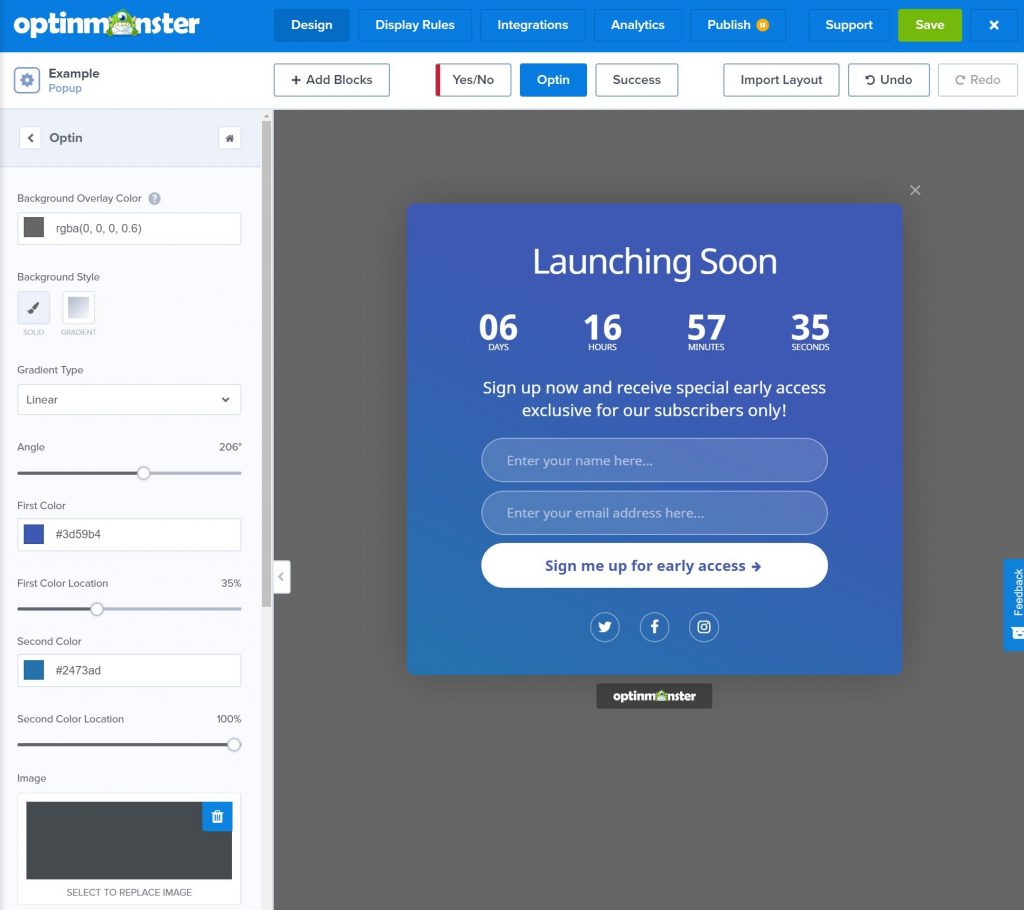
If you click on a block in your template, you will be able to customize it. For example, if you click on the countdown timer, you can select different countdown approaches and set the end time:
If you want to add more content to your opt-in, you can press the +Add Blocks button to select from a number of templates or content elements. You will also be able to use the same editor to build the next steps of your opt-in. For example, if you view the “Success” page after a visitor enters their information, you will also be able to customize it.
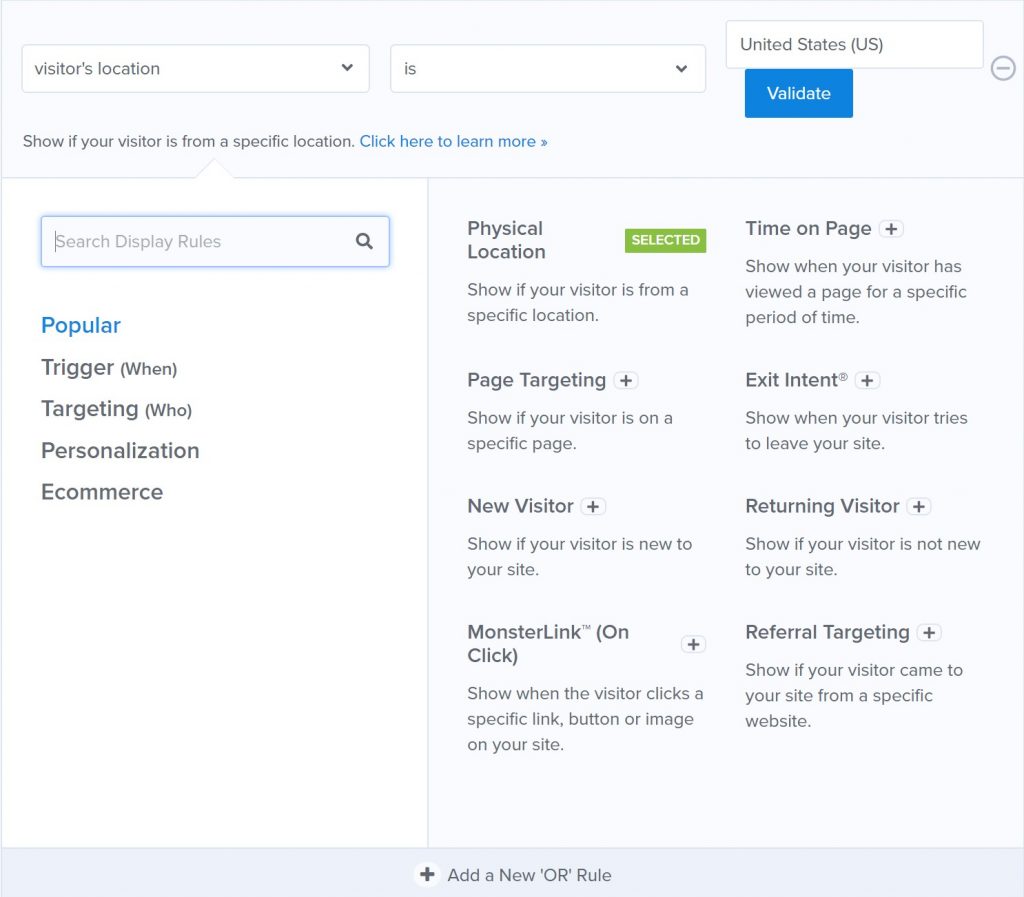
Step 3. Select your display rules
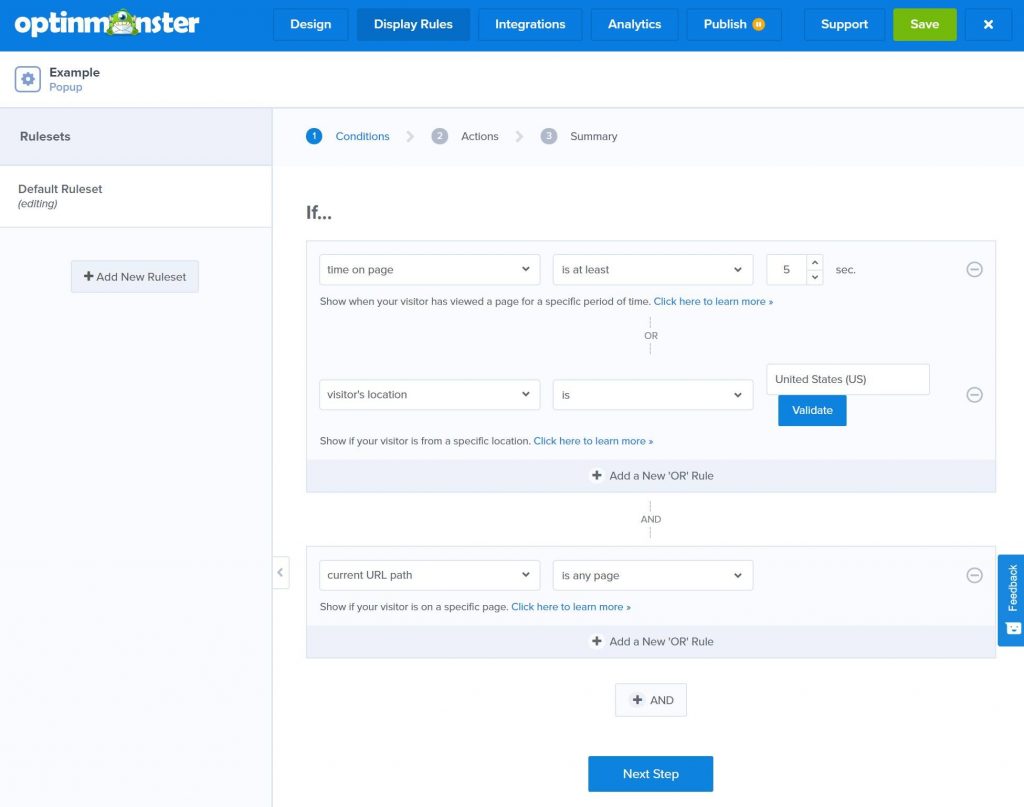
Display rules let you monitor who sees your popups, what material your popup displays for, and when visitors see your popup. As I mentioned earlier, the show rules are certainly one of the strengths of OptinMonster, as you literally get more choices than many other tools offer.
You can create infinite “Rulesets” and each set of rules can include combinations of different show rules. What’s more, when you create a mixture of rules, you can use both the “AND” and the “OR” rules:
- AND – all of the conditions must be met for the popup to trigger.
- OR – as long as one of the conditions is met, the popup will trigger.
It may sound a little confusing, but it’s not hard to understand. And once you understand how it works, you’re going to have a lot of influence over who/where/when your popups appear.
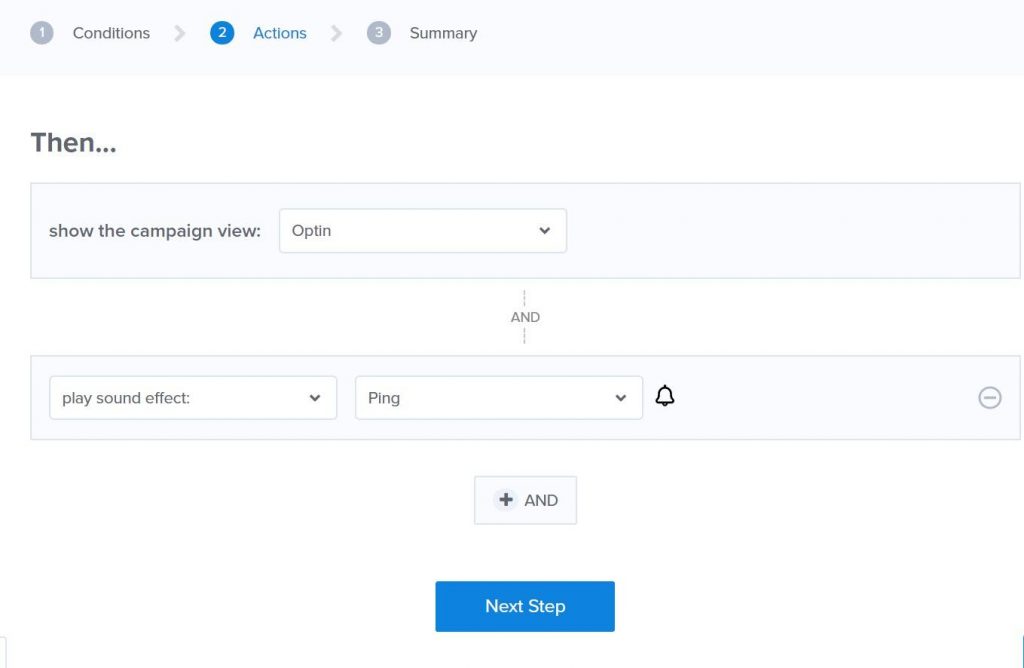
After you have set the rules, you can select the action that will happen if the rules are met. For example, a view that shows the opt-in form or the success page). You can also add animations and sound effects with the + And button:
You can create several sets of rules for various scenarios. You only need to follow the same process to construct another set of rules.
Step 4: Set Up Integrations
Next, you need to select which email marketing provider/CRM you want to connect to on the Integrations page. OptinMonster includes all the big names, and Zapier Webhooks are also integrated to help you connect to other resources if needed:

Step 5: Set up analytics
As I described earlier, OptinMonster provides its own analytical tool which is quite basic though, so if you want to link to Google Analytics for more comprehensive data, you can do this on the Analytics tab:
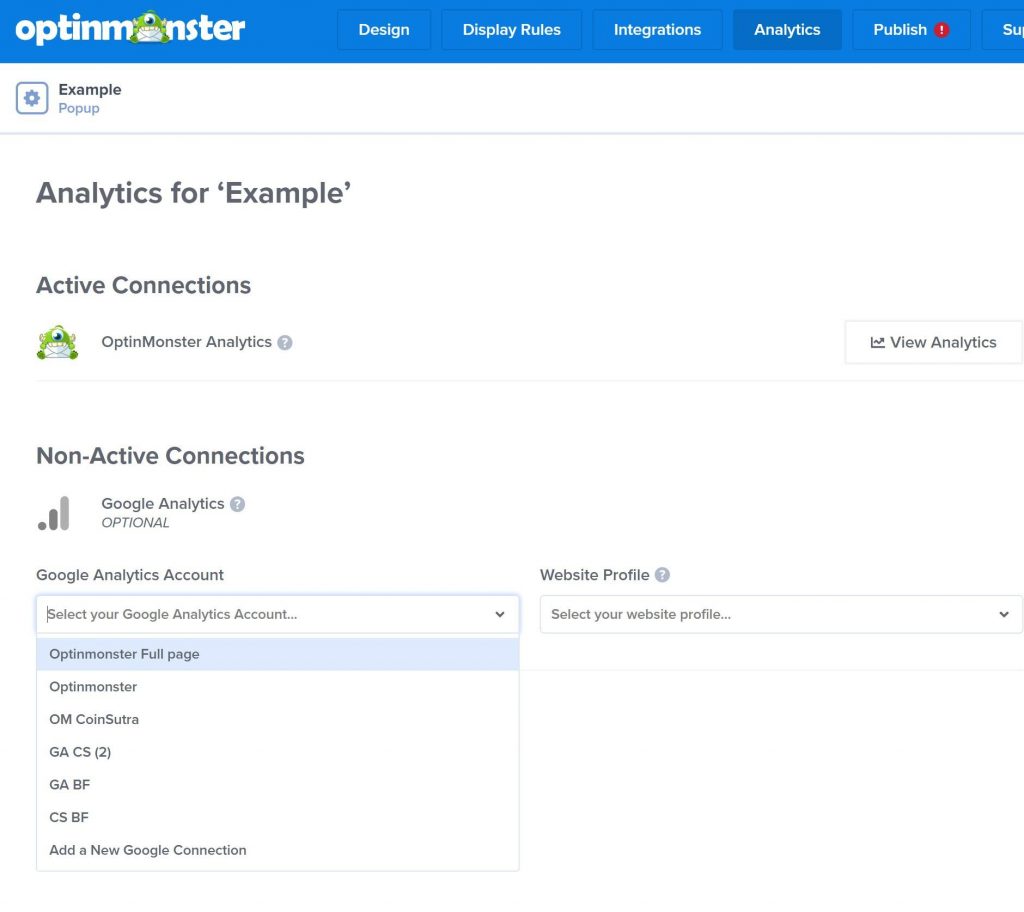
You will be able to use various Google Analytics assets for different projects, which is helpful if you use OptinMonster on several websites.
Step 6: Publish your pop-up
Finally, all you need to do is pick the website where you want to publish your popup to bring it live:
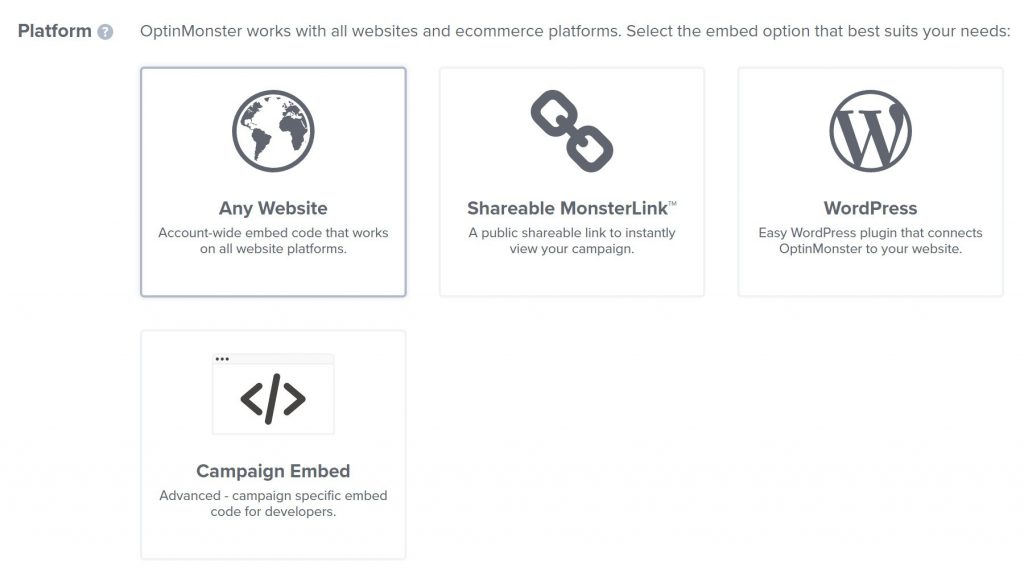
OptinMonster can work with any kind of website – you only need to add a code snippet. However, if you are using WordPress, OptinMonster also provides a free WordPress integration plugin that simplifies the setup process for using OptinMonster on WordPress. The WordPress plugin also gives you a couple of additional WordPress unique targeting settings:
- Show/Hide a campaign for WordPress users logged in
- Target unique categories/tags for WordPress
Also, you can use a code snippet to target unique WordPress user roles, as I stated earlier.
OptinMonster Pricing
Although OptinMonster has a dedicated WordPress plugin, the OptinMonster service itself is a SaaS, which means that you will have to pay a monthly charge for as long as you want to use the app. This is OptinMonster’s biggest drawback. Although the tool itself is very effective, it may be a little costly if you’re just getting started or if you’re on a tight budget.
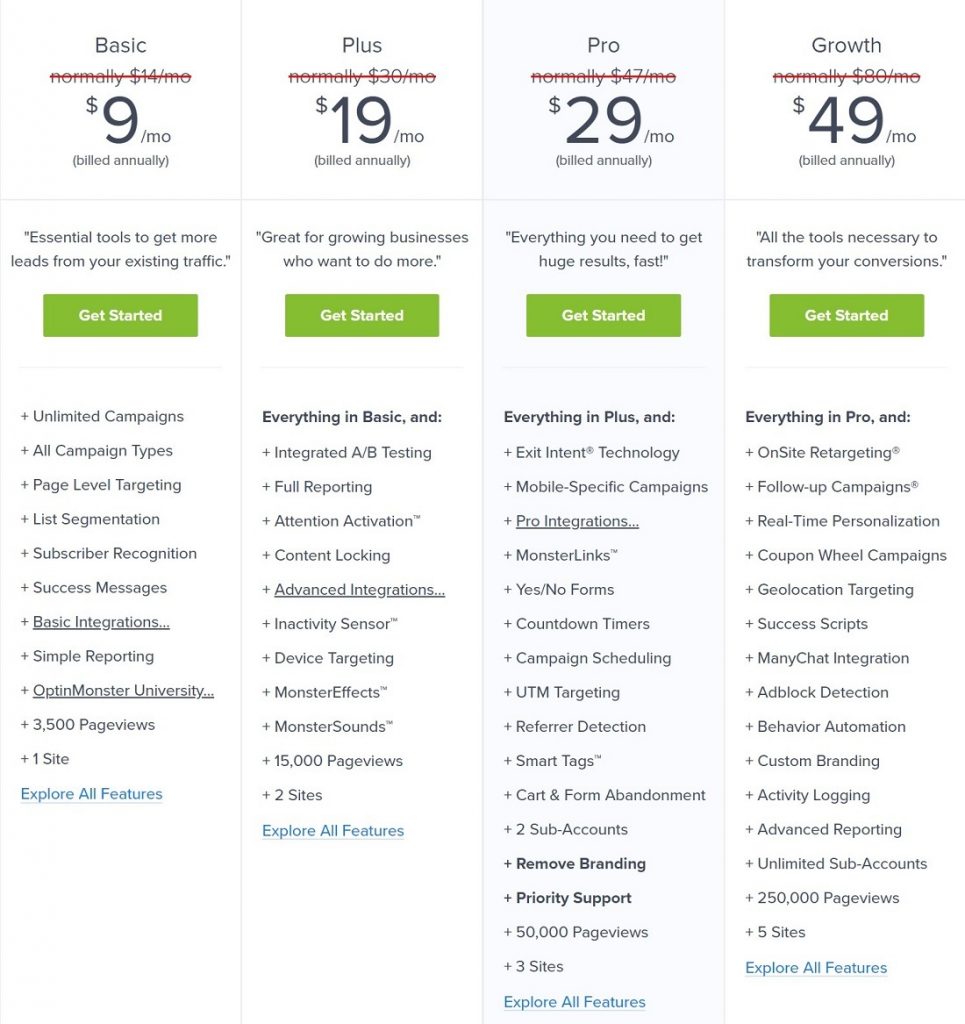
Plans start at $108 a year to use OptinMonster on a single website with up to 3,500 page views per month (only pageviews where you display OptinMonster count). But that lowest-cost plan doesn’t have all the features. For example, you would need a higher-level plan to get the following features:
- A/B Testing – you need to pay for the $228/year Plus plan.
- Exit Intent – you need to pay for the $348/year Pro plan.
- Remove OptinMonster branding – you need to pay for the $348/year Pro plan.
There are also other variations in functionality between the plans, as well as differences in the number of pages and the page views you receive.
Final Words
OptinMonster is certainly one of the best pop-up marketing tools in terms of features and versatility. If you’re a marketer or company owner who can take advantage of the advanced features of OptinMonster when it comes to targeting and customization, it’s a great tool. Not only will you be able to create great-looking deals, but you will also be able to target them to the best viewer, content, etc. I hope this article has given you a comprehensive view of Optinmonster. Please feel free to leave comments for further discussion on this topic.


New Posts


How To Set Up Google Analytics 4 For Your BigCommerce Store
