
How To Create An Exit-intent Automation Email Campaign?

Drive 20-40% of your revenue with Avada
Here is a hard to accept fact: You only have a few seconds to impress a visitor and make them stay on your website. No matter how brilliant the design and content is, visitors can still leave and never return in a heartbeat. And for your part, you have to relay your message, hook the visitors, and convince them to trust your business in those measly seconds.
Consumer attention is short, the digital competition is fierce, and the conversion rate won’t increase by itself. You need a good strategy to keep visitors from abandoning the ship, and you need it now. Thankfully, exit-intent strategy exists to keep your website’s traffic stay and check out what you have to offer.
In this article, I will show you how to create an exit-intent automation email campaign, combining popups and emails, to effectively convert bored visitors into loyal buyers. After reading, you will confidently turn your eCommerce website into a conversion machine that capitalizes on every prospect that is about to leave. Let’s begin!
What is an exit-intent email?
First, you should understand why customers have exit intentions. Many reasons can cost conversions on your website and make visitors bounce. What is a bounce? It is when a visitor leaves your site without continuing to browse. The number of single-page visits like this is called a bounce rate.
Obviously, the higher the bounce rate is, the worse the conversion rate is. For perspective, the average bounce rate for eCommerce sites is 33.9%, but this differs on different types of sites too. For blogs, the bounce rate tends to be between 70-90%, while the service site’s bounce rate is 10-30% of the time.
To stop visitors from leaving, eCommerce stores have exit-intent technology, which can detect when someone is about to leave and show the visitor a final message (as a popup) right at the vital moment. This popup would be the lead magnet that helps store owners collect emails for the campaign. And data shows that popup works too, with an average conversion rate (which means visitors took action with the popup) of 9.28%.
This is where exit-intent emails come into work; they follow up with what the popup offers and lead prospects further down the sales funnel, eventually converting successfully. Based on the popup, exit-intent emails will be the next logical step for the visitors to take. The common strategies for an exit-intent system like this are:
- Offering a coupon or a discount code
- Asking visitors to attend a survey
- Encouraging visitors to subscribe to the newsletter
- Creating a free ebook or guide to download
- Presenting visitors with items in their carts
How do exit-intent emails work?

Getting visitors to your eCommerce site takes a lot of effort. When they get there and start browsing, you want to leverage every opportunity to convert them into new customers, or at least new subscribers. But the problem is that each visitor behaves differently on a site’s offers.
This means you need to analyze visitors’ behaviors, like how long till a visitor often leaves the site, what pages get the most views, and when people are more likely to engage. By understanding visitors’ exit intention, you can determine the moment when a prospect is about to leave your site.
The right digital marketing tools can track visitors’ behaviors like:
- How long a visitor remains idle
- Where visitors move the cursors
- The activity level of a visitor
- How far a visitor often scrolls through a page
- Previous site activities and history
This information gives you a chance to connect with visitors one more time and the tools don’t cost a lot to implement too. More than that, when visitors decide to engage before leaving, you can segment them based on types of popups and have even more personalized exit-intent emails - helping you seal the deals better.
As mentioned, exit intent popups are message boxes appearing right at the moment a visitor is about to leave the site. According to data, 10 - 15%of your site’s lost visitors can be “saved” with exit intent popups. Combined with exit intent emails being sent immediately when visitors finish filling in the popups, you have a powerful process of re-engaging with visitors.
With the right approach, exit-intent popups and exit intent emails will provide visitors with what they subscribed for and even more, forming a relationship with the prospects, and finally converting them into customers.
One-click install exit-intent email series free
Why does your business need exit-intent emails?
When a customer leaves your site, you’ve lost an opportunity to sell, maybe forever. Exit-intent emails and popups help you capitalize on the deciding seconds. Whether you want to grow your email list or increase the conversion rate, exit-intent emails are useful.
The best benefits of having a well-made strategy with exit-intent emails are:
- Grow the email list: When you ask for an email address, you can encourage more site visitors to join your list. Even if they don’t buy from the first deals, you can create an email series to nurture and offer better deals later.
- Improve the conversion rate: You can optimize the emails based on segmentation and analysis. Combined with data from exit-intent popup, you can craft personalized deals for many groups of prospects.
- Sales funnel optimization: If your current lead magnet and sales process doesn’t seem to function as you expected, an exit-intent strategy can help increase the number of prospects and optimization opportunities.
Exit-intent emails are effective to expand your audience base and increase the conversion rate. This also means you have more chances of improving your digital marketing ROI. Which is exactly why they are essential to eCommerce stores of all sizes.
How to write exit-intent automation email series?

In this section, I will show you how to create an exit-intent automation email series. Being an important offer to invite visitors to engage, the exit-intent emails will need to provide a solid reason for the readers to convert or keep subscribing. Let’s start with the essential components.
What are the components of an exit-intent automation email series?
Your exit-intent automation email series should have a clear strategy on how to engage the audience. Whether through a coupon or a free guide, the emails need to follow up with what your popups previously offer and show prospects the next steps. Here are those emails:
Email 1: Including an offer: Your popup as a lead magnet would have an offer for new subscribers. Whether it is a coupon or free shipping code, this email is to convert them because they already have shown buying intention by subscribing. Don’t require any more steps and give what they subscribed to right the way. To create a sense of urgency, you should mention that the offer has an expiration time.
Email 2: Reminding about the coupon: If the subscribers, for some reasons, haven’t used the coupon, this email would remind them to use it. Your copy should clearly communicate the urgency here since the coupon would expire soon and get straight to the point. Your promoted products can appear too.
Email 3: Giving an even bigger offer: So the first coupon didn’t seem to work. You can send an even bigger offer as a one-time offer. Of course, you should have a time limiter to this deal. And be careful while using this method, you can devalue your products with too many discounts.
Email 4: Showing your content: If the visitors subscribed for a free ebook or guide before leaving, they are interested in your content. So why not show them some more relevant articles at the bottom of the emails or show how a member can access free content more frequently?
Email 5: Helping them clear the cart: If your popup shows that the visitor still has items left in the cart before leaving, they may feel a strong urge to complete the purchase. When they enter the email, they can check out right the way or save the cart for more consideration. Either way, you gain the email and a more targeted audience for exit-intent email.
When to send exit-intent emails?
When a visitor exchanges an email address for your coupon (or ebook, the content, cart), he/she has shown a strong interest in your offer and products. So, don’t keep them waiting with that buying intention and send the exit-intent email right away. Let them forget about even the thought of leaving your site with a sweet deal.
For the next emails in the series: The reminder email should come after 24 hours if the subscriber hasn’t used the coupon, while the bigger offer email should arrive 7 days after the first email. This shows that the two deals are not connected, and you are not trying to win the customers so desperately; you just want to show them a good offer.
How to write exit-intent emails’ subject lines
For exit-intent emails, you should always try to keep your subject lines short and descriptive. Since the recipients already know what to expect after subscribing, let them know this is the email they are waiting for with your subject lines. If you want the subscribers to have even a stronger impression, make sure you add a bit of the brand’s characteristics into the subject lines.
Here are some subject line examples for each component:
- The email with an offer: ‘Congratulations! Here is your discount code’ or ‘Here is the coupon code for you.’
- The email with a reminder about the offer: ‘Use your code now before the discount ends!’
- The email with even a bigger offer: ‘Save up to 30% on our store! 😱😱😱’
- The email that helps save the cart: ‘Buy your cart items at a great price now!’
- The email that shows content: ‘Here is your ebook and some more cool articles!’
How to create an exit-intent automation email series
A single email is not enough to build a relationship and leave an impression. You will need popups to engage with visitors, efficient segmentation to group up prospects, and some more emails to offer additional values. Remember that if you exit-intent emails don’t turn visitors into customers, you can still keep the conversation going.
Here is how to create an exit-intent automation email series that can engage with customers - using our app AVADA Email Marketing. The app has plenty of pre-made email templates for different groups of visitors, so let’s check it out.
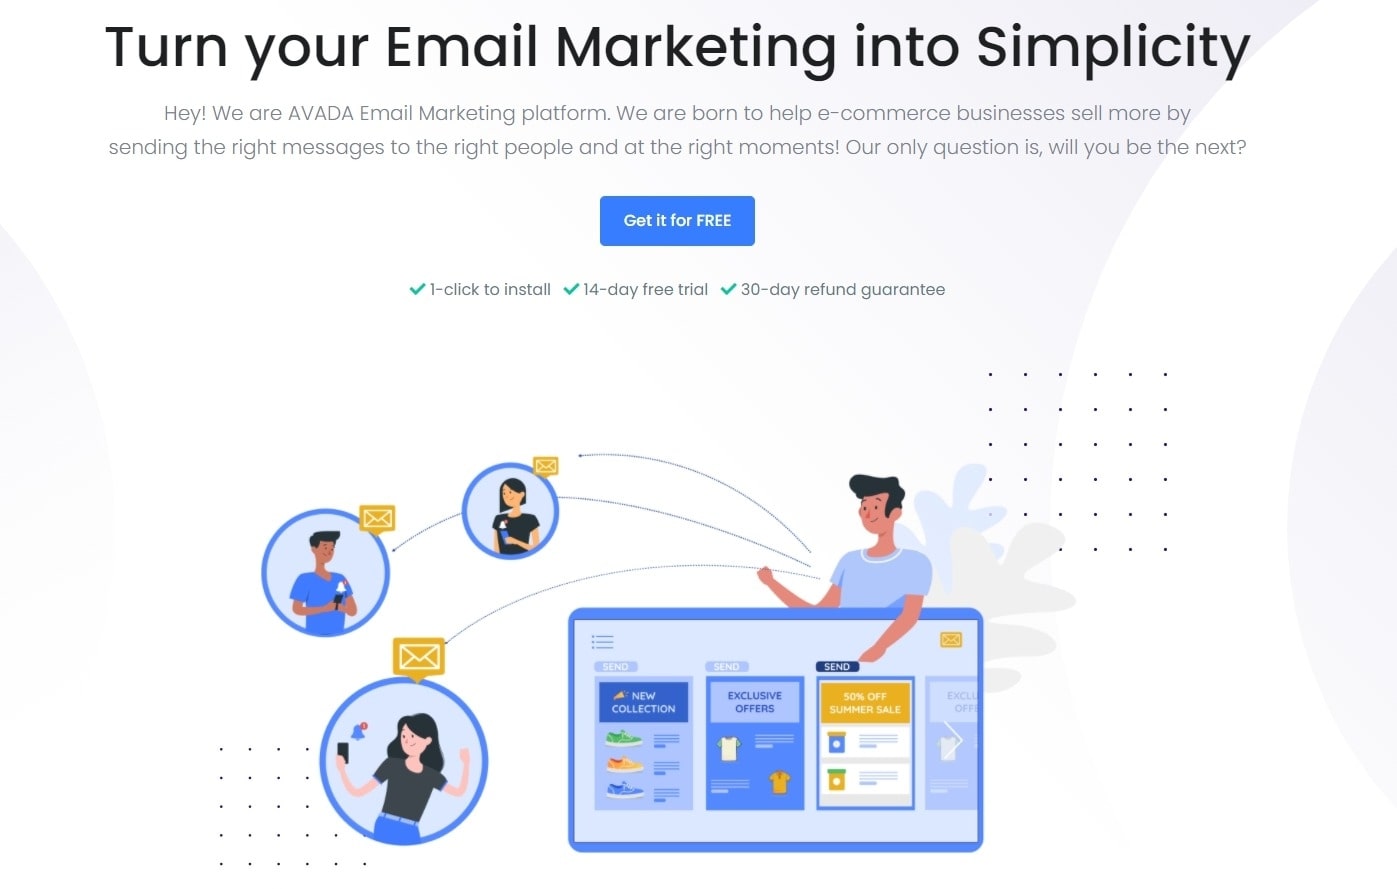
First, you need to install the app. The app is free to use with a pro plan, so don’t hesitate to give it a try. Click on ‘Get it for Free’ like in the picture above. Next, once you installed the app, a dashboard would appear. This is where you can create campaigns, add contacts, view analytics, see abandoned carts, change the settings, and update to the paid plan.
For an exit-intent email campaign, we will start with creating a popup form.
1. Creating an exit-intent popup form
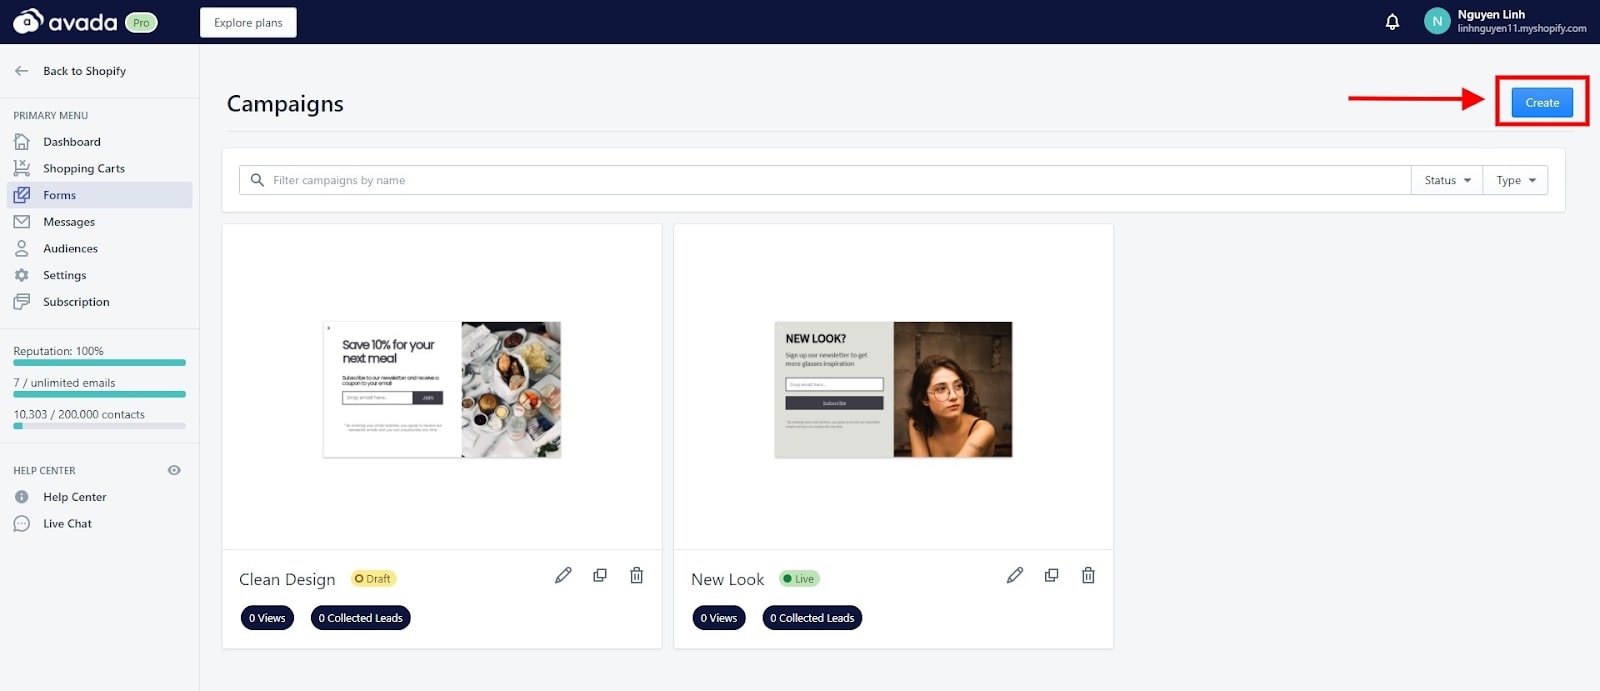
In the Forms section, select Create to begin making a new exit-intent popup form.
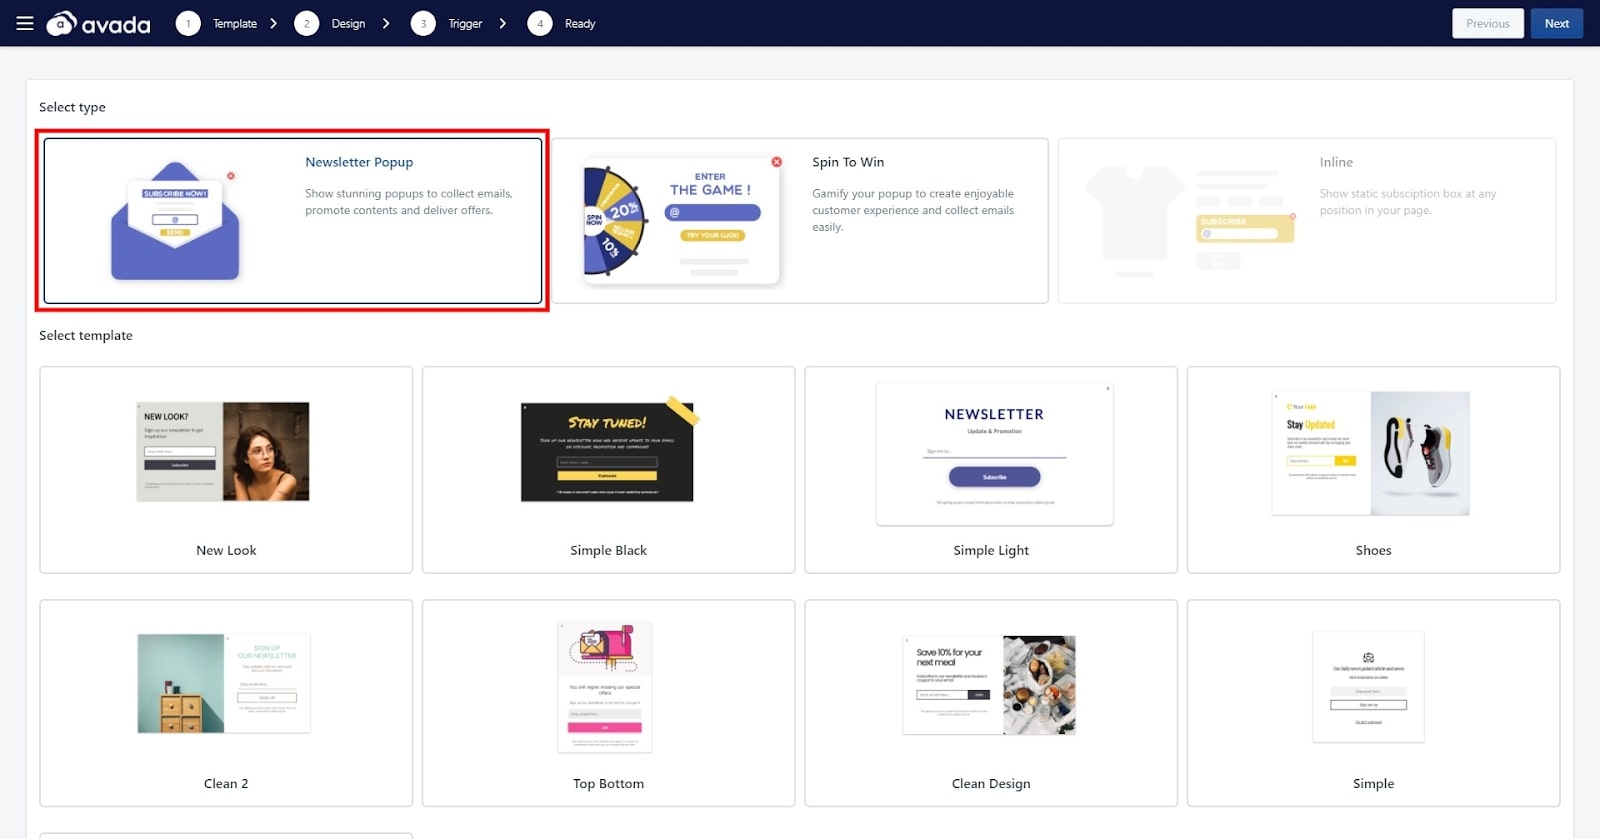
As you can see, there are plenty of beautiful premade templates for a newsletter popup. Feel free to check all the designs and select what is best for your business. You are able to preview the templates right from this screen.
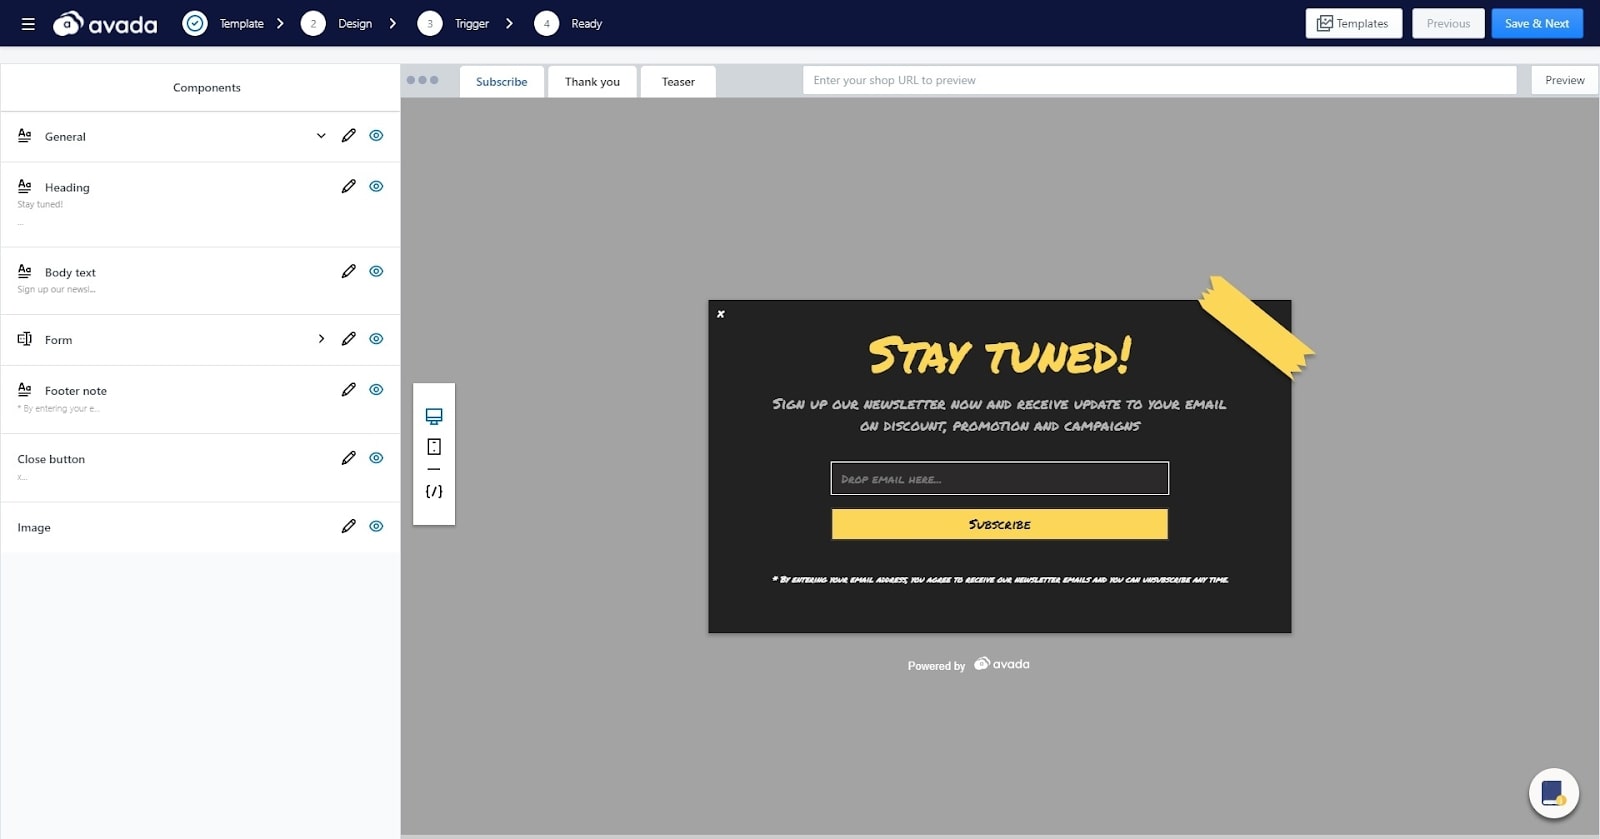
After that, you can edit the exit intent popup template and preview it on desktop or mobile. It is a drag and drop editor, so you can easily change any element. If you need help, there is a little guideline icon at the bottom right of the page.
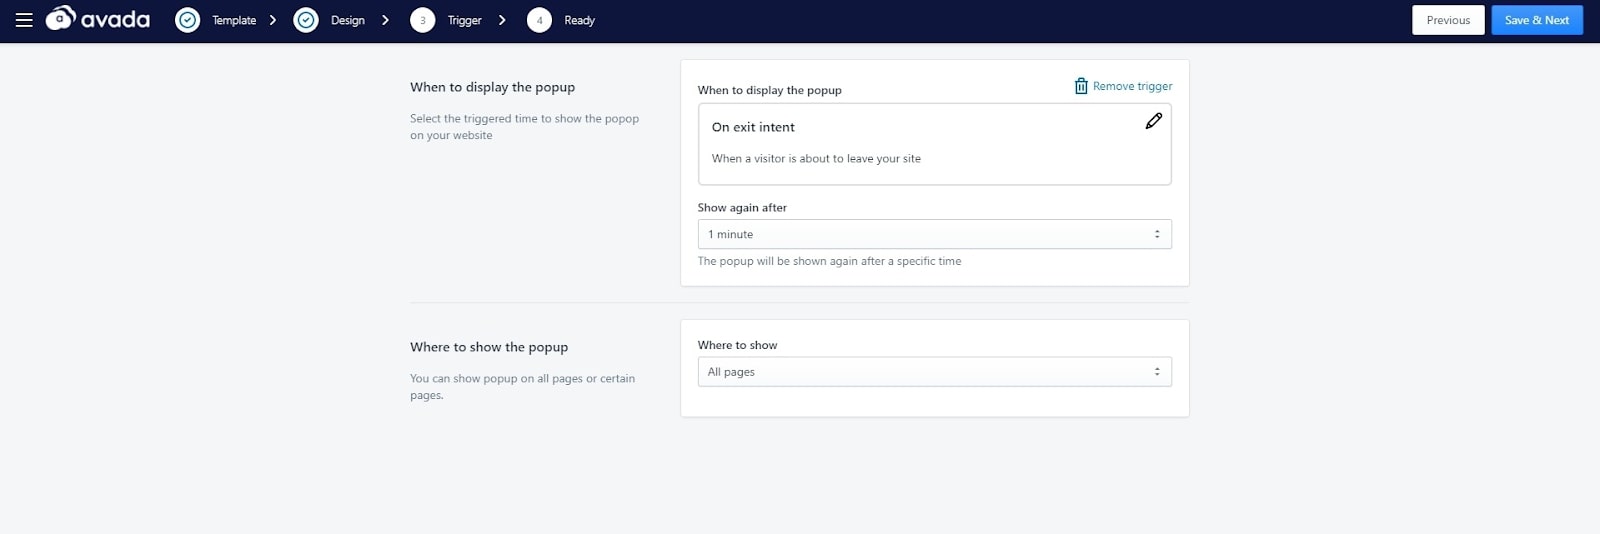
When done editing, you can choose the trigger for the exit intent popup. Simply select On exit intent for when to display the popup and you are good to go. You can also select when to show the popup again and which page to show the popup.
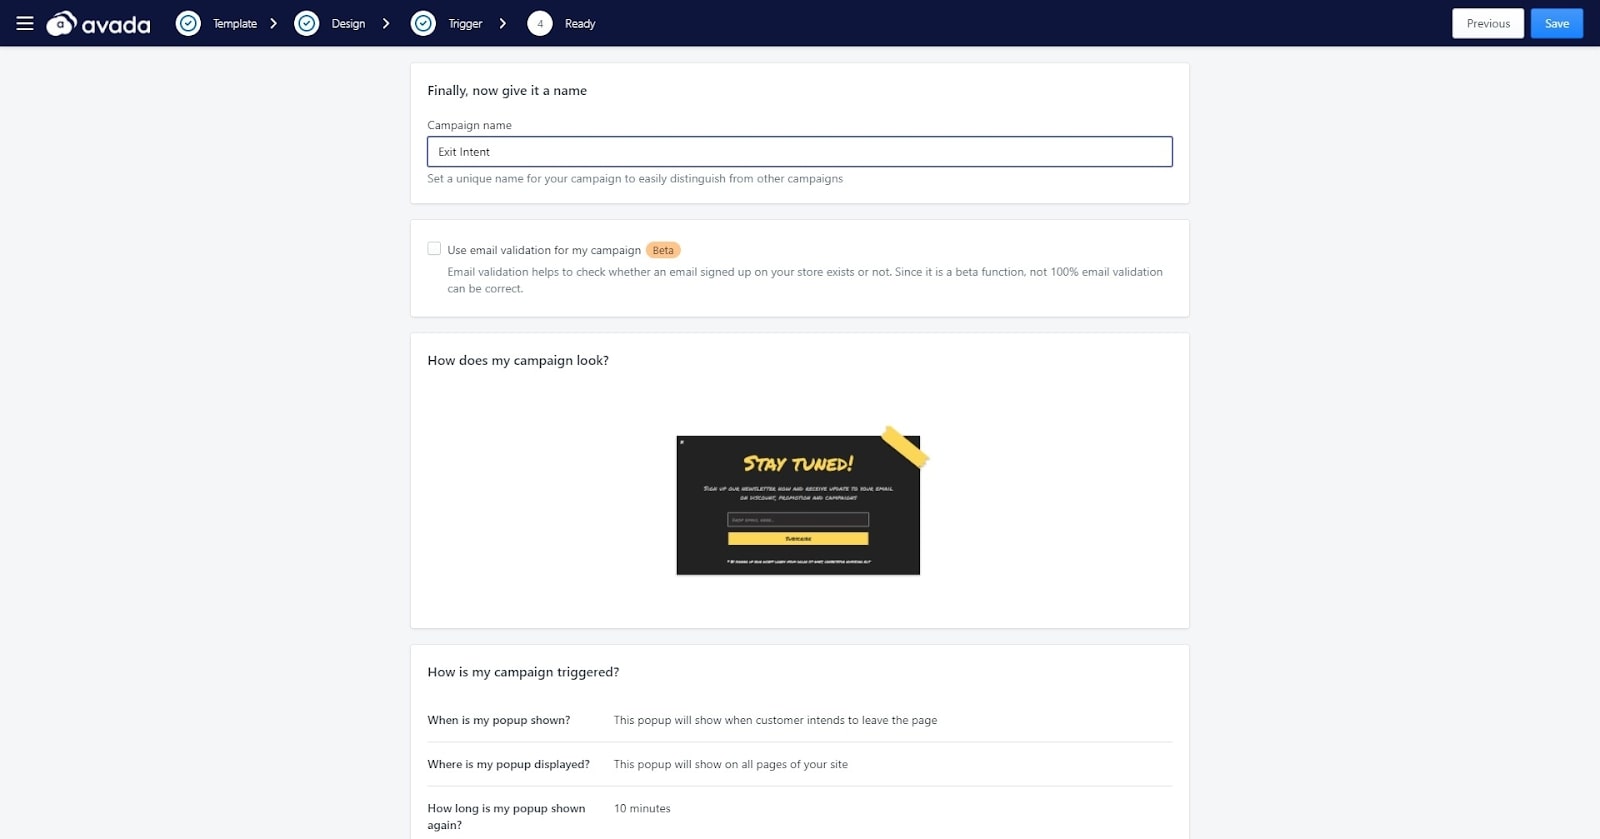
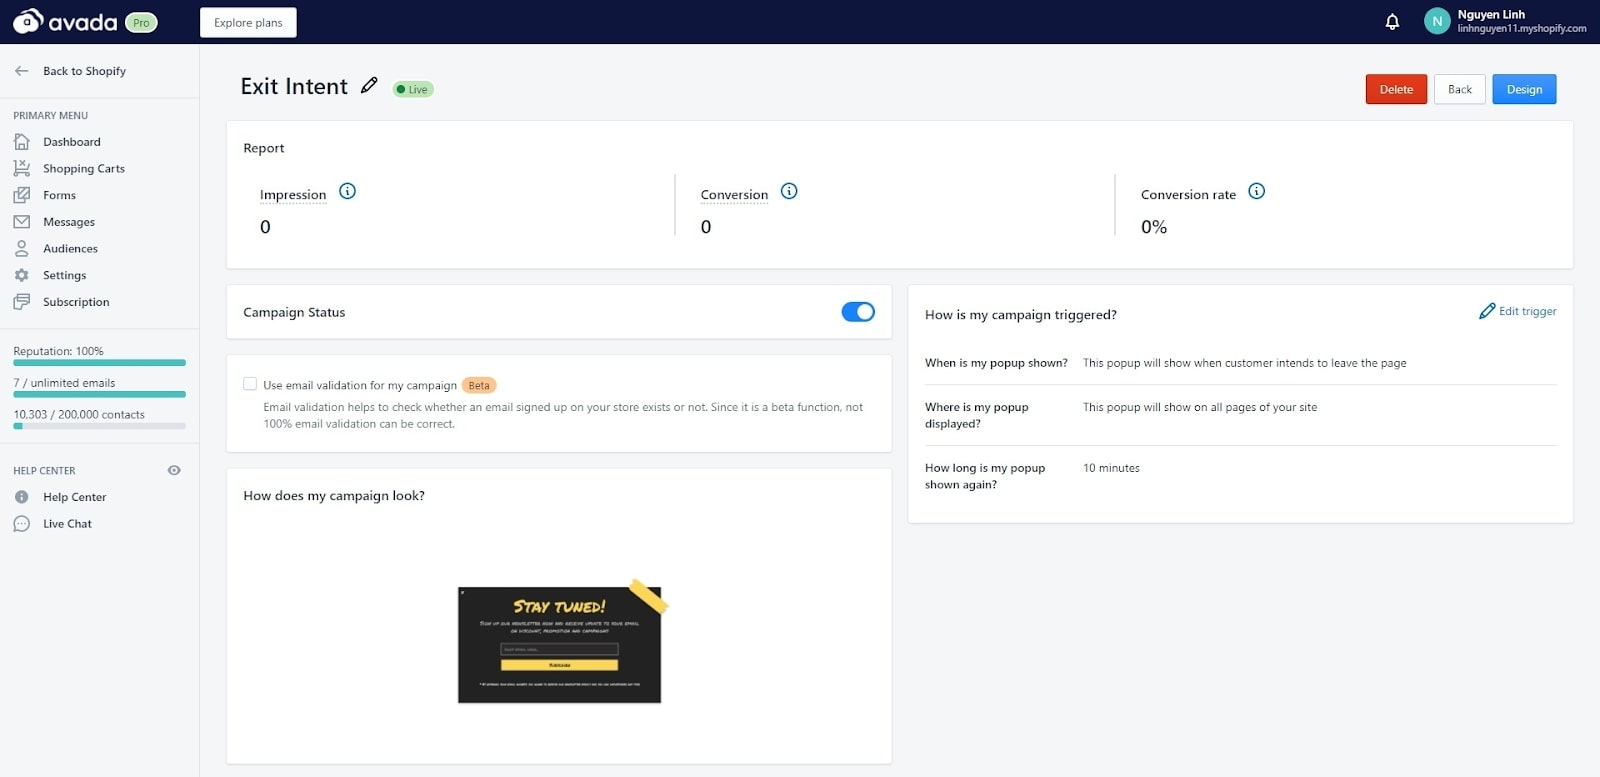
Now, give your popup a name and you are good to go! Click Save to launch the exit intent popup campaign, then you can see the data on impression, conversion, and conversion rate.
But that is just half of the fun. In the next step, let’s see how to create exit intent emails to maximize the power of your campaign.
2. Creating an audience segmentation
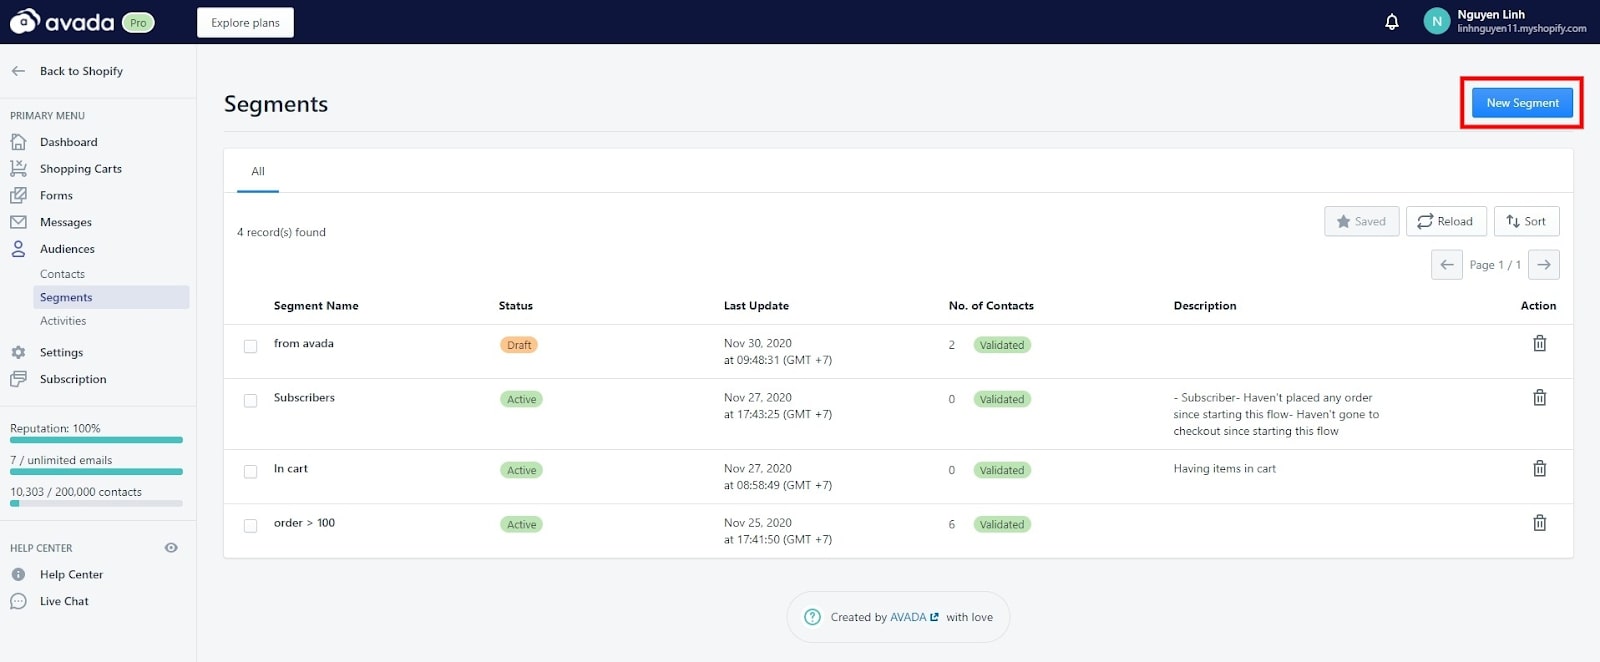
Next, you will need to head to Audience -> Segments to create a new segment for your subscribers coming from the popup we just made. Go ahead and click on New Segment.
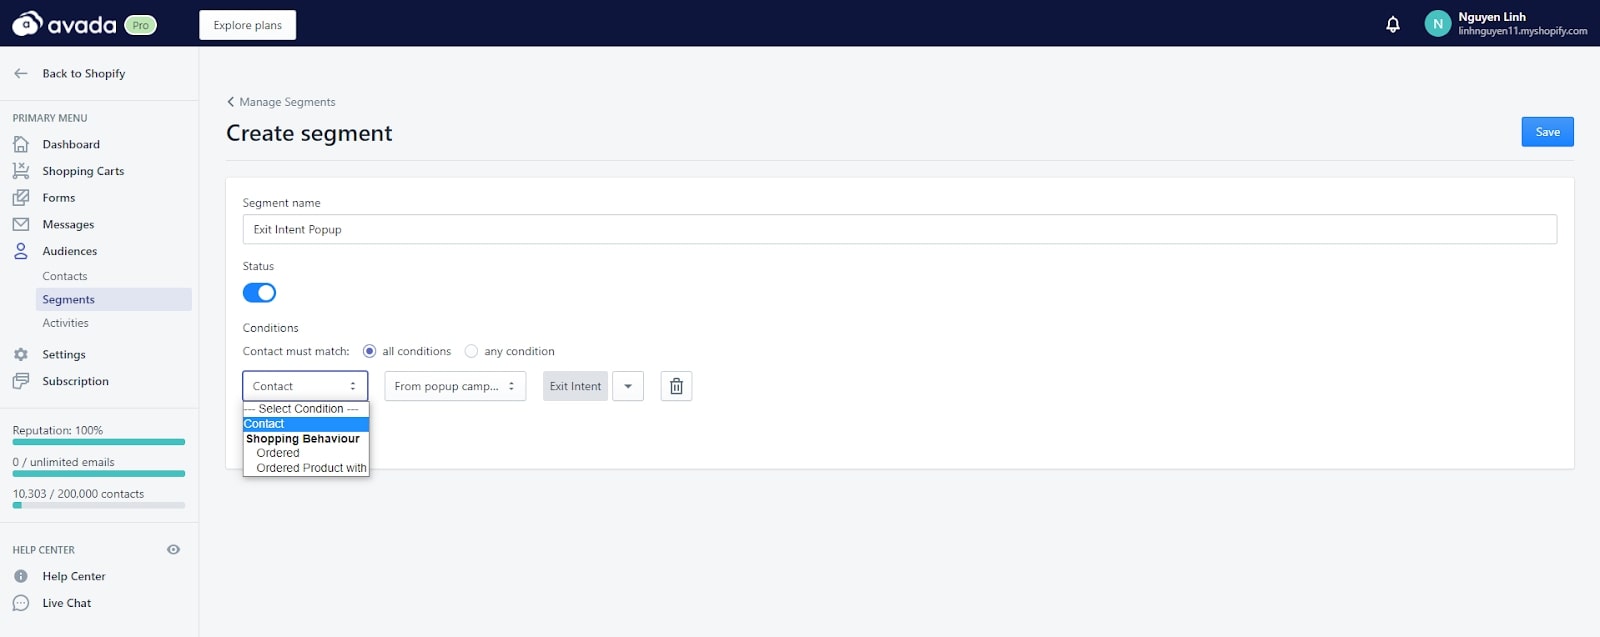
In this step, you will need to fill in the segment name and its condition. As you can see in the image, I selected Contact -> From popup campaign -> my popup campaign’s name. You can create more segments in this feature, but that is for another article. Click on Save to continue.
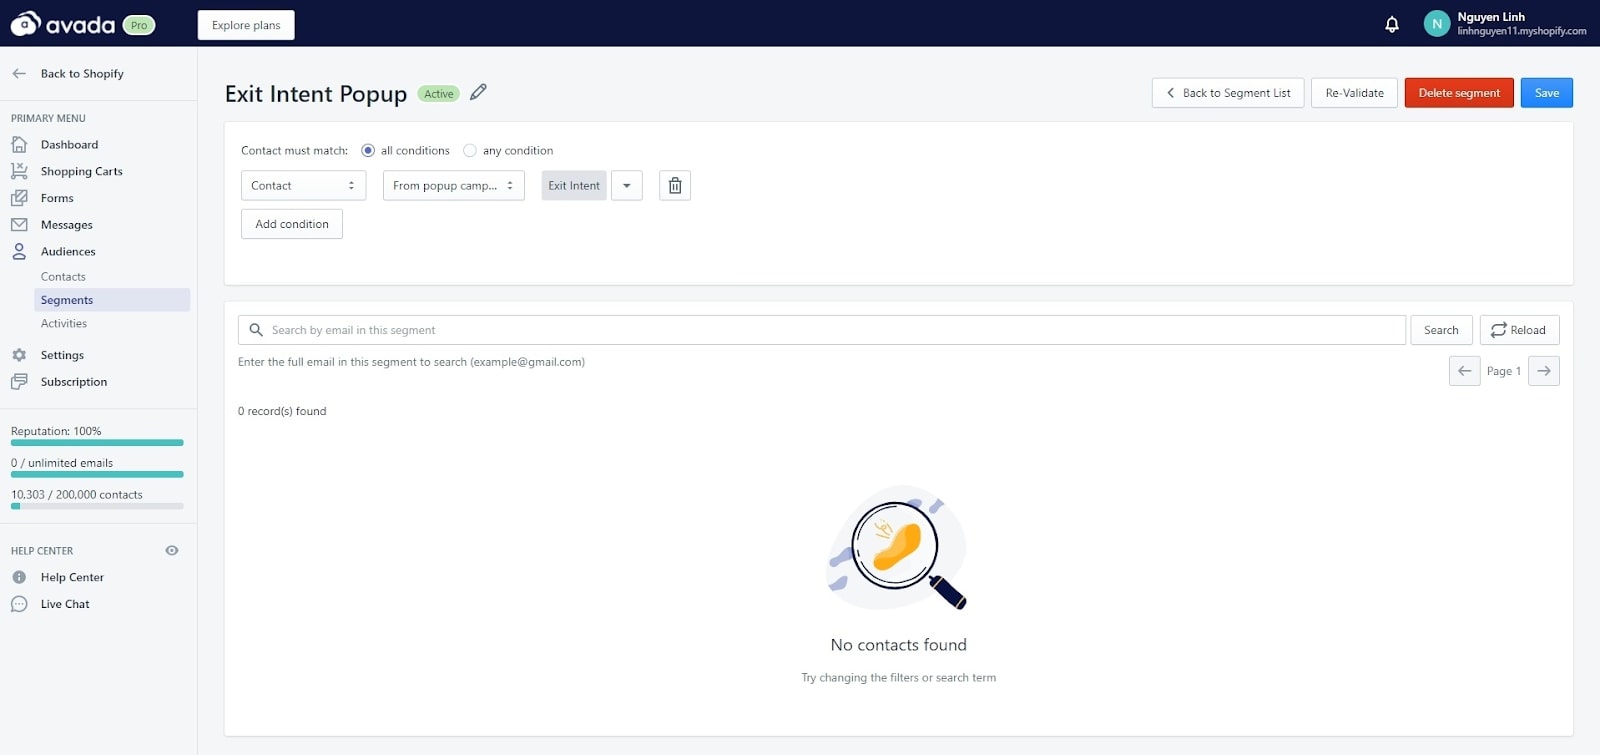
After that, you will see which contacts suit your segment. This segment will then be used to send our exit-intent emails.
3. Creating an exit-intent email campaign
For creating exit-intent emails, select Messages -> Automation, and click New Campaign.
Here is the first step of making an email campaign - Event.
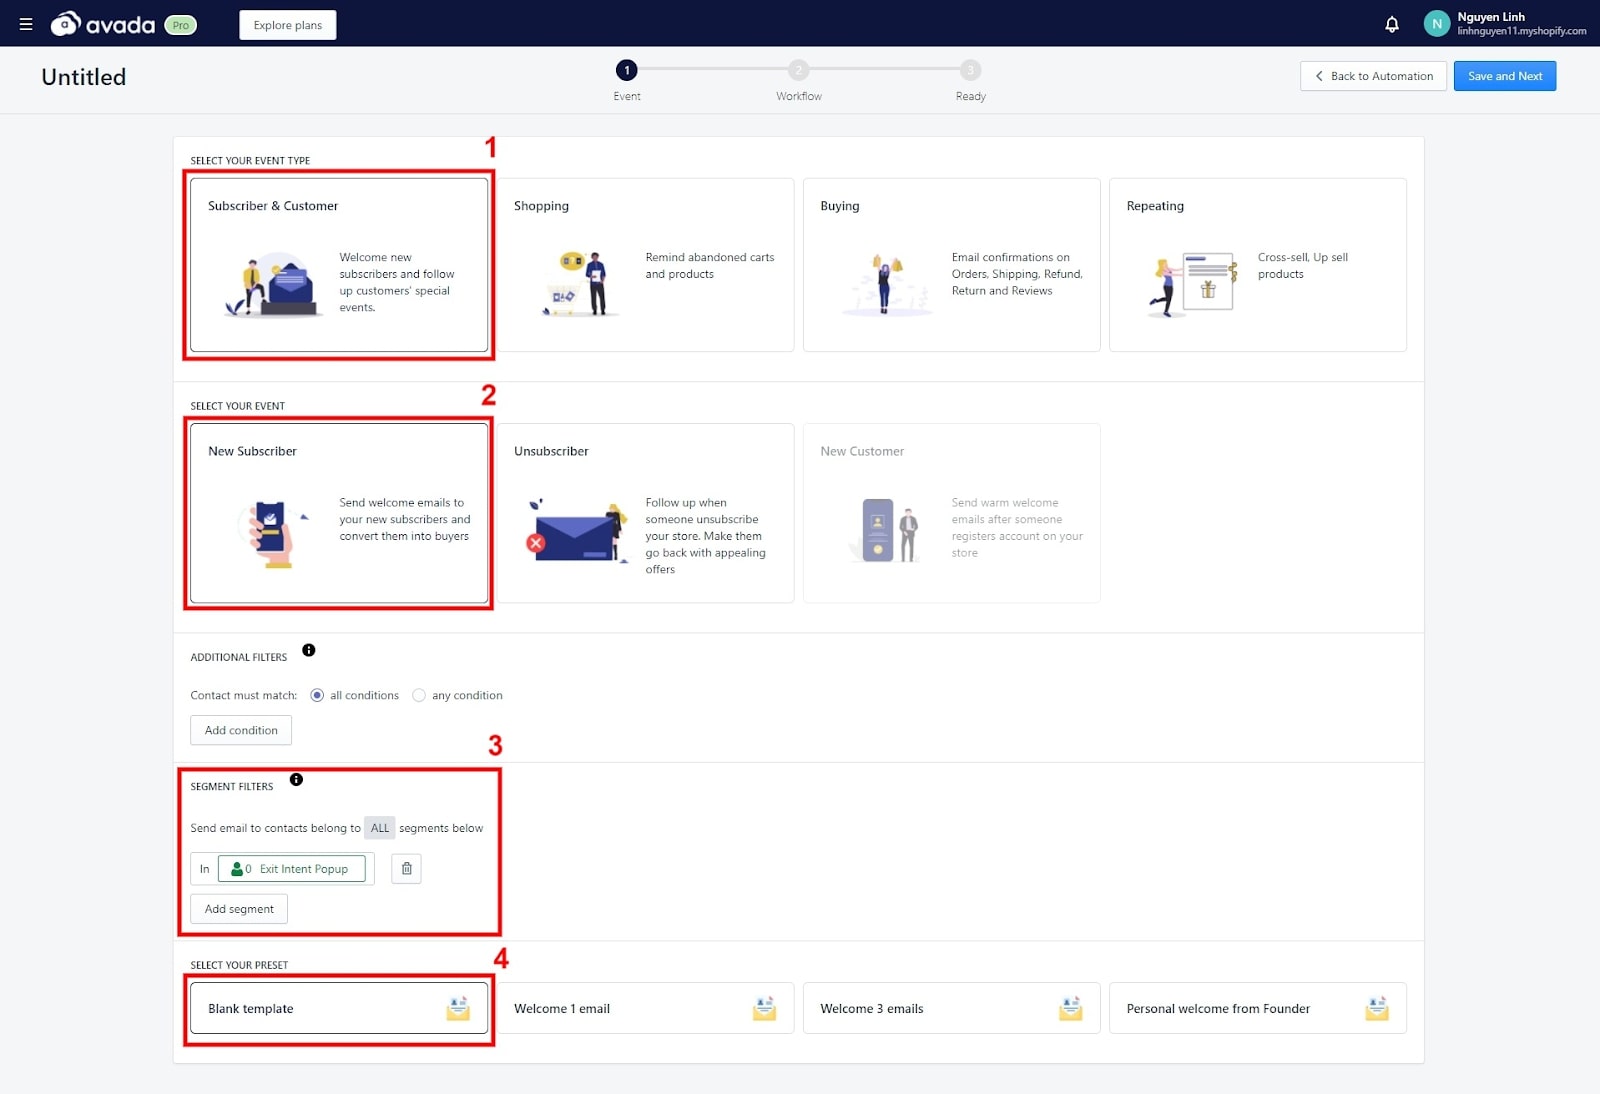
Since exit-intent emails target new subscribers, let’s select Subscriber & Customer -> New Subscriber -> Segment Filters -> Blank template. For the segment filter, you should select the filter for Exit Intent Popup, as we named in the previous step. You will also see how many subscribers you have in this segment.
We already have a template for welcoming subscribers, but I will take you further than that. Click Save and Next to continue.
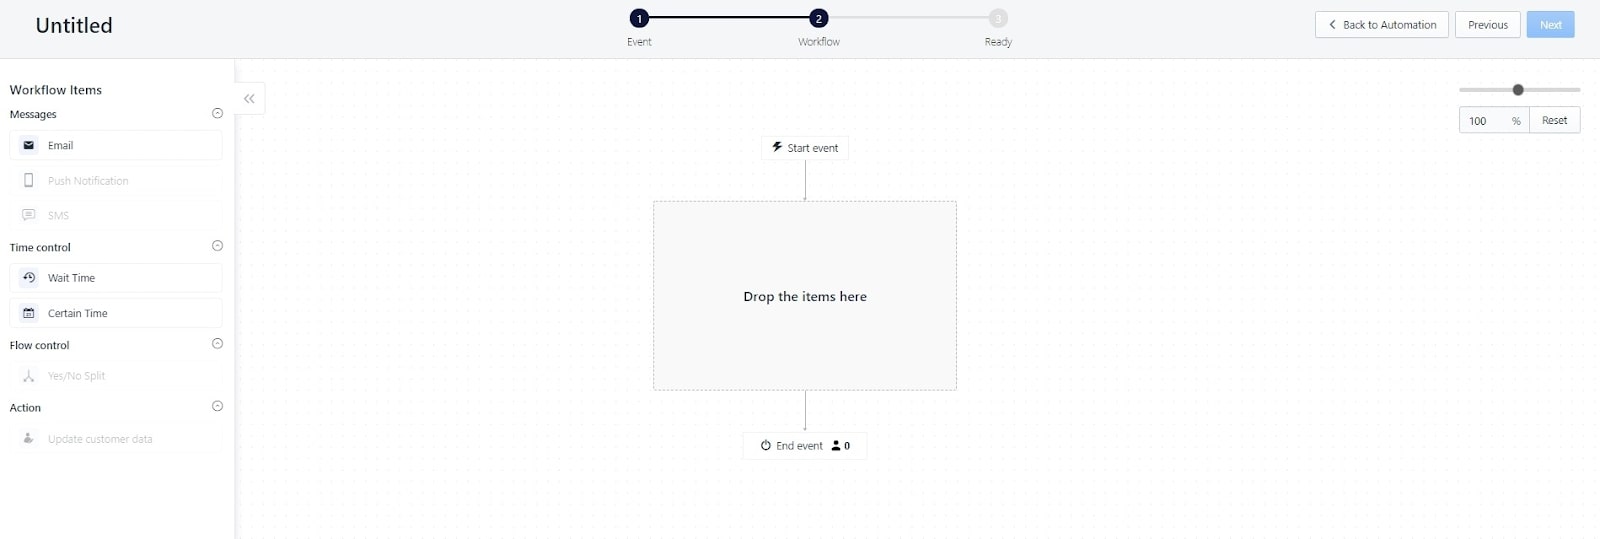
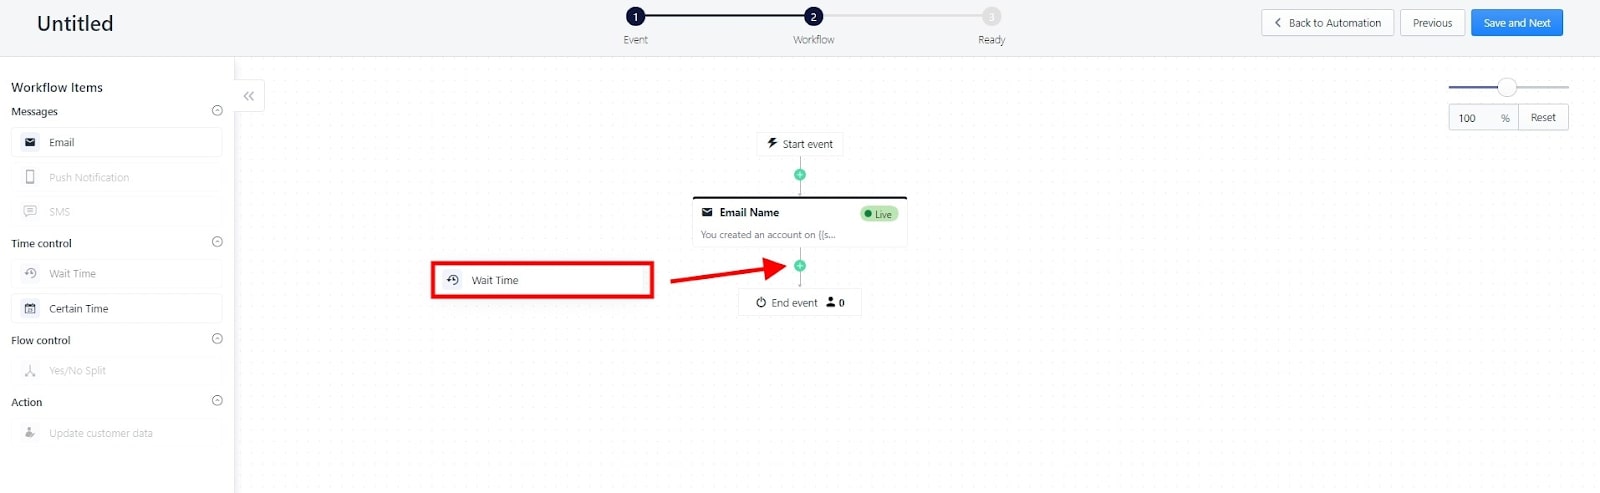
At the second step - Workflow - can customize and edit your email campaign’s workflow with types of emails and when to send them. Here is a blank page that you can edit by dragging and dropping the items on the left tab to the center’s workflow. Let’s start by dragging Email into the box of Drop the items here.

When the email component is added, a sidebar will appear on the right side that lets you edit the email name and add email content, as well an internal note to work with employees. To welcome the subscriber with a gift code, let’s name our email like in the image. For the email content, you can select edit to create a new email or use our templates. Let’s try with a template!
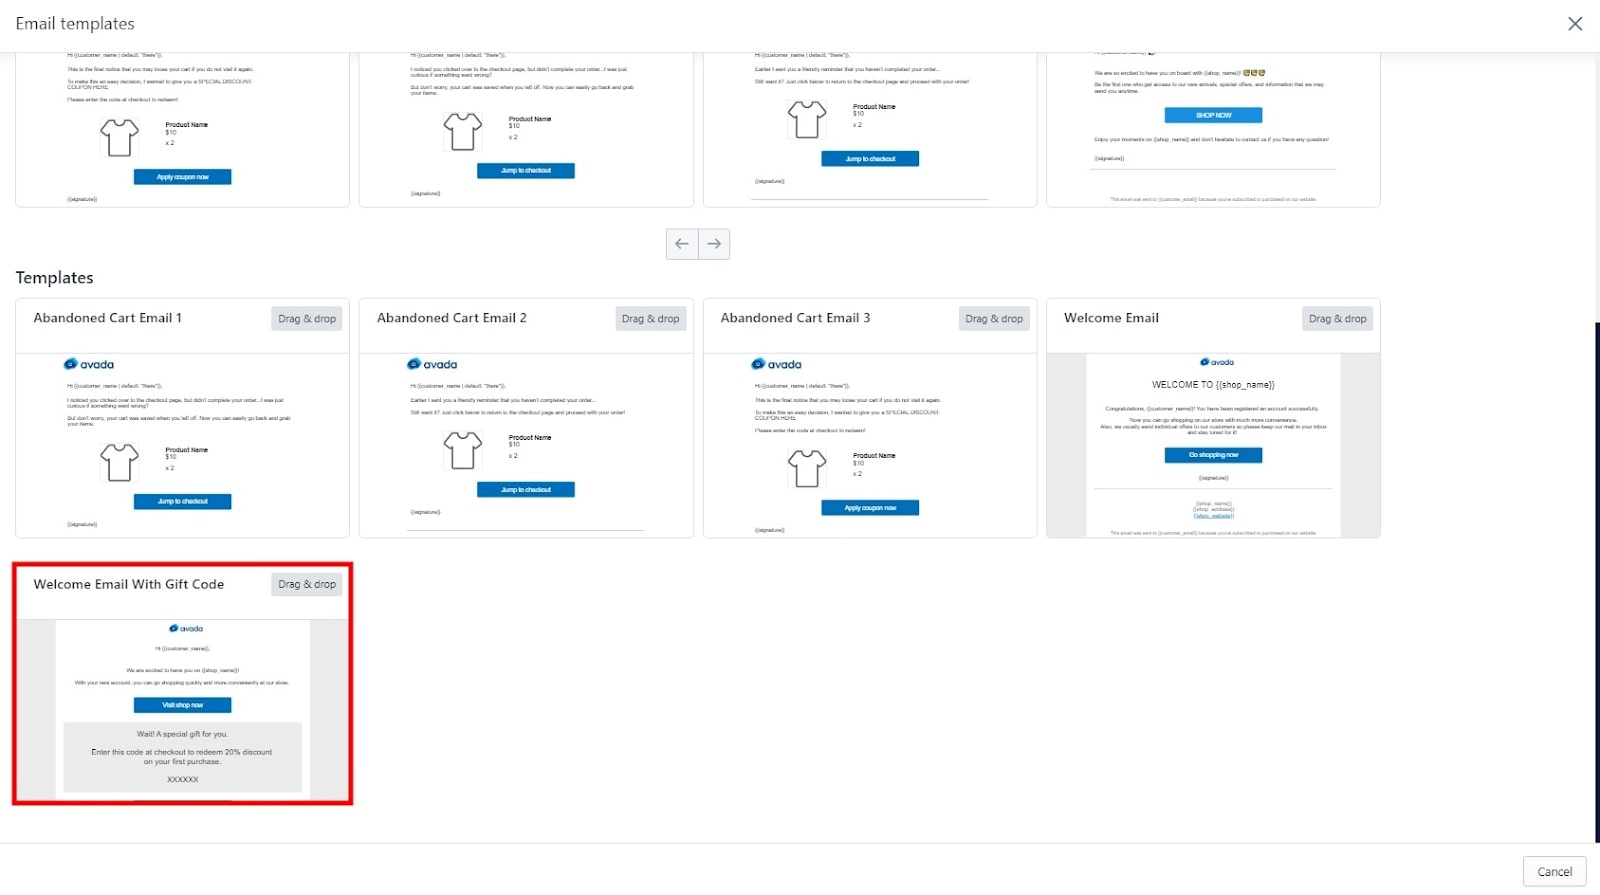
There are many templates to choose from, but for our exit-intent email campaign, scroll down and you will see a template for ‘Welcome Email With Gift Code’. Select it with the button Preview.
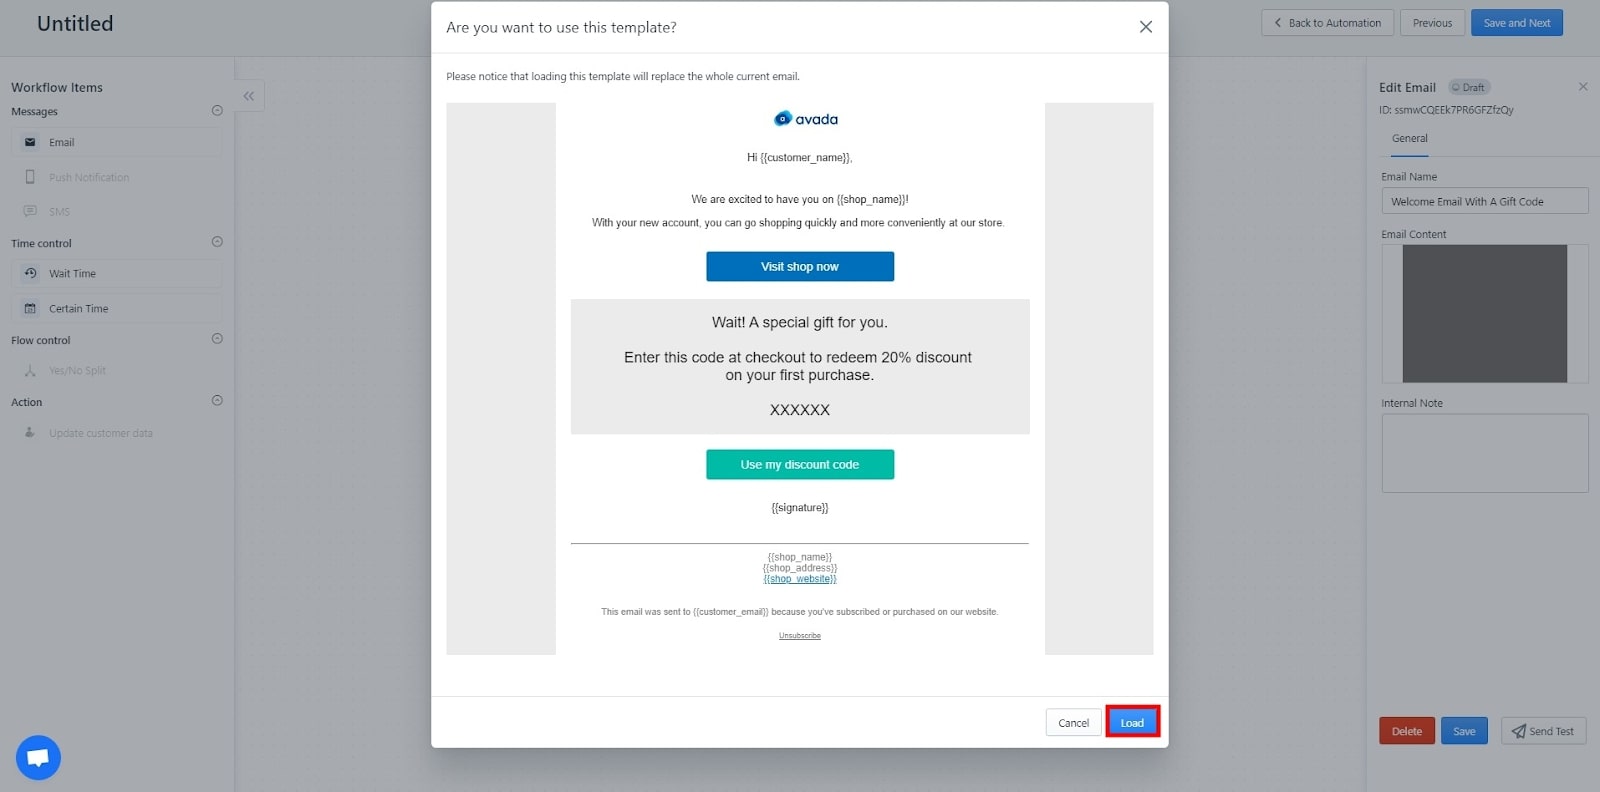
A popup would appear to ask if you are sure with the template, just click on Load.
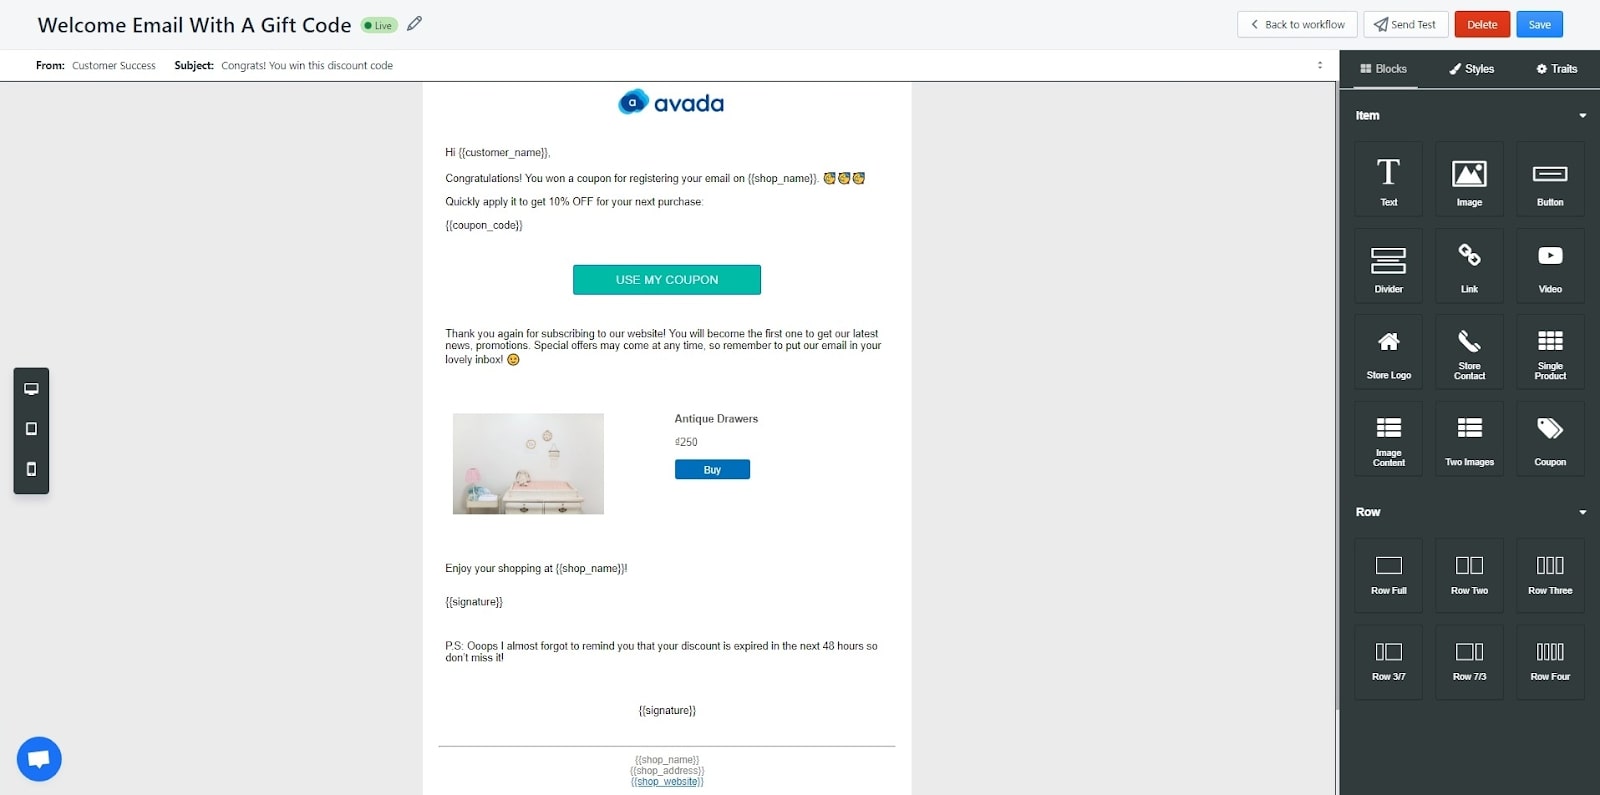
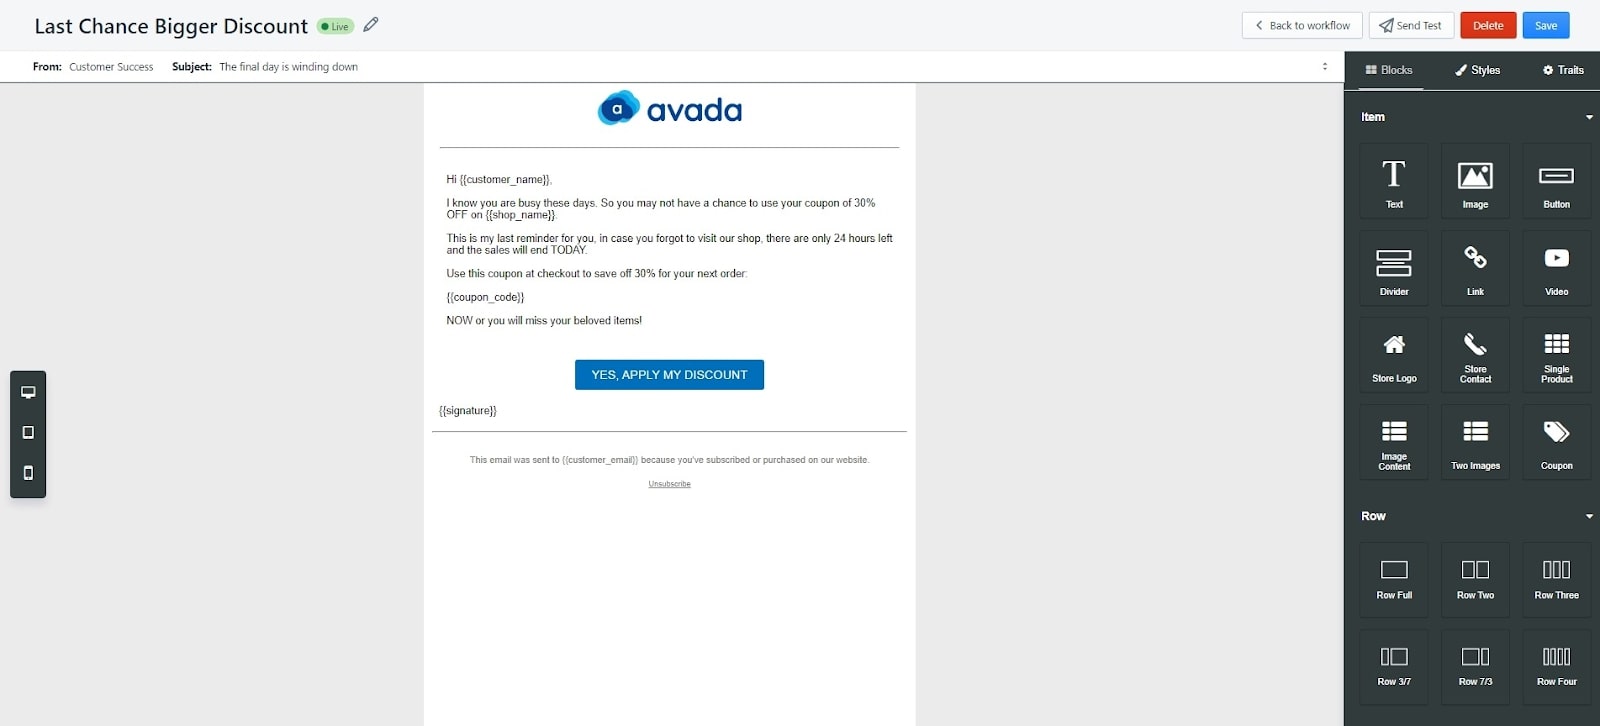
Then, you will have an email editor to customize the email as you wish. The app has many ready-to-use blocks of text, image, button, link, video, and more, you only need to drag and drop to edit. When you are happy with the email, just click Save and Go live now. You will be taken to the workflow page after that.
Next, let’s set the wait time for our next email in the sequence. If the recipient didn’t use the coupon code, send another email to remind them about the coupon code 24 hours later after the first email.
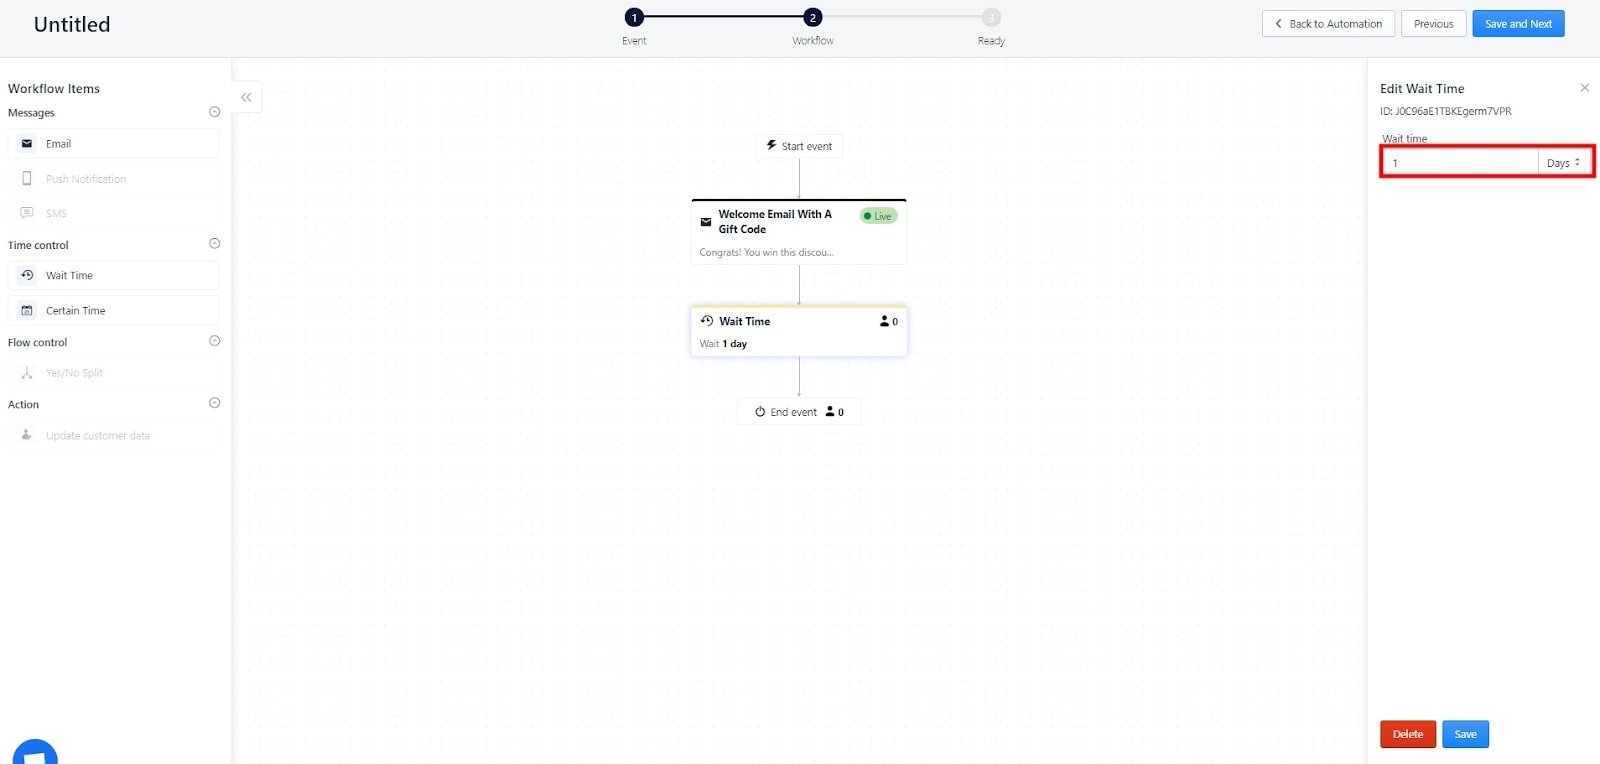
On the right side bar, you can edit the wait time in day, hour, minute, and week. As mentioned, select one day and click Save. Now, with the same method, let’s add our second email, which reminds the recipient about the discount code.
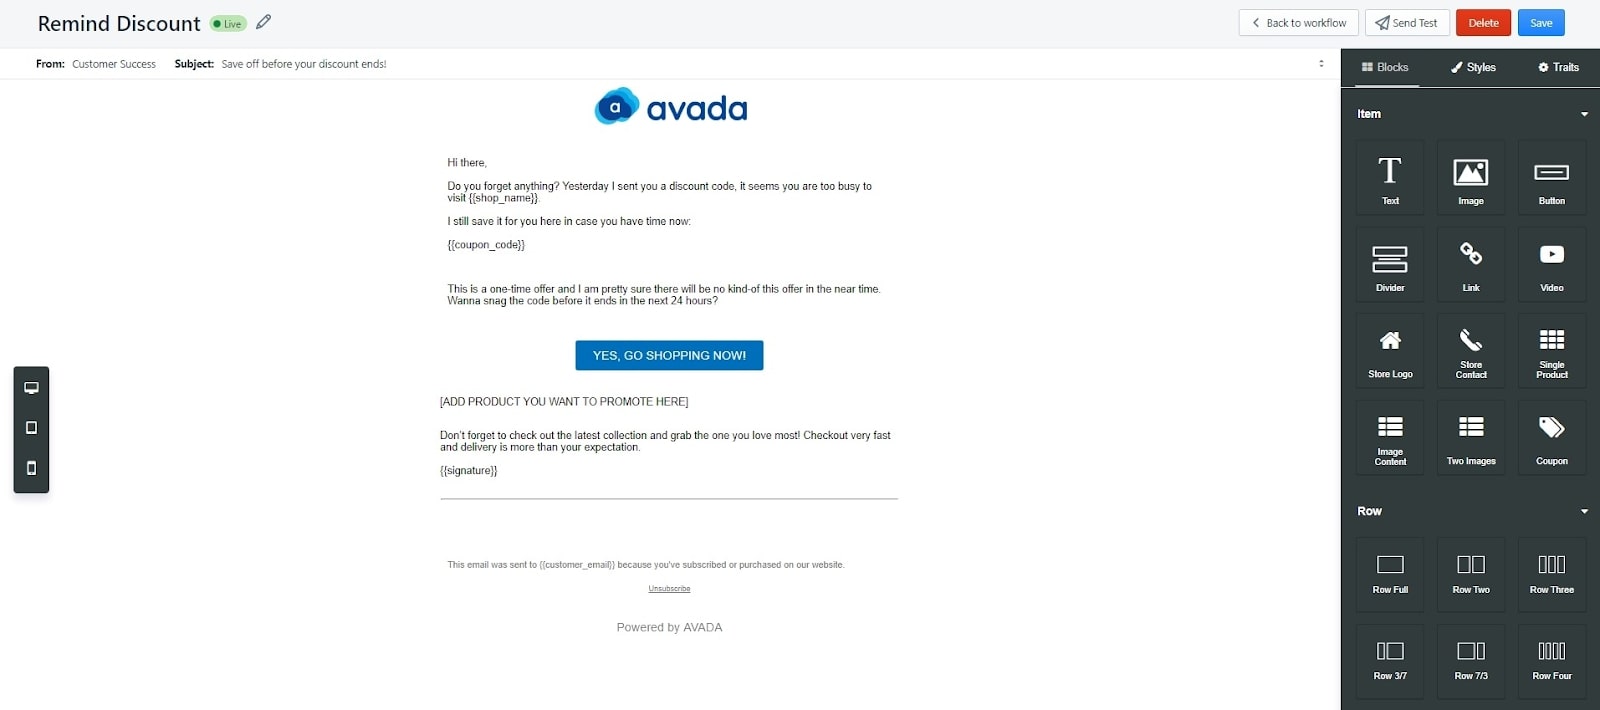
Here is a reminder discount email I made with the app’s email editor. It is simple, but straightforward and helps prospects take the next step. You can have more fun with the editor and make an email that better suits your brand and message. When you are done, click Save. Continue adding emails and wait times like this, you can have the full exit-intent email series.
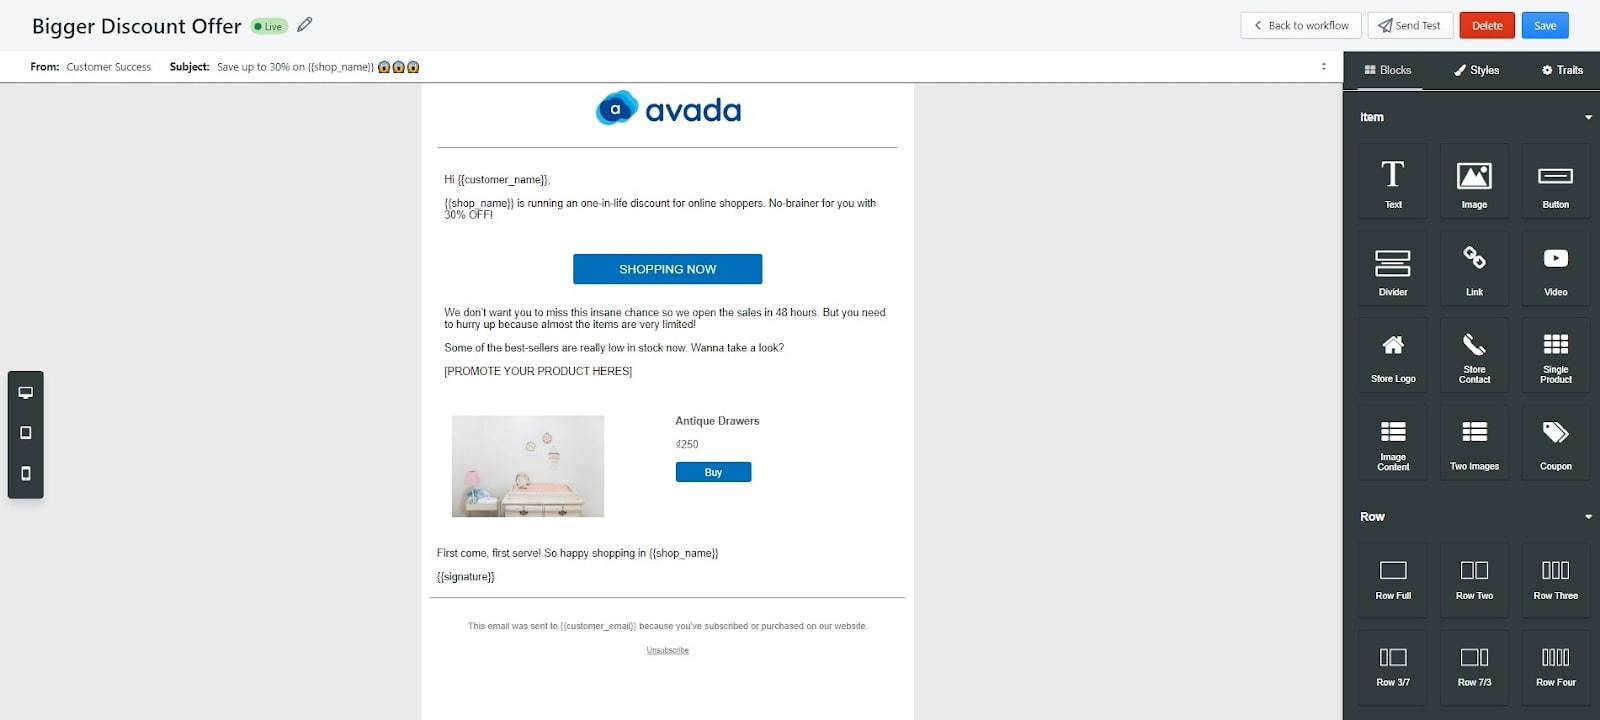
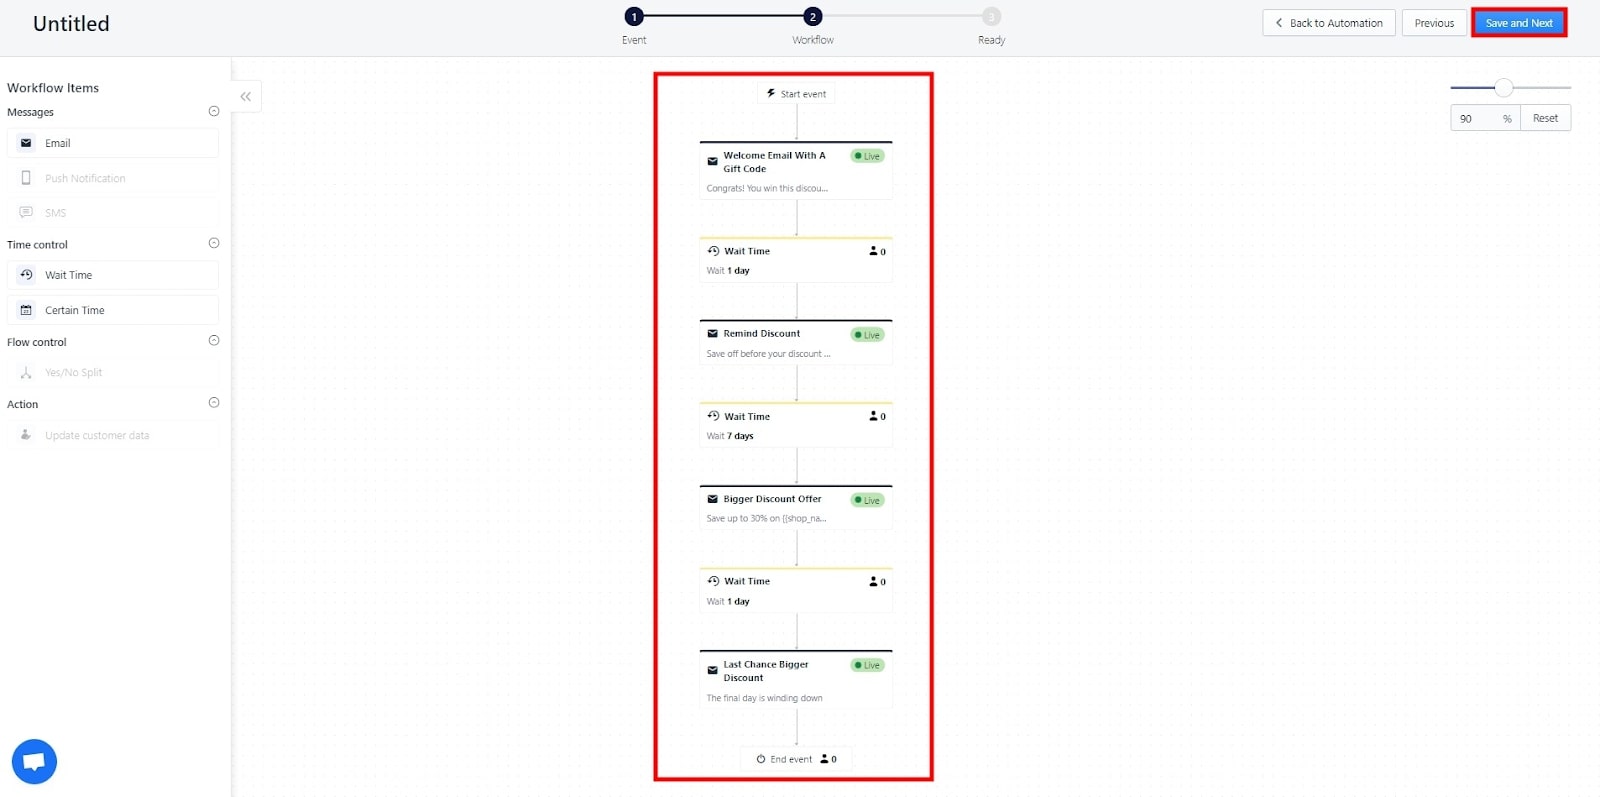
With two more emails for the bigger discount offer and a reminder of the bigger offer, the exit-intent automation email series is completed. If you have also done editing your workflow, click Save and Next.
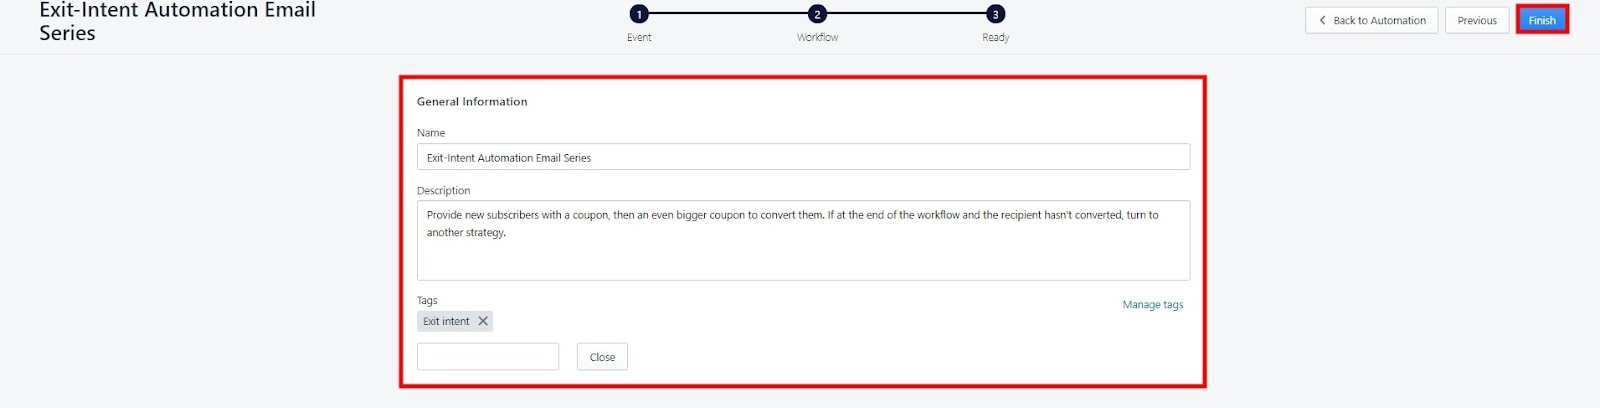
Here is the final step in creating your exit-intent email series. You should put in name, description, and tags to manage all of your campaign. If you also work with others on the email campaigns, a brief description will help them understand them when editing. I also added a tag of exit intent, as you can see in the picture. When you are ready, click Finish.
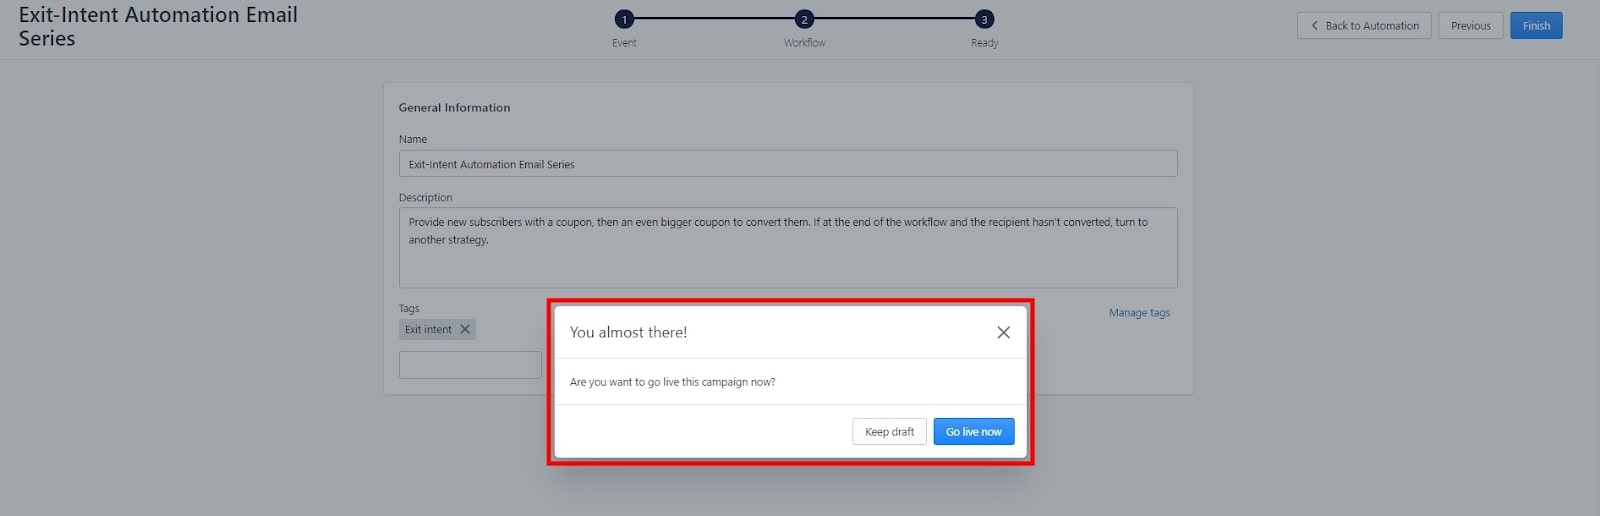
The app would ask if you want the campaign to go live now and start sending based on the pre-conditions. If you still want to edit more, click on Keep draft. But if you are ready, click on Go live now.

Now, when you reselect the dashboard campaign, you will see a report tab, which shows how many emails you have sent, get opened, get clicked on, and the conversion rate, revenue, and unsubscribe rate of the campaign. You can also edit the email workflow and content, so don’t worry if you still want to edit the campaign while it is live.
And that is it, your exit-intent automation email series is completed. Try now with our app, and you will see your exit-intent strategy comes into place with a great result.
Install AVADA Email Marketing
Final words
It is getting harder and harder to keep consumers’ attention, so a well-made exit-intent strategy will help you collect information, engage with your audience, and eventually see new purchases. Luckily, there are plenty of approaches to keep your website traffic engaged and drive a positive return on investment.
Remember what you learned in this article and create your own exit-intent automation email campaign that can turn leaving visitors into potential loyal customers. Stop wasting valuable website visitors today, using our app AVADA Email Marketing.


New Posts

How To Set Up Google Analytics 4 For Your BigCommerce Store

