
Basic Google Tag Manager Tutorial for Digital Marketer
By Sam Nguyen

Drive 20-40% of your revenue with Avada
Google Analytics is an effective tool for you to collect data for expanding your business’s online reach, transforming leads into customers, and optimizing a digital marketing strategy to build stronger relationships with your audience. However, collecting data is not that easy. Google Analytics and some other analytics tools can help you with the process but you cannot ignore the importance of adding tags.
If you have heard about Google Tag Manager but have no idea how to use it then this article is for you. In this article, I will give you the complete Google Tag Manager tutorial for beginners.
What are Google Tags?
In general, tags are pieces of code you put in your website’s javascript or HTML to extract specific information. For marketers, important tag information often shows how long users visit a page on your site, form submissions, how they reached your site, which links they clicked or what products they deleted from their shopping cart.
Every tag traces something different. For example, you can see how many people fill out the form “Contact Us” on your page by creating a tag and it will send more precise information to Google Analytics, AdWords or another third party. However, adding tags manually can be really boring and challenging for marketers with not much development or coding experience and it also wastes a lot of time to fill out tickets for the IT department.
Now that you have Google Tag Manager, your entire tagging process becomes hassle-free. All you need to do is embed codes into your site pages one and then anytime you want to build a tag, Google Tag Manager does all the job including coding it and embedding it for you.
What is Google Tag Manager?
Google Tag Manager is a system that helps you manage tags by letting you create and monitor tags on a user interface without writing a new code every time you want to build a tag. You just need to embed the Google Tag Manager code into each page on your website. This removes the manual process of building tags, aiding your marketing process and making it more effective and exact.
Google Tag Manager has many features but the first thing I want to mention is that it allows your developers and IT department to focus on bigger-picture tasks by reducing the burden of coding every individual marketing tag. Moreover, as Google Tag Manager codes the tags for you, it significantly decreases the likelihood of human error.
Last but not least, Google Tag Manager allows your marketing department to take full control over the tags they create and monitor. This tool also gives your marketers full reign over their tags which increases efficiency. Furthermore, using tags increases the correctness of your analytics system, ensuring higher-quality reports and a better sense of your true online viewers.
With all these features mentioned above, Google Tag Manager is definitely a tool you should try unless you already have a tagging system right now or you don’t feel the need to have that level of organization. Google Tag Manager is totally free so don’t be afraid to try it out without any risks. In this post, I will show you how to sign up for an account, how to create a new tag, how to use Google Tag Manager along with your Google Analytics account.
How to set up Google Tag Manager
Set up an account
Setting up an account for Google Tag Manager is totally free and simple. Just follow these steps to create your account easily:
1. Sign up for an account
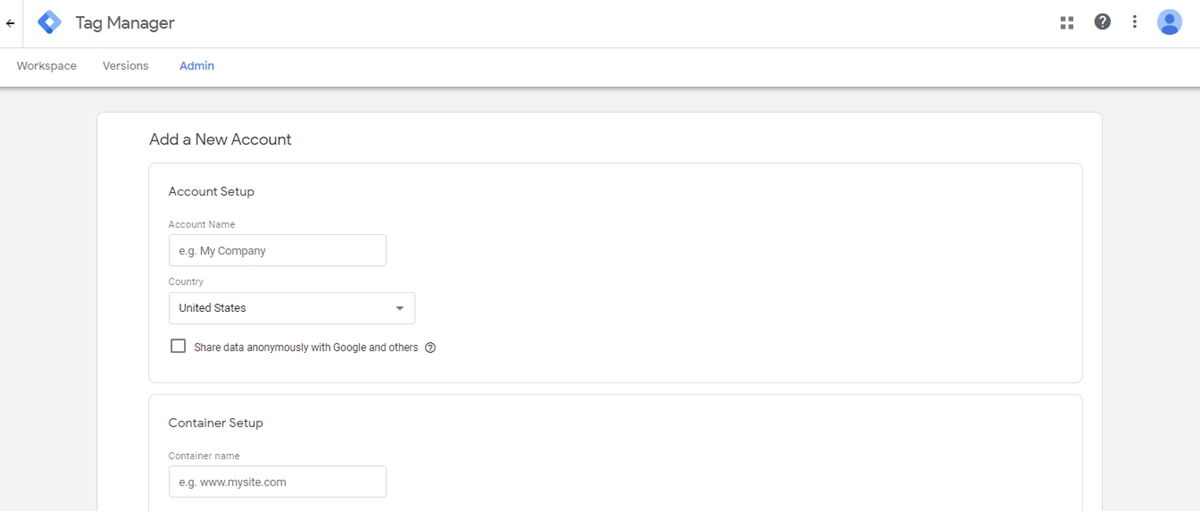
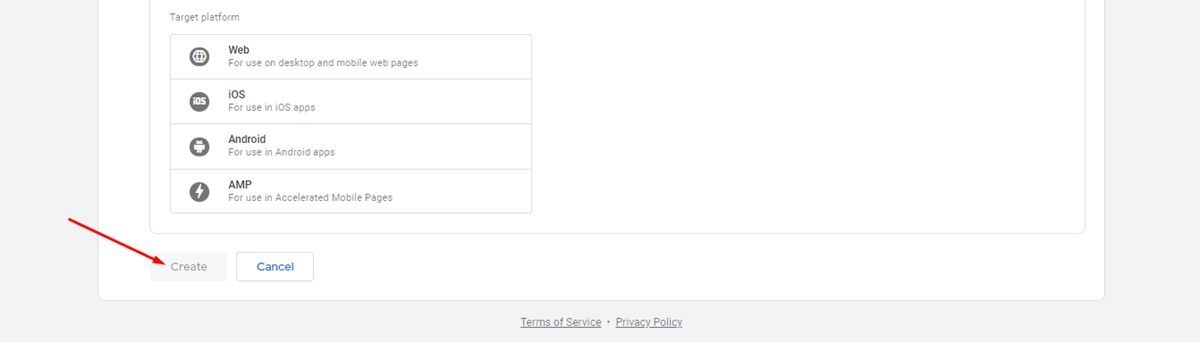
Click the green “Sign Up for Free” button on the Google Tag Manager. Then you will need to fill in your information including account name (company), country, website URL and where you want to use Google Tag (web, ios, android, AMP). When you’re done, click the blue button “Create”.
2. Follow the coding instructions.
After that, you will get the codes and instructions to include one code high in the head of your page and the other after the opening body tag. You can do it right away or apply the codes to your site later (they are available in your dashboard). Click “OK” after you are finished.
Set up a tag
1. Create a new tag in the Google Tag Manager dashboard.
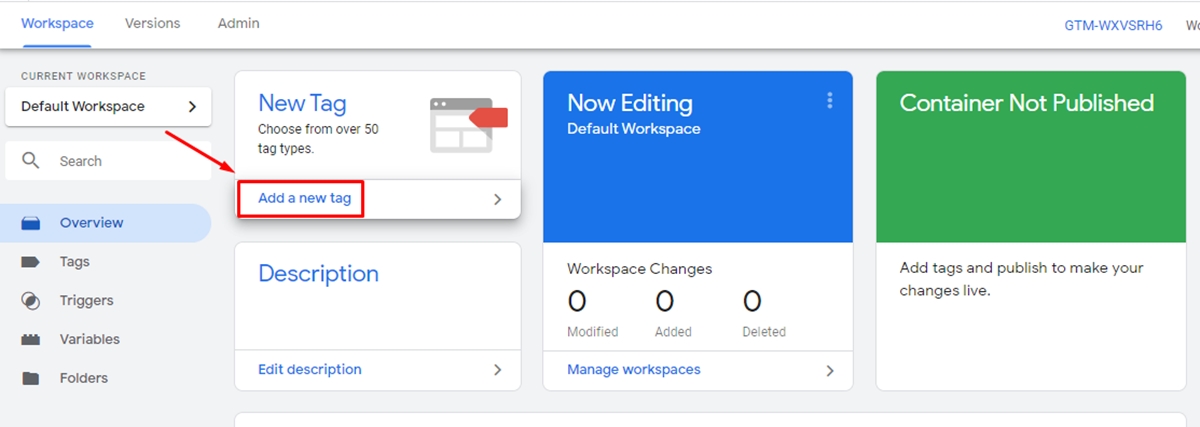
After you’re done setting up, click the “Add a New Tag” button to create a tag.
2. Configure your tag.
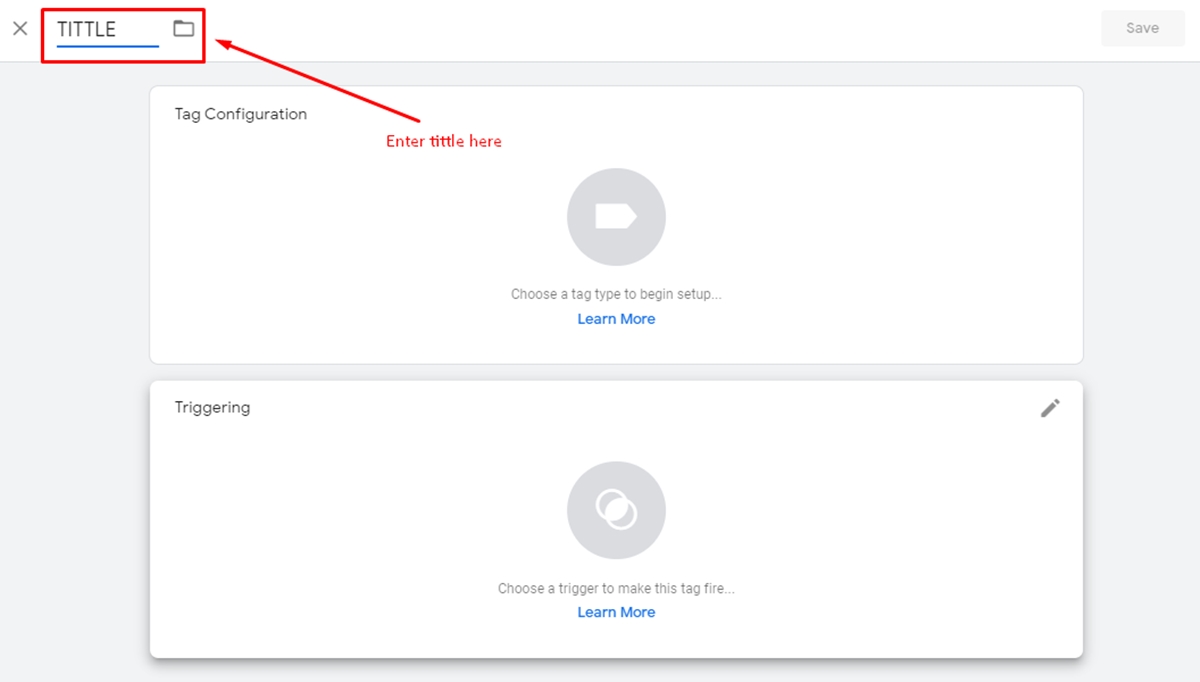
Give your tag a tittle, and then click anywhere in the top “Tag Configuration” box, to choose a tag type.
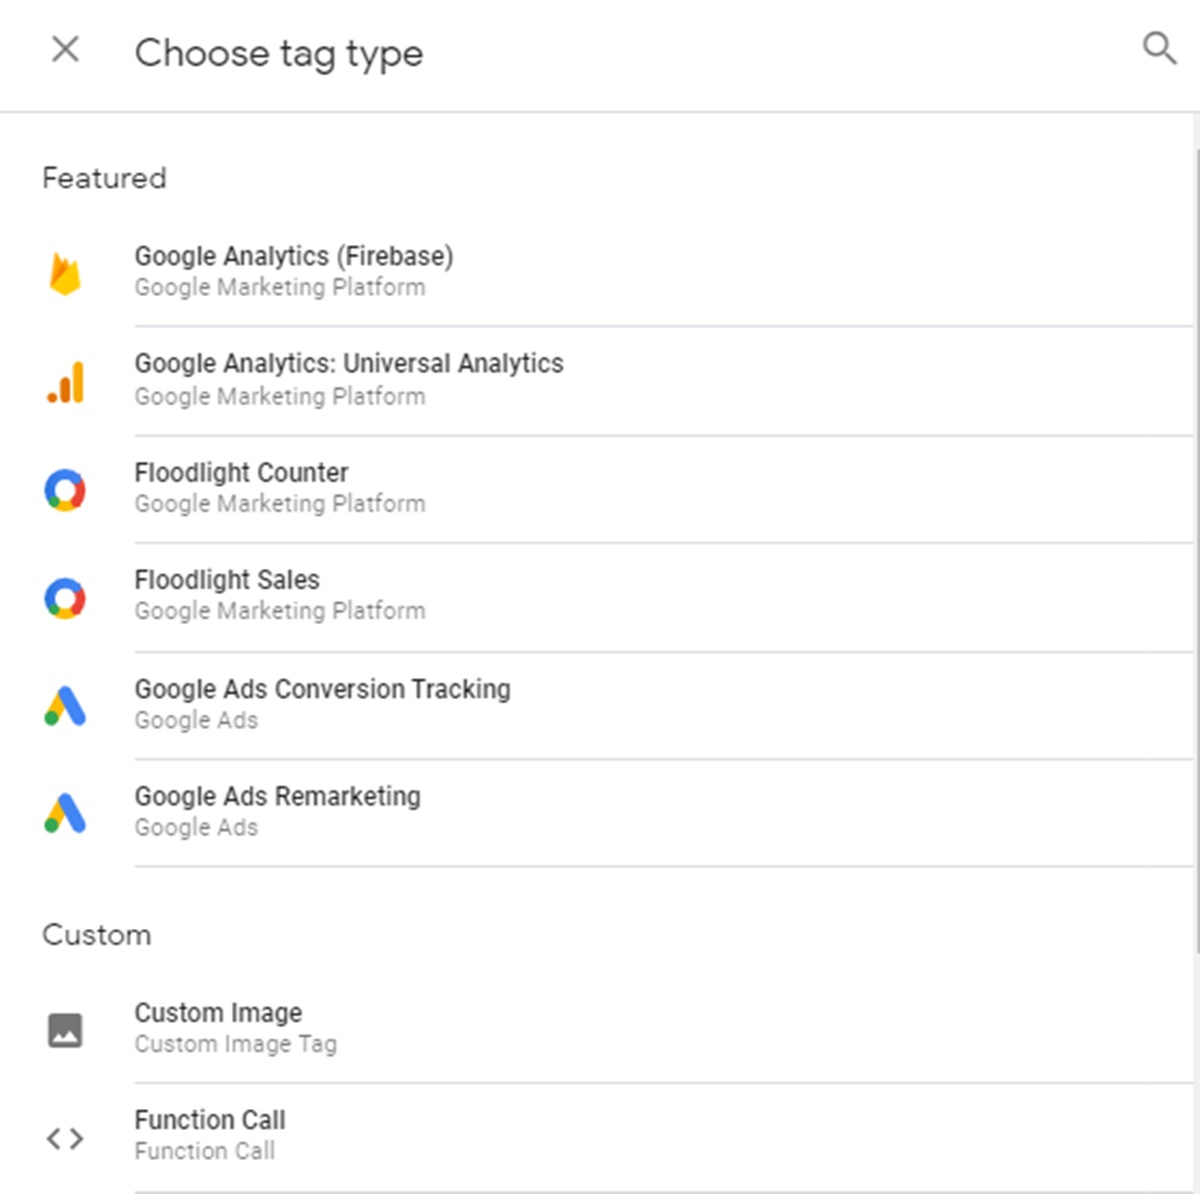
3. Choose a tag type
There are many types of tags (they are not all shown here and you can create your own tag type). Just pick what you think suits you best.
4. Link your tag to Google Analytics tracking.
If you want to trace your tag in Google Analytics, you should fill in your Web Property ID, found in your Google Analytics account. After that, select a “Track Type”. There are a variety of choices so just choose what most suitable for you.
5. Choose a trigger to decide when the tag is recorded.
The next step is to pick a trigger which means when you want the tag recorded or when someone visits the page. If you are still considering what to pick, you can try “All pages” to get insights every time someone views any of your web pages.
6. Save your tag
After finishing with all the steps above, don’t forget to save your work by clicking the “Save” button.
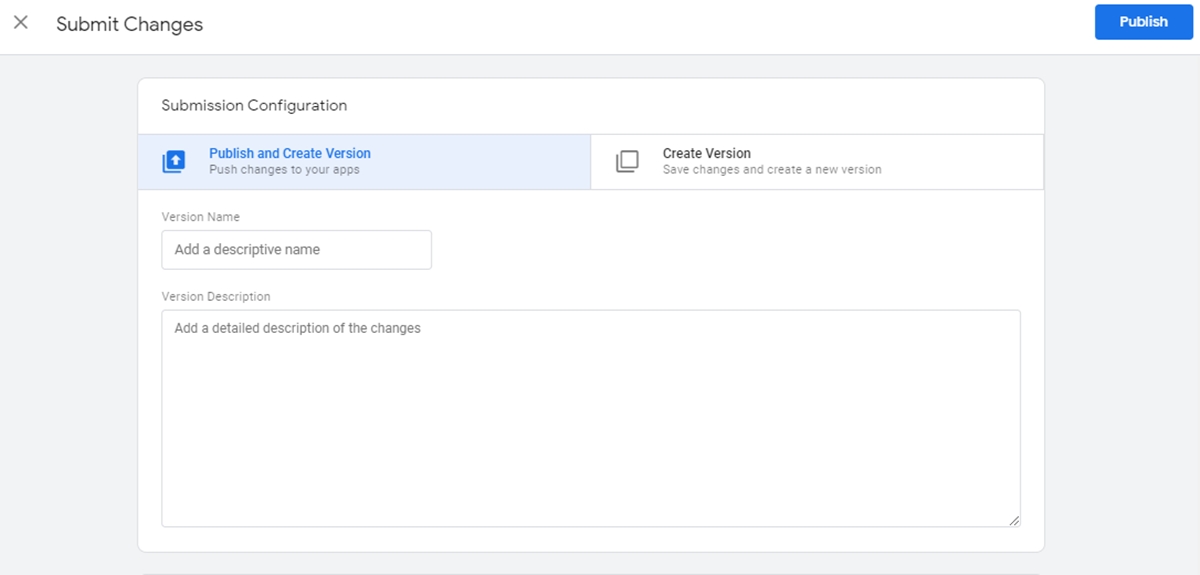
7. Activate your tag
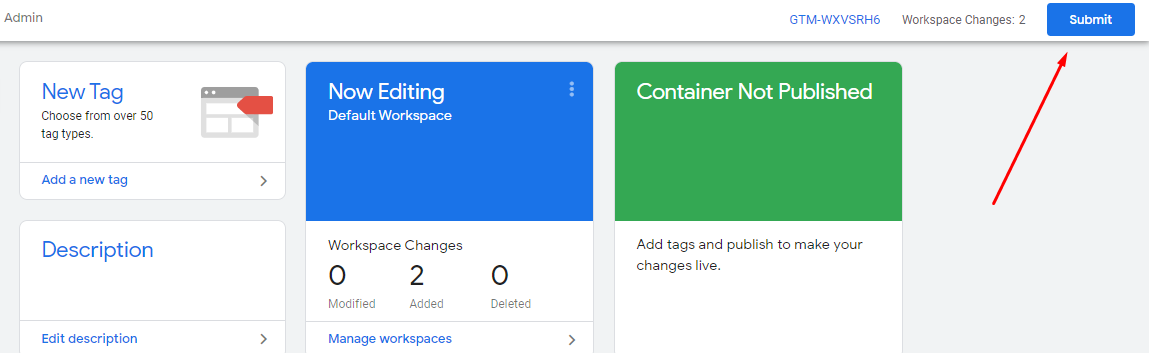
Remember to click on the “Submit” button so that your tag can actually work. After clicking on the “Submit” button, you will be taken to the “Submission Configuration” page. Now you can choose between “Publish and Create Version” or “Create Version”.
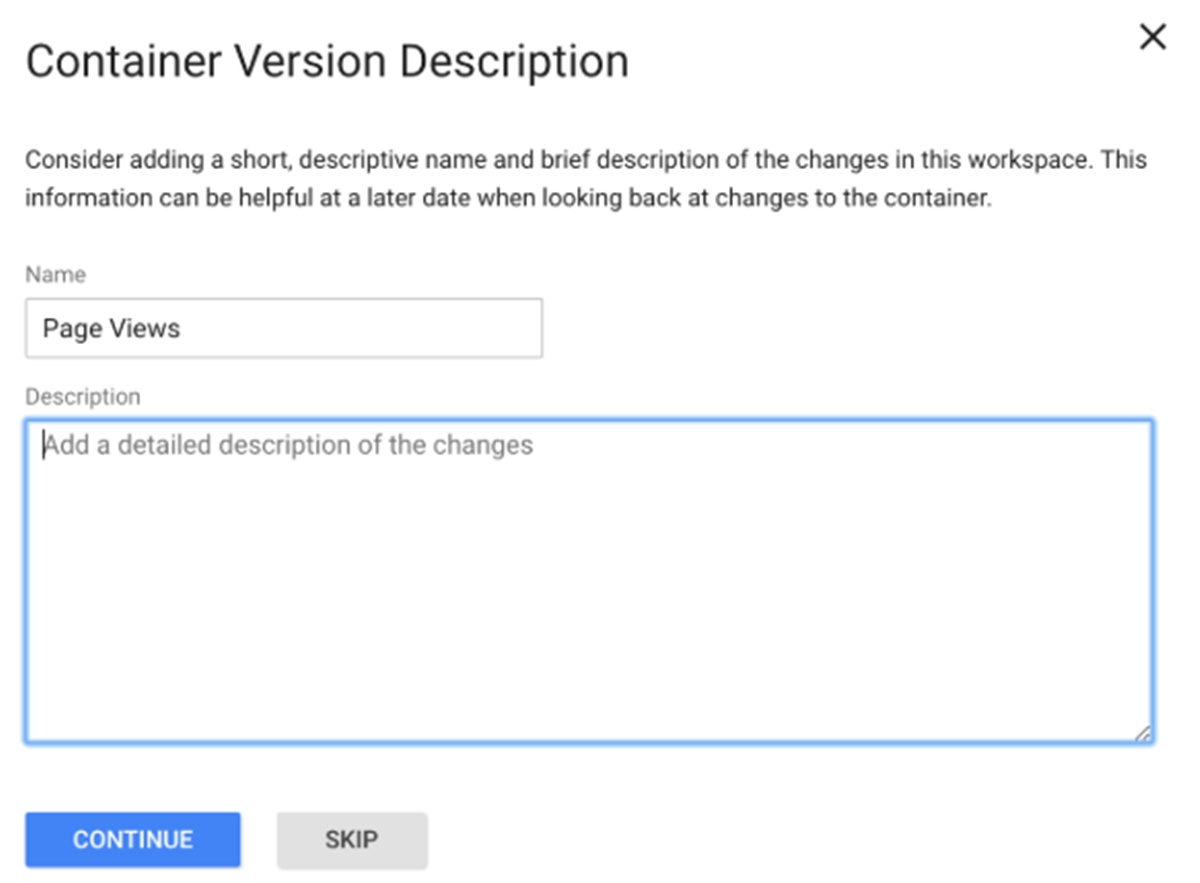
8. Add a name and description to your tags to keep them organized.
When you’re done, you will see the “Container Version Description”. To organize your tags and keep it that way, add a name and description to understand what you want to track with this tag.
9. Make sure your tag appears in your “Version Summary” report.
Check again to ensure that your tag shows up in your “Version Summary” report. Now, you’ve successfully built your first tag.
Conclusion
I hope this basic tutorial for Google Tag Manager helped you take the first step towards new possibilities in your marketing/analytics. If you find it hard to do it yourself, AVADA Commerce provides an app to help you implement Google Tag Manager into Shopify site in one click. You can also try some other tools such as Managehub, ManageWP… to manage your websites better.
Related Posts:


New Posts

How To Set Up Google Analytics 4 For Your BigCommerce Store

